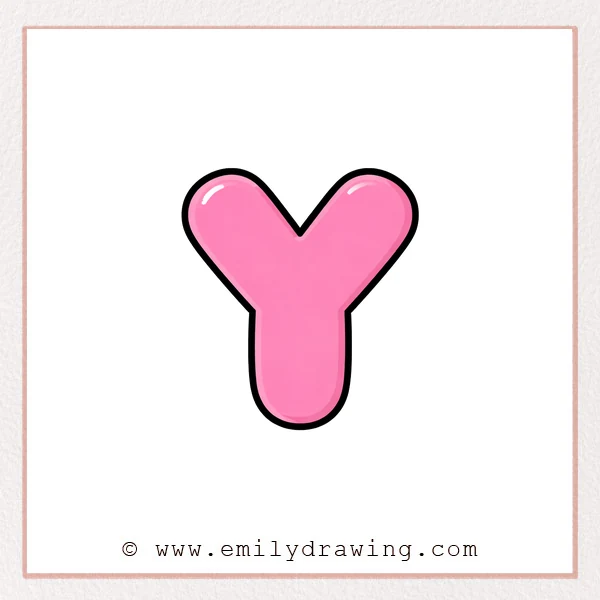
Bubble letters are soft, rounded shapes that look inflated and playful.
This easy drawing tutorial shows how to build a bubble letter Y with smooth curves.
Take your time, and keep each corner rounded for a friendly look.
What You Will Need
- Pencil and eraser (or a drawing tablet)
- Black marker or pen for clean outlines
- Optional: colored markers or pencils
Here are my RECOMMENDED Art Supplies!
- Crayola Coloring Set (140 Pieces – Mega Value!)
- 24 Colored Crayon Set
- A4 Printer Paper
- Crayola Coloring Pencils
- HP Home Printer with Instant Ink!
Time needed:
16 minutes.
Step-by-Step Drawing Guide
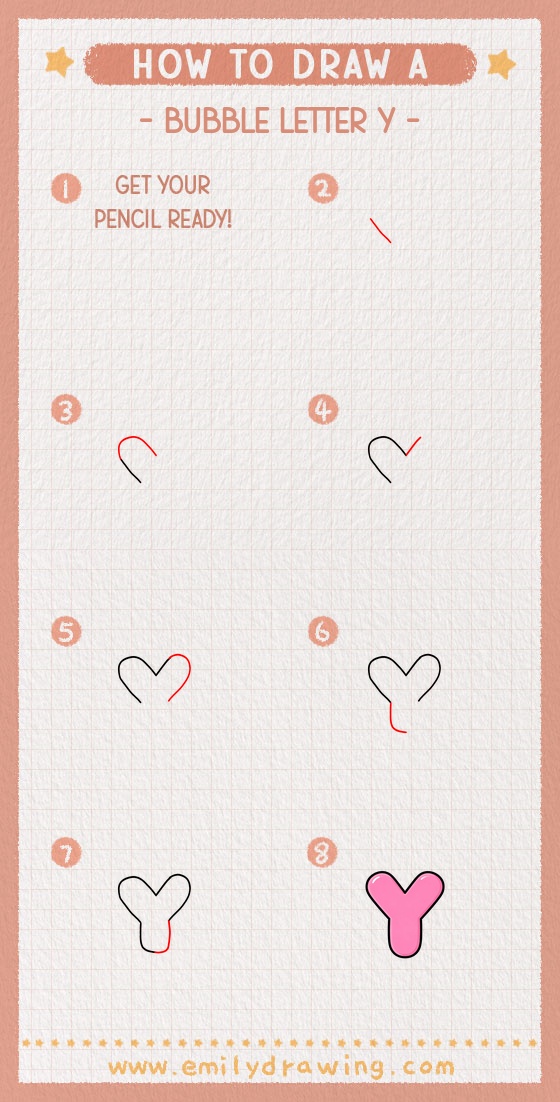
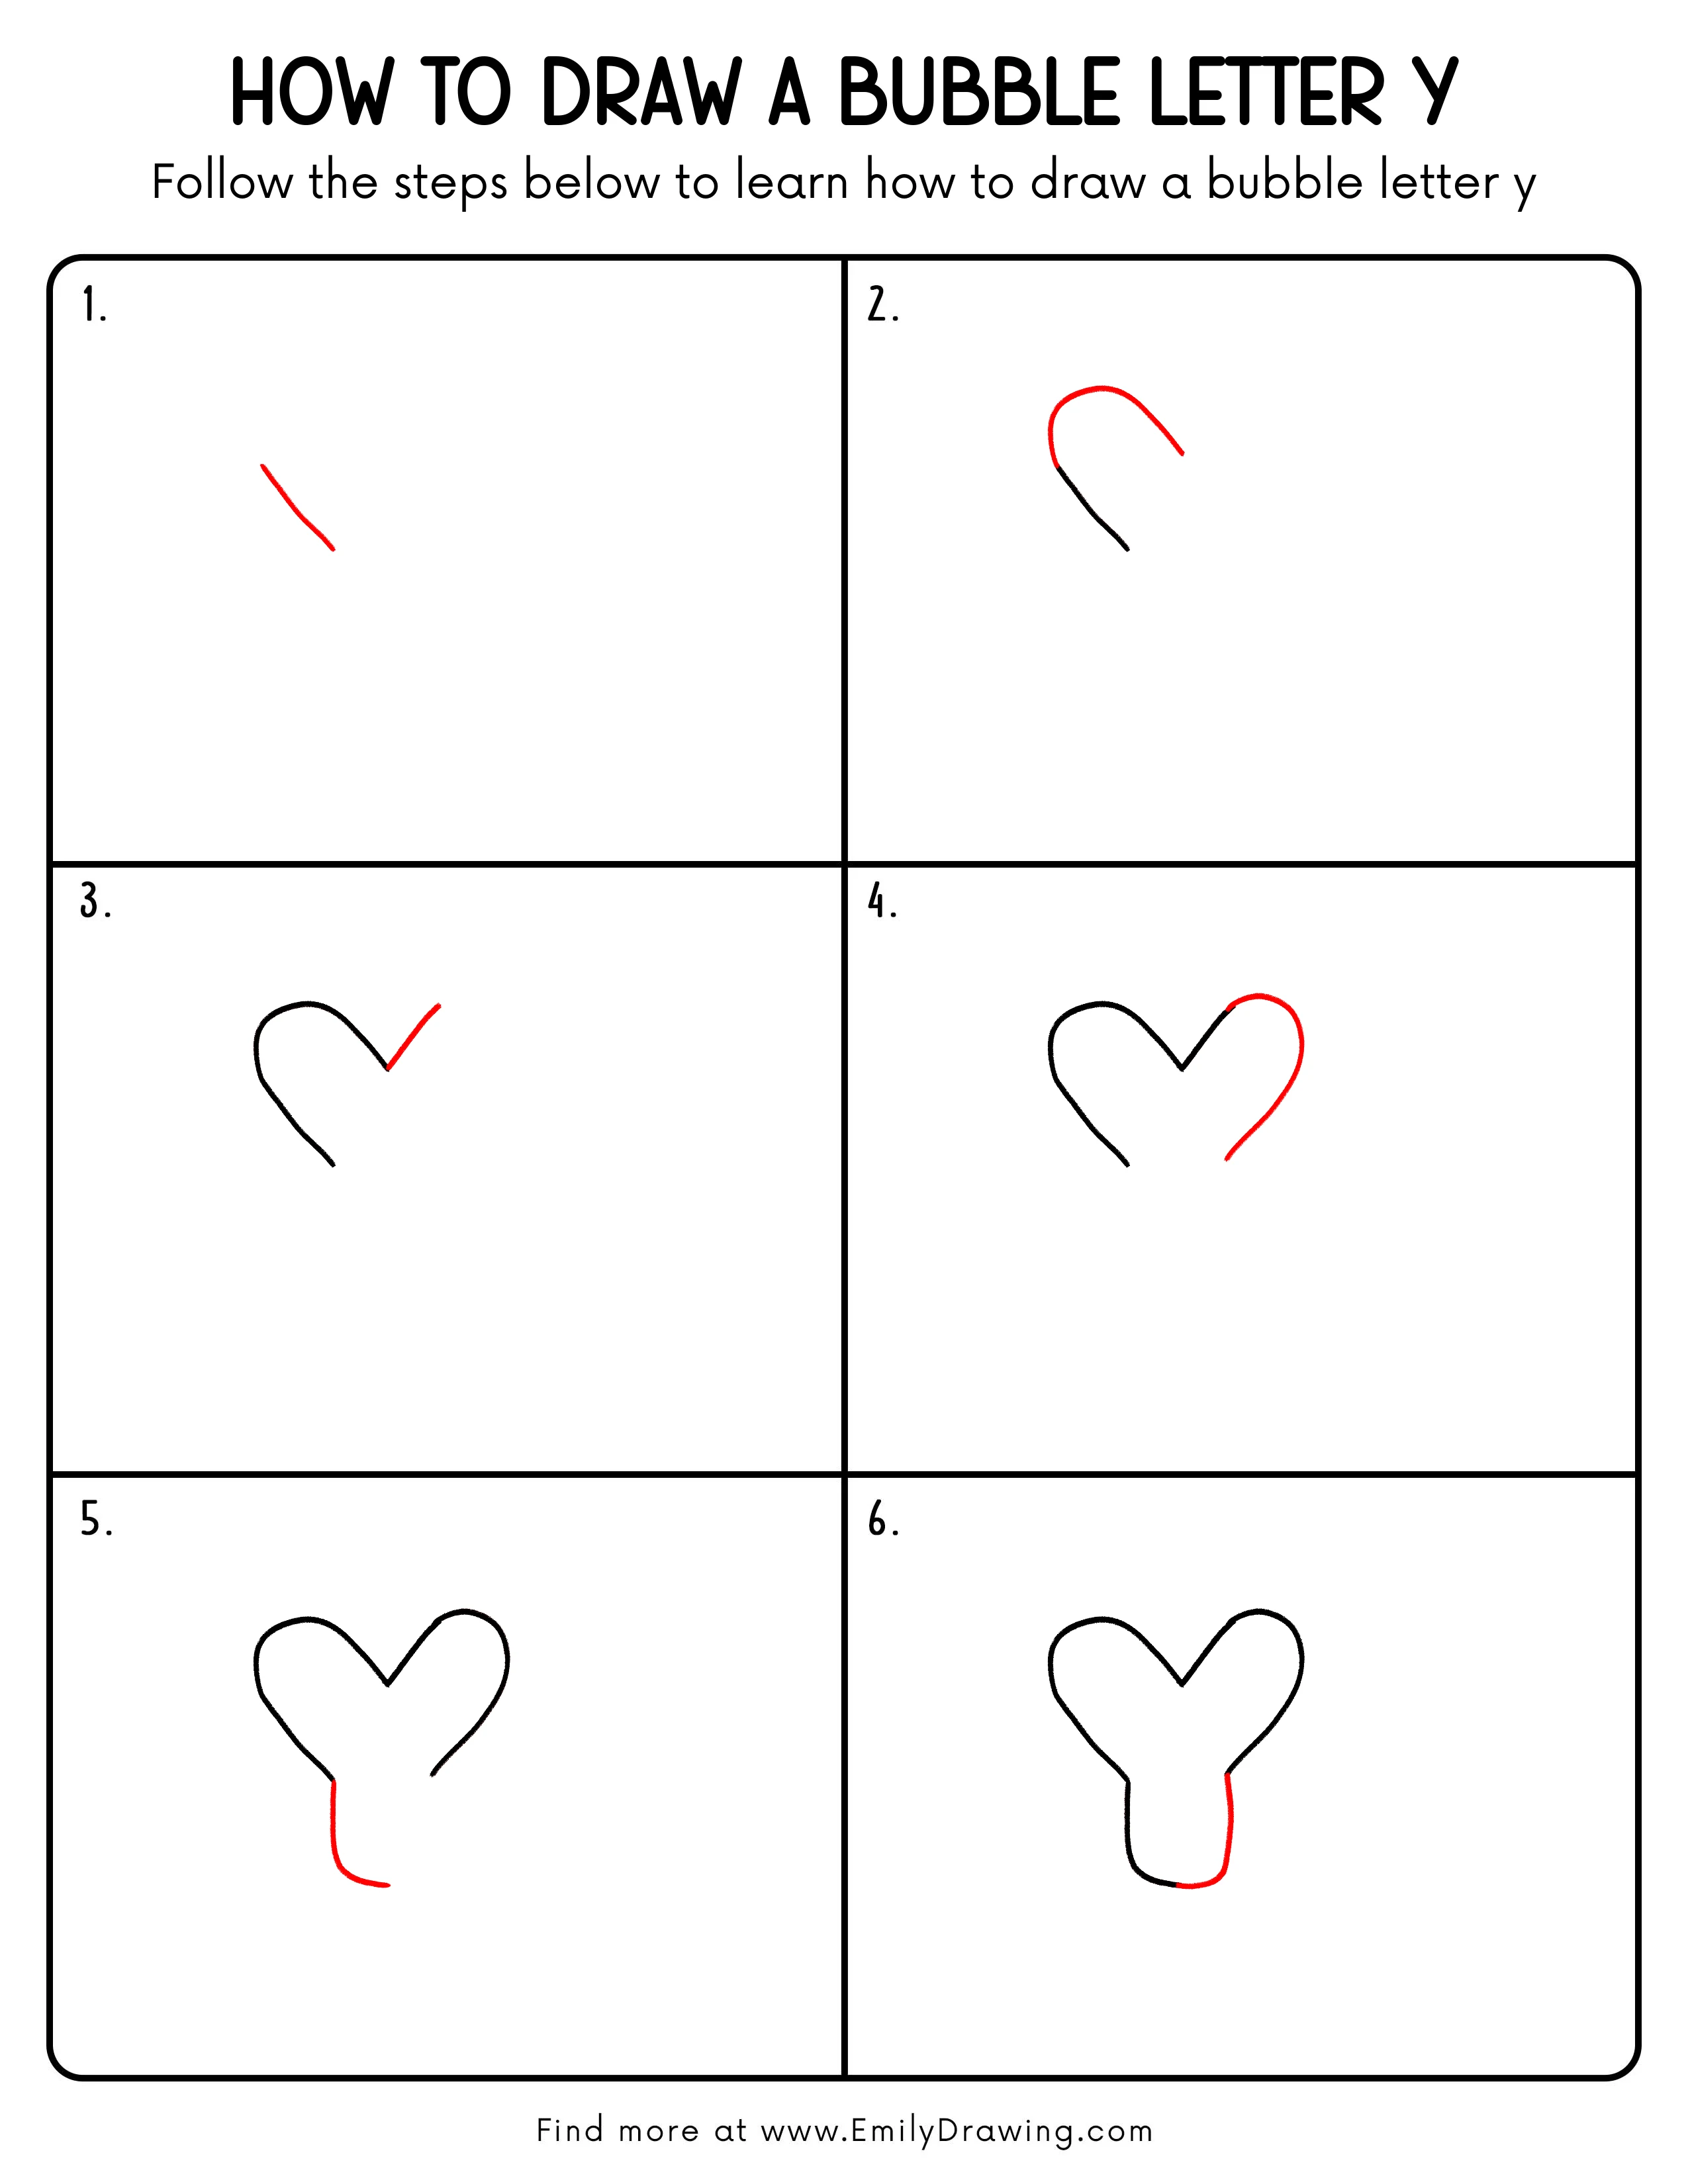
Step 1: Draw the Left Main Stroke
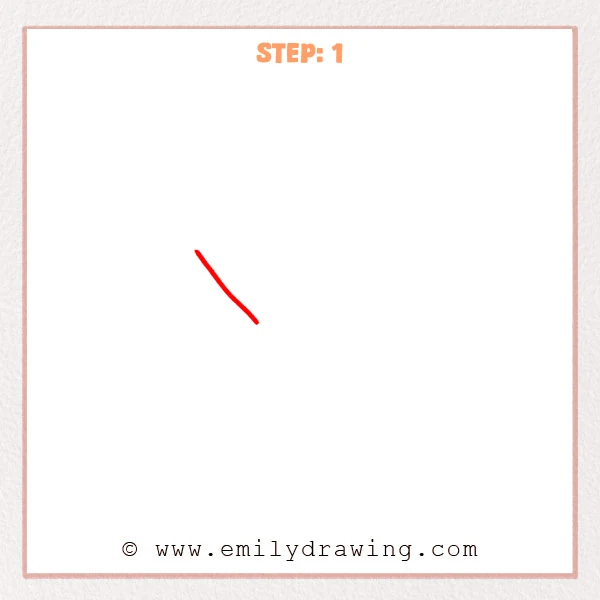
Start with one smooth diagonal stroke to set the left direction of the bubble letter Y.
Keep the top slightly thicker and taper a bit at the bottom for a rounded outline start.
Pro Tip: A tiny curve in the stroke helps the outline feel more puffy and rounded.
Step 2: Add the Top Curve and Thickness Edge
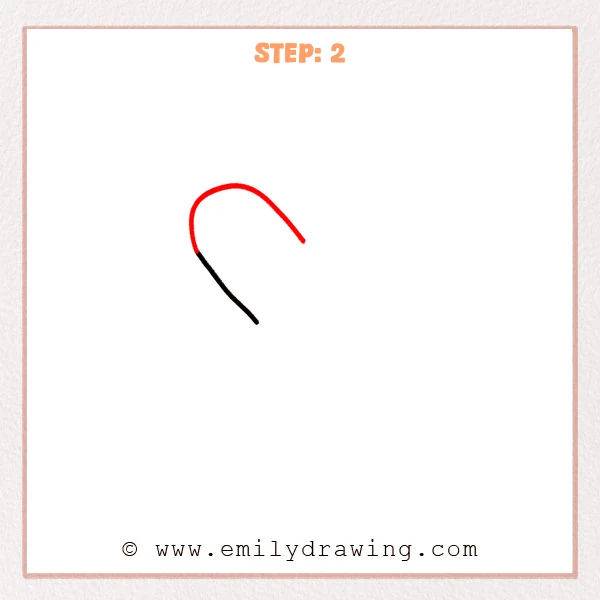
Connect a big rounded curve to the top of the left stroke, arching over to the right and then sloping down.
Add a second line along the inside of the left stroke to begin showing bubble thickness.
Pro Tip: Make the top arc extra round and roomy so the bubble style reads clearly.
Step 3: Add the Right Branch Stroke
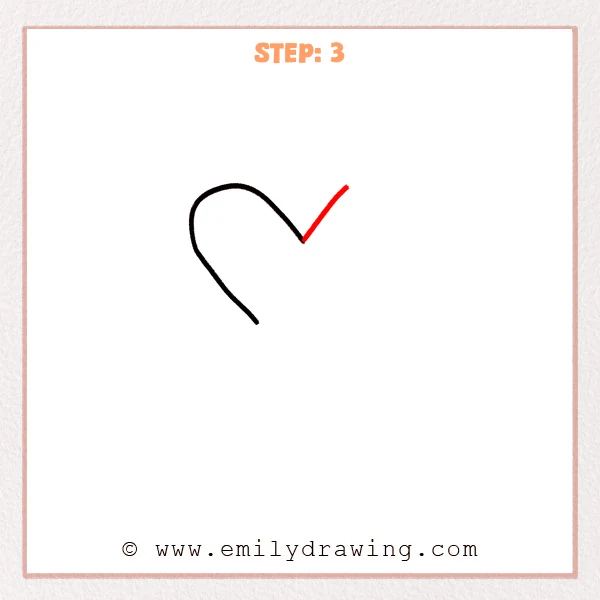
From the top corner, draw a diagonal stroke up to the right to form the Y’s right branch outer outline.
Keep it close in length to the left branch, and round the end instead of making it sharp.
Pro Tip: Start the right branch exactly from the top corner so the Y feels balanced.
Step 4: Draw the Rounded Right Outer Outline

From the end of the right branch, add a big smooth curve that rounds to the right and flows downward.
Leave the lower end slightly open so you can connect the stem cleanly later.
Pro Tip: Keep the right curve as one smooth sweep so it stays soft and bubble-like.
Step 5: Add the Center Downstroke
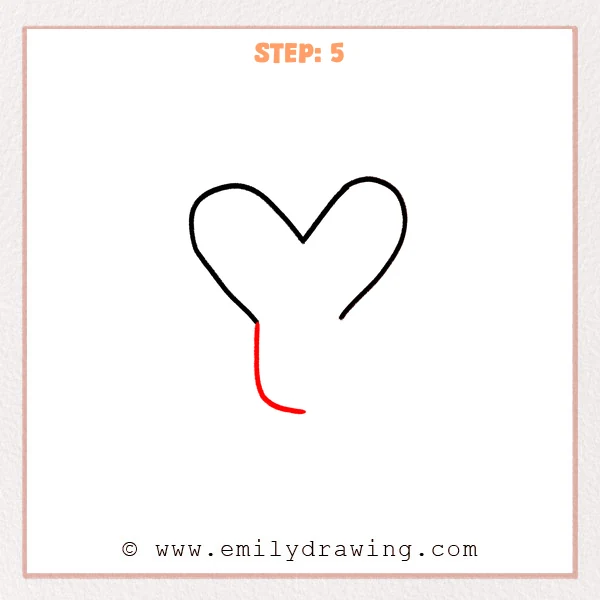
From the lower turning point on the left side, pull a mostly straight line downward to create the Y’s hanging stem.
Curve slightly to the right at the bottom and round the end so it stays soft and bubbly.
Pro Tip: Don’t make the stem too short or thin; about two-thirds of the top height looks balanced.
Step 6: Complete the Stem Thickness and Close the Bottom
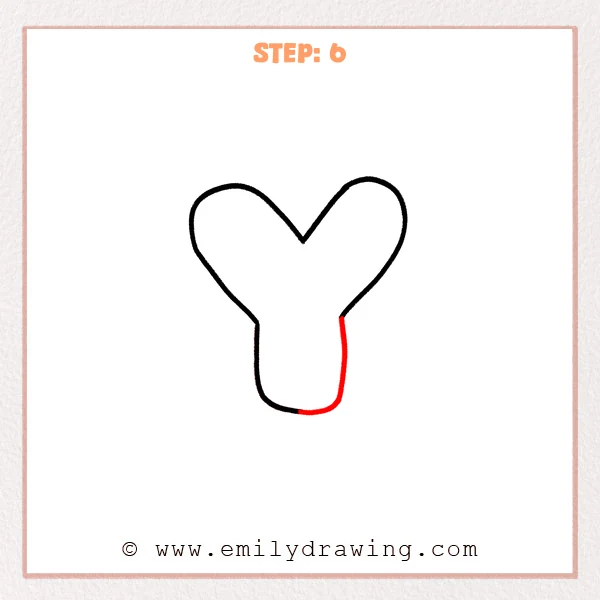
Draw a parallel line down the right side of the hanging stem to show the bubble thickness, connecting into the right outline.
Add a rounded bottom curve to join both sides, forming a soft U-shaped base.
Pro Tip: Make the bottom U-curve slightly wider so the letter feels extra puffy.
Step 7: Color in your drawing!
Fun Facts
- Bubble letters became popular in poster art, signage, and early graffiti styles.
- Rounded outlines help letters feel friendly, bold, and easy to read.
- Thick “puffy” shapes work well for stickers, logos, and headings.
Pin it now, Draw later!
Trace your final outline with a darker pen and erase any sketchy overlaps.
You can add color fills, outlines, or simple highlights to make the bubble letter pop.
Now you know how to draw a bubble letter Y step by step—try drawing a whole word next!
Get the FREE Printable Drawing Guide
FREE Download Printable Bubble Letter Y Drawing Tutorial
Frequently Asked Questions
How do I make my bubble letter Y look more even?
Keep both top branches similar in size, and match the curve fullness on both sides.
What if my corners look too sharp?
Round the corners by replacing pointy turns with small arcs and smooth transitions.
Can I make the bubble letter thicker?
Yes, draw the inner parallel lines a little farther from the outer outline, then reconnect with rounded edges.