
Learning how to draw a padlock is a great drawing for beginners.
This easy drawing tutorial uses simple curves, rounded shapes, and a clear keyhole.
Take your time with each step by step drawing stage, and build the padlock slowly.
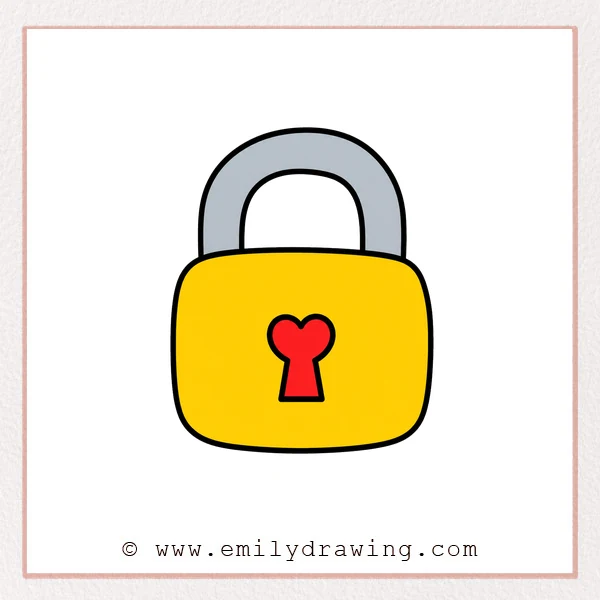
What You Will Need
- Pencil
- Eraser
- Black marker or pen
- Paper
- Colored pencils or crayons
Here are my RECOMMENDED Art Supplies!
- Crayola Coloring Set (140 Pieces – Mega Value!)
- 24 Colored Crayon Set
- A4 Printer Paper
- Crayola Coloring Pencils
- HP Home Printer with Instant Ink!
Time needed:
14 minutes.
Step-by-Step Drawing Guide
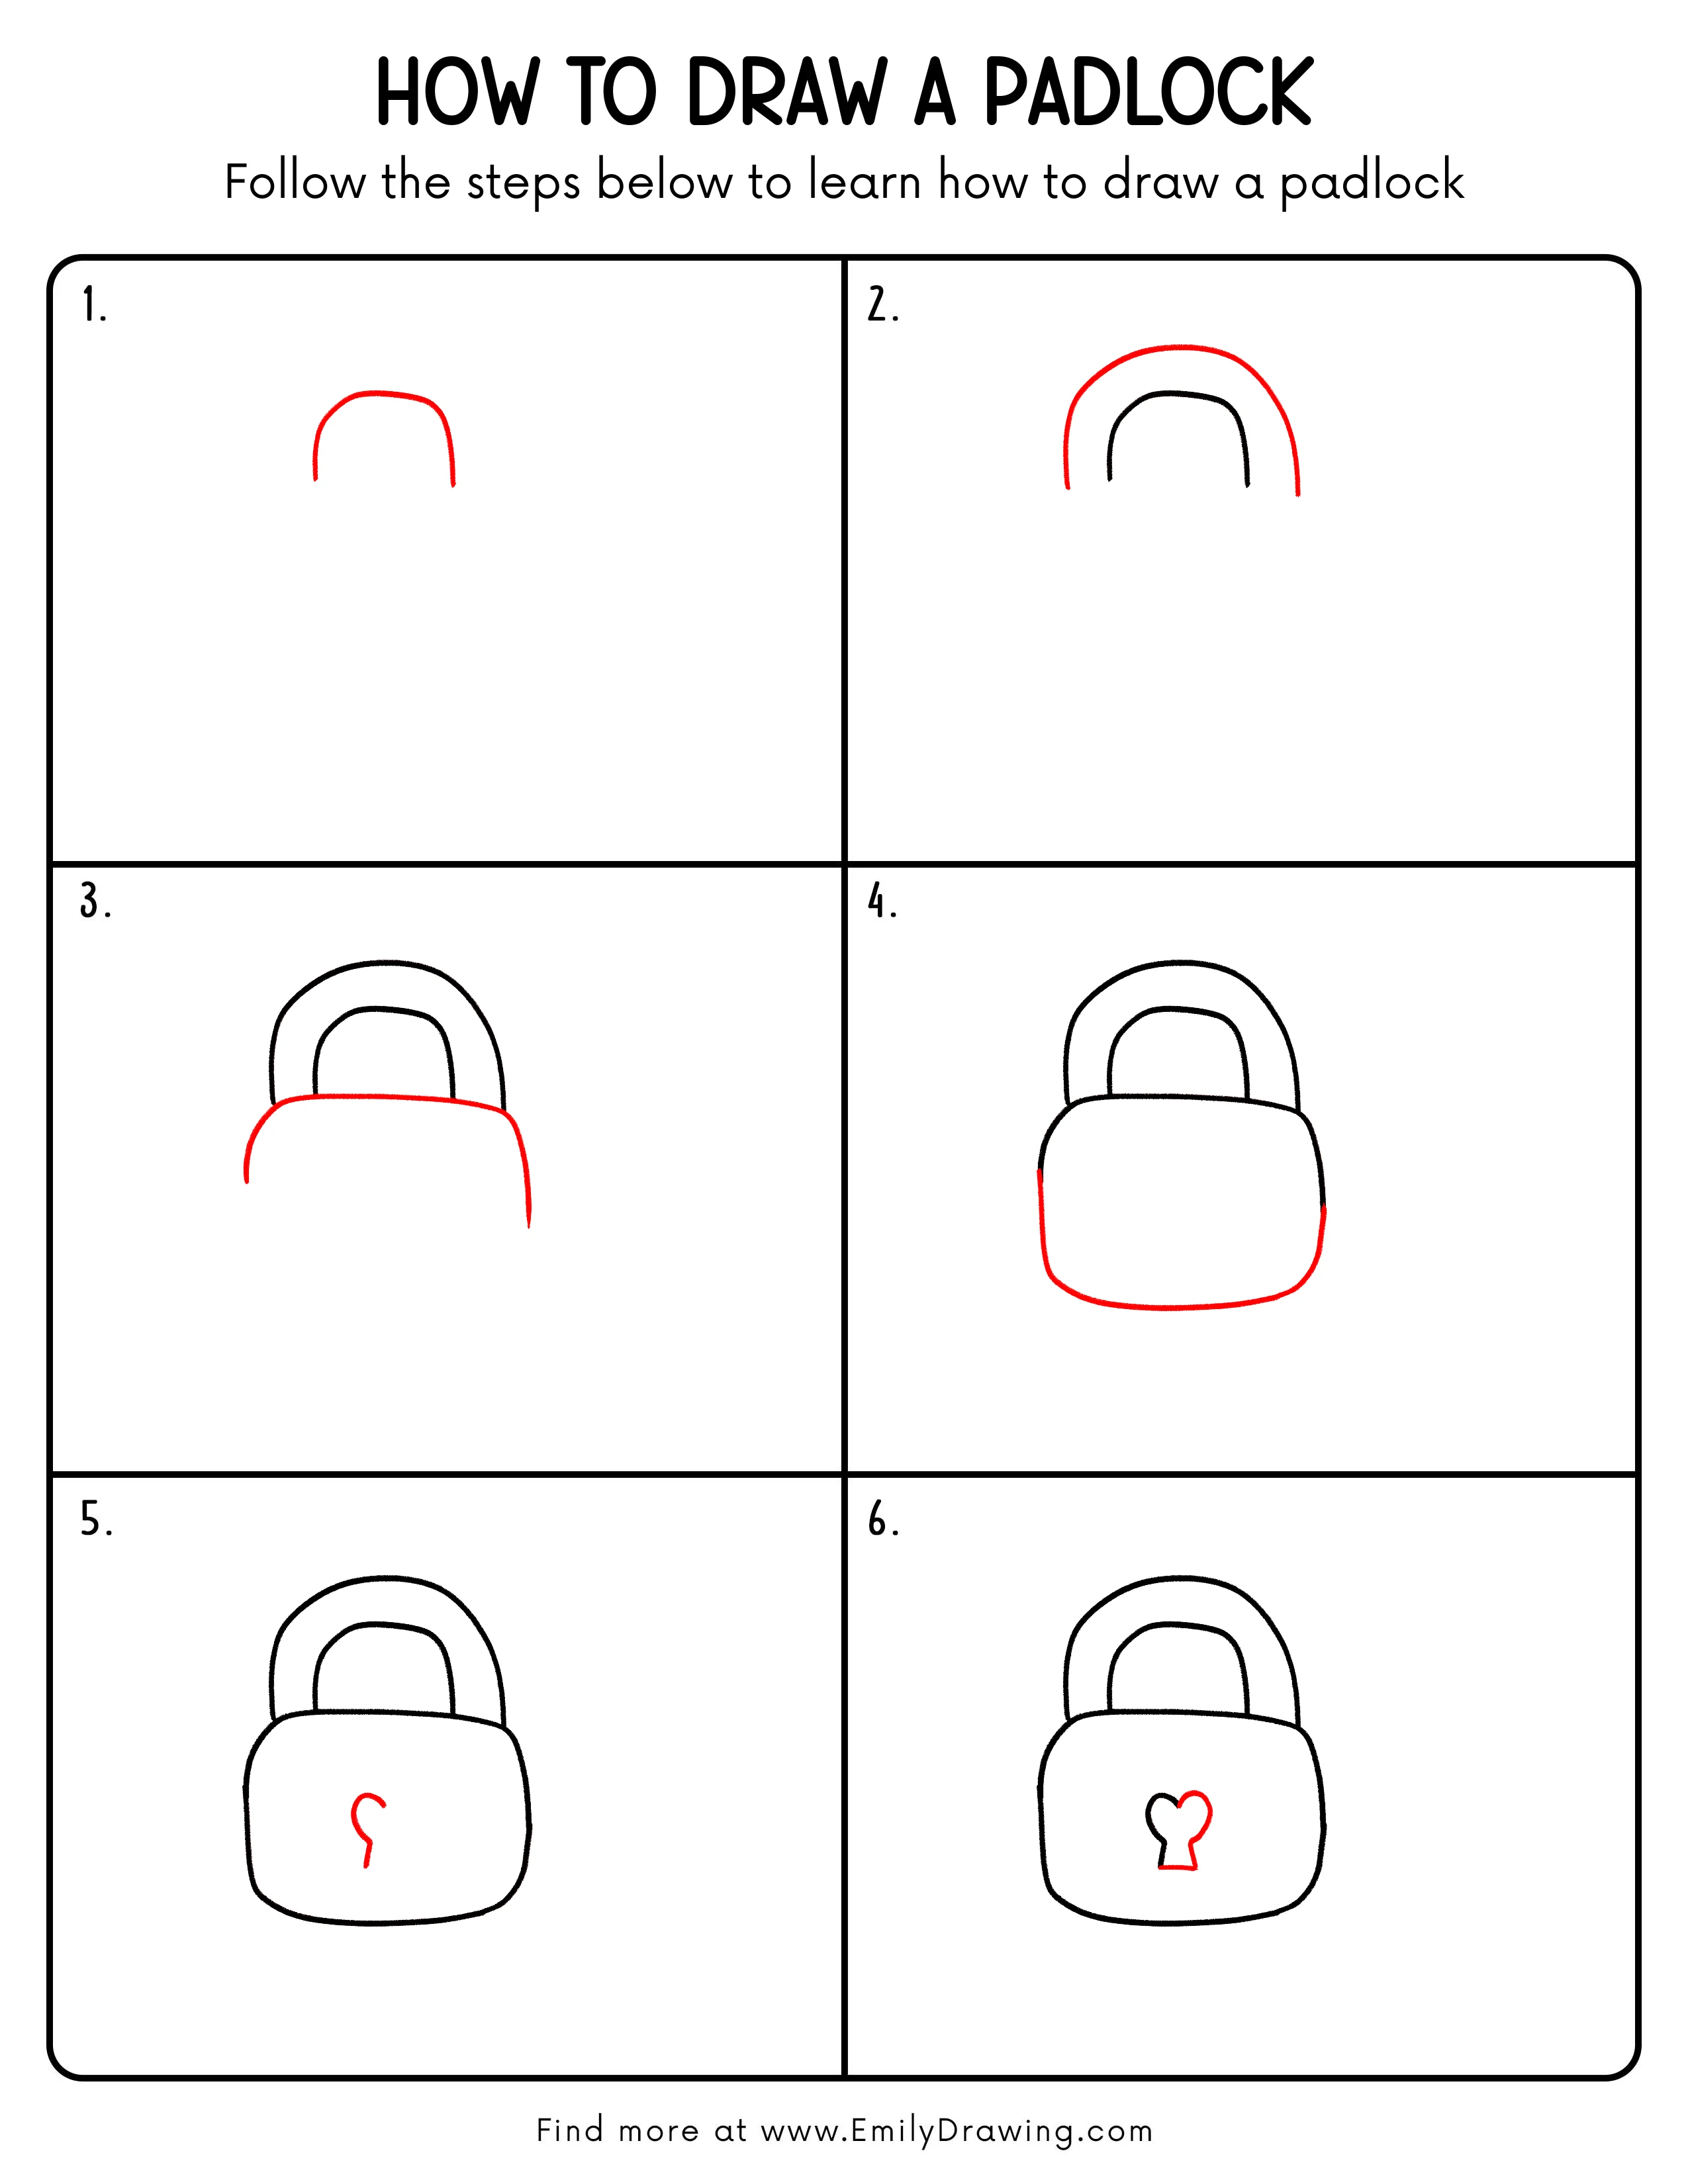
Step 1: Draw the Outer Shackle
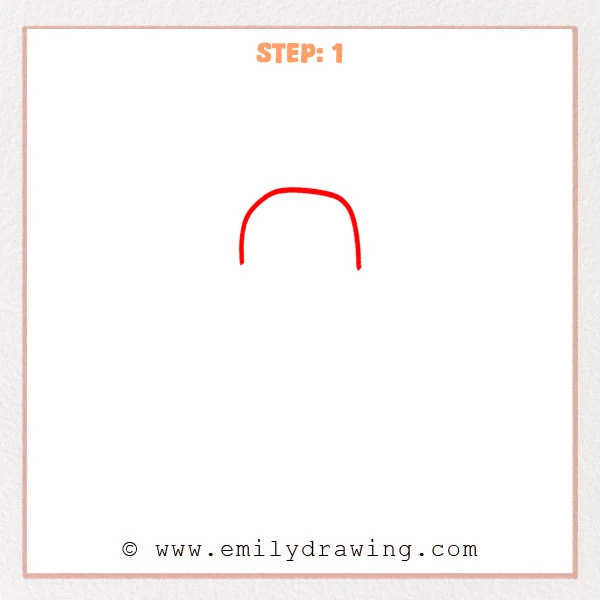
Start with an upside-down U shape for the top shackle of the padlock.
Keep both sides slightly straight downward, and connect them with a smooth curved top.
Pro Tip: Keep both sides close in height so the padlock looks balanced.
Step 2: Add the Inner Shackle Line
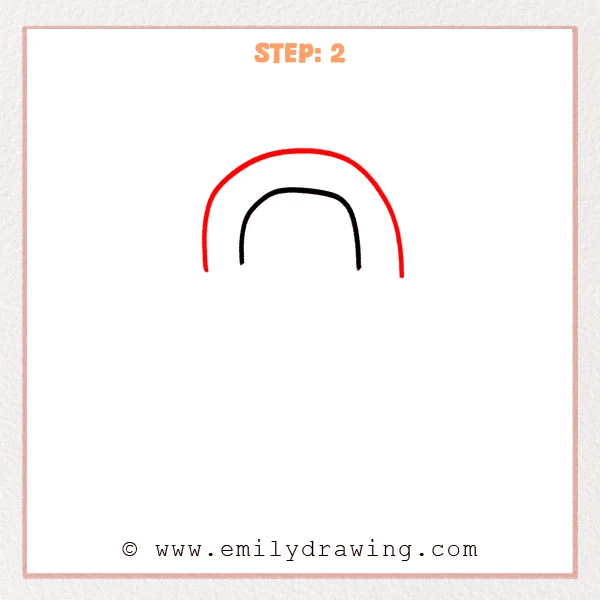
Draw a smaller upside-down U shape inside the outer shackle.
Let the inner line follow the outer curve to create the padlock shackle’s thickness.
Pro Tip: Keep the space between the two lines even so the shackle looks neat.
Step 3: Draw the Top of the Lock Body
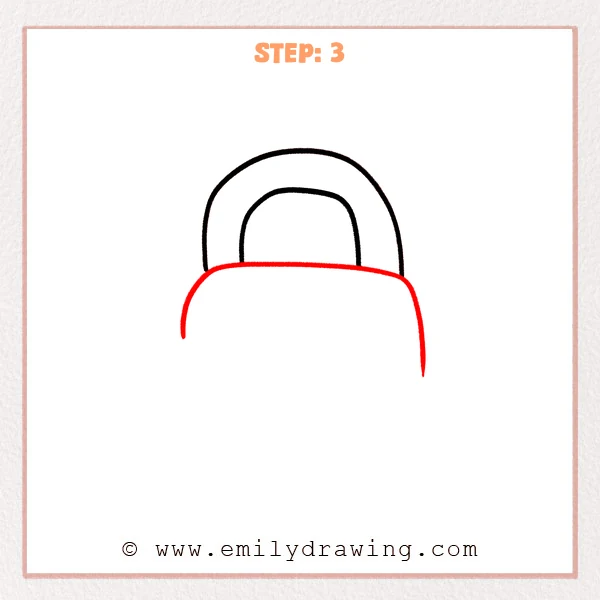
Draw a wide curved line below the shackle for the top edge of the padlock body.
Turn both ends downward to begin forming a rounded rectangle shape.
Pro Tip: Make the lock body wider than the shackle so the padlock proportions feel natural.
Step 4: Complete the Lock Body Shape
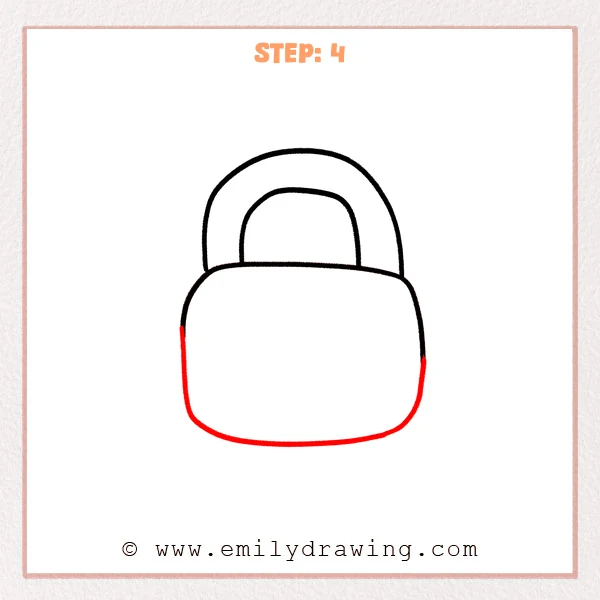
Continue the lock body downward on both sides, letting the lines become straighter.
Connect the sides with a slightly curved bottom edge to finish the rounded rectangle body.
Pro Tip: Let the bottom edge curve upward slightly to make the padlock look softer.
Step 5: Start the Keyhole
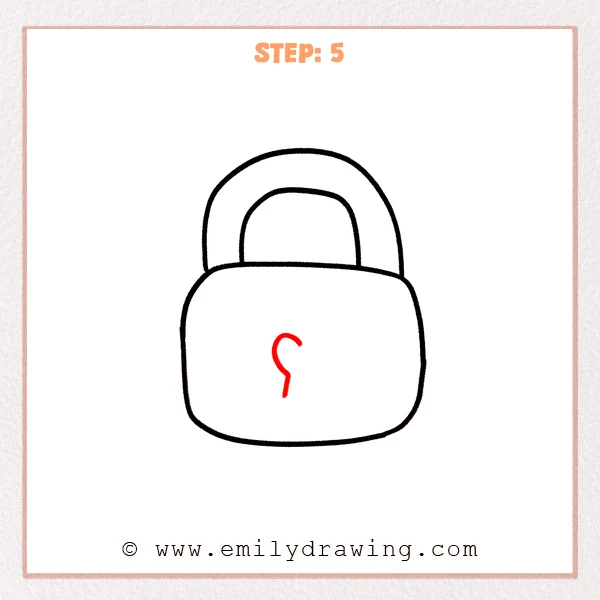
Draw a small curved line near the lower middle of the lock body for the top of the keyhole.
Add a short downward line from the curve to begin the narrow key slot.
Pro Tip: Place the keyhole near the center of the lock body so the drawing stays balanced.
Step 6: Complete the Keyhole Shape
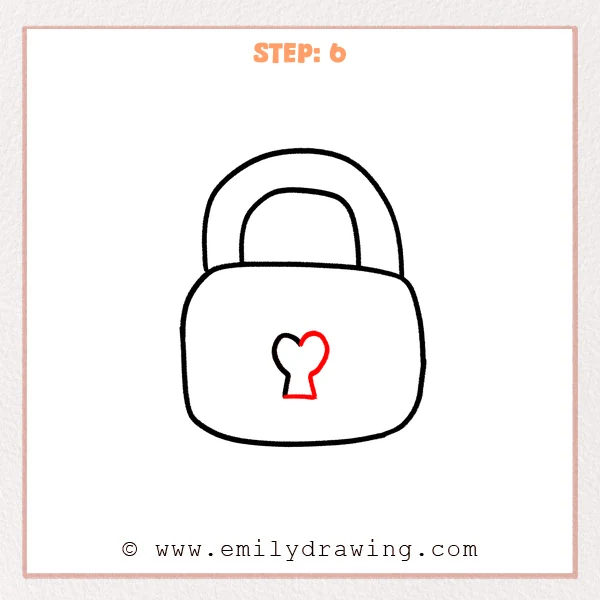
Continue the curve on the right side to complete the rounded top of the keyhole.
Widen the lower part and connect the bottom edge to form a clear keyhole outline.
Pro Tip: Keep the keyhole modest in size so the lock body has enough open space around it.
Step 7: Color in your drawing!
Fun Facts
- A padlock has a curved part called a shackle.
- Many padlocks open with a key, while others use numbers.
- Padlocks are often used on lockers, gates, boxes, and bags.
Pin it now, Draw later!
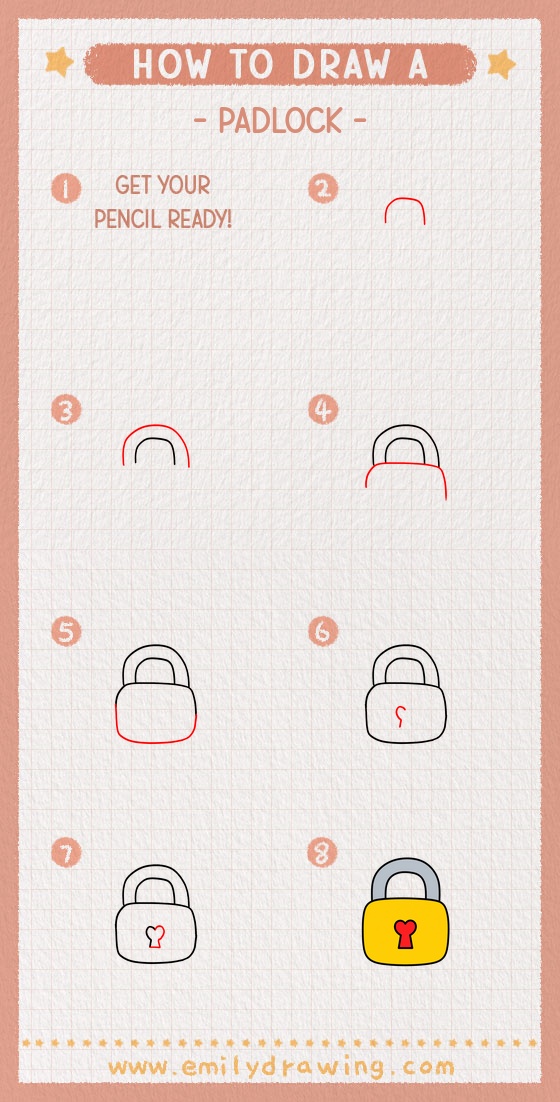
Now you know how to draw a padlock using simple beginner shapes.
Trace your best lines with a marker, then erase any extra pencil marks.
You can color the lock body gold, silver, red, or any color you like.
Try this step by step drawing again and make a smaller or larger padlock next time.
Get the FREE Printable Drawing Guide
FREE Download Printable Padlock Drawing Tutorial
Frequently Asked Questions
Is this padlock drawing good for beginners?
Yes, this padlock is a drawing for beginners because it uses curves and rounded rectangles.
How can I make my padlock look more even?
Check that the shackle is centered above the lock body and that both sides match in height.
Can I add more details to the padlock?
Yes, you can add shine marks, color shadows, or a small label on the lock body.



