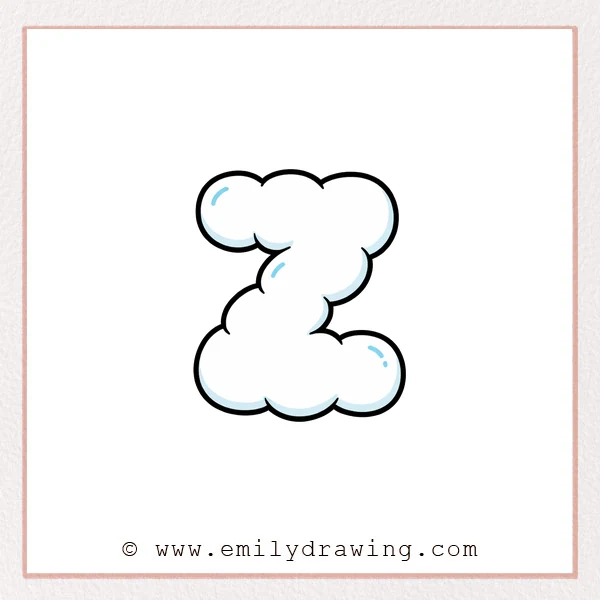
Bubble letters are rounded, puffy versions of regular letters that look soft and fun.
In this easy drawing tutorial, you will build a bubble letter z using simple curves.
Take your time with each arc, and your letter will feel smooth and bouncy.
What You Will Need
- Pencil (or a digital brush)
- Eraser
- Black marker or pen (optional, for outlining)
- Paper or a drawing tablet
Here are my RECOMMENDED Art Supplies!
- Crayola Coloring Set (140 Pieces – Mega Value!)
- 24 Colored Crayon Set
- A4 Printer Paper
- Crayola Coloring Pencils
- HP Home Printer with Instant Ink!
Time needed:
18 minutes.
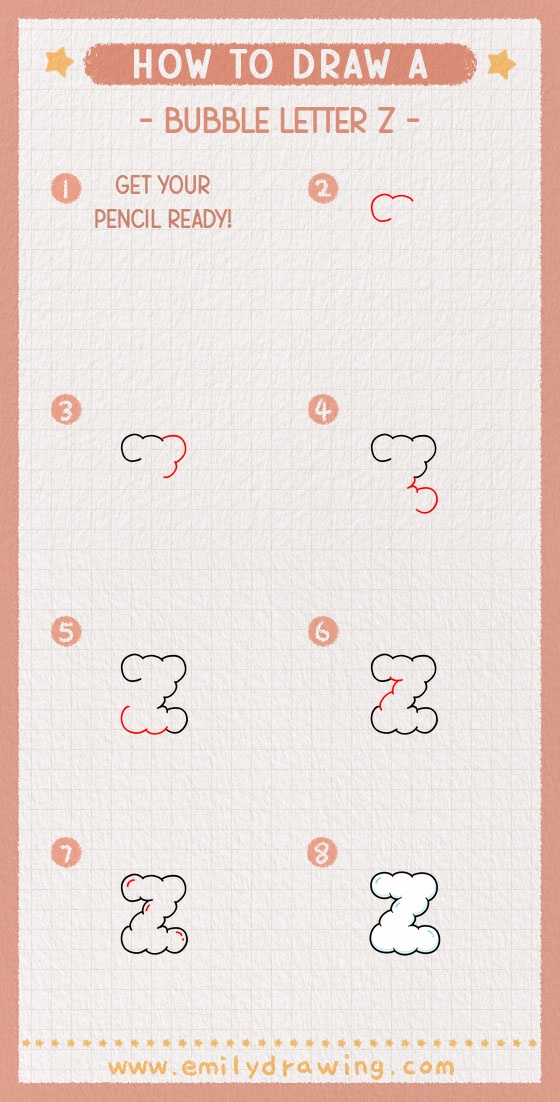
Step-by-Step Drawing Guide
Step 1: Draw the Top Bubble Outline
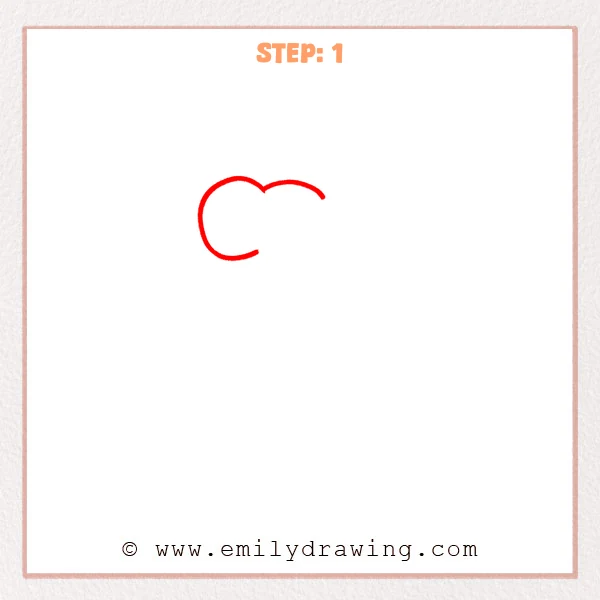
Start with a smooth rounded arc to form the top edge of the letter.
Then pull a big curved line downward on the left to make the corner feel puffy.
Pro Tip: Keep the curves very smooth and leave the line slightly thick so it’s easy to widen later.
Step 2: Add the Big Right Bubble Curve
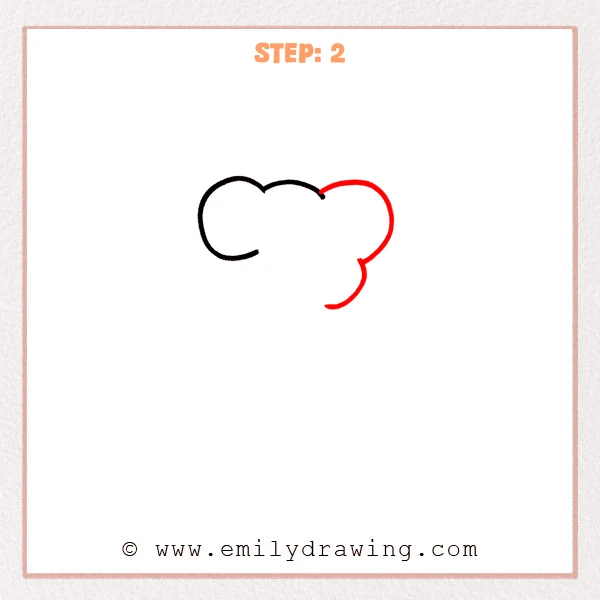
Continue from the top-right arc and pull a large outer curve downward to form the puffy right side.
Add a smaller bump near the lower right so it feels bubbly, while keeping the bottom open for now.
Pro Tip: Make the right outer curve a bit rounder and bigger than the top so it reads as bubble lettering.
Step 3: Draw the Big Bottom Bubble

Extend a short curved “neck” downward from the lower right to start the turn.
Then draw a large rounded loop at the bottom to form the bubble base of the letter z, leaving the left side open for now.
Pro Tip: Make the bottom loop extra full so it balances the top bubble shapes.
Step 4: Complete the Bottom-Left Bubble and Connect
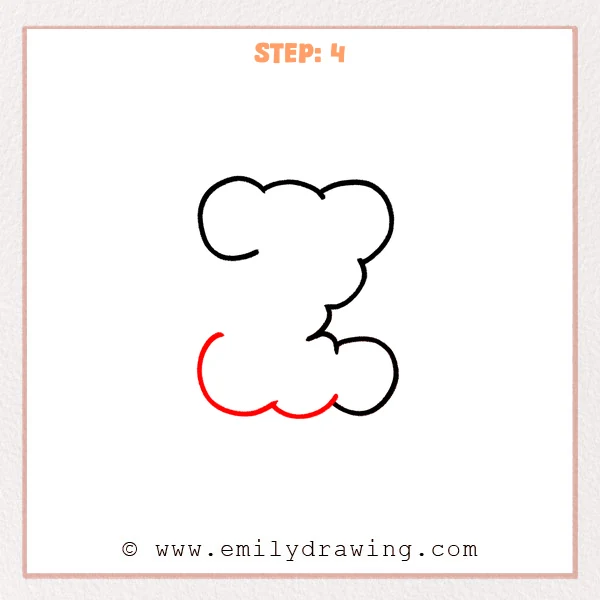
Draw a large curved line on the bottom left to expand the bubble base outward.
Add a small rounded bump in the bottom middle so it flows smoothly into the lower-right bubble.
Pro Tip: Keep the bottom curves equally round so the joins feel like one continuous stroke.
Step 5: Add the Inner “Z” Path
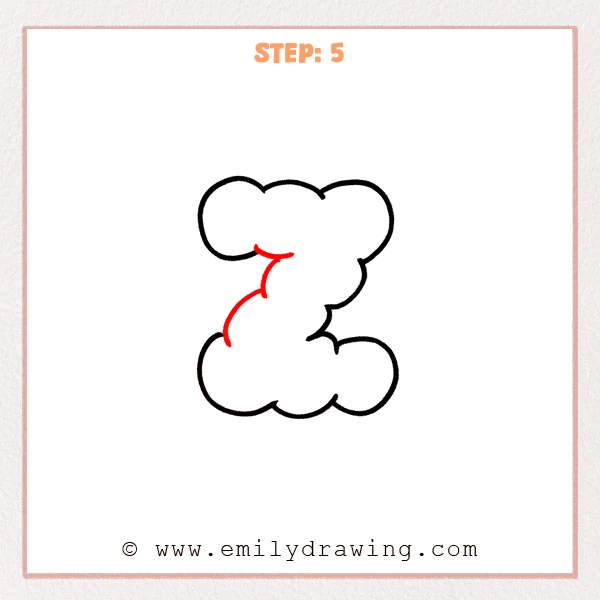
Near the open space under the top-left bubble, draw a short inward arc to start the inner turn.
Then pull a curved line downward into the middle and continue it toward the lower-left area to reveal the inner flow of the letter z.
Pro Tip: Make the inner line just as rounded as the outer outline, with no sharp corners.
Step 6: Add Small Highlight Curves
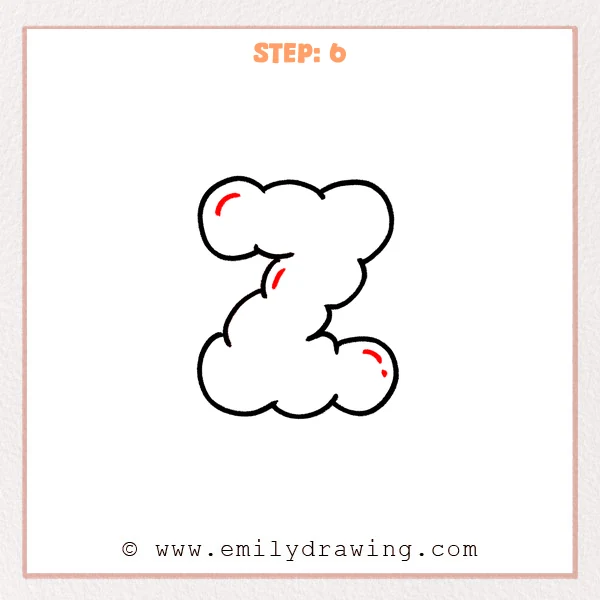
Draw a short curved stroke inside the top-left bubble to create a shiny highlight.
Add another small curve on the inner middle turn, then place a curved highlight and a tiny dot on the lower-right bubble for extra gloss.
Pro Tip: Curve all highlights in the same direction so the shine looks consistent.
Step 7: Color in your drawing!
Fun Facts
- Bubble letters became popular in graffiti because they are bold and easy to read from far away.
- Rounded shapes often feel friendly because they have no sharp corners.
- Small highlights can make simple letters look like shiny stickers.
Pin it now, Draw later!
Trace your final outline with a darker pen if you want it to pop.
You can add color fills, simple shadows, or patterns like stripes and polka dots.
Now you know how to draw a bubble letter z step by step—try drawing a whole bubble-letter alphabet next.
Get the FREE Printable Drawing Guide

FREE Download Printable Bubble Letter Z Drawing Tutorial
Frequently Asked Questions
How do I make my bubble letter z look more even?
Lightly sketch your curves first, then smooth them out with one confident line.
Try to keep the bumps similar in roundness across the letter.
Can I color a bubble letter z without making it messy?
Yes—outline first, then use one flat color fill, and add highlights last.
Let ink dry before coloring if you use markers.
What if my curves look shaky?
Slow down and draw in longer strokes, using your arm instead of only your wrist.
You can also redraw the line slightly outside the shaky part to smooth it out.