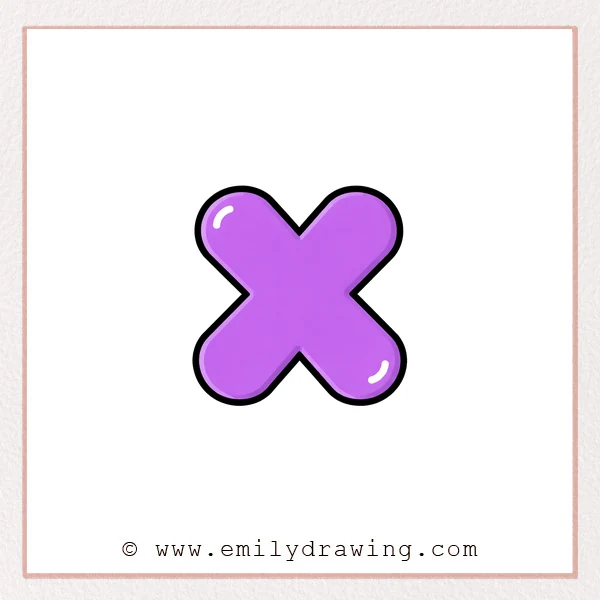
Bubble letters look soft, puffy, and fun to color.
This easy drawing tutorial will help you build a bold bubble letter X step by step.
What You Will Need
- Pencil (or a digital brush)
- Eraser
- Black marker or pen (optional for clean outlines)
- Coloring tools (markers, crayons, or digital colors)
Here are my RECOMMENDED Art Supplies!
- Crayola Coloring Set (140 Pieces – Mega Value!)
- 24 Colored Crayon Set
- A4 Printer Paper
- Crayola Coloring Pencils
- HP Home Printer with Instant Ink!
Time needed:
17 minutes.
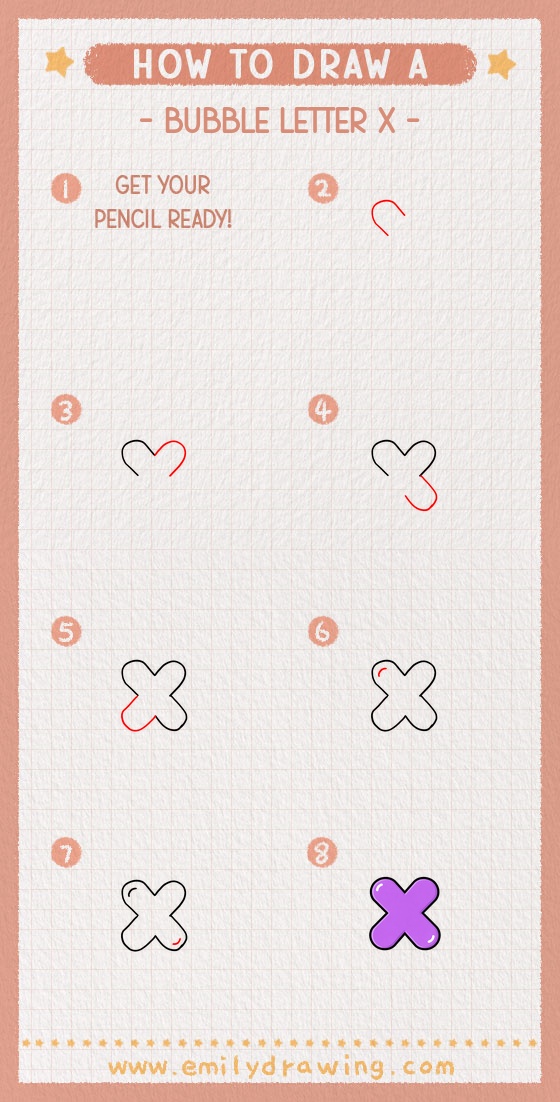
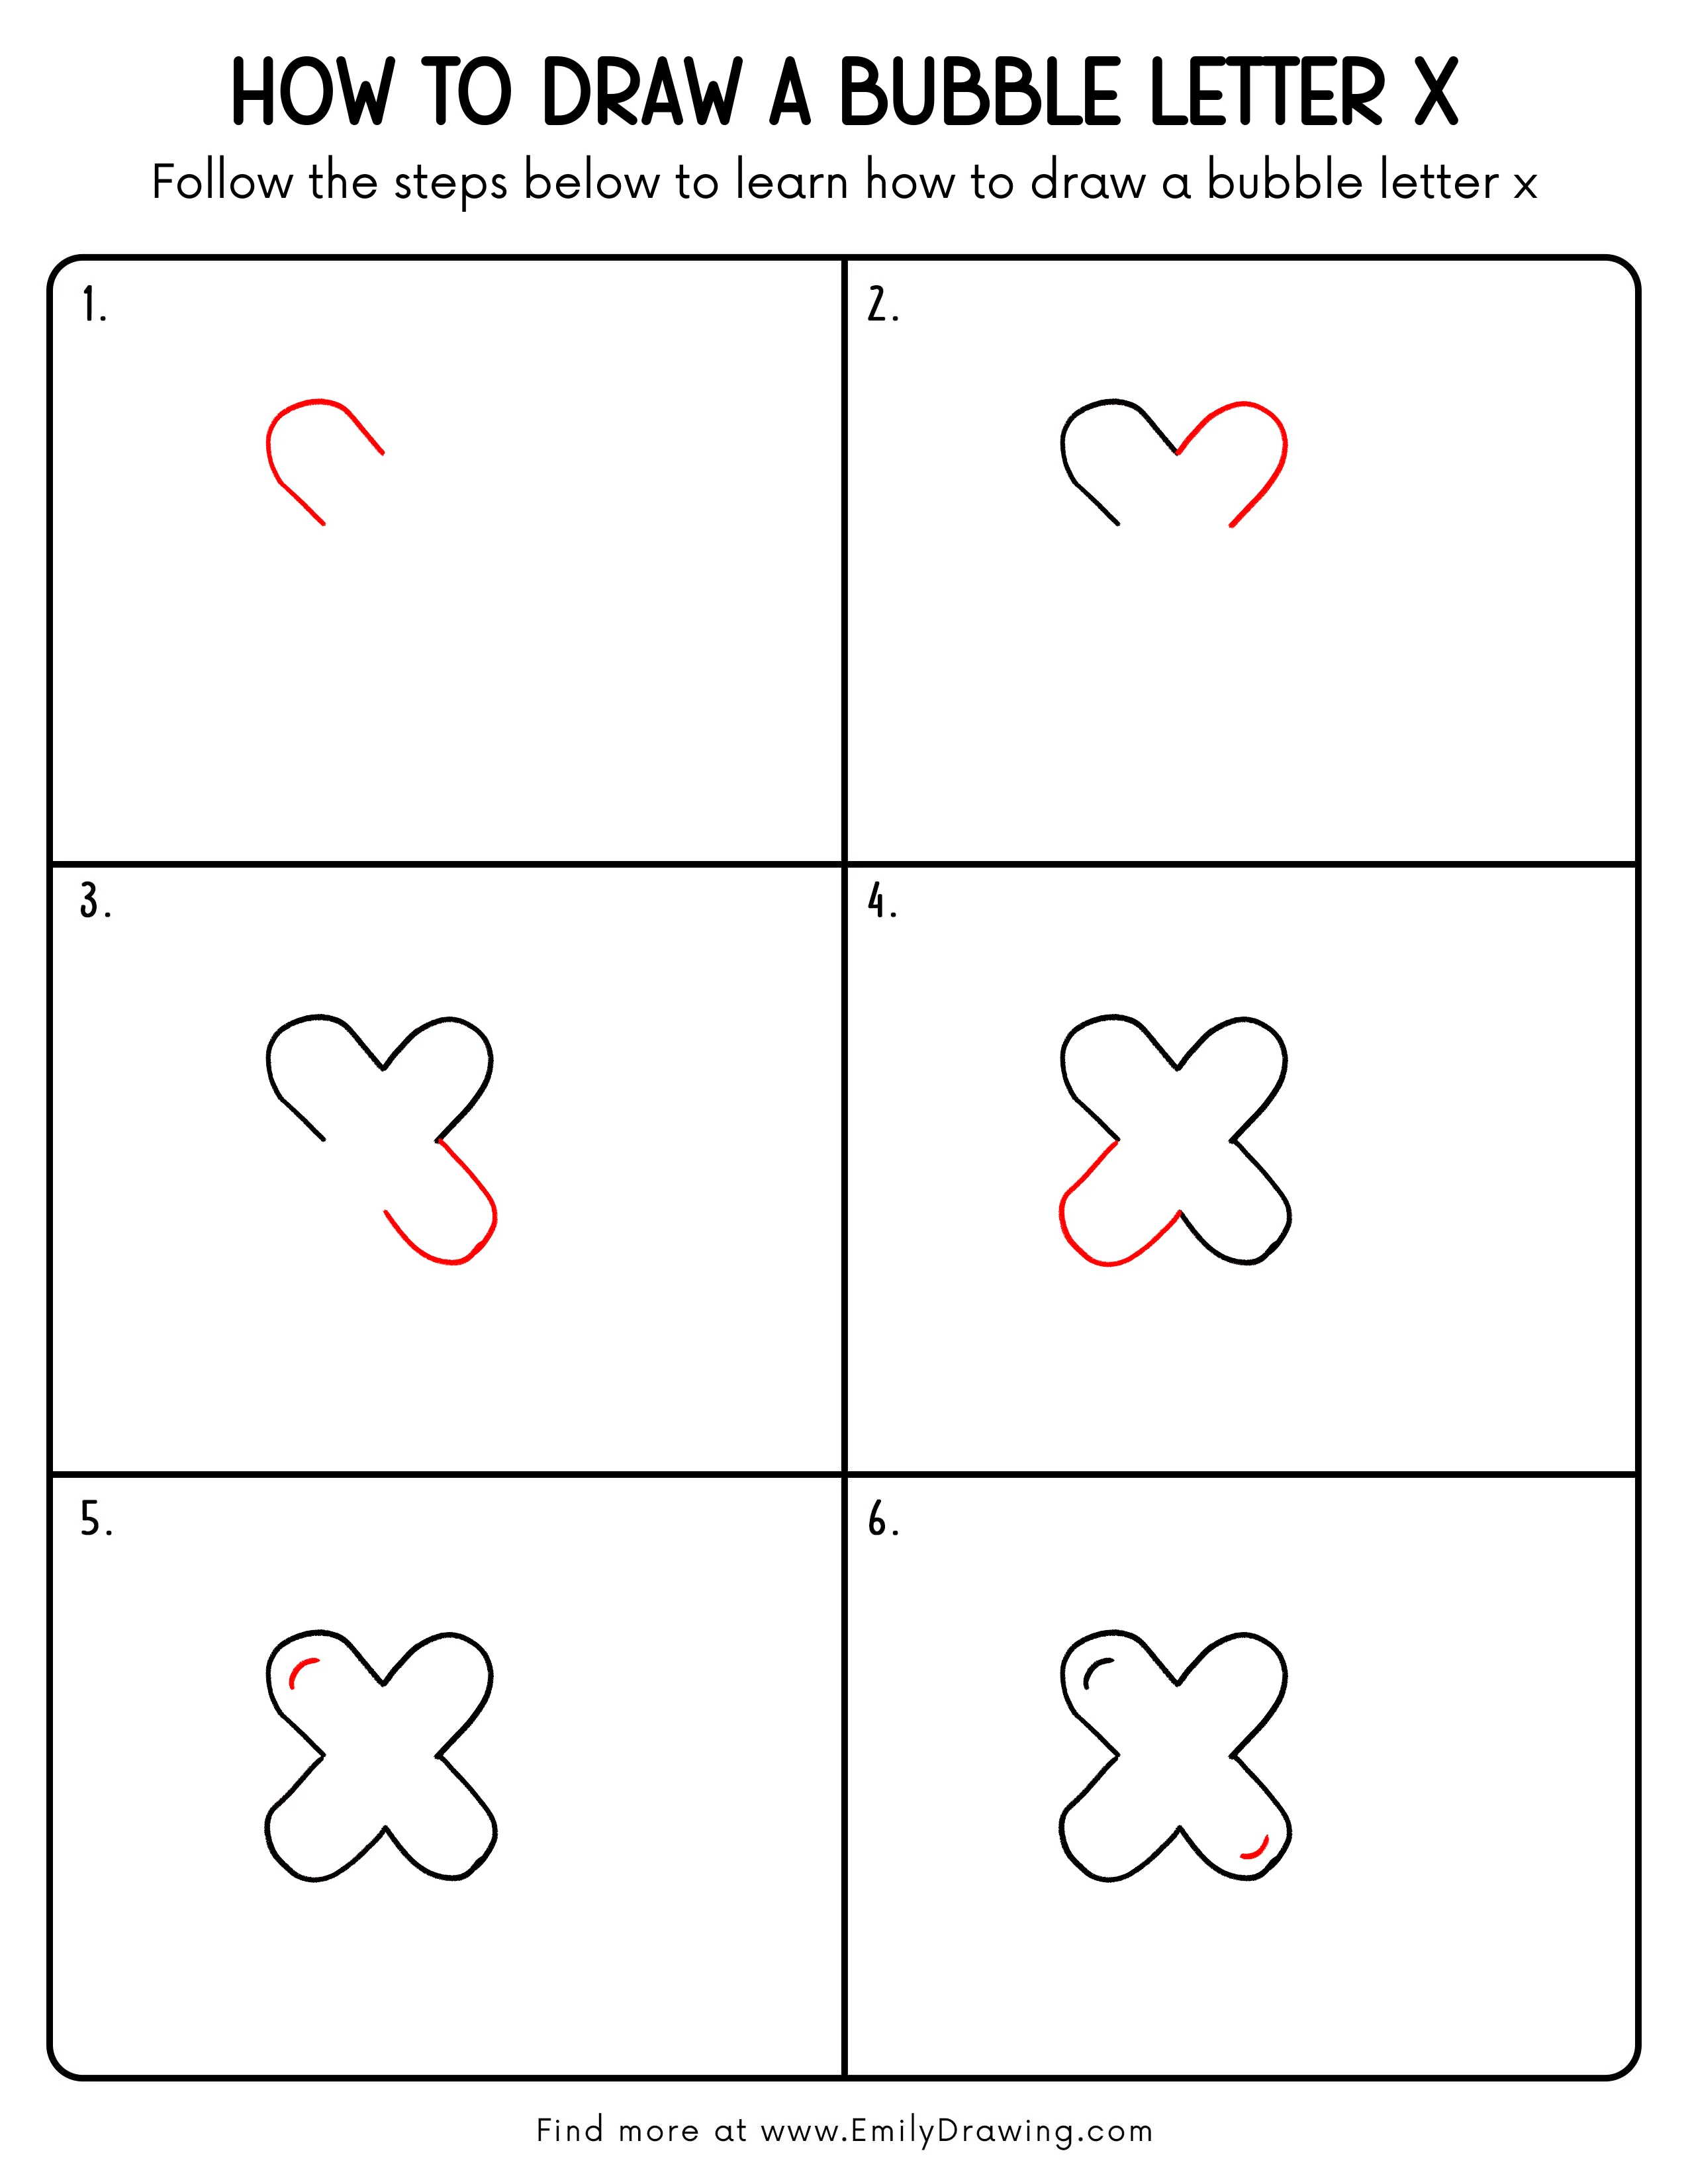
Step-by-Step Drawing Guide
Step 1: Draw the first rounded curve
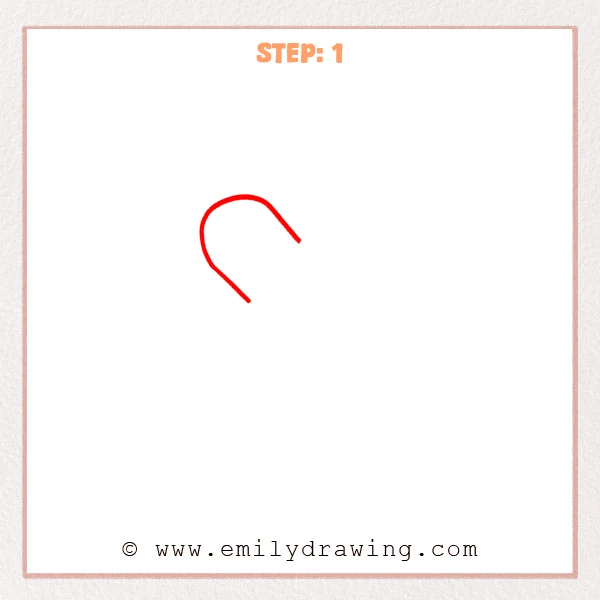
Draw one thick curved stroke that bends from the upper left down to the lower left, like a backward “C.”
Keep both ends open for now so you can connect the bubble shapes later.
Pro Tip: Keep the curve smooth and the thickness consistent for a puffy bubble look.
Step 2: Add the matching right curve
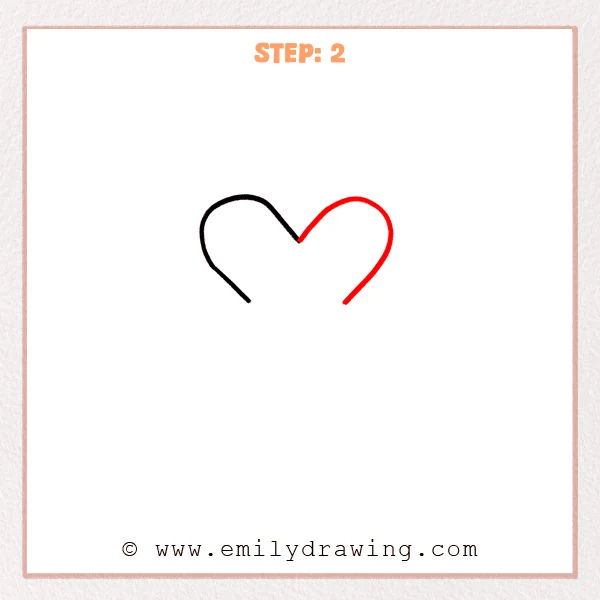
Draw a second thick curved stroke on the right, bending from the upper right down to the lower right.
Let the two curves meet gently at the top center, making a soft point where they touch.
Pro Tip: Match the right curve’s height and thickness to the left so the top meeting point stays centered.
Step 3: Draw the long lower-right stroke
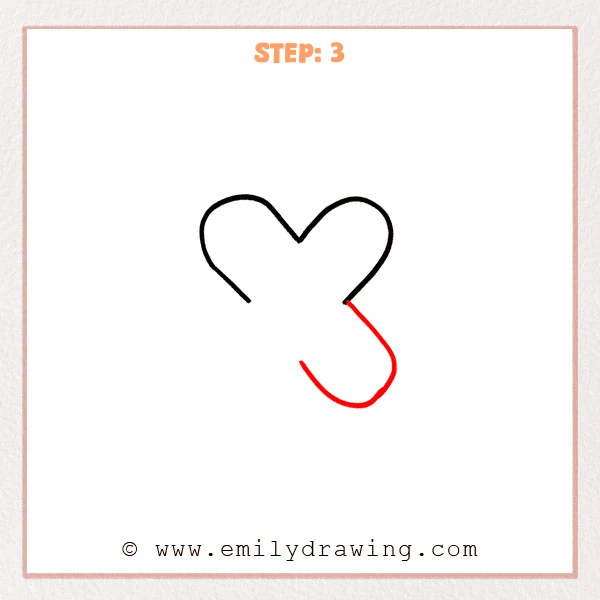
Start near the lower end of the right curve and draw a thick stroke downwards.
Round it at the bottom, then curve it slightly back up toward the left, keeping the inner end open for now.
Pro Tip: Make the bottom turn nicely rounded, not sharp, to keep the bubble letter puffy.
Step 4: Add the long lower-left stroke
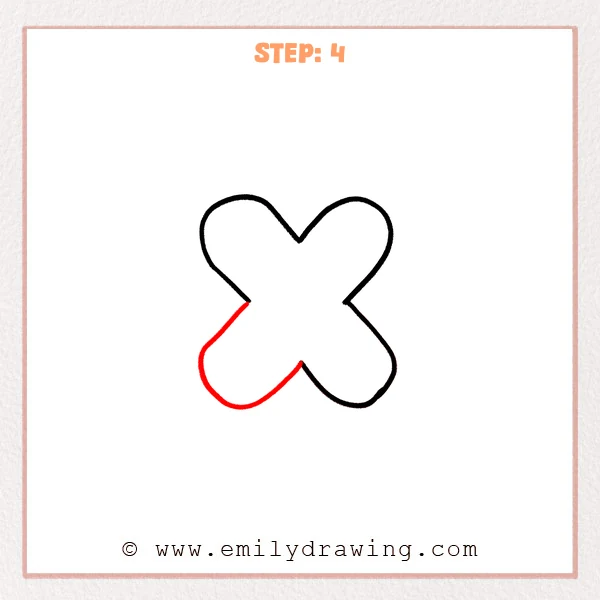
Start near the lower end of the left curve and draw a thick stroke downward to form the puffy lower-left arm.
Round the bottom turn, then curve the line back up toward the right, leaving a clear notch where the X will cross.
Pro Tip: Keep the two lower arms similar in length and roundness for a balanced bubble letter X.
Step 5: Add a small highlight curve
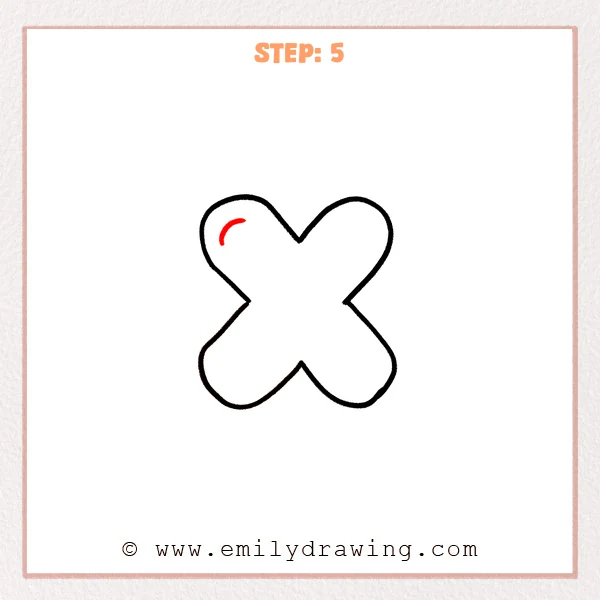
Inside the top-left bubble area, draw a short curved line like a tiny crescent.
Follow the outer curve’s direction so it reads as a shiny highlight.
Pro Tip: Leave a little space between the highlight and the outer edge for a cleaner, more 3D look.
Step 6: Add a highlight on the lower-right
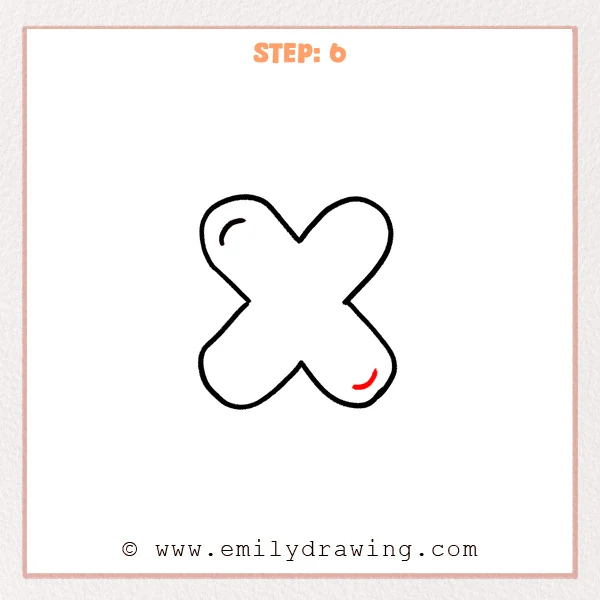
Inside the lower-right bubble area, draw a short curved highlight line near the inner side of the edge.
Match the curve direction to the rounded corner so it pairs with the top-left highlight.
Pro Tip: Keep both highlights similar in size, with the lower-right slightly shorter if needed.
Step 7: Color in your drawing!
Fun Facts
- Bubble letters are a classic style in graffiti and poster art.
- Rounded corners make letters feel friendly and “inflated,” like balloons.
- The letter X is great for practicing symmetry and smooth curves.
Pin it now, Draw later!
Trace your final outline with a clean pen if you like, then erase extra sketch lines.
Add color, patterns, or a simple shadow to make your bubble letter X pop.
Keep practicing step by step drawing, and try a whole bubble alphabet next!
Get the FREE Printable Drawing Guide
FREE Download Printable Bubble Letter X Drawing Tutorial
Frequently Asked Questions
1) How do I make my bubble letter X look more even?
Lightly sketch a center point first, then match the curves on both sides.
2) What if my lines look shaky?
Slow down, use longer strokes, and redraw the curve until it feels smooth.
3) Can I add shading to a bubble letter X?
Yes—add a small shadow on one side, but keep it simple for beginners.