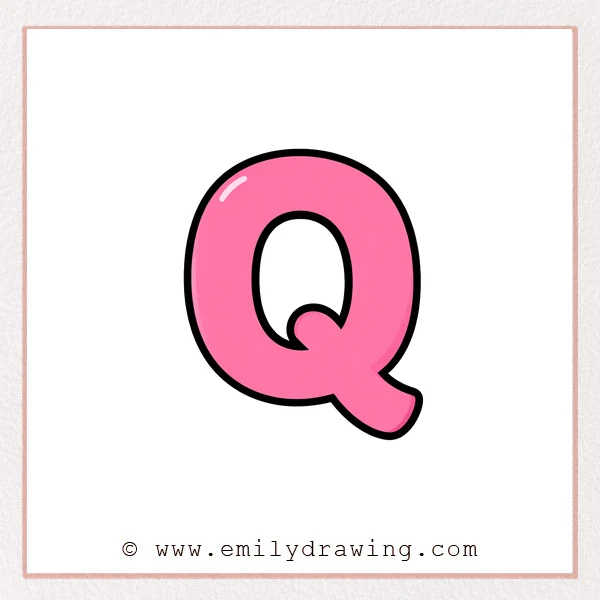
Bubble letters are round, friendly, and fun to color. This easy drawing tutorial will help you build a bubble letter q using smooth curves. Take your time, and keep your lines soft and even.
What You Will Need
- Pencil
- Eraser
- Black marker (optional for tracing)
- Paper
- Colored markers or crayons (optional)
Here are my RECOMMENDED Art Supplies!
- Crayola Coloring Set (140 Pieces – Mega Value!)
- 24 Colored Crayon Set
- A4 Printer Paper
- Crayola Coloring Pencils
- HP Home Printer with Instant Ink!
Time needed:
27 minutes.
Step-by-Step Drawing Guide
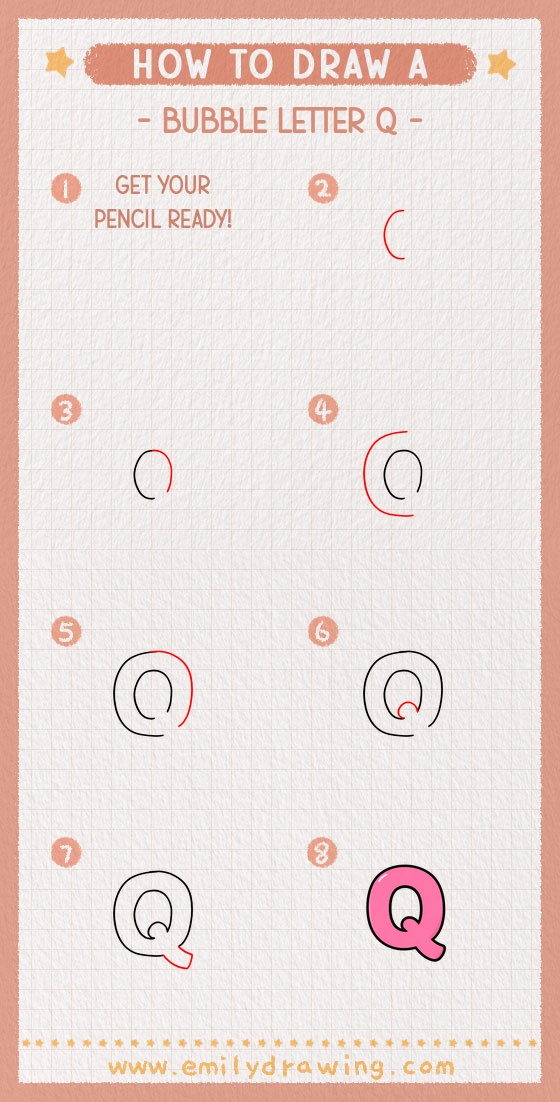
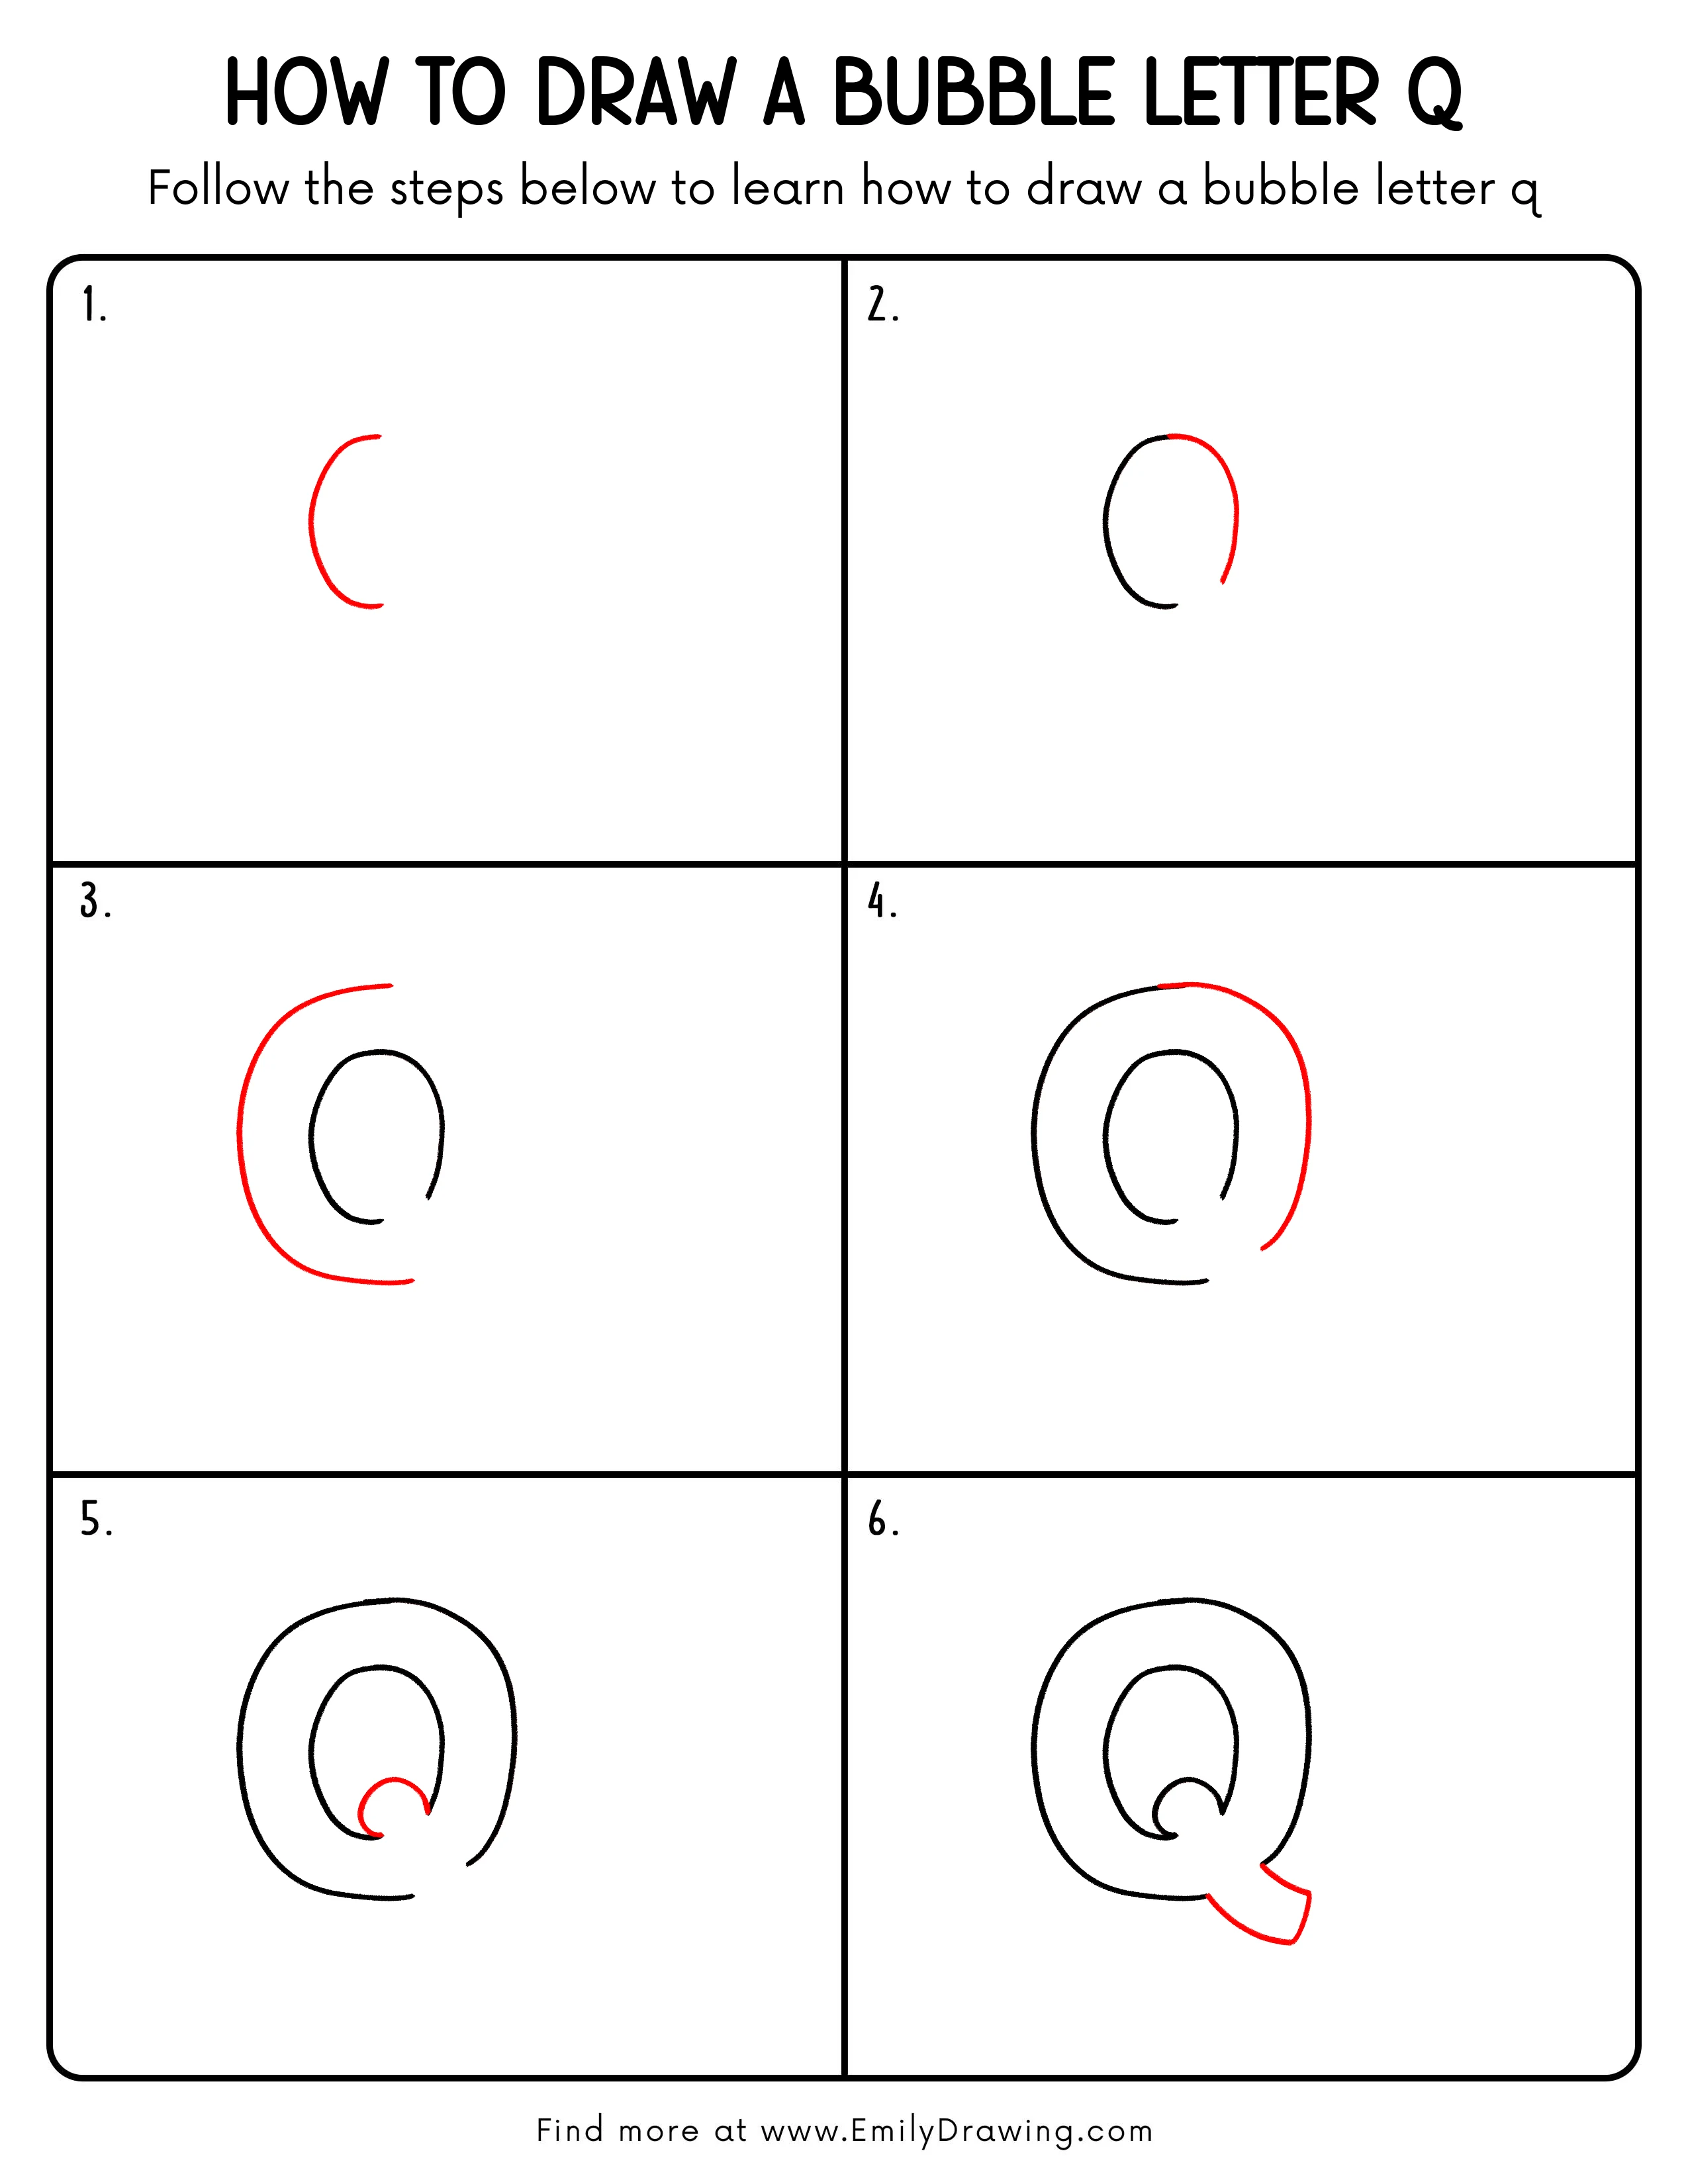
Step 1: Draw the Main Outer Curve
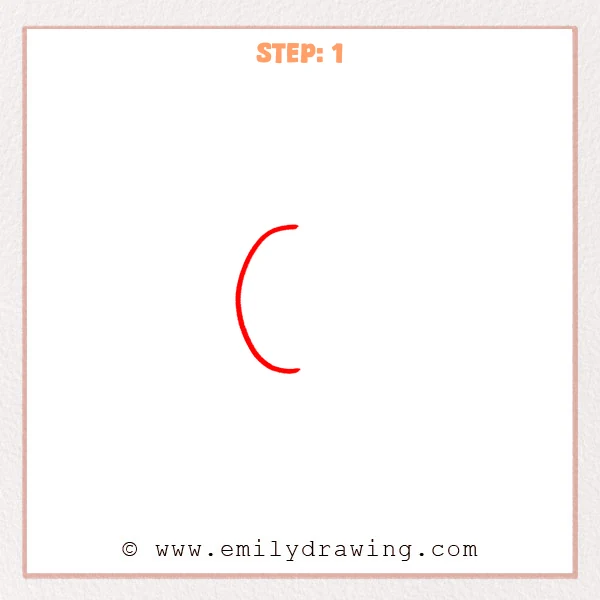
Start with one large “C”-shaped curve for the left side of the bubble letter q. Keep the top and bottom ends softly rounded. Leave the shape open for now.
Pro Tip: Make the curve wide so the bubble style has plenty of space.
Step 2: Add the Right Curve to Form the Outer Loop
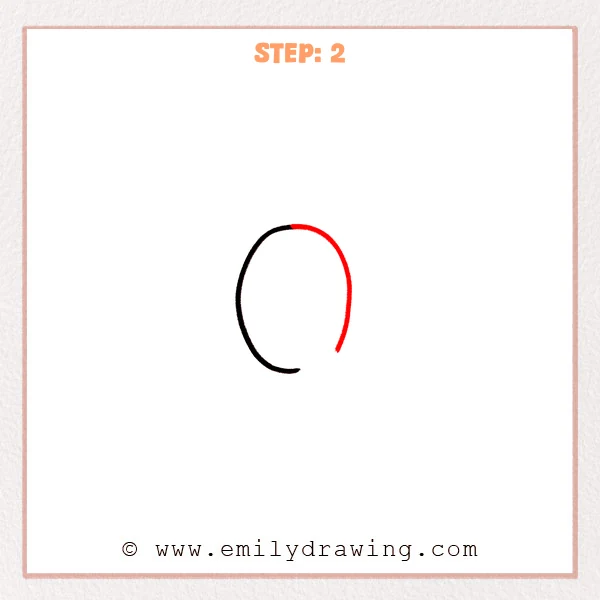
Draw a matching curve on the right side and connect it at the top to create an almost oval outline. Keep a small opening near the bottom so you can add the tail later. Try to keep both sides evenly spaced.
Pro Tip: Match the left and right spacing so the bubble thickness feels even.
Step 3: Add a Bigger Outer Bubble Outline
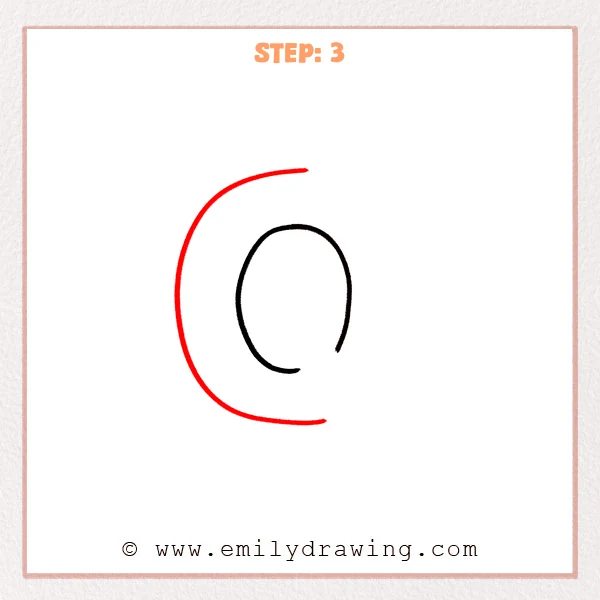
Draw a larger curved outline around the inner oval to create the bubble thickness. Start near the top and sweep down smoothly. Keep the gap between the inner and outer lines consistent.
Pro Tip: Aim for the same thickness all the way around for a clean bubble look.
Step 4: Close the Outer Bubble Loop
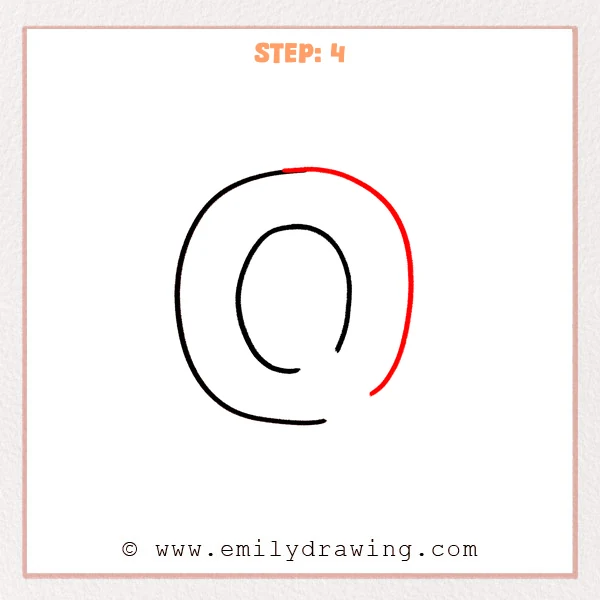
Continue the outer line around the right side so the shape feels complete and rounded. Leave a small opening at the lower right where the tail will attach. Make the corners soft and curved.
Pro Tip: Slow down on the turns so the corners stay round, not sharp.
Step 5: Add a Small Inner Hook
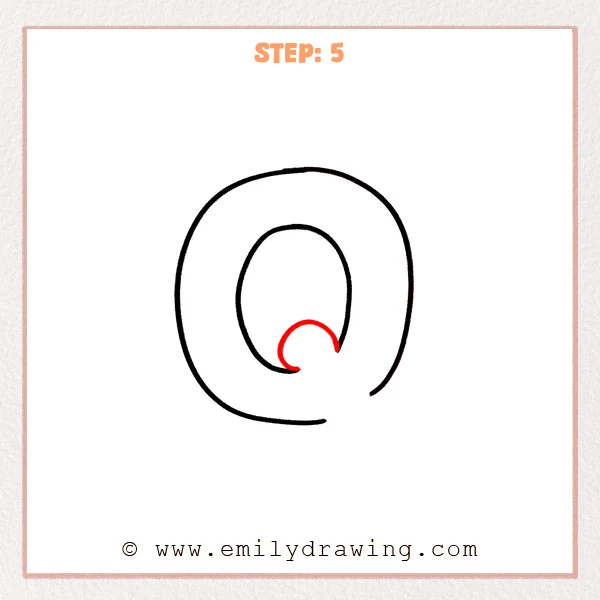
Inside the opening near the bottom, draw a small curved hook like a tiny comma. This marks the starting point for the q tail detail. Keep it smooth and not too large.
Pro Tip: Keep the hook small so the tail can flow out naturally.
Step 6: Draw the Bubble Tail of the q
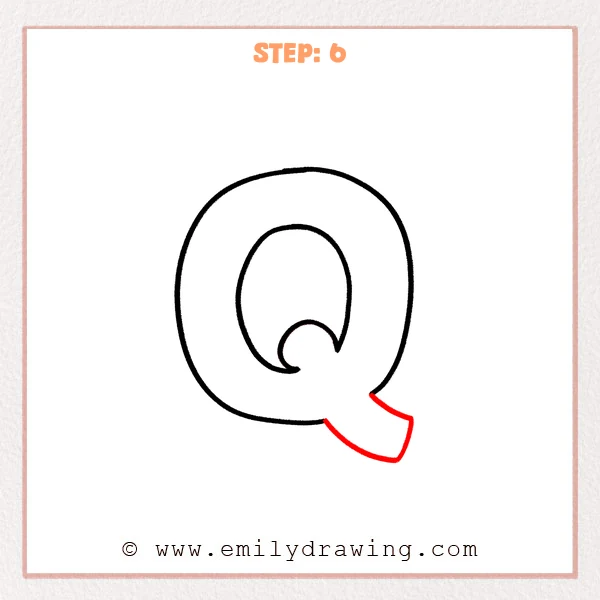
From the lower right opening, draw a thick tail shape that goes down and to the right like a rounded ribbon. Close the tail with a short curved end so it looks puffy. Make sure the tail feels attached and sturdy.
Pro Tip: Match the tail thickness to the bubble thickness for a consistent look.
Step 7: Color in your drawing!
Fun Facts
- Bubble letters became popular in posters, comics, and early graffiti styles.
- Rounded letter shapes are easier to color because they have big open spaces.
- Changing the tail shape can make your bubble letter q look playful or bold.
Pin it now, Draw later!
Trace your final lines with a marker if you want a clean, bold look. Erase any sketchy overlaps, then add color, shadows, or patterns like stripes and dots. Keep practicing step by step drawing, and try other bubble letters next.
Get the FREE Printable Drawing Guide
FREE Download Printable Bubble Letter Q Drawing Tutorial
Frequently Asked Questions
Q1: How do I make my bubble letter q look more even?
Use light pencil first and check that the thickness stays similar all around.
Q2: Can I make the tail longer or shorter?
Yes, just keep it rounded and close to the same thickness as the letter.
Q3: What is an easy way to decorate bubble letters?
Add simple highlights, polka dots, or a thick outline for a bold finish.