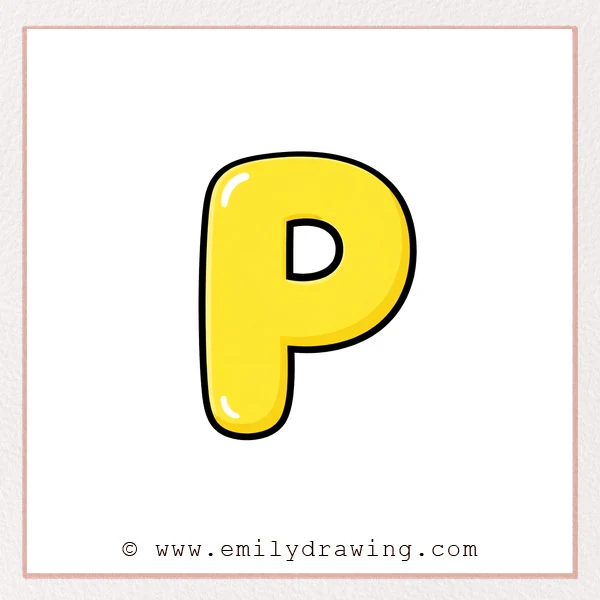
Bubble letters are rounded, puffy letters that feel playful and bold.
In this easy drawing tutorial, you will build a bubble letter P in simple stages.
Take your time with the curves, and aim for smooth, even thickness.
What You Will Need
- Pencil (or a digital brush)
- Eraser
- Black marker or pen (optional for outlining)
- Paper or a drawing tablet
Here are my RECOMMENDED Art Supplies!
- Crayola Coloring Set (140 Pieces – Mega Value!)
- 24 Colored Crayon Set
- A4 Printer Paper
- Crayola Coloring Pencils
- HP Home Printer with Instant Ink!
Time needed:
26 minutes.
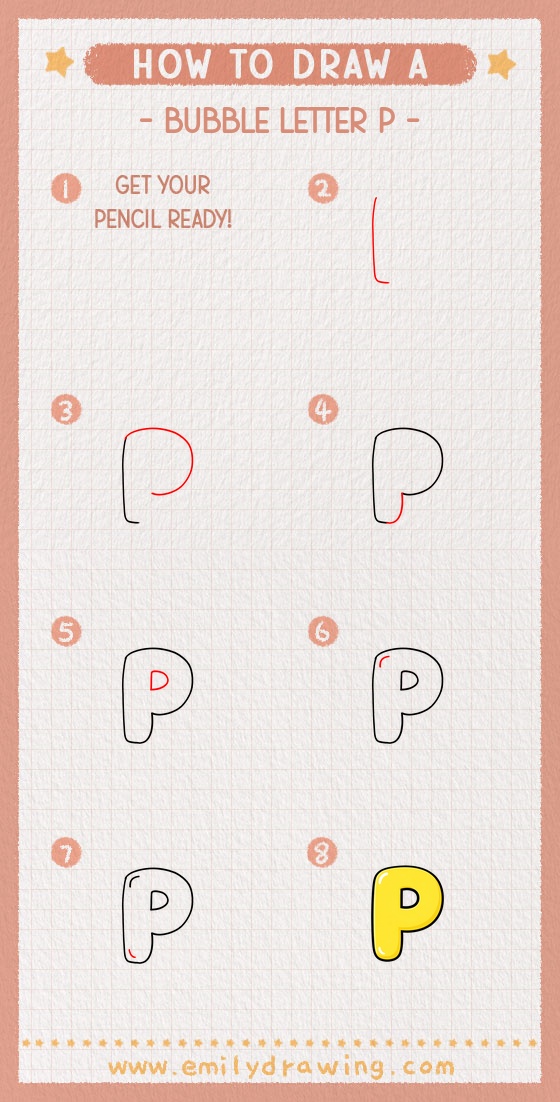
Step-by-Step Drawing Guide
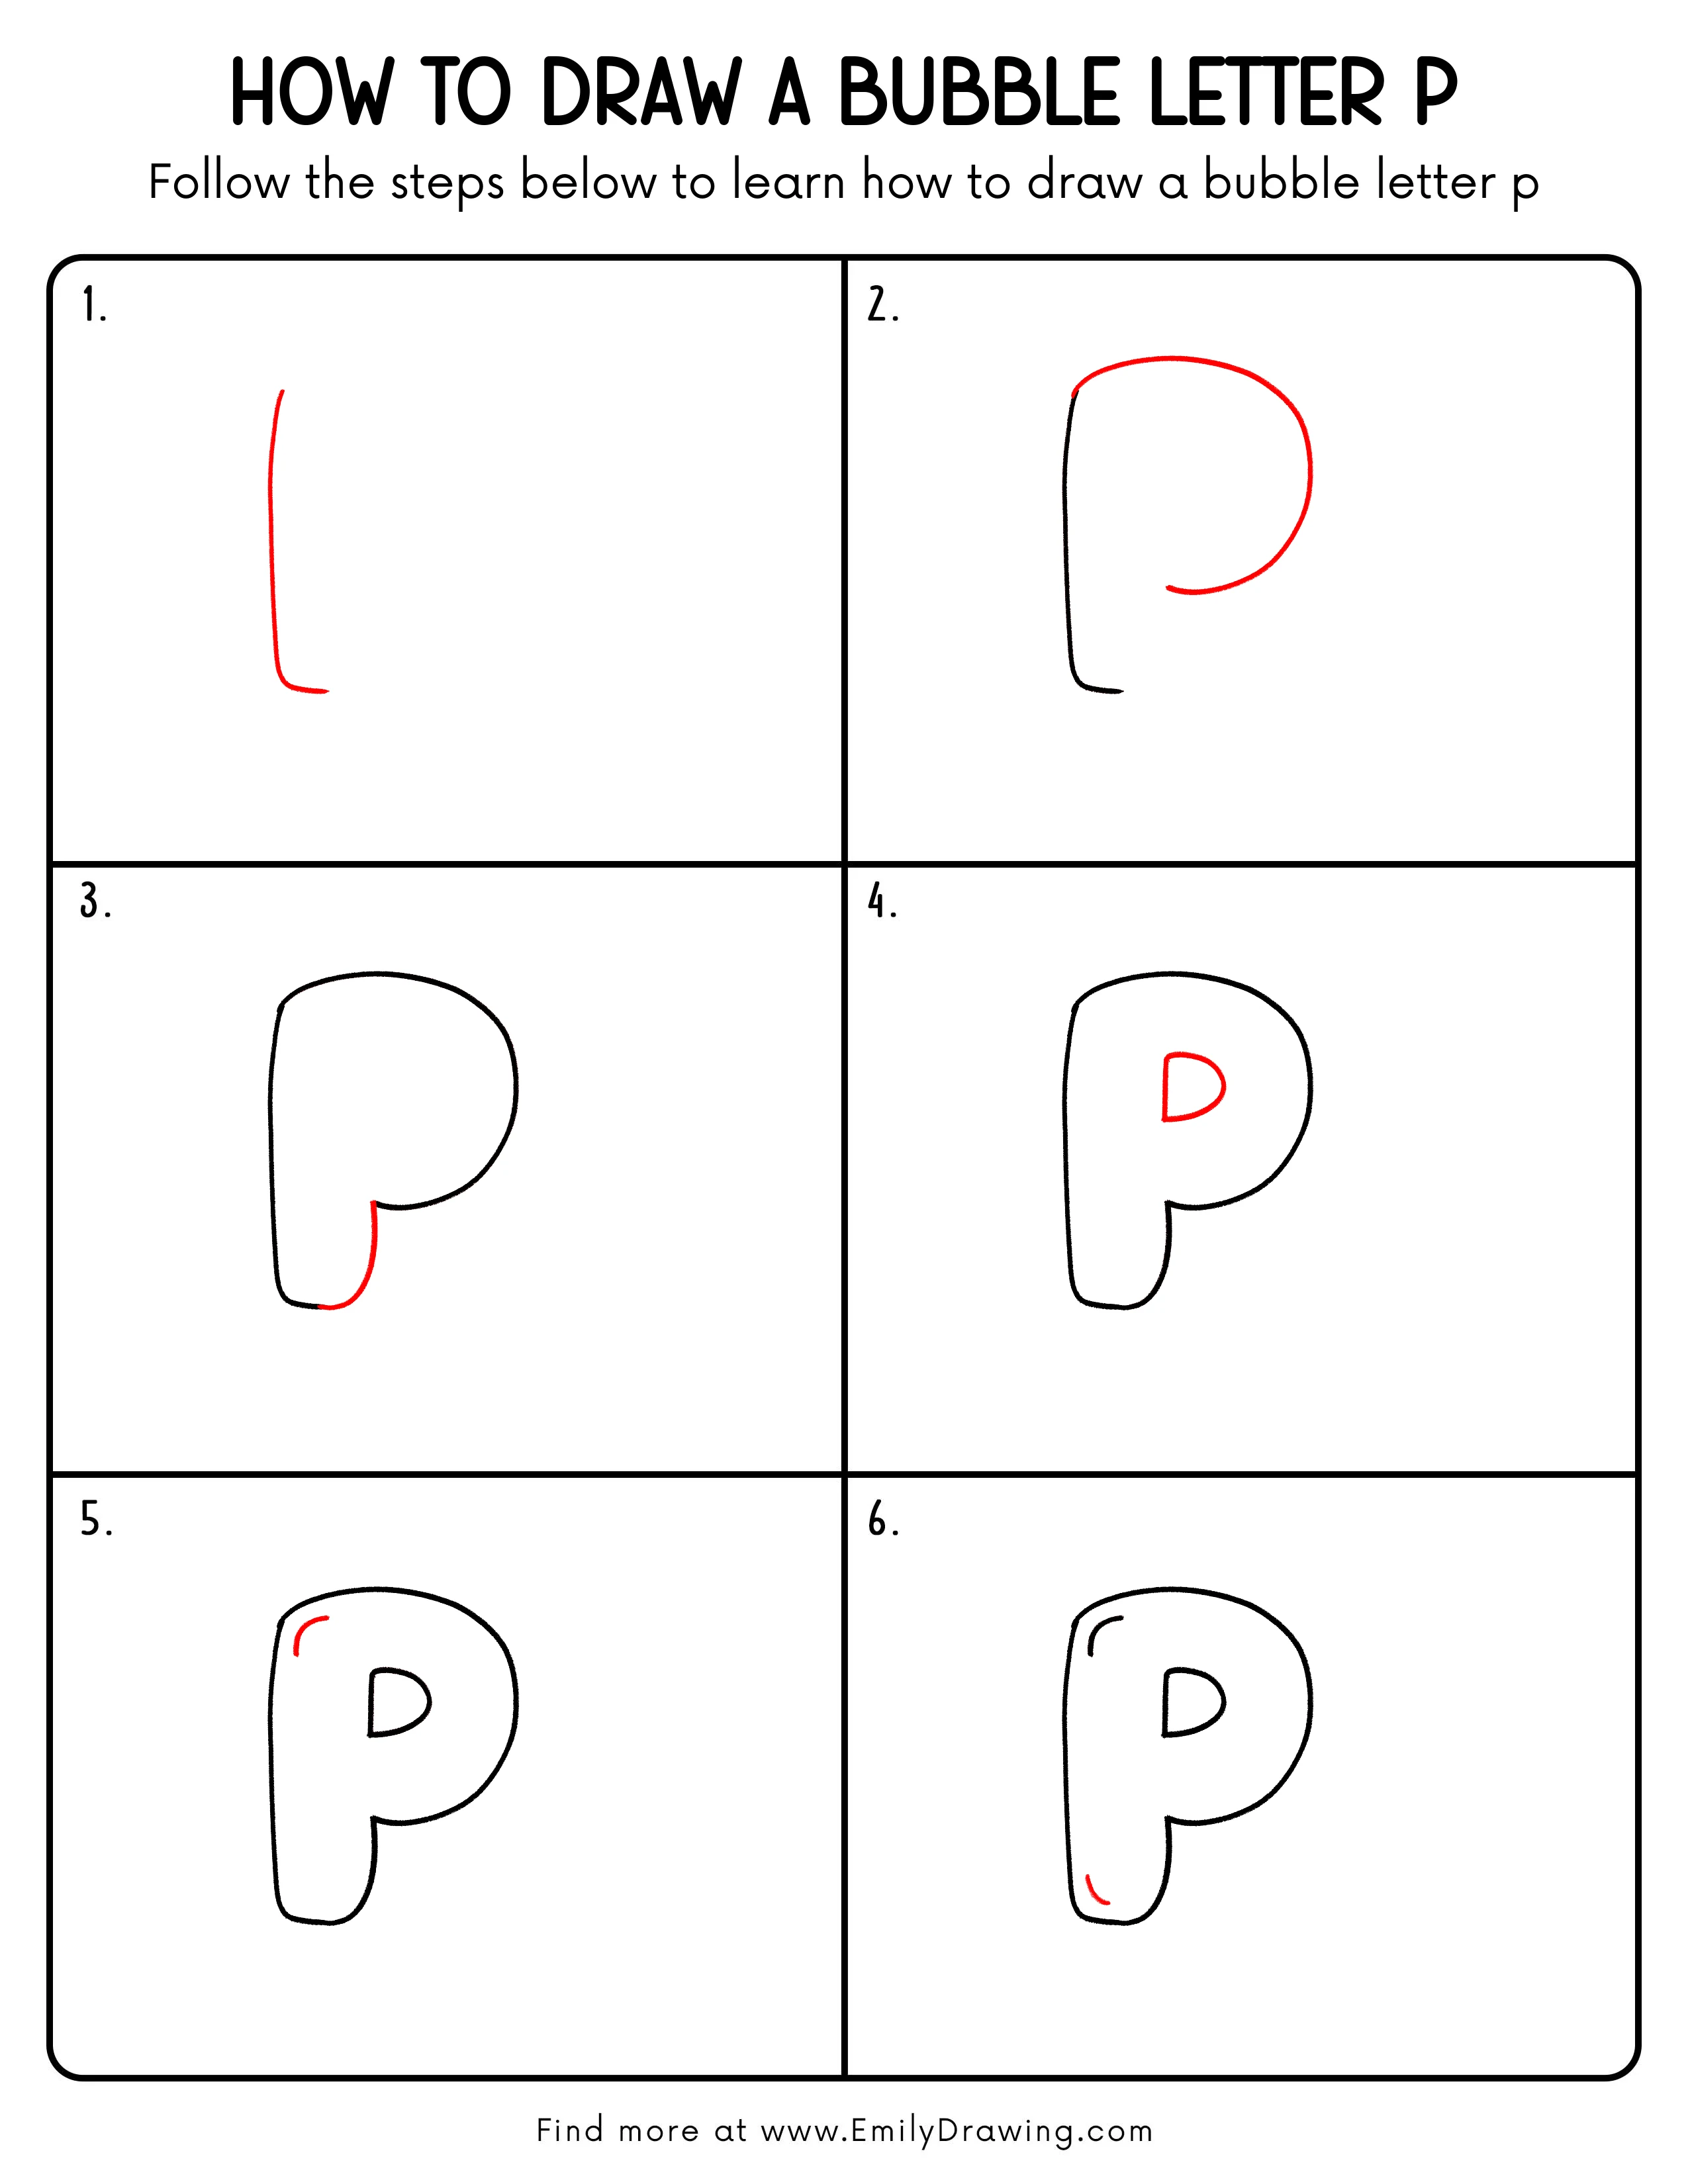
Step 1: Draw the Main Stem
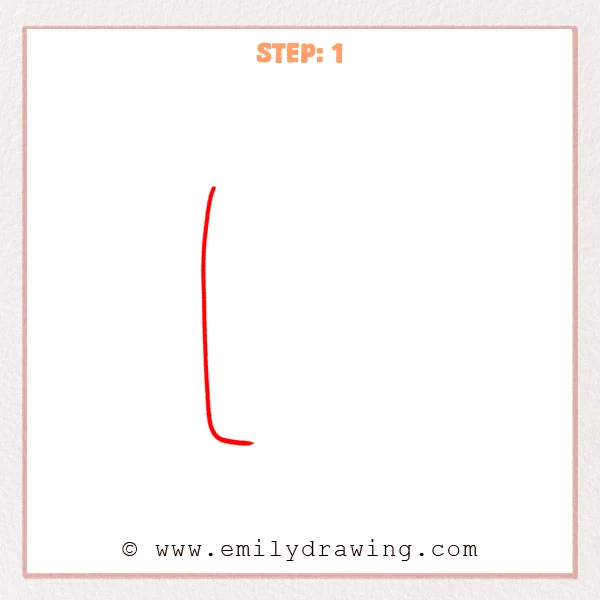
Start with a tall, rounded vertical “bubble” strip, with soft ends.
Add a tiny curve at the bottom pointing slightly to the right, but keep it narrow for now.
Pro Tip: Keep the stem straight and thick so the letter stays nicely “bubbly” later.
Step 2: Add the Big Bubble Bowl
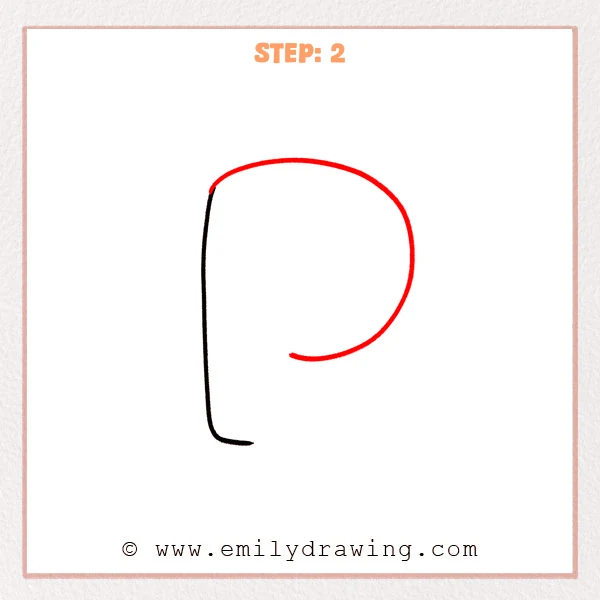
From the top of the stem, sweep a large rounded curve to the right to form a full outer bowl.
Bring the curve back toward the middle of the stem, leaving a small gap instead of closing it.
Pro Tip: Make the bowl much wider than the stem so the bubble look feels bold.
Step 3: Draw the Inner Thickness Line

Add a second line inside the bottom of the stem to show the bubble thickness.
Curve that inner line upward into the bowl area and stop around the middle, leaving an open inner space.
Pro Tip: Keep the inner line an even distance from the outline for consistent thickness.
Step 4: Draw the Inner Hole
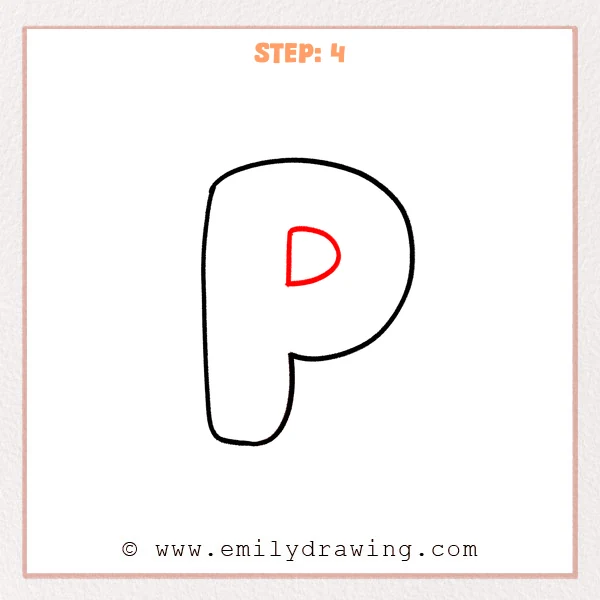
Inside the big bowl, draw a smaller “D”-shaped opening.
Use a short straight line on the left and a smooth curve on the right to keep it rounded.
Pro Tip: Place the inner hole slightly upper-middle so it reads clearly as a P.
Step 5: Add a Highlight Curve
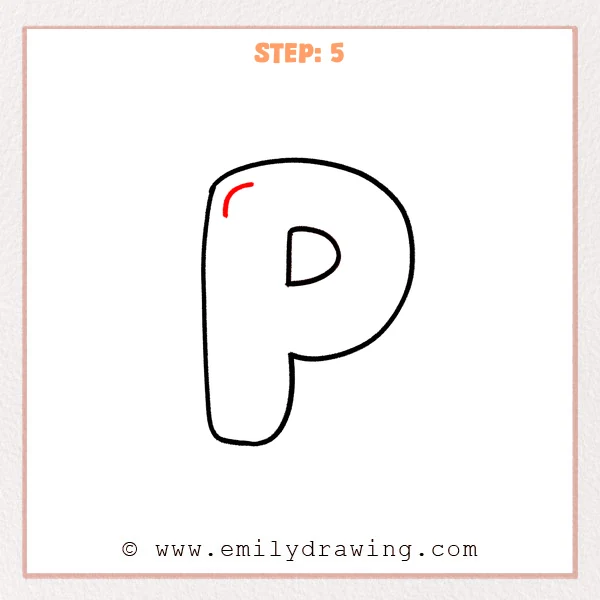
Inside the top-left area of the P’s bowl, draw a small curved “C”-shaped line.
Match the curve to the outer edge so it feels like a shiny highlight.
Pro Tip: Leave a small gap from the outline so the highlight looks clean.
Step 6: Add a Second Small Highlight
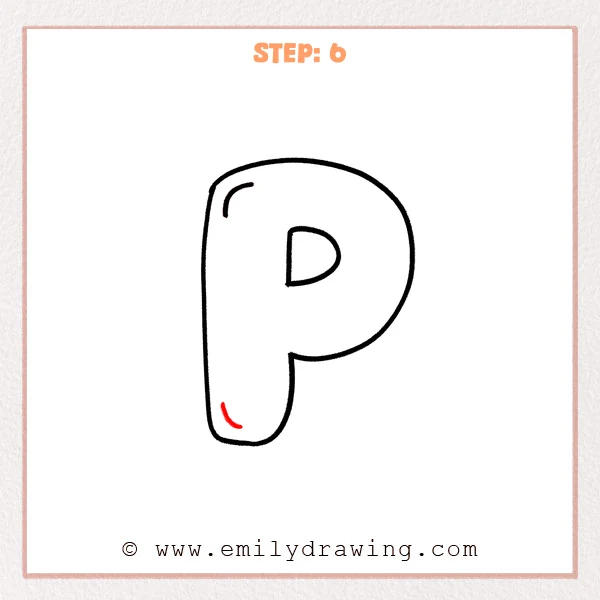
Inside the lower-left part of the stem, draw a short curved “crescent” line.
Follow the stem’s curve so it reads as a second shine mark.
Pro Tip: Keep the lower highlight smaller so the top highlight stays the main one.
Step 7: Color in your drawing!
Fun Facts
- Bubble letters are common in graffiti and poster design because they read clearly from far away.
- Rounded shapes often feel friendlier than sharp corners, which is why bubble letters look playful.
- A strong bubble letter usually has even thickness and smooth, continuous curves.
Pin it now, Draw later!
If you want a clean final look, trace the outline with a darker pen and erase sketch lines.
You can also color the letter P with a bright fill and keep highlights uncolored for shine.
Now you know how to draw a bubble letter P step by step—try making a whole bubble alphabet next!
Get the FREE Printable Drawing Guide
FREE Download Printable Bubble Letter P Drawing Tutorial
Frequently Asked Questions
How do I make my bubble letter P look more even?
Use a light sketch first, then check that the inner spacing stays consistent before outlining.
Where should the inner hole go on the letter P?
Place it slightly above the center of the bowl so the letter reads clearly.
Can I add more shine without shading?
Yes—add a few small curved highlight marks, but keep them simple and spaced from the outline.