A brick wall is a fun pattern to practice because it repeats simple shapes.
In this easy drawing tutorial, you will build rows of bricks one layer at a time.

What You Will Need
- Pencil
- Eraser
- Black marker or pen
- Paper
Here are my RECOMMENDED Art Supplies!
- Crayola Coloring Set (140 Pieces – Mega Value!)
- 24 Colored Crayon Set
- A4 Printer Paper
- Crayola Coloring Pencils
- HP Home Printer with Instant Ink!
Time needed:
26 minutes.
Step-by-Step Drawing Guide
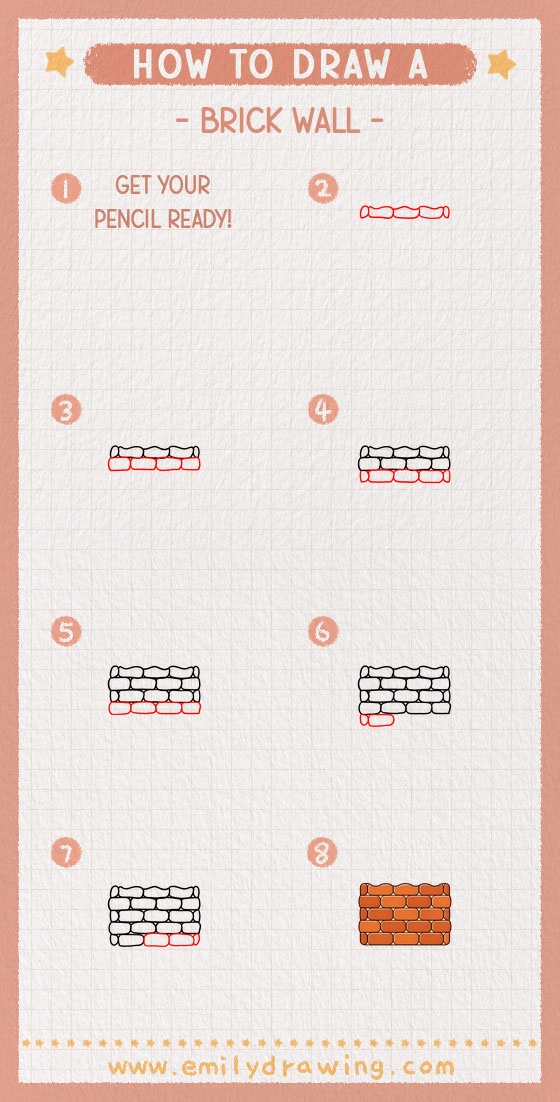
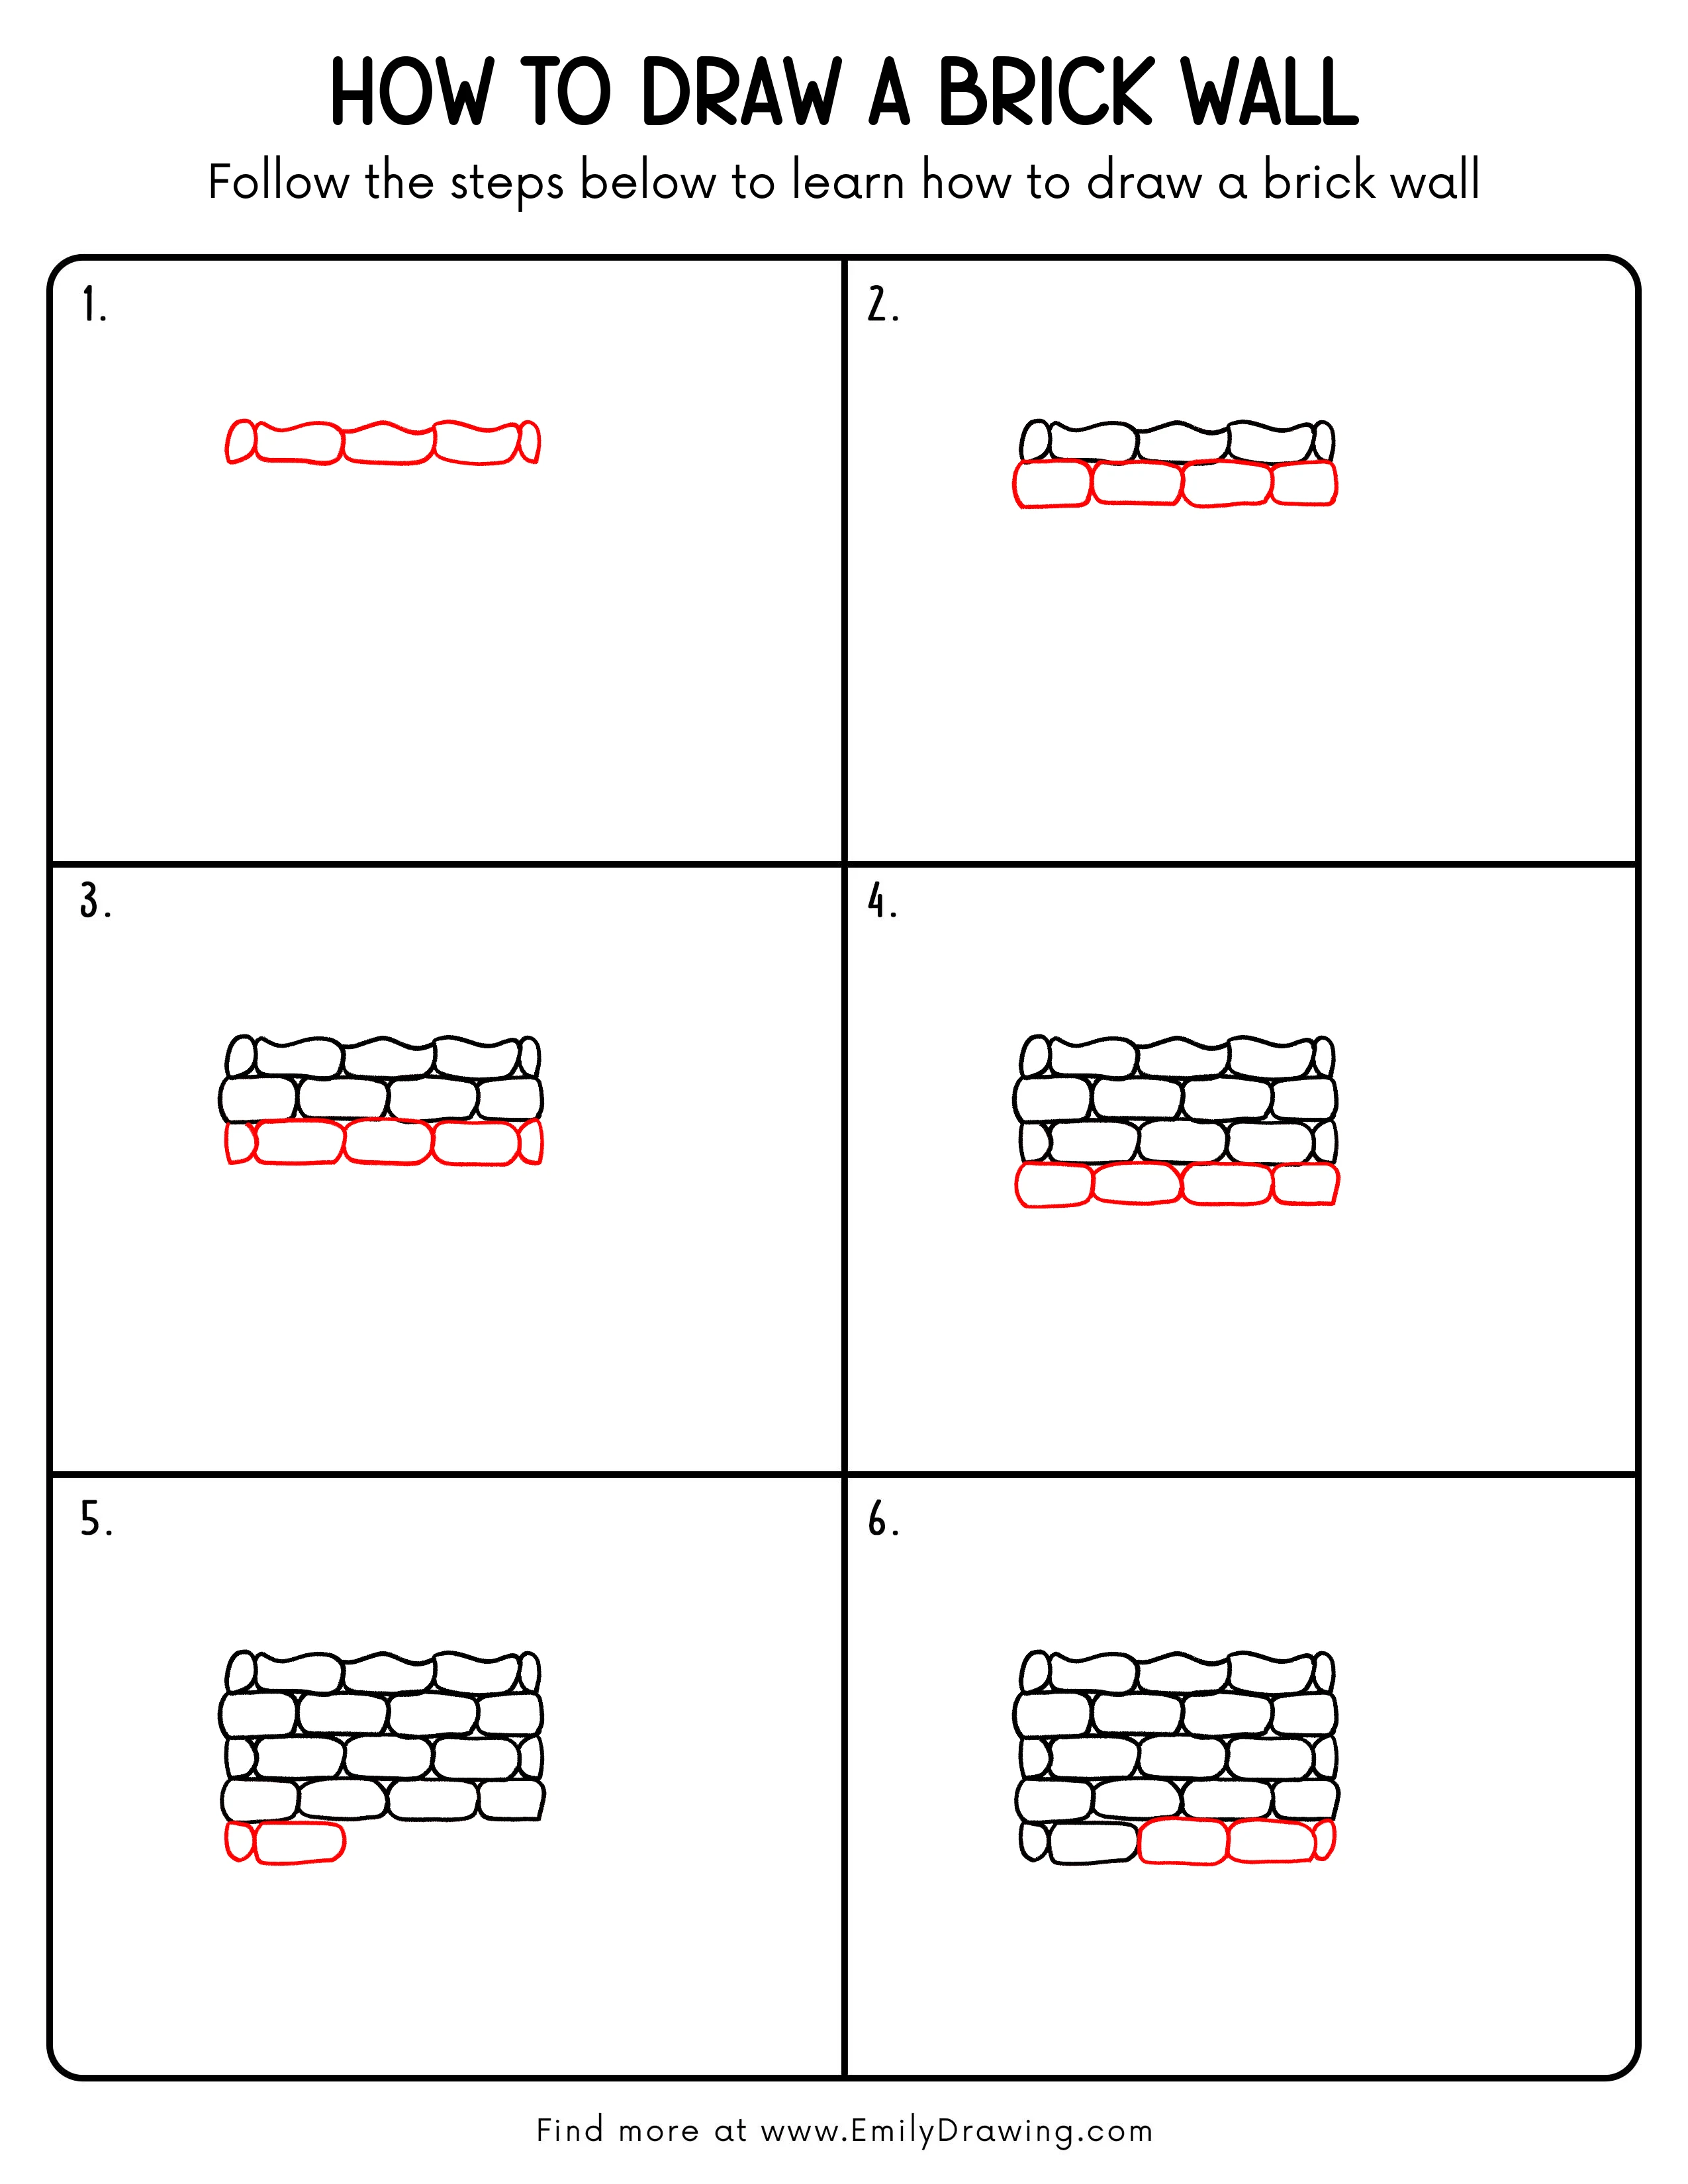
Step 1: Sketch the First Row of Bricks
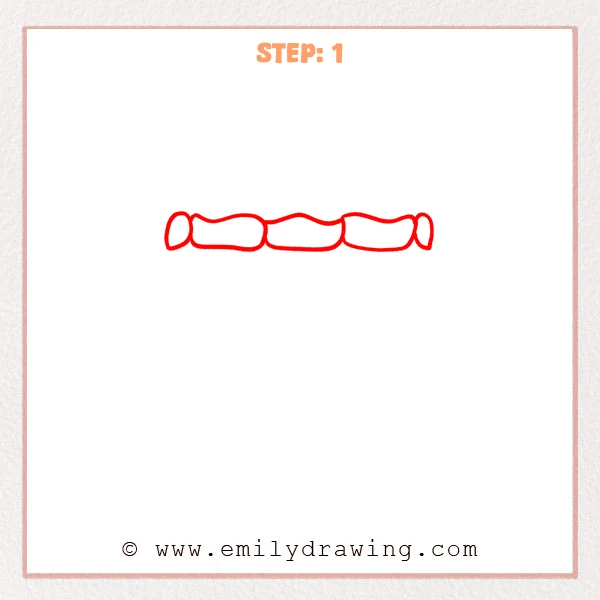
Start near the top and draw one long horizontal band with a gentle wavy edge.
Break it into connected rounded rectangles for bricks, and add half-oval ends to cap the row.
Pro Tip: Keep the brick heights consistent so the row looks tidy.
Step 2: Add the Second Row of Bricks

Under the first row, draw a new row of rounded-rectangle bricks so they sit close beneath it.
Divide the row into several connected brick faces, keeping the left and right edges smoothly rounded.
Pro Tip: Try not to line up the joints with the row above for a more real brick wall.
Step 3: Add a Third Row to Extend the Wall
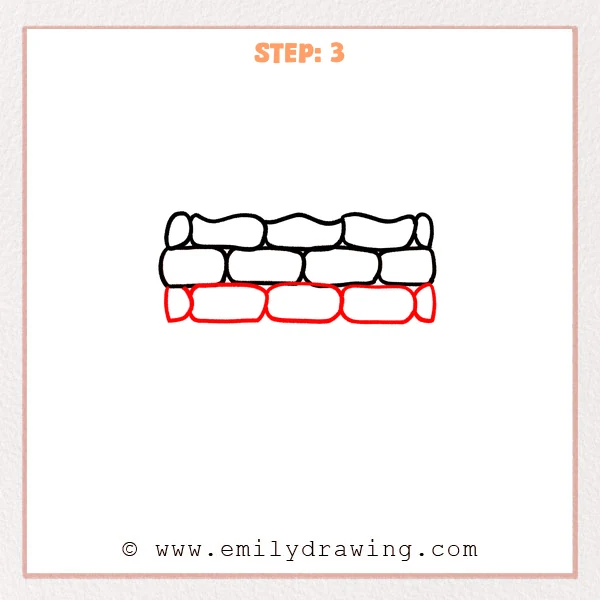
Under the second row, draw a third row of rounded-rectangle bricks to build downward.
Cap both ends with half-oval shapes, and stagger the joints from the row above.
Pro Tip: Add a slight waviness to the top edge so the brick wall feels more natural.
Step 4: Add the Fourth Row of Bricks
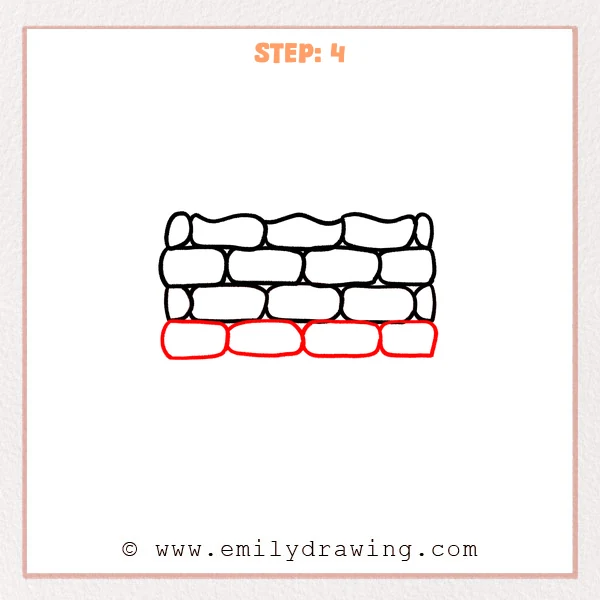
Draw one more full row of bricks beneath the third row to make the wall taller.
Keep the rounded-rectangle shapes, and offset the joints so they don’t match the row above.
Pro Tip: Let the brick widths vary a little, but keep the heights consistent.
Step 5: Start the Bottom Row
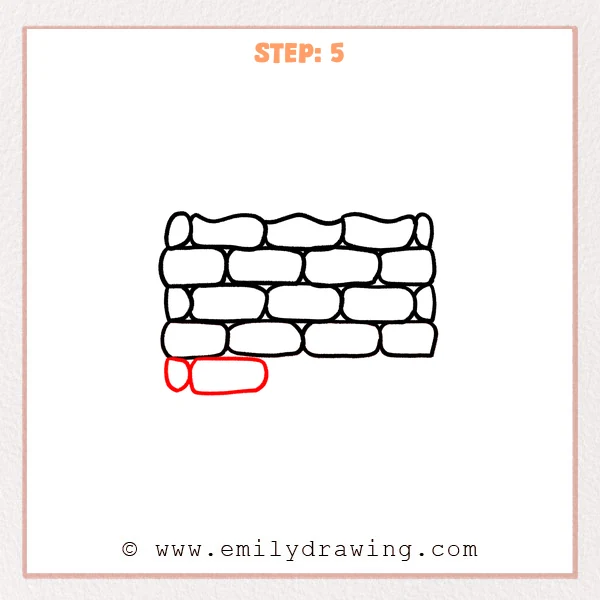
Below the fourth row, begin a new bottom row starting from the left side.
Draw a half-oval end cap first, then add one rounded-rectangle brick connected to it under the row above.
Pro Tip: Align the new row’s height with the gaps above so it feels stable and neat.
Step 6: Complete the Bottom Row
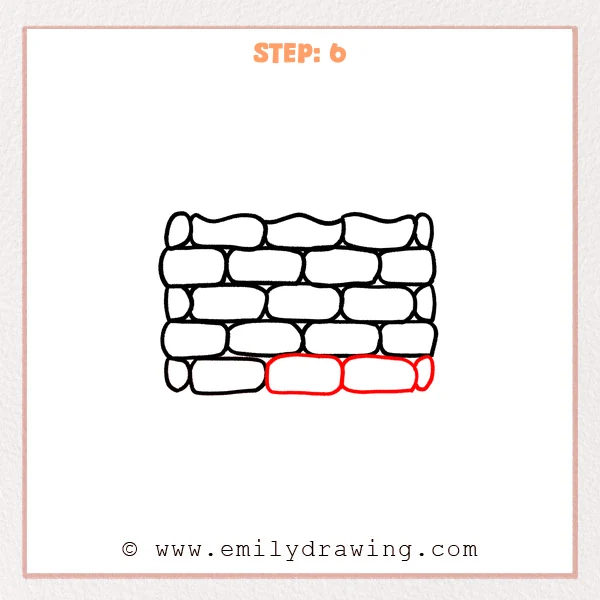
To the right of the first bottom brick, add two more rounded-rectangle bricks to extend the row.
Finish the far right side with a half-oval end cap so the bottom row feels complete.
Pro Tip: Vary the brick lengths slightly to make the wall look more natural.
Step 7: Color in your drawing!
Fun Facts
- Brick patterns often “stagger” joints so the wall stays strong.
- Mortar is the cement-like material that fills the gaps between bricks.
- Some old brick walls can last for hundreds of years.
Pin it now, Draw later!
Trace your final brick outlines with a clean, steady line.
Erase extra sketch marks, then add small chips or tiny cracks if you want more texture.
You just learned how to draw a brick wall step by step—try drawing a taller wall next!
Get the FREE Printable Drawing Guide
FREE Download Printable Brick Wall Drawing Tutorial
Frequently Asked Questions
How do I make the wall look more realistic?
Keep the joints staggered and let a few brick edges look slightly uneven.
What if my bricks don’t match in size?
Aim for similar height, then let widths vary a little for a natural look.
Can I add shading later?
Yes, you can lightly shade along one side of each brick and keep the mortar lighter.