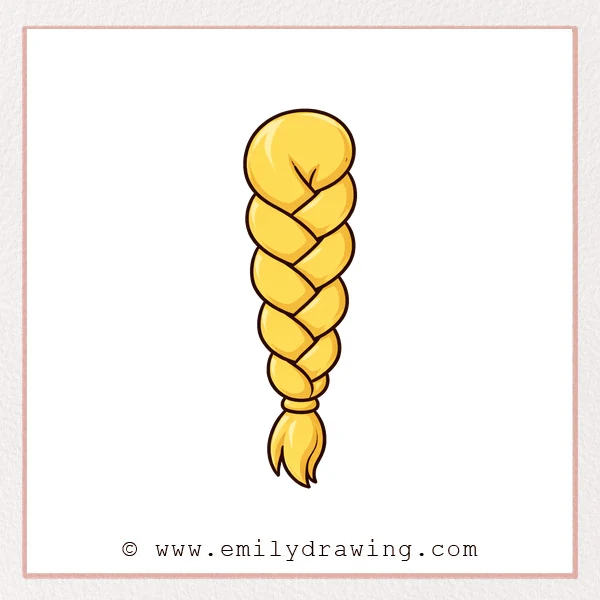
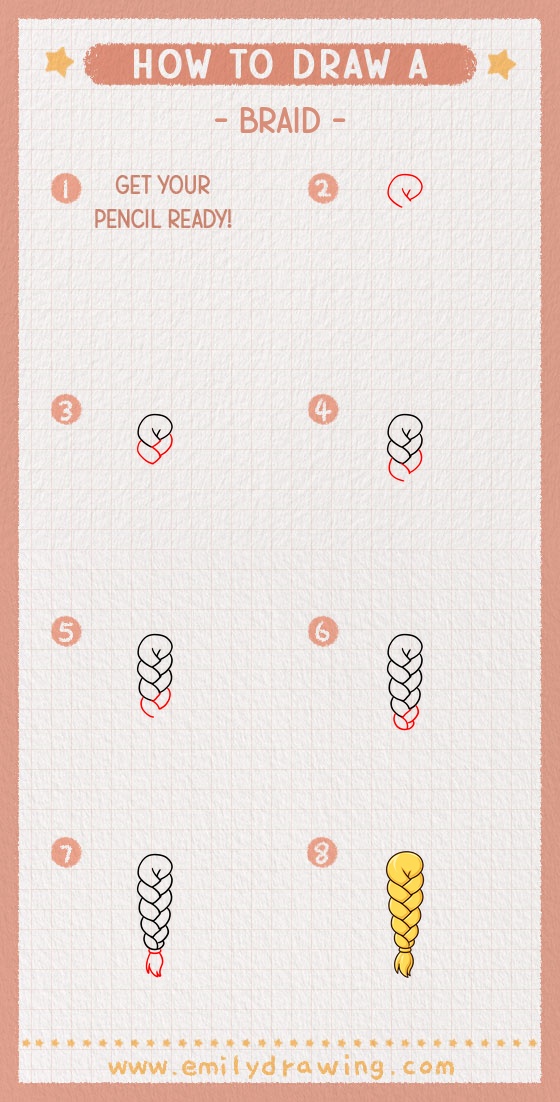
This easy drawing tutorial shows you how to draw a braid with simple shapes.
You will build a woven look by stacking curved “links” from top to bottom.
Take your time, and keep each link clear and neat.
What You Will Need
- Pencil
- Eraser
- Black pen or marker
- Paper
Here are my RECOMMENDED Art Supplies!
- Crayola Coloring Set (140 Pieces – Mega Value!)
- 24 Colored Crayon Set
- A4 Printer Paper
- Crayola Coloring Pencils
- HP Home Printer with Instant Ink!
Time needed:
15 minutes.
Step-by-Step Drawing Guide
Step 1: Sketch the Main Curve and a Split
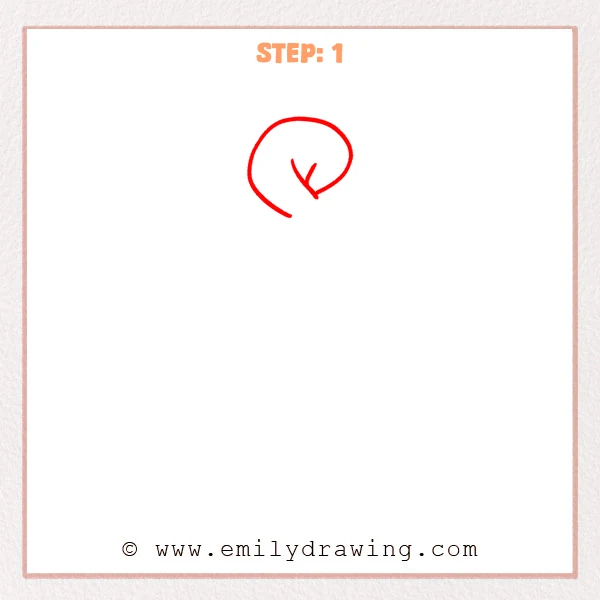
Start with one large curved line to show the overall hair flow.
Add a small “Y”-shaped split inside the curve to suggest the braid’s starting sections.
Pro Tip: Keep the first curve light so you can adjust proportions later.
Step 2: Add the First Braid Links
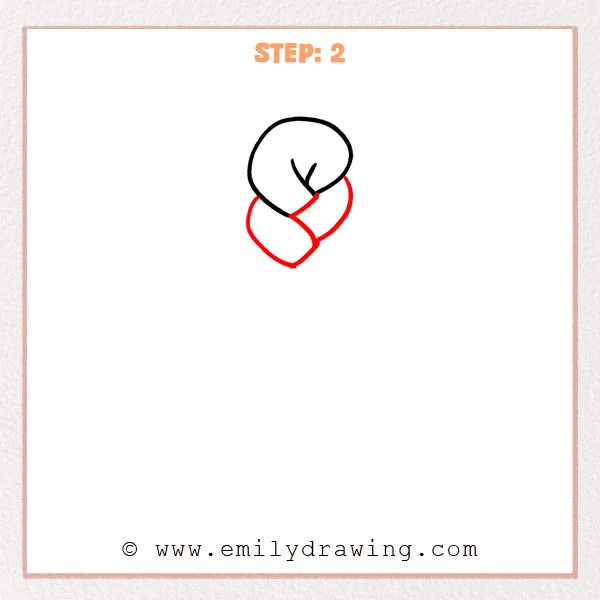
Below the main curve, draw two teardrop-shaped links that overlap like a chain.
Make one link pass over the other at the crossing so the weave feels clear.
Pro Tip: Keep the two links similar in size to make the braid look neat.
Step 3: Complete the Middle Overlap and Start the Next Link
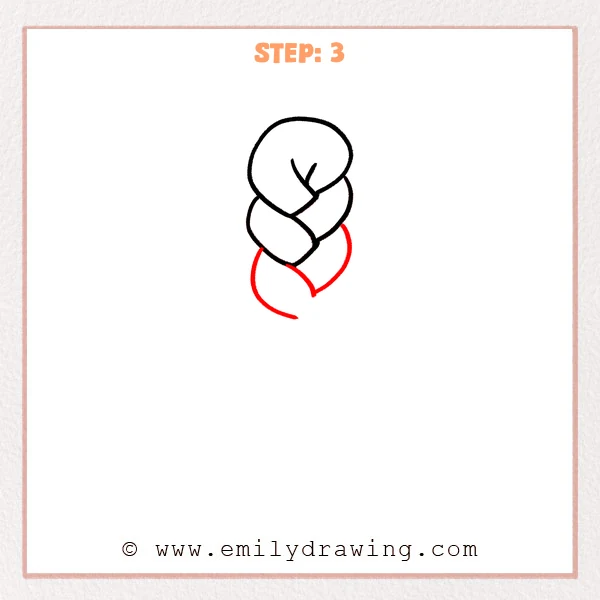
Darken and finish the outline of the middle section so it clearly weaves under the top part.
Add the next curved edge below, leaving an open gap for the next braid link.
Pro Tip: Don’t close the overlap lines completely; a small gap sells the weave.
Step 4: Complete the Next Braid Link
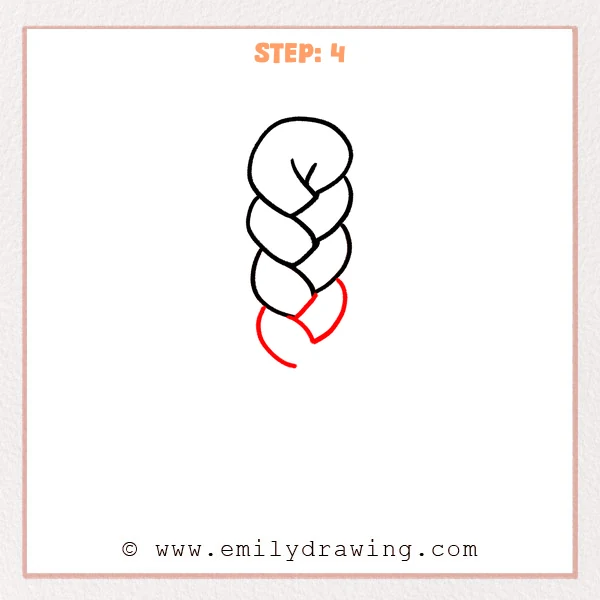
Finish the new lower link by drawing a larger teardrop shape that comes out from under the section above.
Add the outer curve on the right side so the over-under weave reads clearly.
Pro Tip: Make the lower link slightly bigger, but avoid a sudden jump in width.
Step 5: Add the Small End Link and Taper
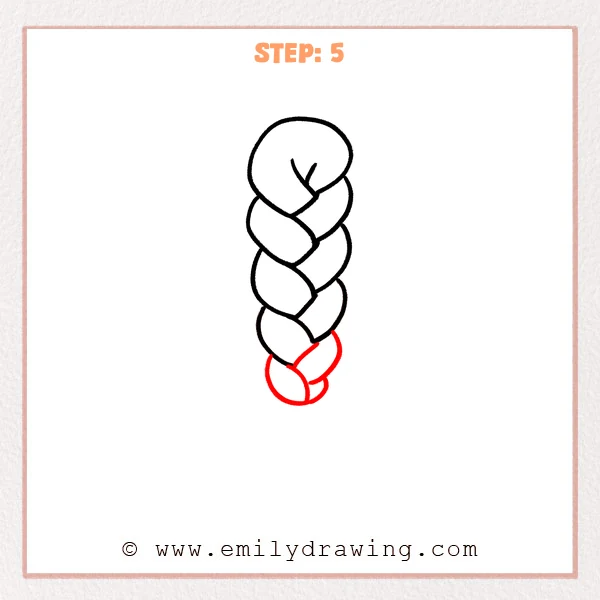
Add one smaller braid link at the bottom, starting with a rounded teardrop on the left that connects under the section above.
Draw a short inner curve on the lower right to show the final overlap and the braid tightening.
Pro Tip: Let the last link get smaller so the braid tapers naturally.
Step 6: Add the Hair Tie and Loose Tail
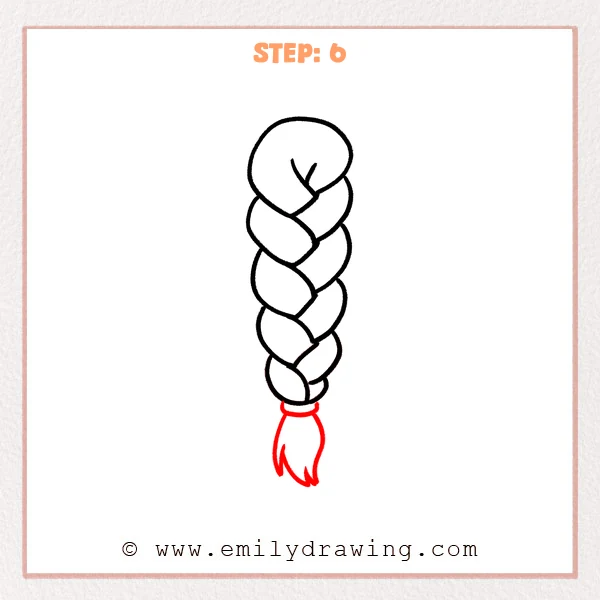
Draw a thin horizontal band at the end to show a hair tie holding the braid.
Pull a small hair tail below it with two outer lines, then add a few pointy tips at the bottom.
Pro Tip: Keep the tail outline simple, and use just a few points for ends.
Step 7: Color in your drawing!
Fun Facts
- Braids can be found in art and history across many cultures worldwide.
- A simple braid drawing looks woven because of clear “over and under” overlaps.
- Tapering the end makes the braid feel more natural and realistic.
Pin it now, Draw later!
Trace your final braid lines with a darker pen, then erase extra sketch marks.
If you like, add a few short texture strokes inside each link to suggest hair strands.
Now you know how to draw a braid step by step—try drawing two braids next!
Get the FREE Printable Drawing Guide
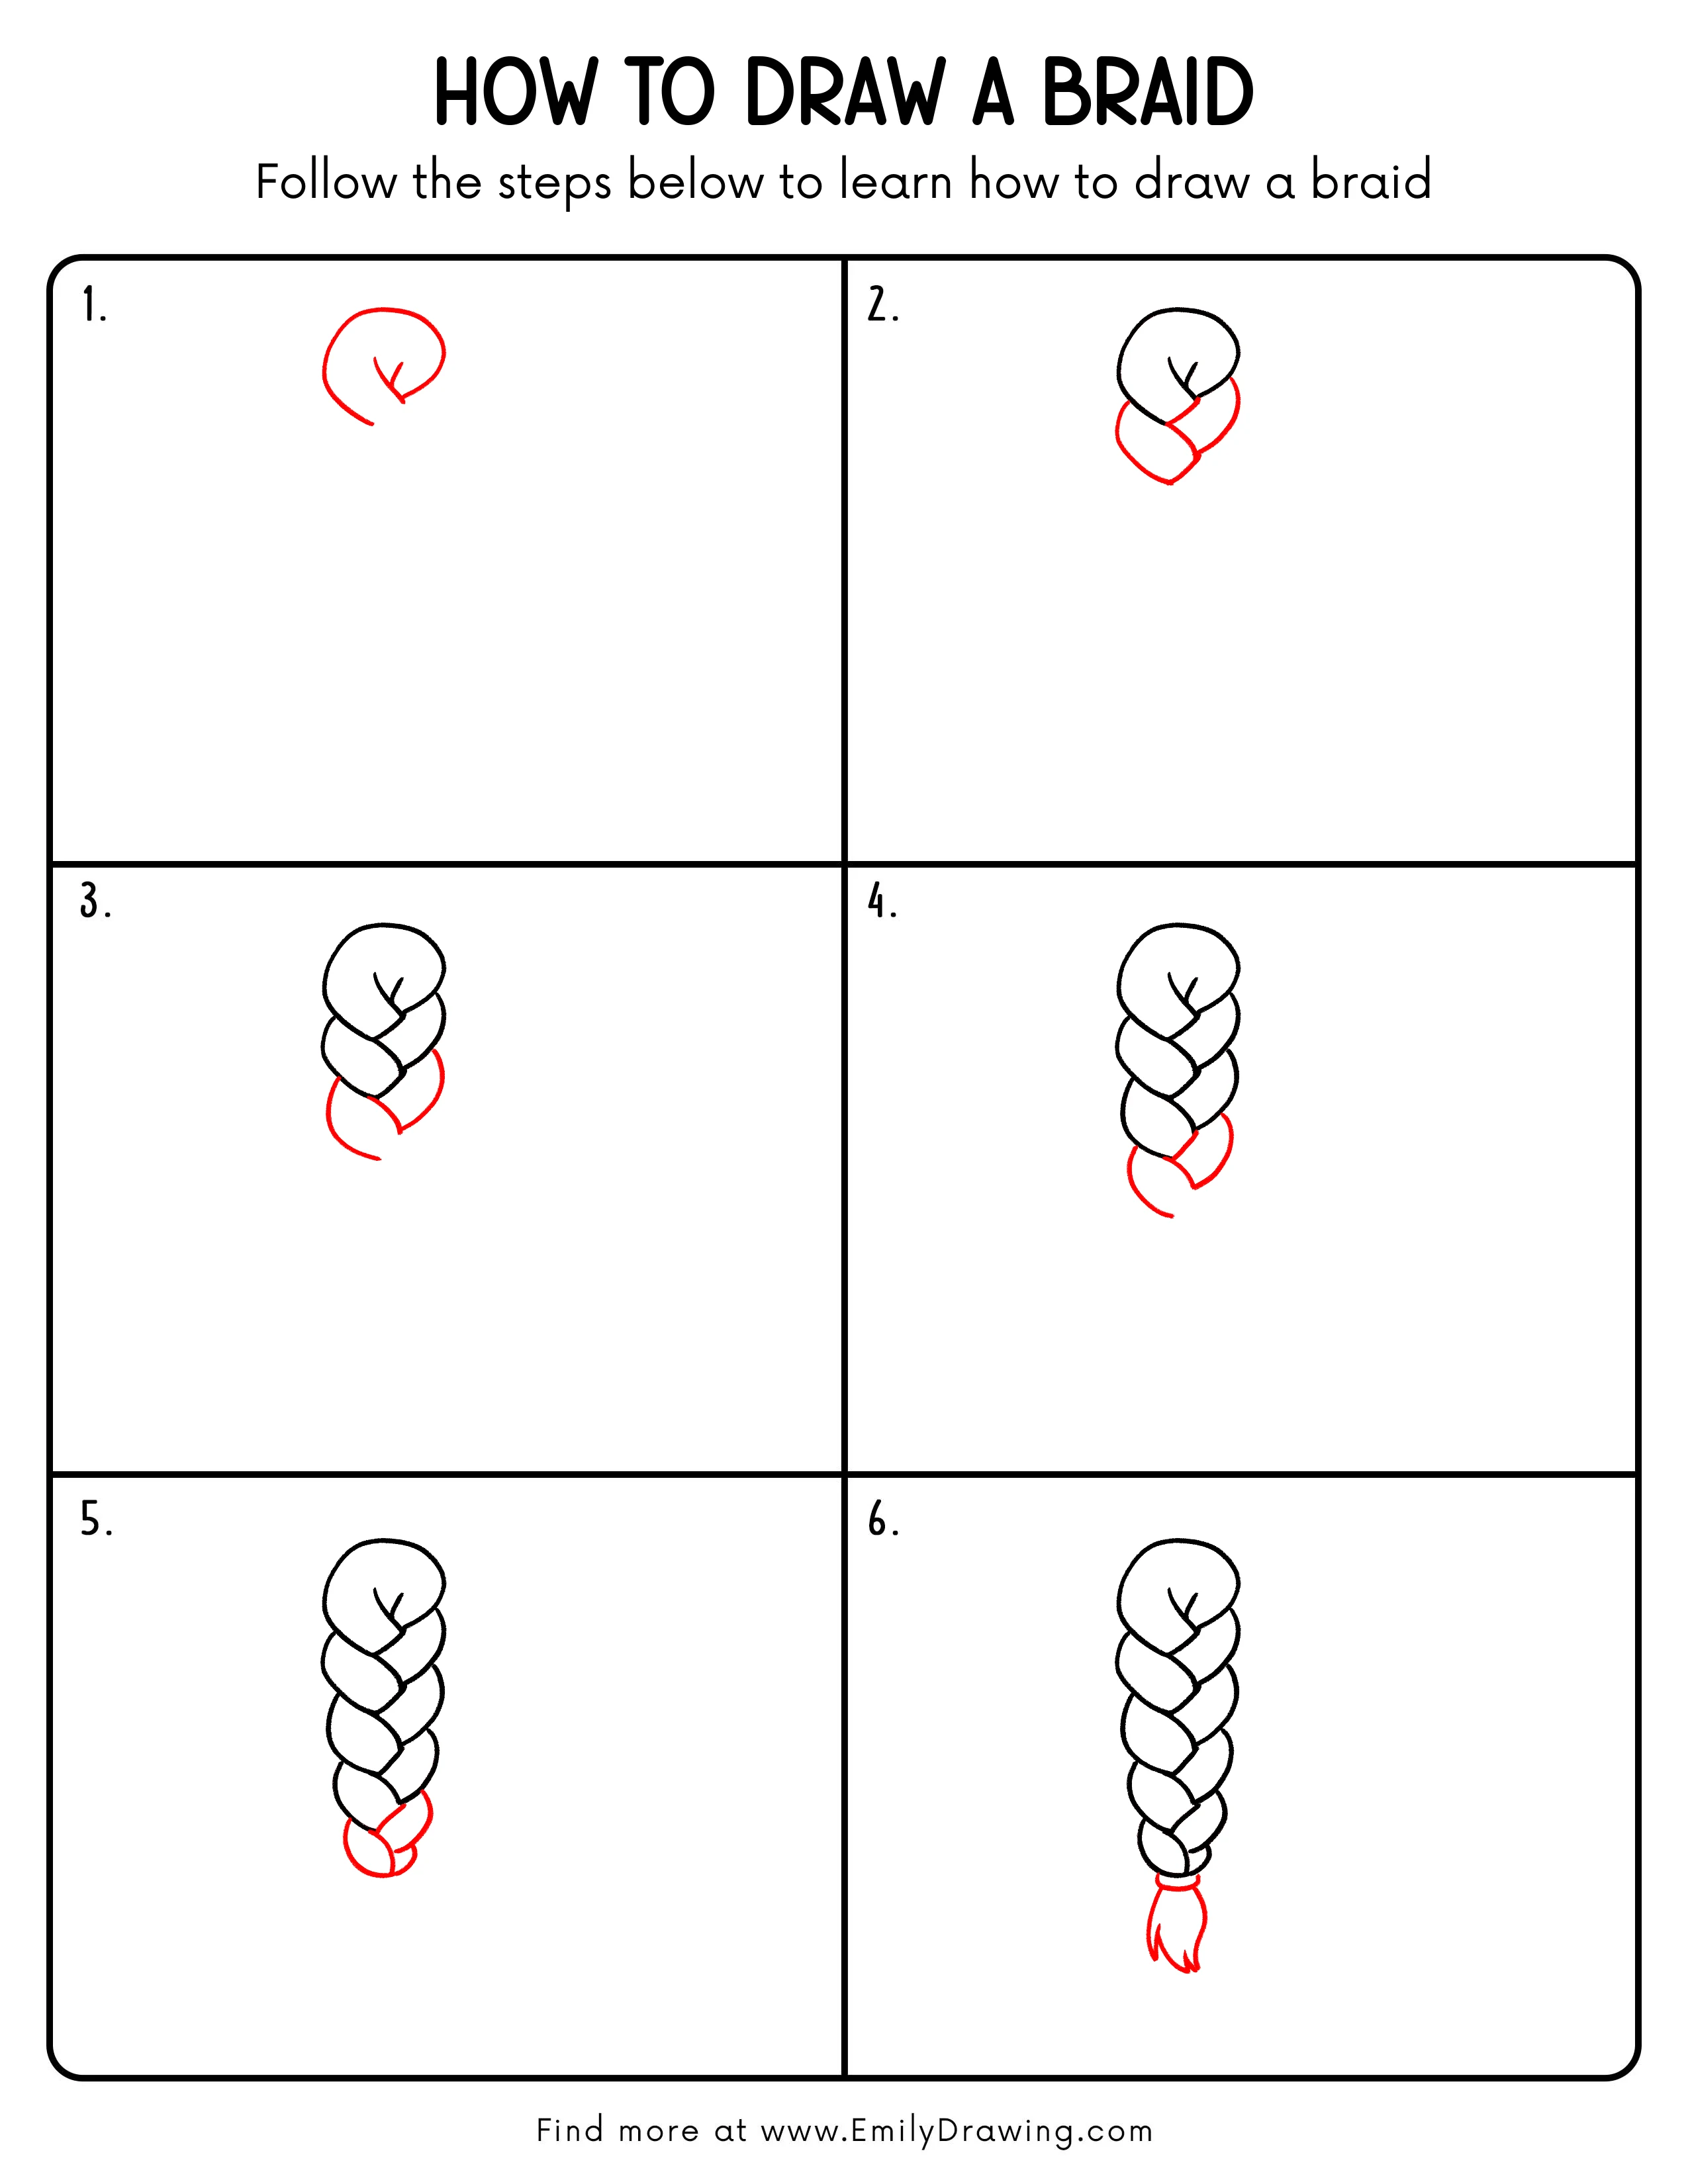
FREE Download Printable Braid Drawing Tutorial
Frequently Asked Questions
How do I make the braid look more 3D?
Use clearer overlaps and leave tiny gaps where one section passes behind another.
Why do my braid links look uneven?
Keep each teardrop link close in size and centered along the braid’s main curve.
Can this work as an easy drawing tutorial for beginners?
Yes, the braid is built from repeating shapes, which is great for beginners.