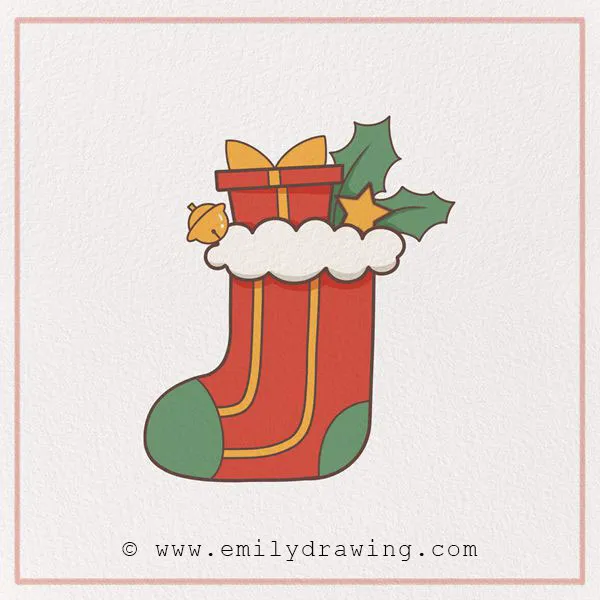
For our next tutorial, we are going to learn how to draw a Christmas stocking together!
If you’ve ever had one yourself, you know that they are filled with small presents on Christmas morning by Santa Claus. If you’ve never had one, you can still have fun drawing one and learning about the tradition.
There isn’t a definite story of how Christmas stockings came to be, but they are popular in many countries now. They are one of the most famous symbols of the Christmas season. Often, they are placed above fireplaces, up a stairwell, or on bedposts.
Maybe you’ve experienced the charm and joy of the holiday season. The chilly weather, snowmen, hot chocolate, carols, and maybe even sledding if you get snow where you live! There’s a lot to love about winter time.
If you’re excited about festive drawing ideas, you might also enjoy our tutorials How to Draw a Christmas Tree and How to Draw Santa Claus.
Let’s make our own Christmas stocking now—perfect for Christmas crafts for kids! Ready? Keep reading and happy drawing!
Materials:
- a piece of paper
- a pencil for the guiding lines and sketching
- an eraser
- a black sharpie or a pen for the outlines
- markers or colored pencils for coloring
- our printable drawing guide (Join my Email List below to get this Tutorial)
Here are my RECOMMENDED Art Supplies!
- Crayola Coloring Set (140 Pieces – Mega Value!)
- 24 Colored Crayon Set
- A4 Printer Paper
- Crayola Coloring Pencils
- HP Home Printer with Instant Ink!
Time needed:
15 minutes.
How to Draw a Christmas Stocking — Let’s get started!
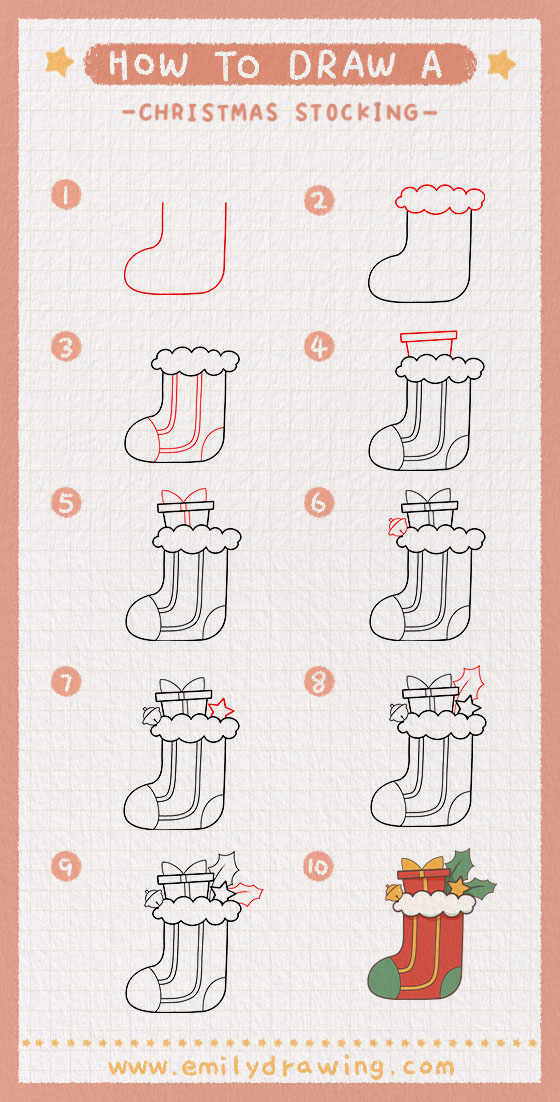
Step 1 – Form the shape of the stocking.
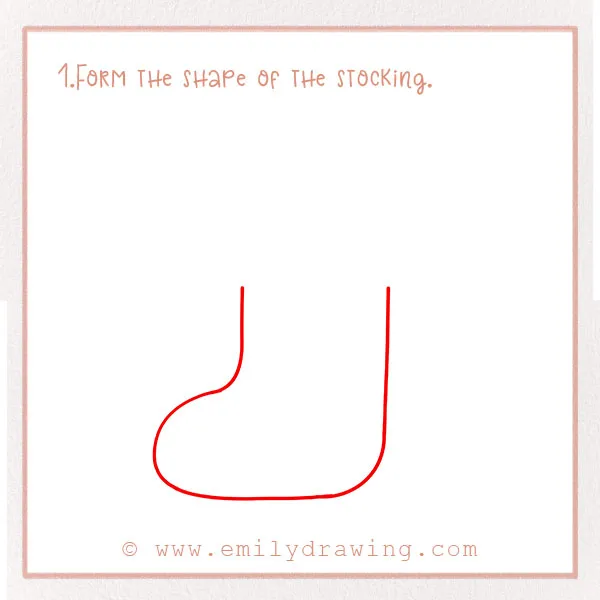
Start your beginner drawing guide by sketching the overall shape of the stocking. It will be the shape of a J. Make it wide enough so that it can be filled with objects!
This should take up half of the page—leave some space at the top for the rest of the drawing. Refer to the photo.
Step 2 – Draw the top of the stocking.
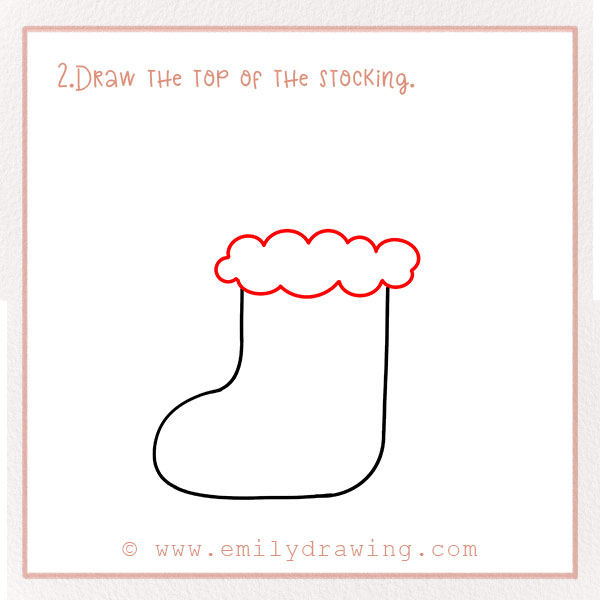
Let’s add some texture to the top of the shape you just drew. This will symbolize a fluffy fabric decorating the stocking, similar to a big fluffy snowflake.
Draw a series of curved lines forming a cloud-like shape. It should extend a little bit past the edge of the stocking.
Step 3 – Add stripes to the stocking.
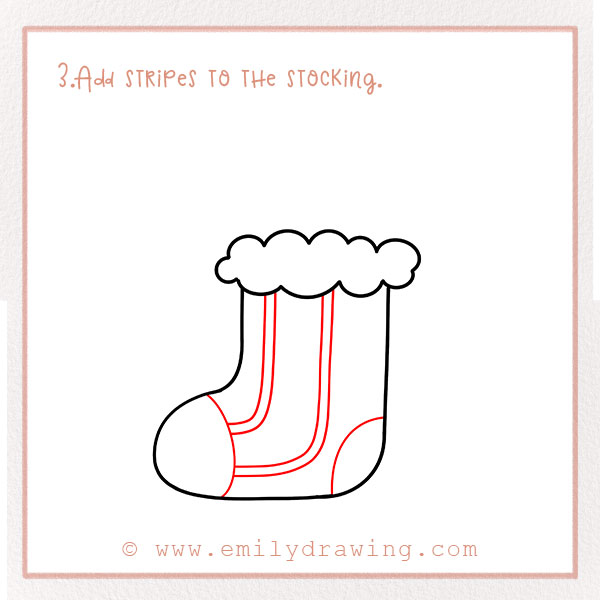
Next, we’ll add some patterns to the stocking by drawing stripes.
Draw four lines inside the stocking that mimic the J shape of the stocking.
These stockings aren’t to actually wear on your feet, but sometimes they can resemble a sock! So, let’s add detail to the toe and heel of the sock, too. On the left, draw a curved line showing the toe area. Then, on the bottom right, add another curved line to show the heel.
Step 4 – Draw a present!
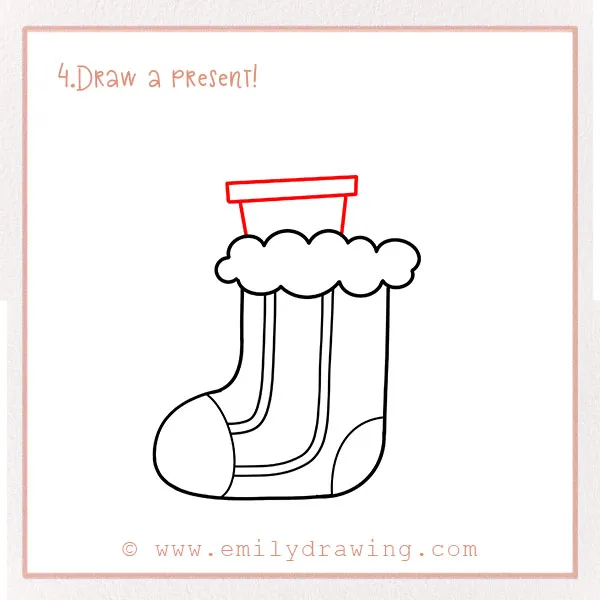
The tradition is that stockings get filled with presents! So, we need to add some to ours, too!
Draw two short lines coming out of the stocking. Then, draw a long, skinny, horizontal rectangle on top. It should look like a present emerging from the stocking. Refer to the photo!
To add more festive elements to your drawing, consider learning How to Draw a Bow to decorate your present.
Step 5 – Add detail to the present!
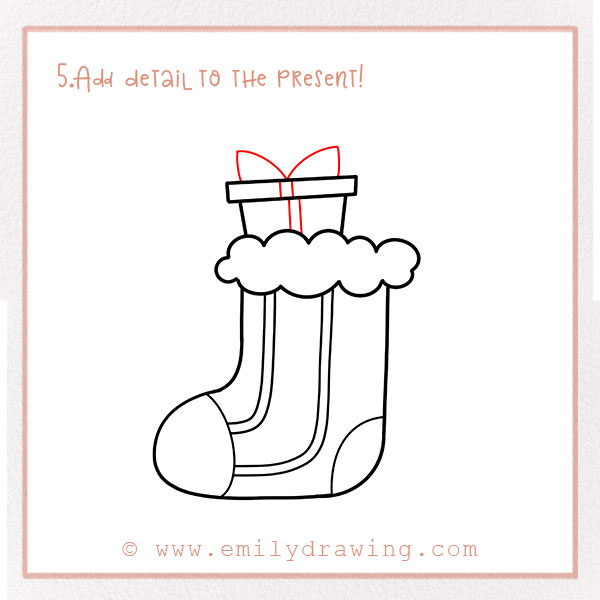
Let’s add a ribbon and a bow, so the present is wrapped nicely. Draw some lines in the middle of the box to show a ribbon.
Then, draw two curved lines coming from the top of the box. It should look like a gift-wrapped present now!
Step 6 – Add a jingle bell.
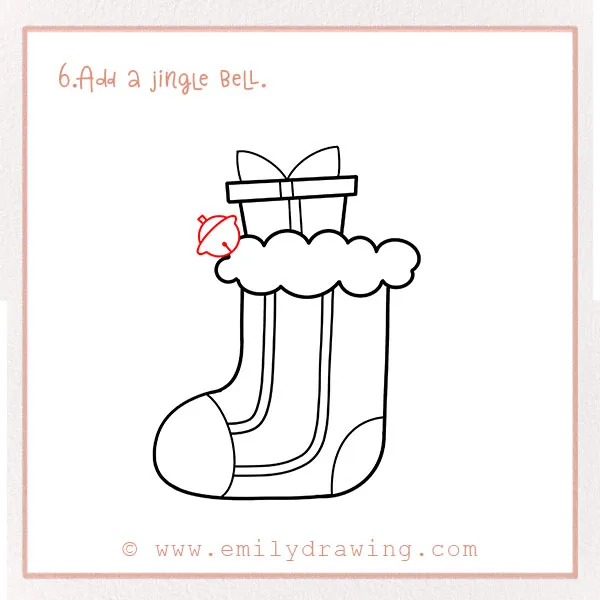
On the left side, we’re going to add another well-known Christmas symbol: a jingle bell!
Look at the photo to see the shape. It will be about the shape of a circle with a line in the middle. Add a smaller circle on top. Place it on the left of the present.
Step 7 – Draw a star.
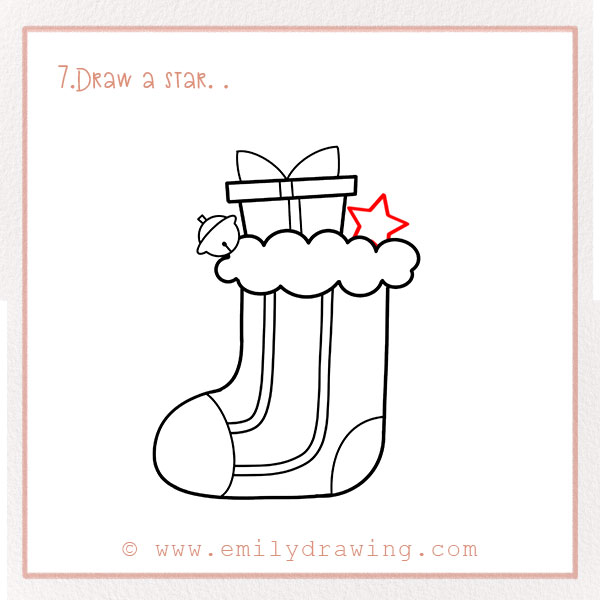
Let’s fill the stocking even more. On the right side of the present, draw a star.
It should be slightly cut off by the fluffy top of the stocking. This makes it look like it is inside the stocking.
Step 8 – Add a holly leaf!
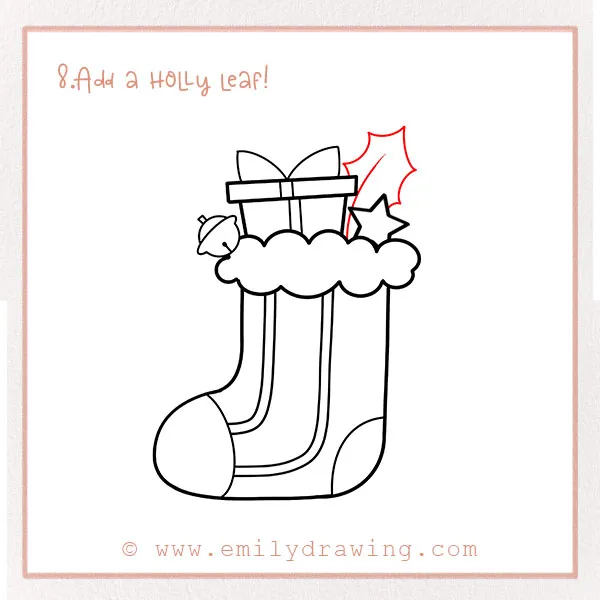
Holly is a beautiful and unique plant associated with winter and Christmas. In this step, we’re going to add one to our stocking. It will be behind the star.
Start by drawing a diagonal line coming out to the right from the present. Around the line, draw a series of curved lines to form the spiky leaf of a Holly bush. Look at the photo!
Step 9 – Add another holly leaf!
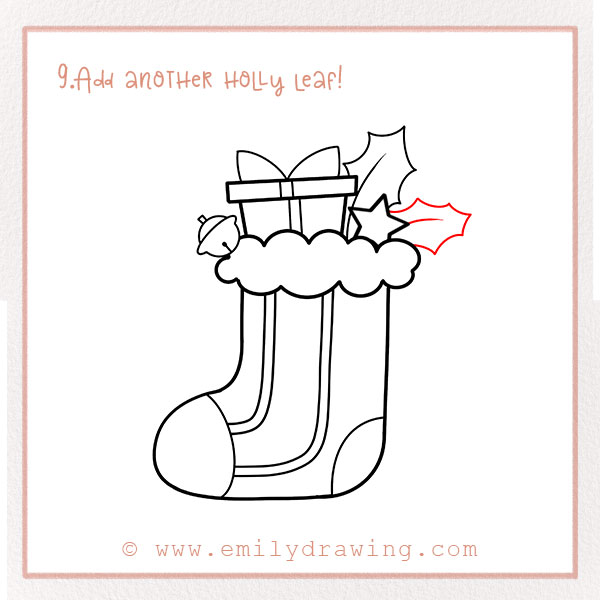
This will be very similar to the last step. Form another holly leaf using the same technique. Draw it to the right of the star.
Step 10 – Color!
Grab your coloring materials so we can add some style to the stocking! Christmas stockings come in all colors, patterns, and styles, so make it your own. Have fun with it!
Now that you’ve drawn your Christmas stocking, you might enjoy our Santa Claus Coloring Page to add more holiday cheer to your art collection.
Pin it now, Draw later!
You’re all done! We hope you enjoyed this step-by-step drawing tutorial! Maybe, you discovered how to draw some new shapes, like holly bush leaves and a jingle bell.
Comment your thoughts on this tutorial below, and share your masterpiece with loved ones. Maybe, if you celebrate Christmas, you’ll get your own actual stocking this year.
If you enjoyed this tutorial, you might also like our guides on How to Draw a Snowman and How to Draw a Gingerbread House.
Get the FREE Printable Drawing Guide
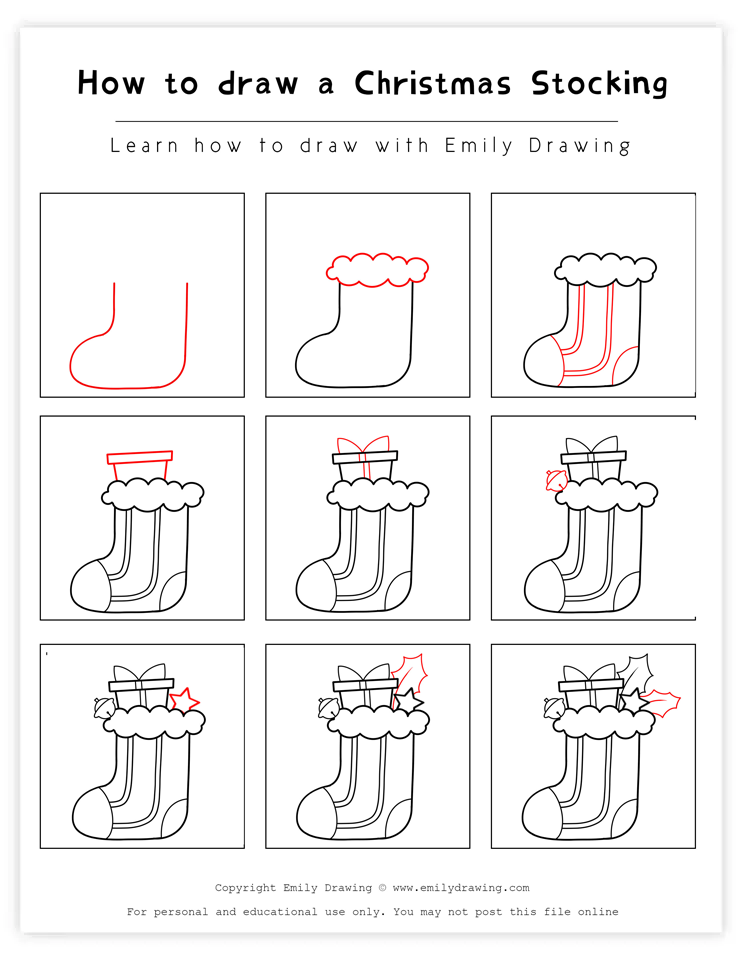
FREE Download Printable Christmas Stocking Drawings Tutorials