
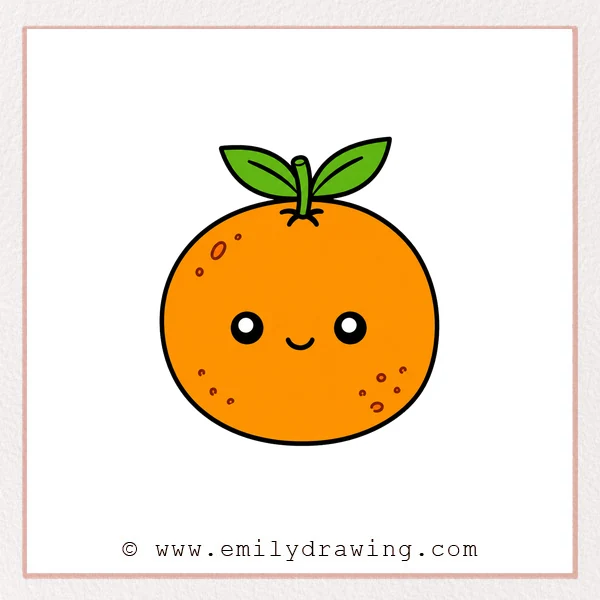
Learning how to draw orange is a fun way to practice round shapes, small details, and cute expressions. This step by step drawing guide keeps each part simple, so beginners can follow along with confidence.
What You Will Need
- Drawing paper
- Pencil
- Eraser
- Black marker or pen
- Orange and green coloring tools
Here are my RECOMMENDED Art Supplies!
- Crayola Coloring Set (140 Pieces – Mega Value!)
- 24 Colored Crayon Set
- A4 Printer Paper
- Crayola Coloring Pencils
- HP Home Printer with Instant Ink!
Time needed:
19 minutes.
Step-by-Step Drawing Guide
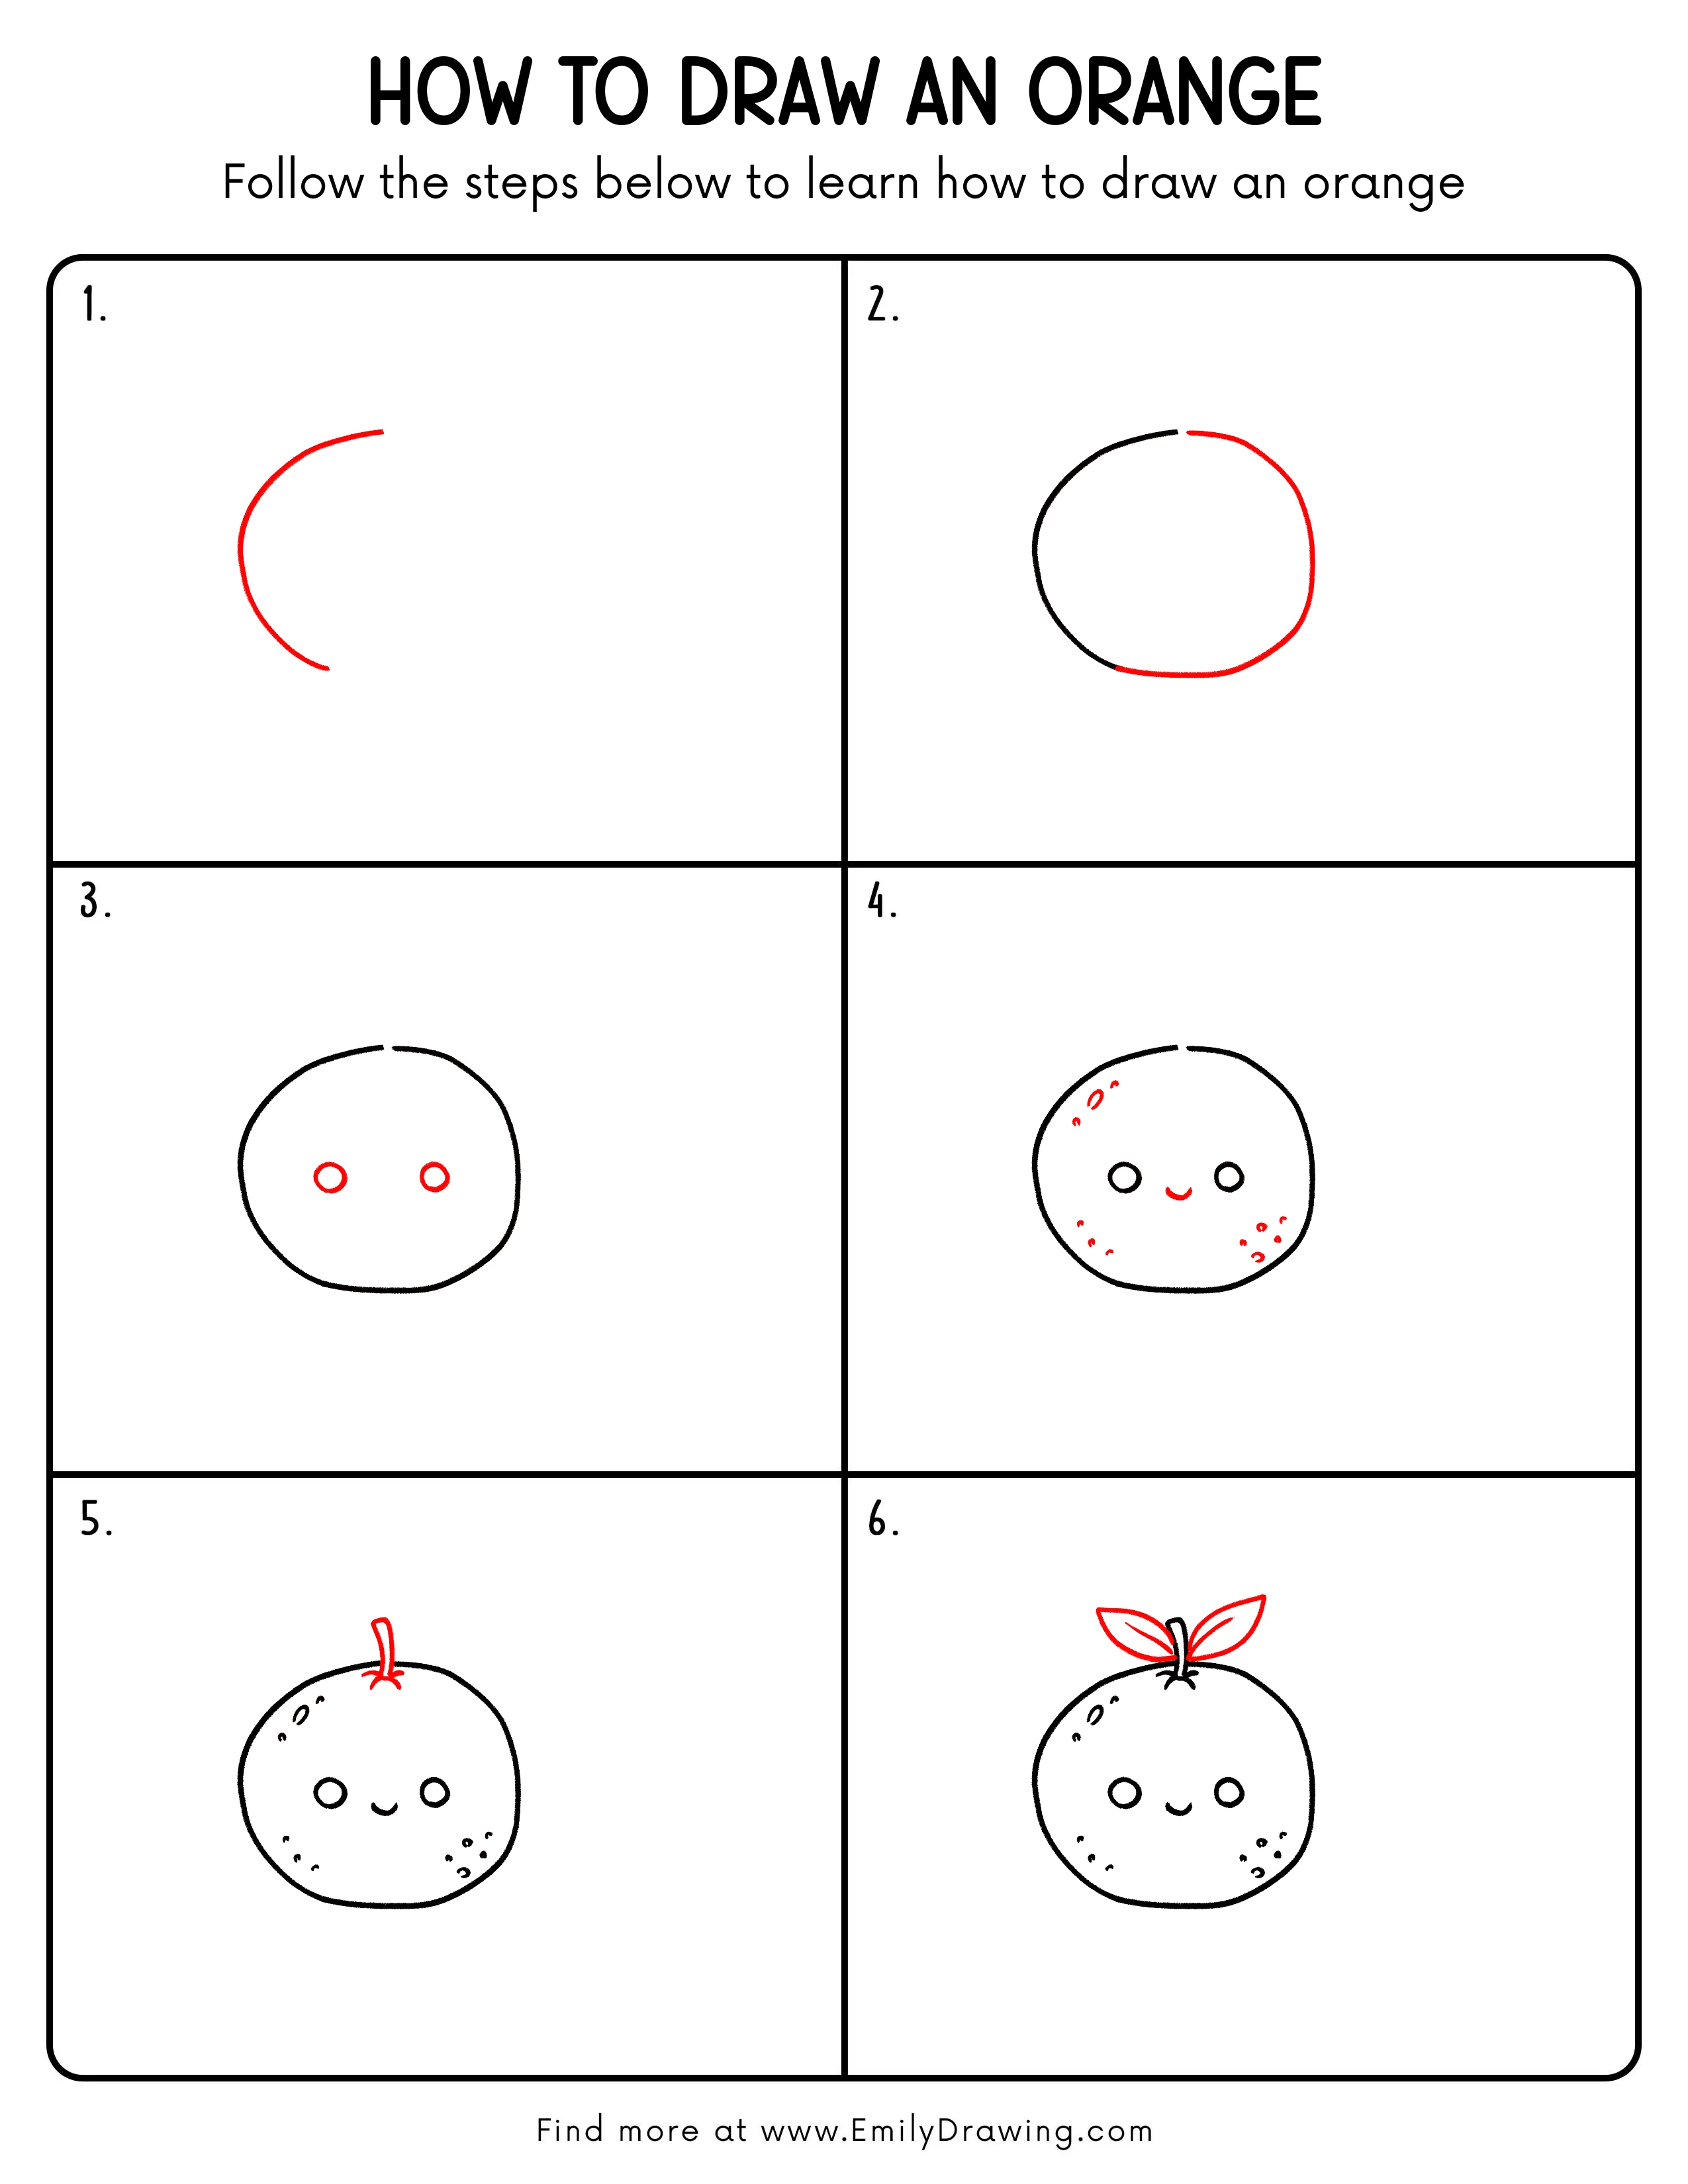
Step 1: Draw the Outer Curve of the Orange
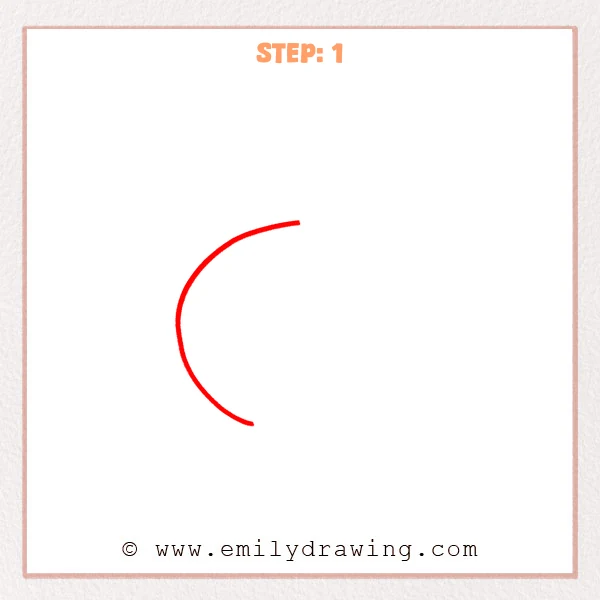
Start with a large curved line, like the side of an open circle. Let it bend gently from the top to the bottom, keeping the right side open.
Pro Tip: Keep the curve smooth and natural, sketching lightly before making it darker.
Step 2: Complete the Round Outline of the Orange
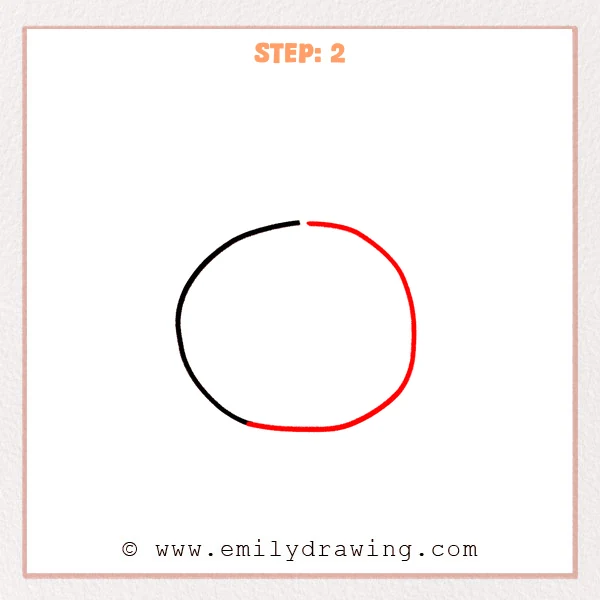
Continue the curve from the top opening, around the right side, and down to the bottom. Keep the shape nearly round, with a slightly wider body like a natural orange.
Pro Tip: Align the joining points gently so the outline does not form sharp corners.
Step 3: Add Two Small Circles
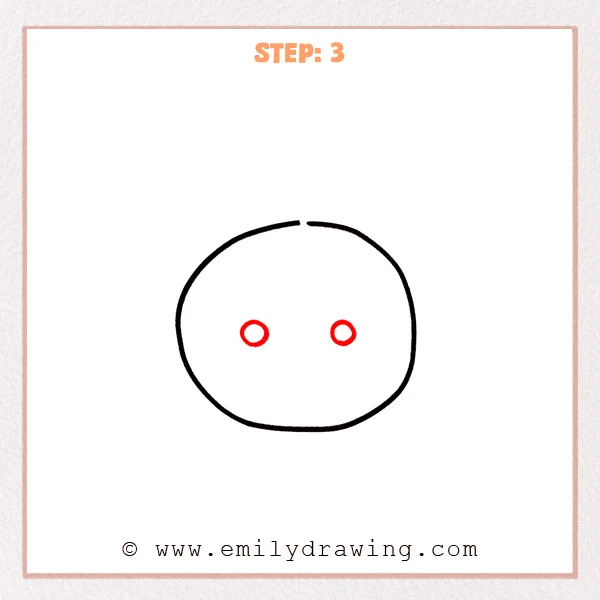
Draw two small circles near the middle inside the orange. Keep the circles similar in size, with even spacing between them.
Pro Tip: Mark the two centers lightly first, then draw the circles slowly.
Step 4: Draw the Face and Peel Spots
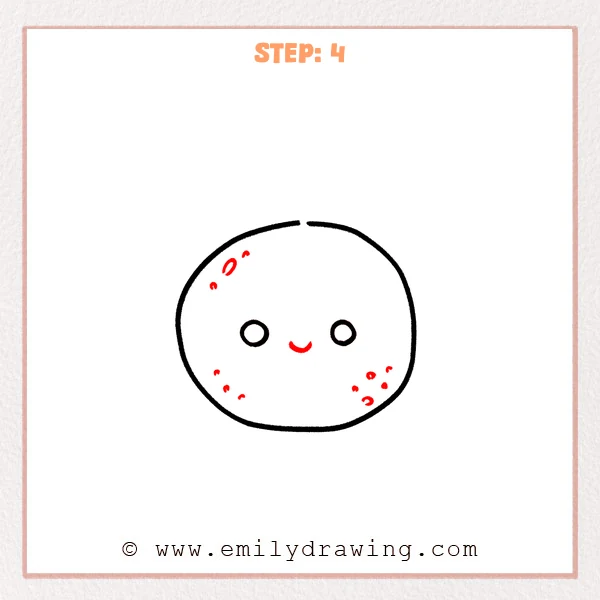
Add a small curved smile below the two circles. Then draw a few groups of short curves and tiny dots on the orange surface to show cute peel texture.
Pro Tip: Spread the small spots apart instead of placing them all in one area.
Step 5: Add the Top Stem
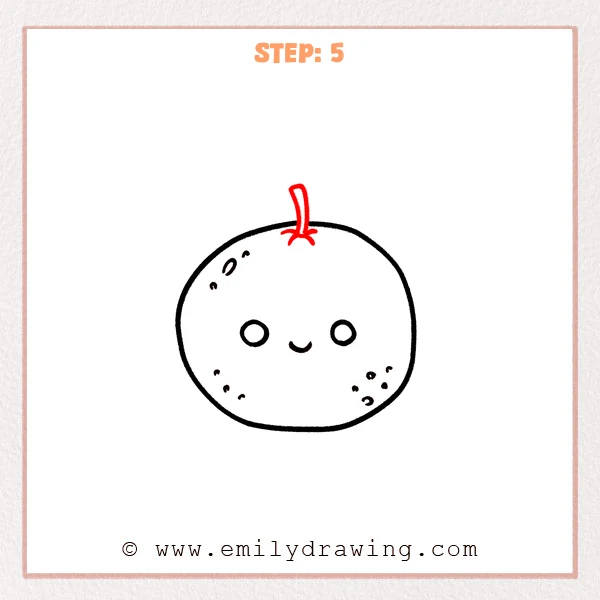
Draw a short curved stem at the top opening of the orange. Add a few small curves at the base so it looks naturally attached.
Pro Tip: Keep the stem much smaller than the orange so the overall proportion feels cute.
Step 6: Draw Two Leaves
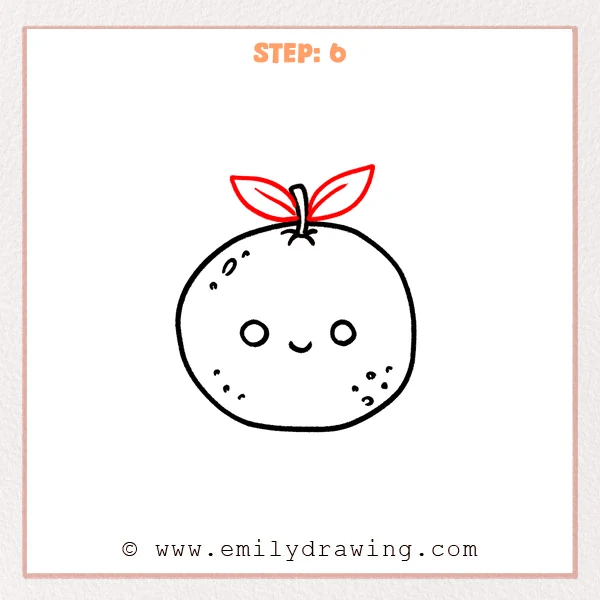
Add one pointed leaf on each side of the stem, shaped like a long narrow teardrop. Then add one curved line inside each leaf to show the vein direction.
Pro Tip: The two leaves can be similar in size, but slightly different angles look more natural.
Step 7: Color in your drawing!
Fun Facts
- Oranges grow on evergreen trees in warm places.
- The peel has tiny oil pockets that create its fresh citrus smell.
- Some oranges are sweet for eating, while others are better for juice.
Pin it now, Draw later!
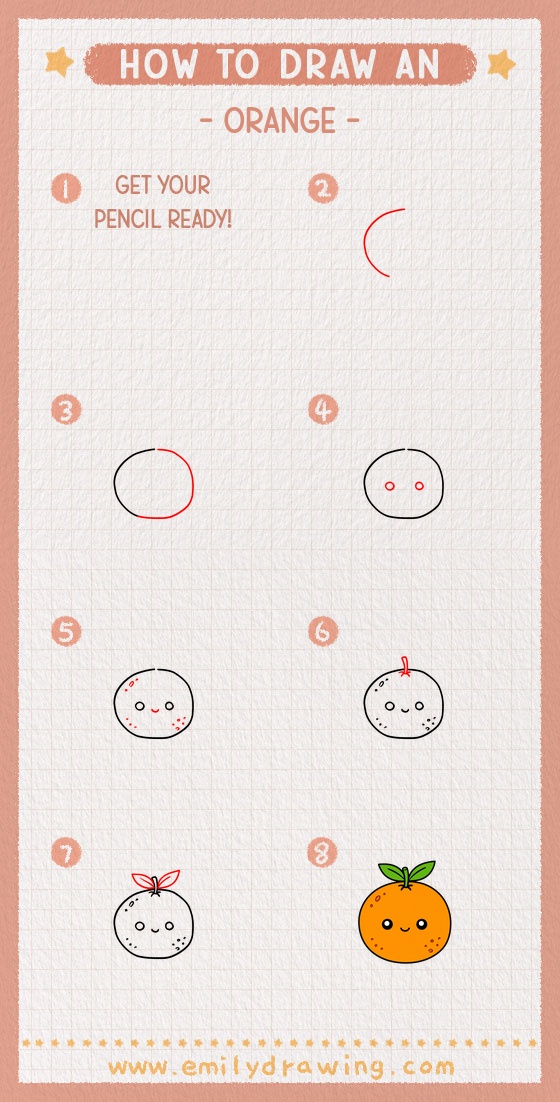
Trace the final lines with a black marker when you are happy with the shape. Color the fruit orange, the leaves green, and add soft shading if you like. Now you have completed a cute orange drawing for beginners, step by step.
Keep practicing this easy drawing tutorial with different fruit shapes, and enjoy building your drawing confidence.
Get the FREE Printable Drawing Guide
FREE Download Printable Orange Drawing Tutorial
Frequently Asked Questions
Is this orange drawing good for beginners?
Yes, this tutorial uses simple curves, small circles, and easy details, making it friendly for beginners.
How can I make my orange look rounder?
Take your time with the outer outline, and keep the sides evenly curved before adding details.
Can I color this orange drawing differently?
Yes, you can use bright orange, yellow-orange, or soft pastel colors to create your own style.



