
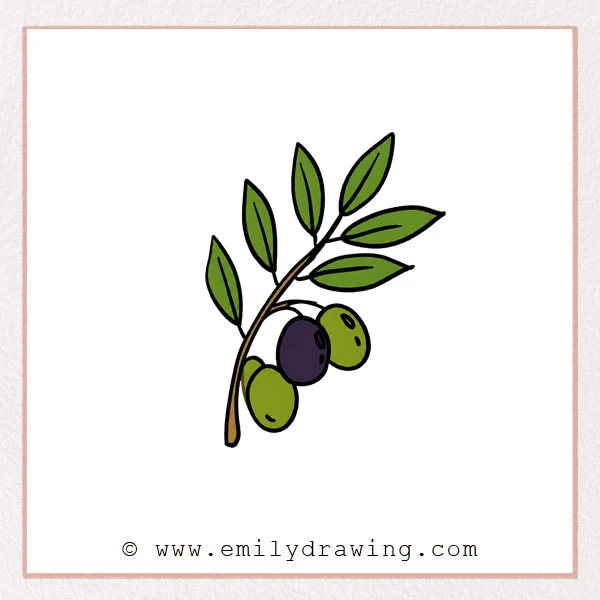
In this easy drawing tutorial, you will learn how to draw olive branch with simple shapes. This step by step drawing is friendly for beginners and uses narrow leaves, a curved stem, and rounded olives. Take your time with each part, and keep the lines light before making them darker.
What You Will Need
- Pencil
- Eraser
- Drawing paper
- Black marker or pen
- Green and olive-colored pencils, crayons, or markers
Here are my RECOMMENDED Art Supplies!
- Crayola Coloring Set (140 Pieces – Mega Value!)
- 24 Colored Crayon Set
- A4 Printer Paper
- Crayola Coloring Pencils
- HP Home Printer with Instant Ink!
Time needed:
15 minutes.
Step-by-Step Drawing Guide
Step 1: Draw Three Olive Leaves
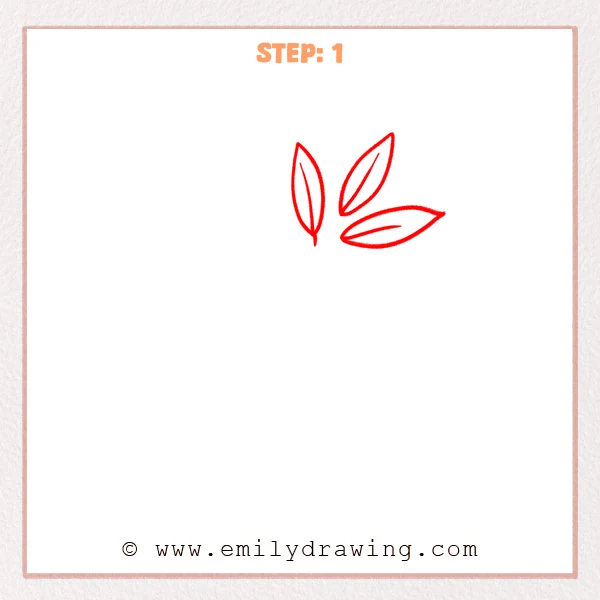
Start with three long, narrow leaves, each shaped like a pointed oval. Add one gently curved vein inside each leaf, keeping the lines simple for now.
Pro Tip: Let the three leaves point in slightly different directions to make the olive branch feel natural.
Step 2: Add More Olive Leaves
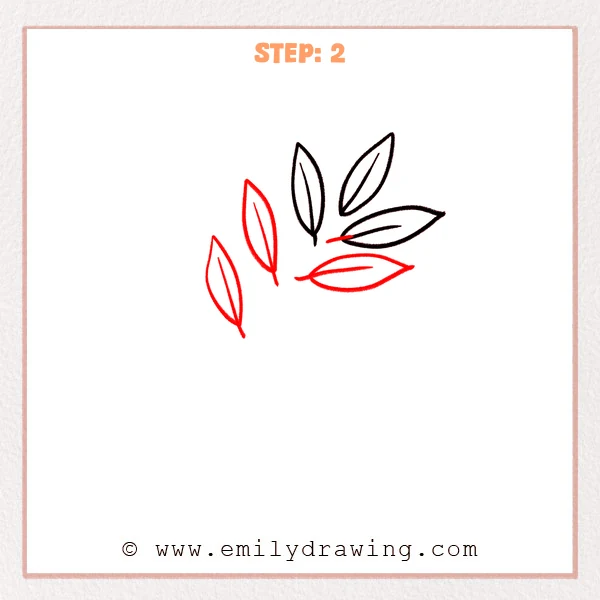
Add two long, narrow leaves growing upward on the left side. Add one more sideways leaf below, letting the leaf group spread outward.
Pro Tip: The new leaves can vary slightly in size, but keep each one in a pointed oval shape.
Step 3: Draw the Curved Stem
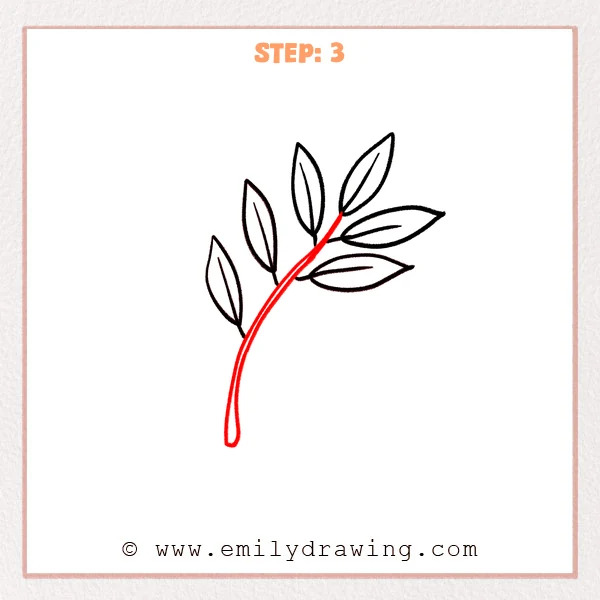
Draw a long, curved stem from the bottom up to the center of the leaves. Make the stem slightly thicker near the bottom and gently narrower near the top.
Pro Tip: Let the stem curve like a soft arc instead of making it too straight.
Step 4: Add the Olive Fruit Outline
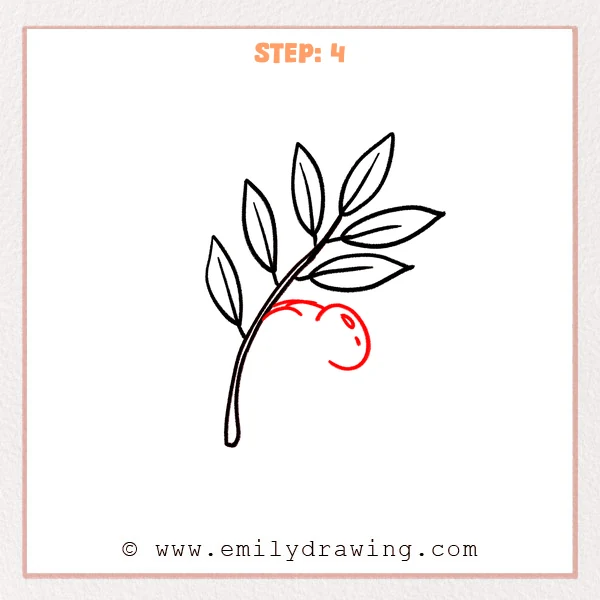
Draw a rounded group of olive fruits on the lower right side of the stem. Use curved lines to show overlapping fruit shapes, then add a few small arcs for surface details.
Pro Tip: Keep the fruits close together so they look naturally attached beside the stem.
Step 5: Complete the Front Olive Fruit
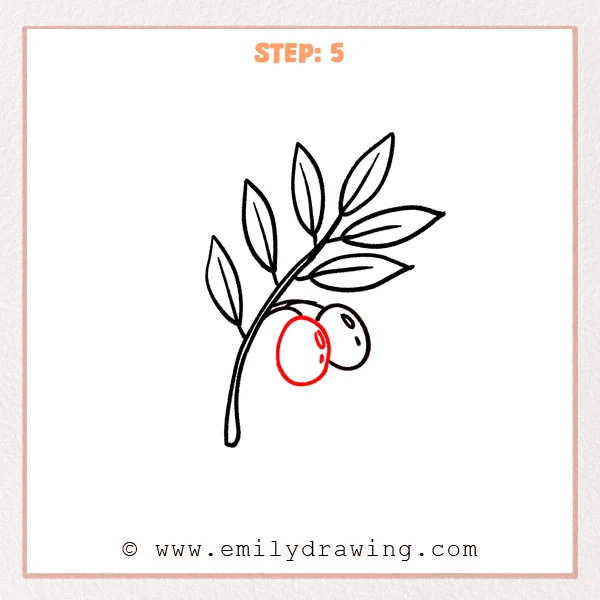
Draw a fuller round olive at the front of the fruit group, letting it slightly cover the fruit behind. Add a small curved mark and a short dot on the new olive to show simple highlight details.
Pro Tip: Make the front fruit a little rounder so the layering is easier to see.
Step 6: Add the Lower Olive Fruit
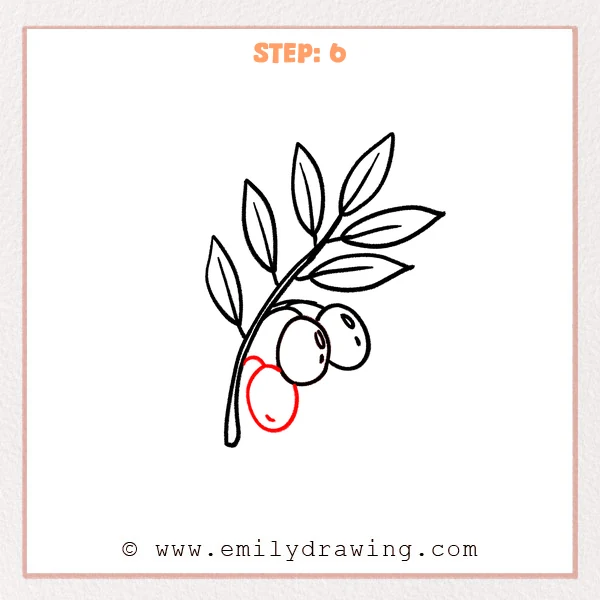
Draw another rounded olive on the lower left side of the stem, close to the front fruit. Add a short curved highlight, then use a small curved line to connect it to the fruit group.
Pro Tip: Place the lower fruit slightly outward to give the olive cluster more depth.
Step 7: Color in your drawing!
Fun Facts
Olive branches are often used as symbols of peace and hope. Olive trees can live for a very long time, and their leaves are narrow and simple. The small oval fruits can be green, purple, or dark brown when ripe.
Pin it now, Draw later!
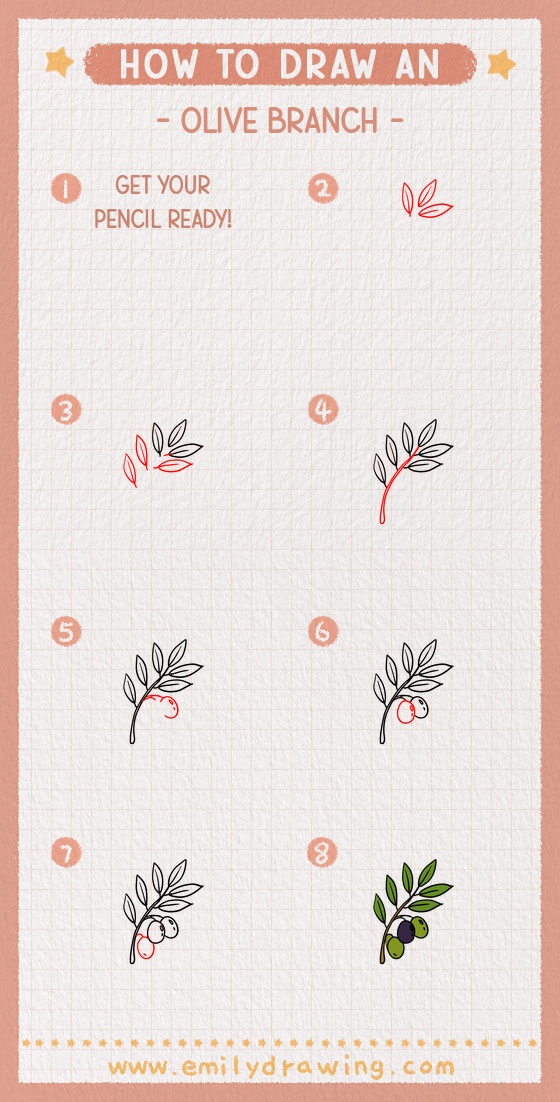
Now you know how to draw olive branch using simple leaves, a curved stem, and rounded olives. Trace your best lines with a marker, then gently erase any extra pencil marks. Color the leaves green and the olives in soft green or purple tones, then try drawing another branch with your own leaf arrangement.
Get the FREE Printable Drawing Guide
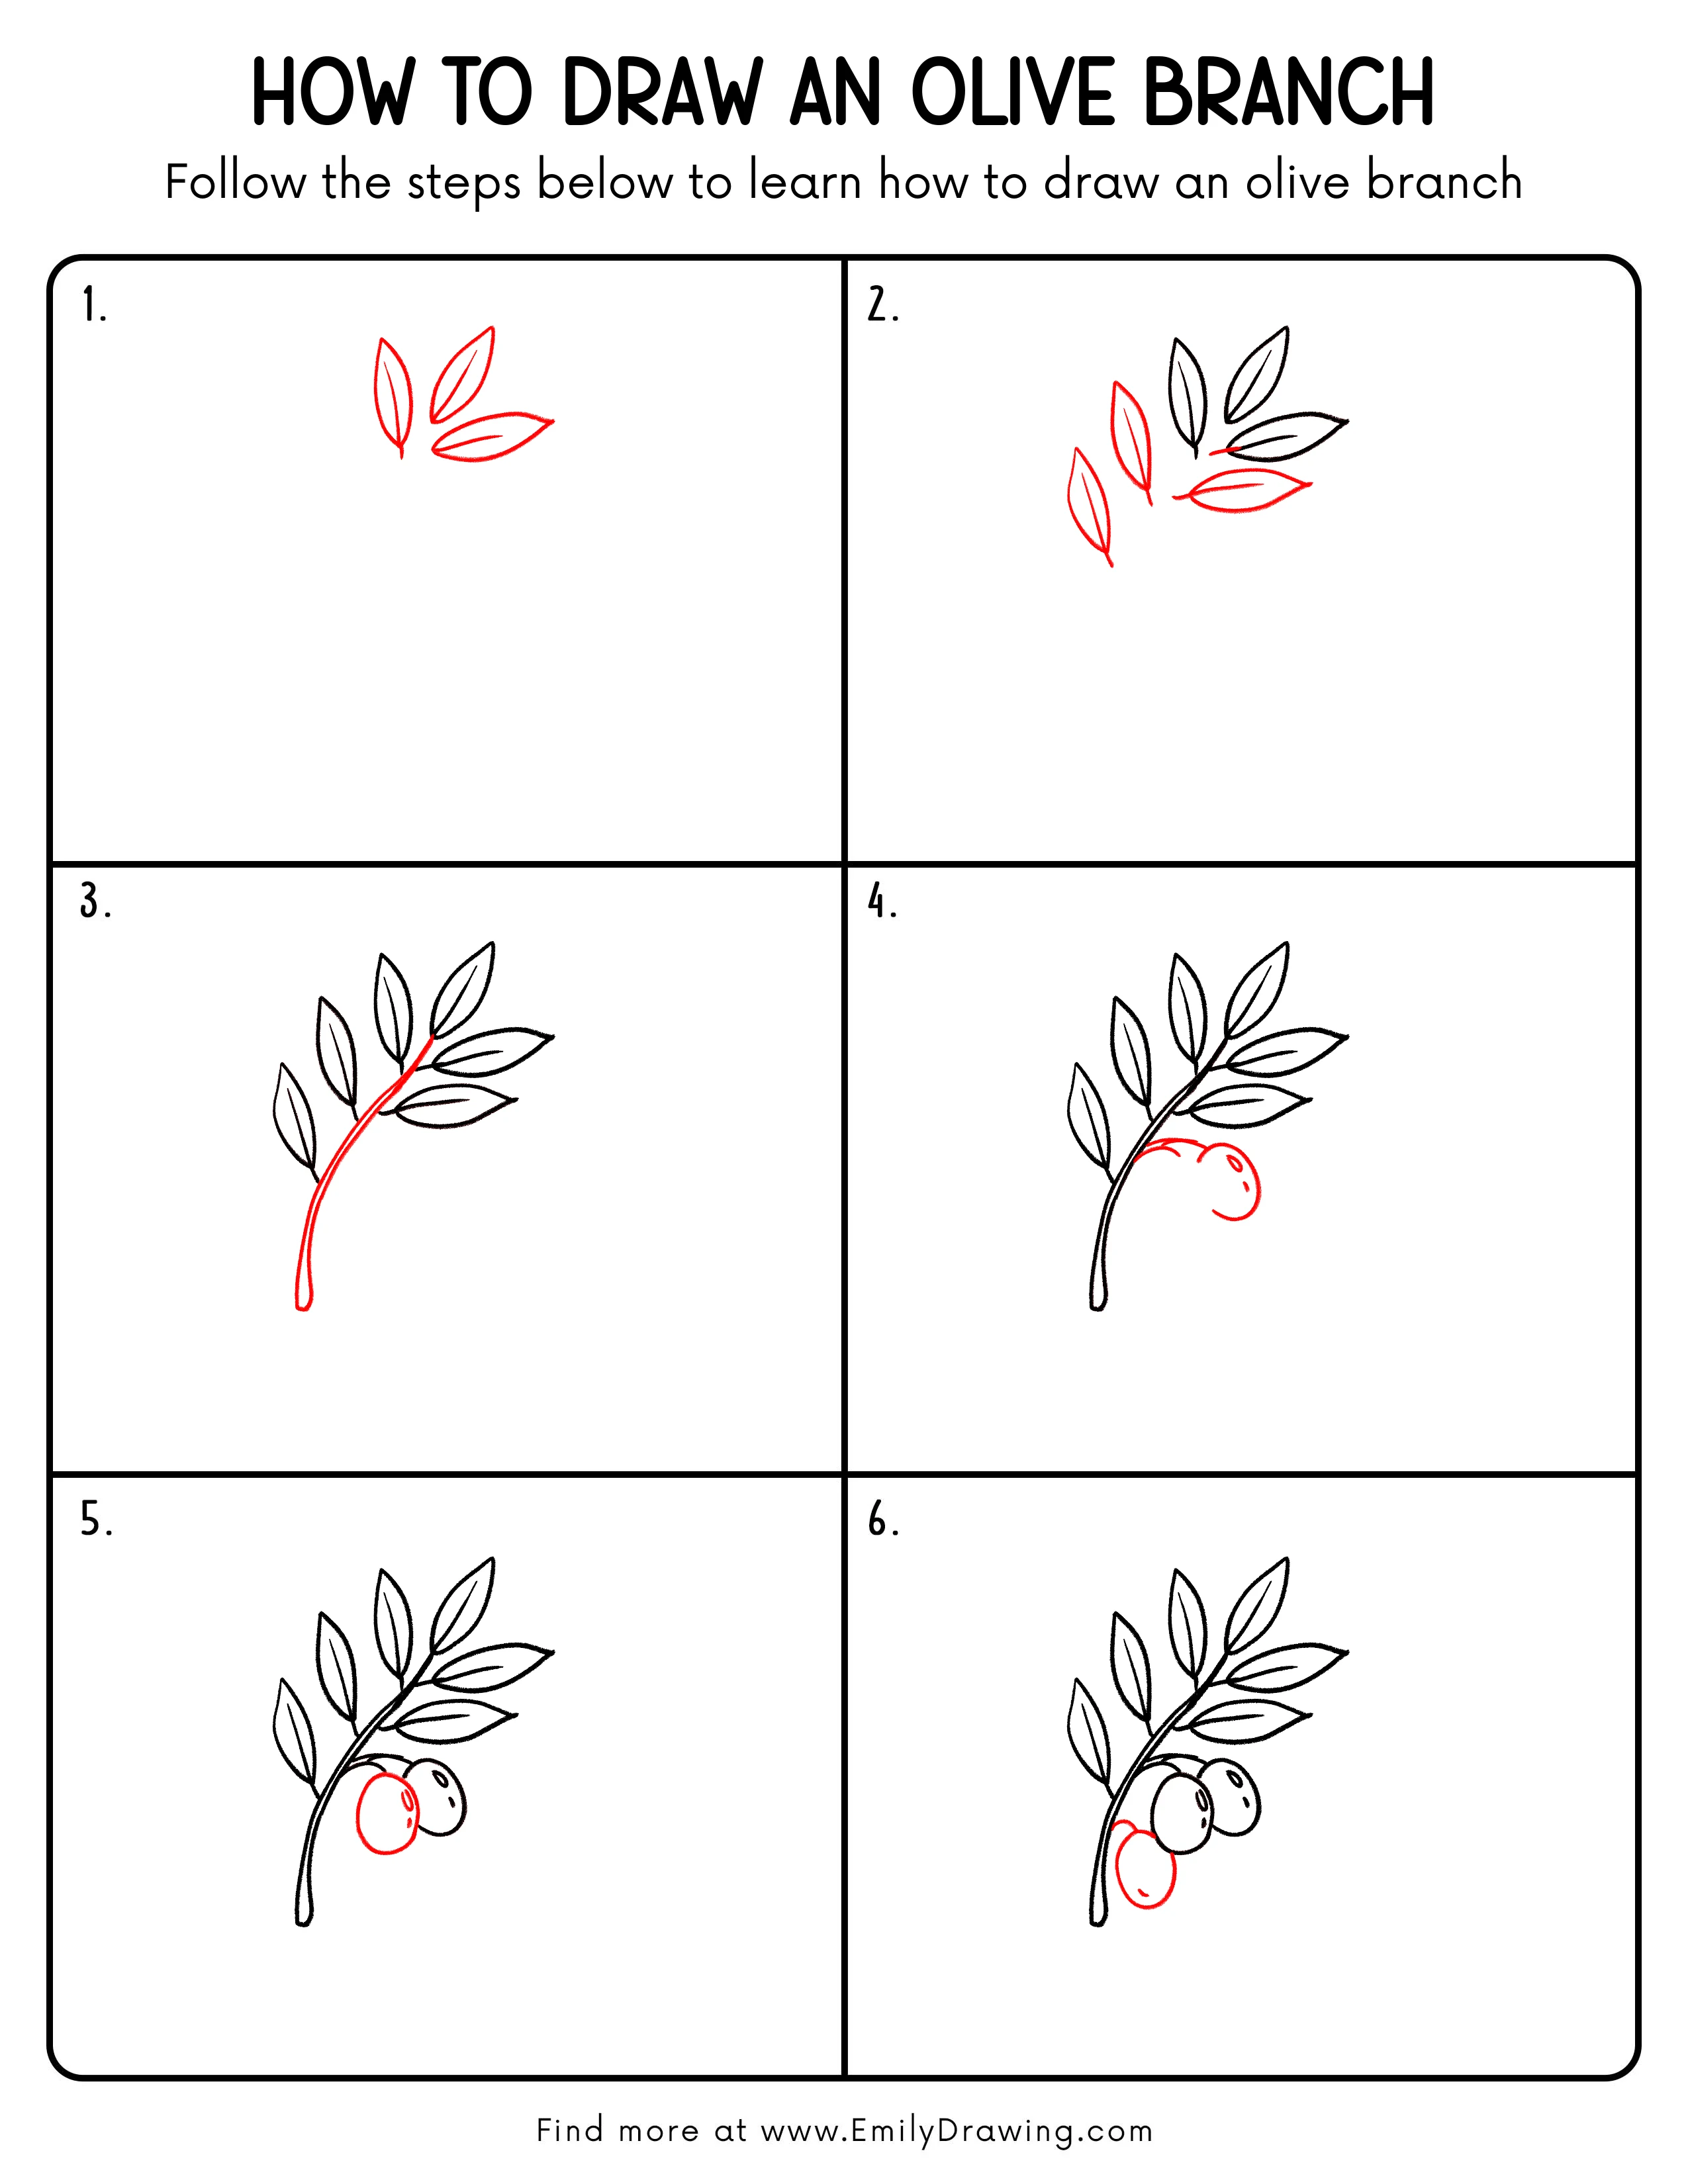
FREE Download Printable Olive Branch Drawing Tutorial
Frequently Asked Questions
Is this olive branch drawing good for beginners?
Yes, this drawing for beginners uses easy leaf shapes, soft curves, and simple round fruits.
How can I make my olive branch look more natural?
Vary the direction and size of the leaves, while keeping them narrow and pointed.
What colors should I use for an olive branch?
Use green for the leaves, brown or green for the stem, and green, purple, or dark brown for the olives.



