
In this easy drawing tutorial, you will learn how to draw noose using simple rounded shapes and smooth lines. This step by step drawing guide is made for beginners, so take your time with each part. Focus on the rope thickness, rounded loops, and wrapped details.
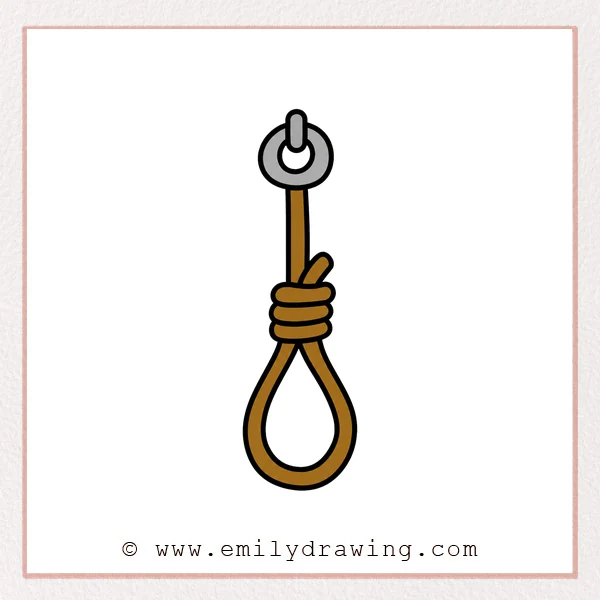
What You Will Need
- Pencil
- Eraser
- Black marker or pen
- Drawing paper
- Colored pencils or crayons, optional
Here are my RECOMMENDED Art Supplies!
- Crayola Coloring Set (140 Pieces – Mega Value!)
- 24 Colored Crayon Set
- A4 Printer Paper
- Crayola Coloring Pencils
- HP Home Printer with Instant Ink!
Time needed:
28 minutes.
Step-by-Step Drawing Guide
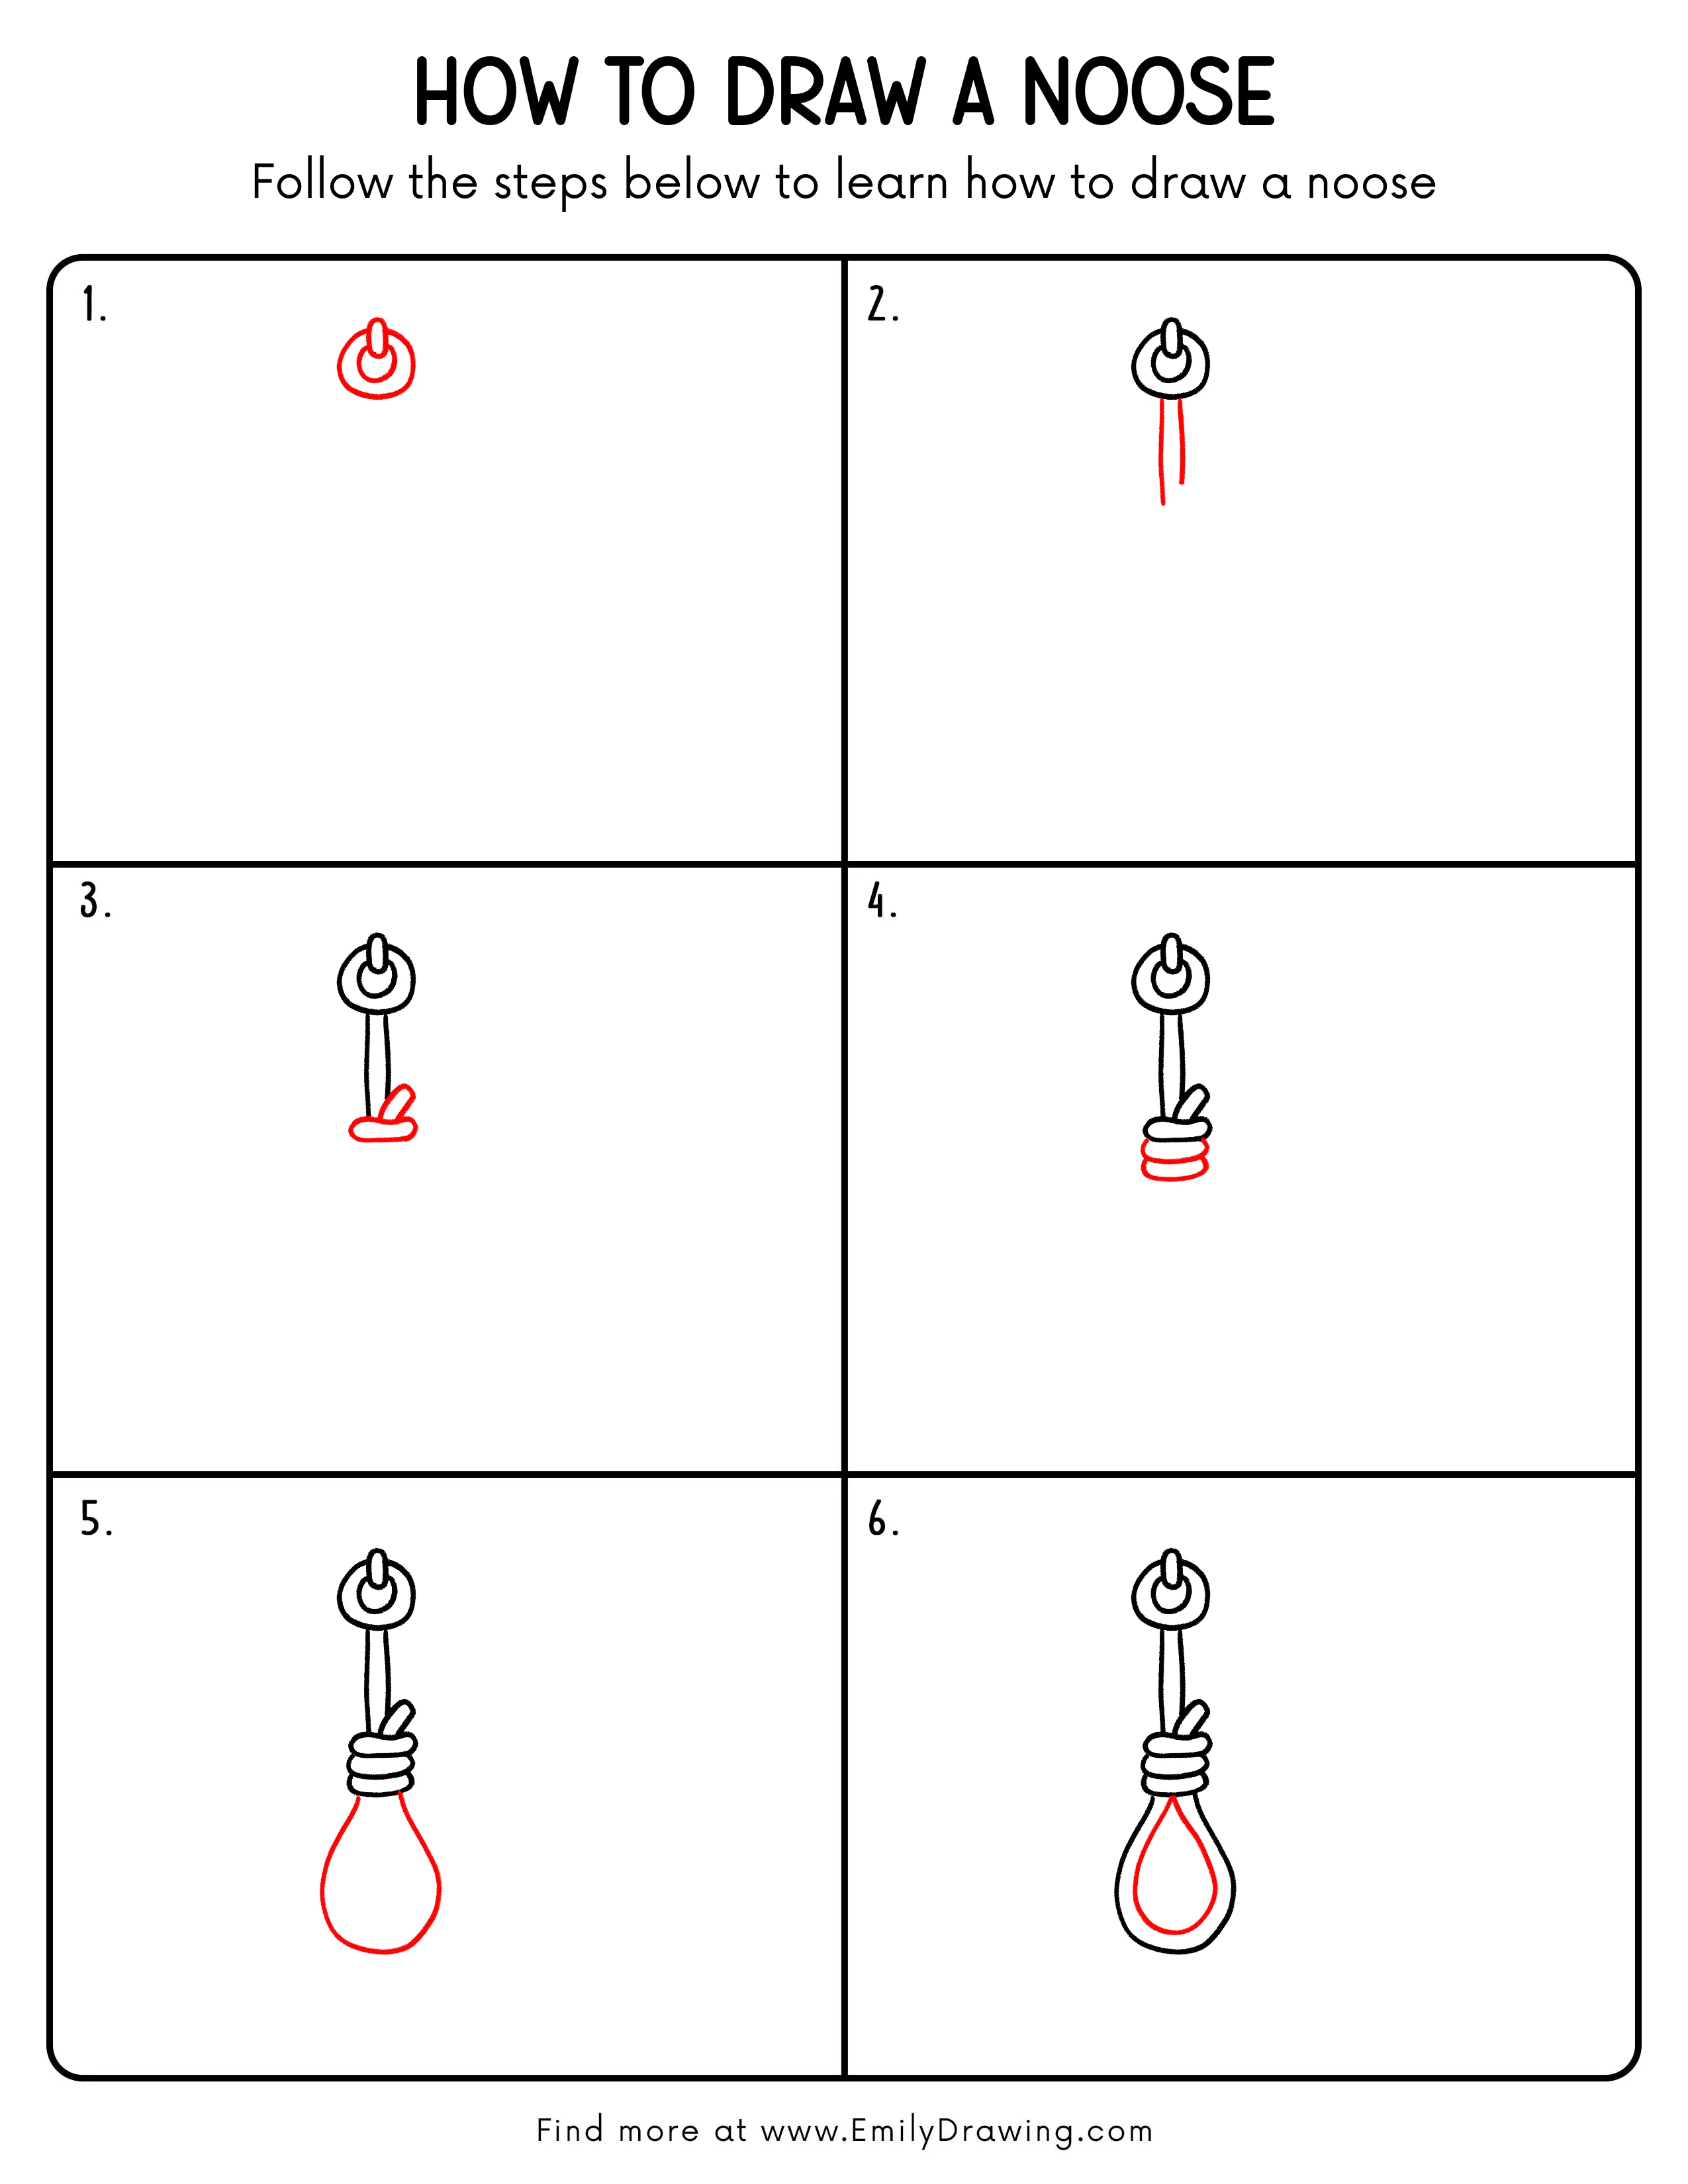
Step 1: Draw the Top Knot and Loop Opening
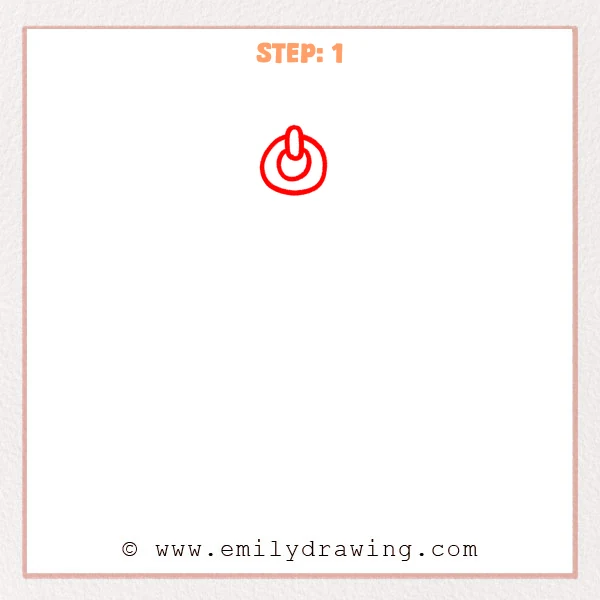
Start with a small vertical rounded rectangle for the top rope section. Add a rounded inner loop below it, then wrap a larger curved line around the outside. This creates the first knot-like opening of the noose.
Pro Tip: Keep the top shape centered, so the loop feels balanced from the start.
Step 2: Add the Two Hanging Rope Ends
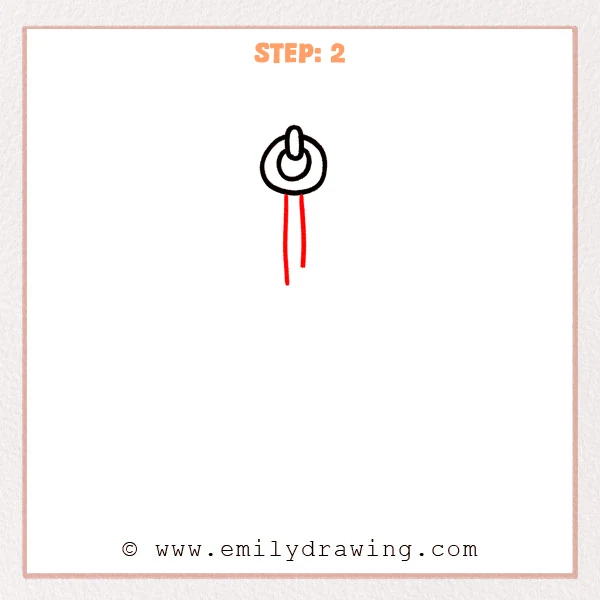
Draw two straight lines downward from the bottom of the loop. These lines show the hanging rope ends of the noose. Make the left rope end a little longer and the right one slightly shorter for a natural look.
Pro Tip: Keep the two lines close but not touching, so the rope shape stays clear.
Step 3: Draw the Curved Bottom Rope Loop
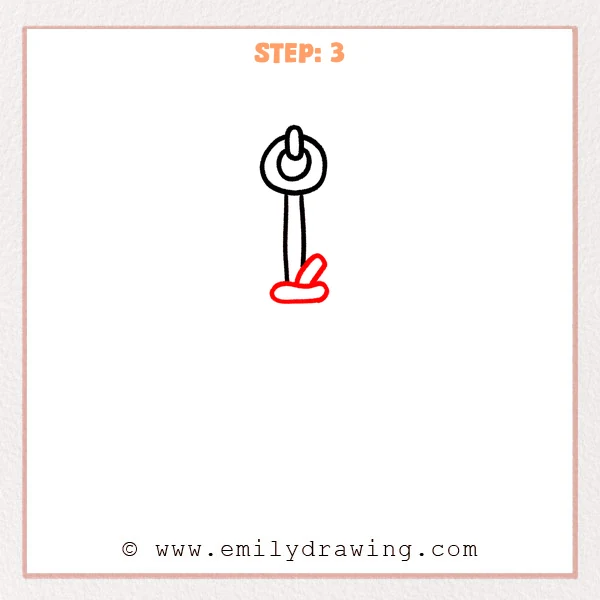
Add a horizontal rounded bar shape at the bottom of the two vertical rope lines. Then draw a slanted rounded rope section rising on the right side. This begins the bent rope shape before the wrapped section is finished.
Pro Tip: Keep the bottom horizontal rope section steady, so the whole noose feels more balanced.
Step 4: Build the Wrapped Rope Section
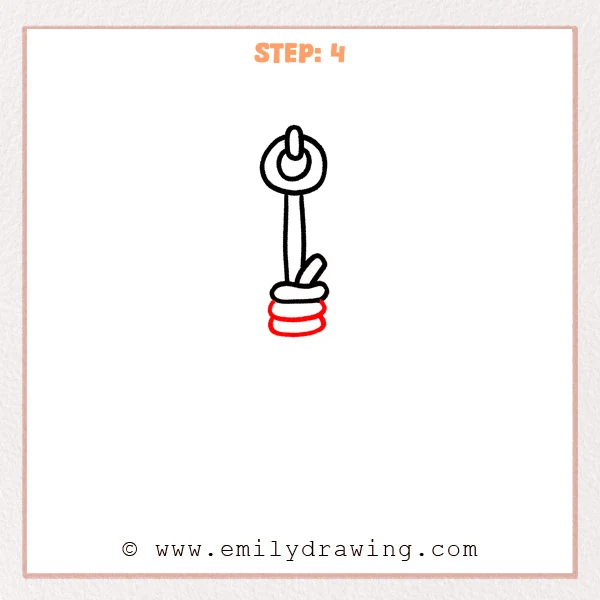
Add two more rounded horizontal bands beneath the first bottom band. Keep each band slightly curved and stacked closely together. These layers make the wrapped part of the noose look thicker.
Pro Tip: Leave small gaps between the bands, so each wrap is easy to see.
Step 5: Draw the Large Lower Loop
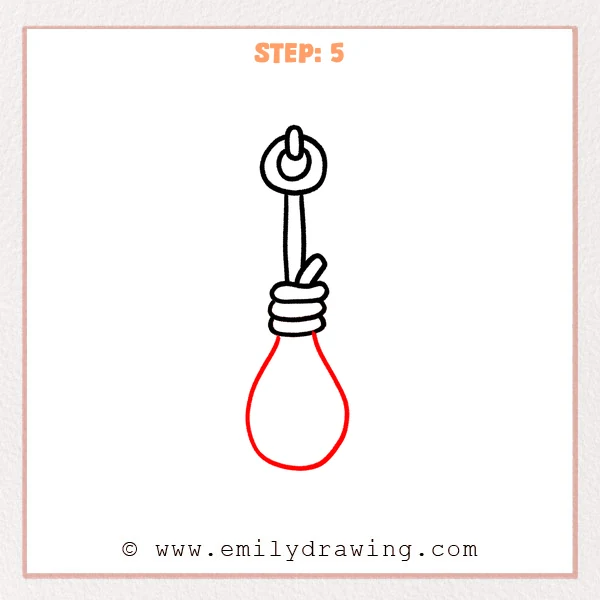
From both sides of the wrapped section, draw a large teardrop-shaped loop downward. Keep the bottom wide and rounded. Let the top narrow as it connects back near the wrapped rope.
Pro Tip: Keep both sides of the large loop mostly even, so the noose looks stable.
Step 6: Add the Inner Loop Line
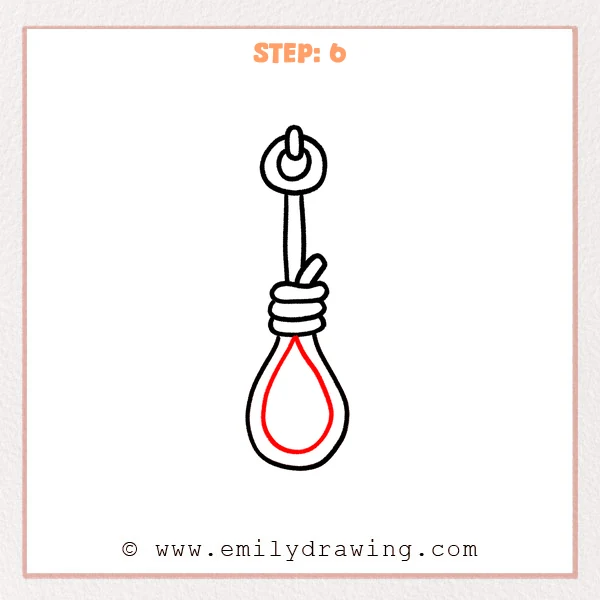
Inside the large loop, draw a smaller teardrop-shaped inner line. Start it below the wrapped section, then round the bottom smoothly. This final line shows the rope thickness of the noose.
Pro Tip: Keep the inner line evenly spaced from the outer loop, so the rope width looks natural.
Step 7: Color in your drawing!
Fun Facts
- Rope drawings often use repeated curved lines to show thickness and texture.
- A teardrop shape is helpful when drawing loops that hang downward.
- Rounded corners make rope forms look softer and easier to draw.
- Simple geometry can turn a complex object into a drawing for beginners.
Pin it now, Draw later!
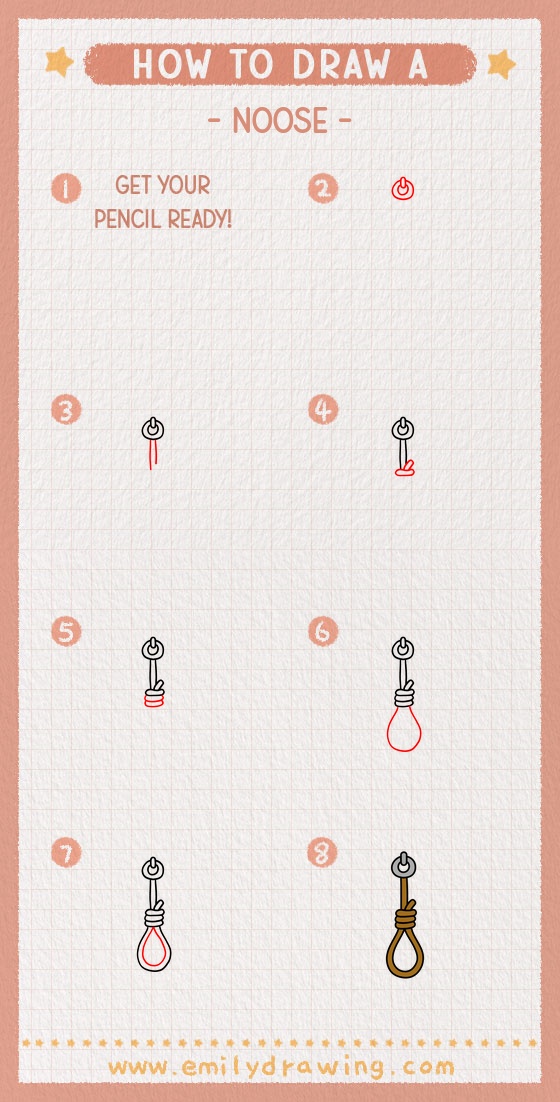
Trace your best pencil lines with a black marker when you are happy with the shape. Erase extra sketch marks after the ink dries. You can add gentle shading along the inner edges to make the rope look more rounded. Keep practicing this step by step drawing, and try drawing the noose again with smoother, lighter lines.
Get the FREE Printable Drawing Guide
FREE Download Printable Noose Drawing Tutorial
Frequently Asked Questions
Is this tutorial good for beginners?
Yes, this easy drawing tutorial uses simple rounded shapes and clear steps. Beginners can follow each part slowly.
How do I make the rope look thicker?
Keep the inner and outer lines evenly spaced. Add small curved bands where the rope is wrapped.
What is the hardest part when learning how to draw noose?
The hardest part is keeping the large lower loop balanced. Draw lightly first, then adjust the sides before tracing.



