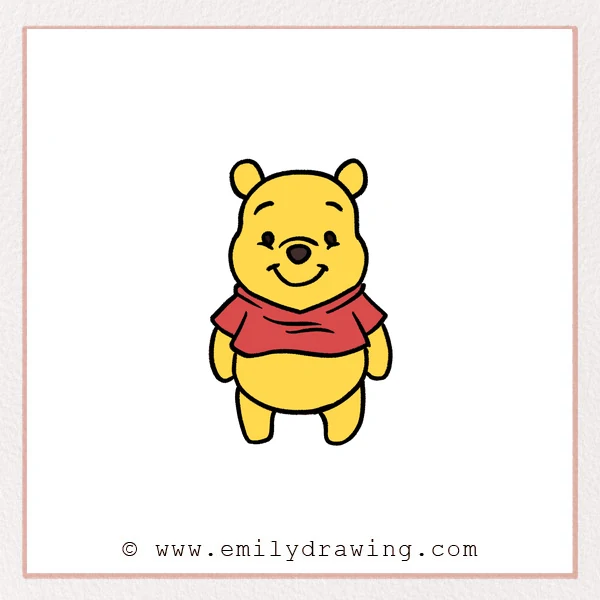
Learn how to draw Winnie the Pooh with a calm, simple approach. This step by step drawing guide uses rounded shapes and gentle curves. It is an easy drawing tutorial made for drawing for beginners.
What You Will Need
- Pencil
- Eraser
- Black marker or pen
- Drawing paper
- Coloring tools, such as crayons or colored pencils
Here are my RECOMMENDED Art Supplies!
- Crayola Coloring Set (140 Pieces – Mega Value!)
- 24 Colored Crayon Set
- A4 Printer Paper
- Crayola Coloring Pencils
- HP Home Printer with Instant Ink!
Time needed:
10 minutes.
Step-by-Step Drawing Guide
Step 1: Draw the Head Top and Ears
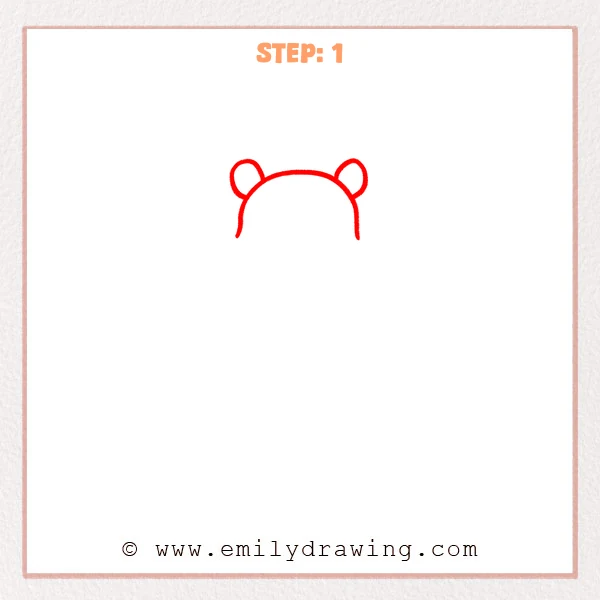
Start with a wide curved line for the top of Winnie the Pooh’s head. Add one rounded ear on each side, shaped like soft little half-circles.
Pro Tip: Keep both ears close in size so the head looks balanced.
Step 2: Add the Cheeks and Facial Features
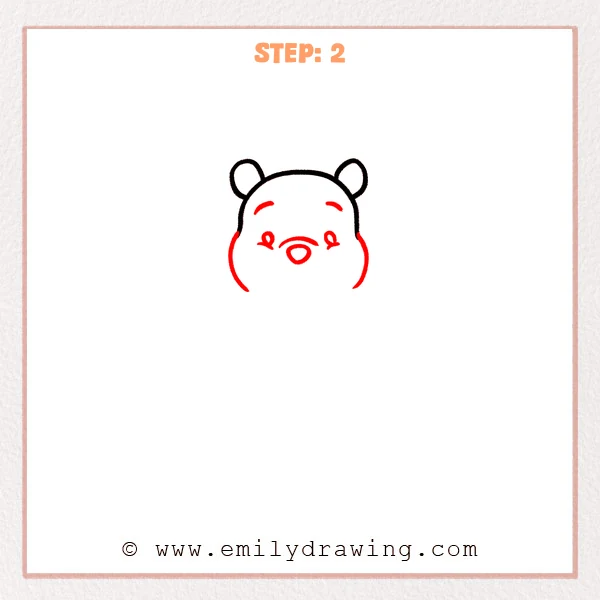
Draw rounded cheek lines downward on both sides to make the face fuller. Add curved eyebrows, small closed eyes, short eye-corner lines, and an oval nose in the center.
Pro Tip: Place the nose slightly lower than the face center to make Winnie the Pooh’s expression feel natural.
Step 3: Draw the Smiling Mouth
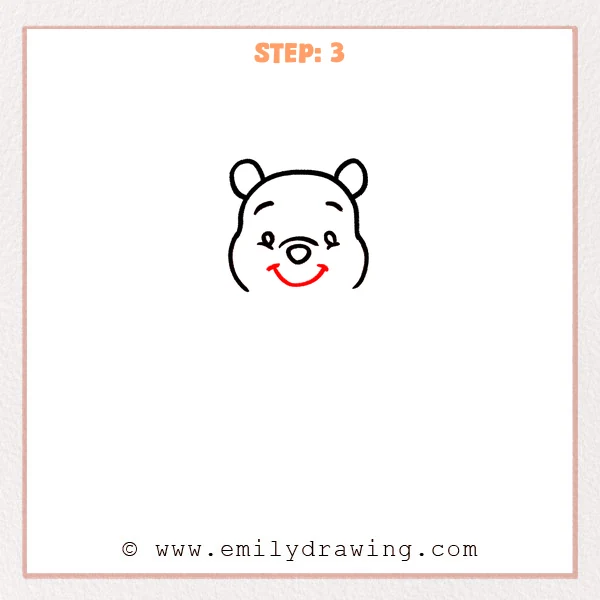
Add a large upward curve under the nose to form Winnie the Pooh’s gentle smile. Lift both ends of the curve slightly so the expression feels happy and soft.
Pro Tip: Draw the mouth curve loosely, because it can look cute without being perfectly even.
Step 4: Draw the Shirt and Sleeves
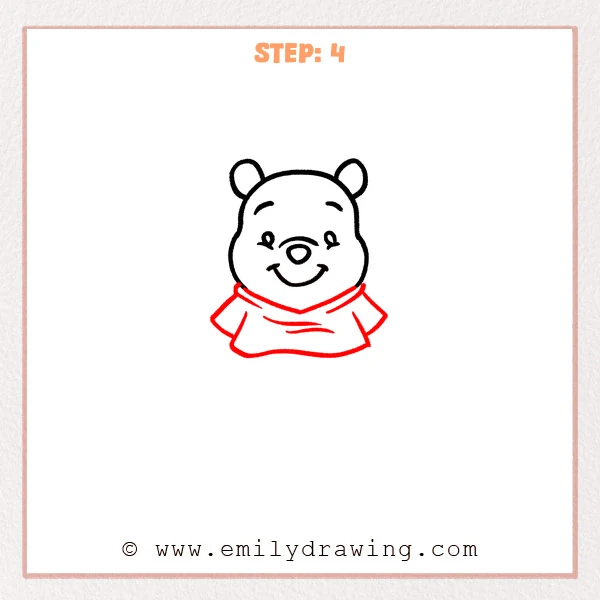
Under the head, draw Winnie the Pooh’s little shirt with a soft folded neckline. Add short sleeves on both sides, then connect the bottom with a curved line to make the body look rounded.
Pro Tip: Make the shirt bottom slightly curved so it fits the rounded body better.
Step 5: Add the Body and Arms
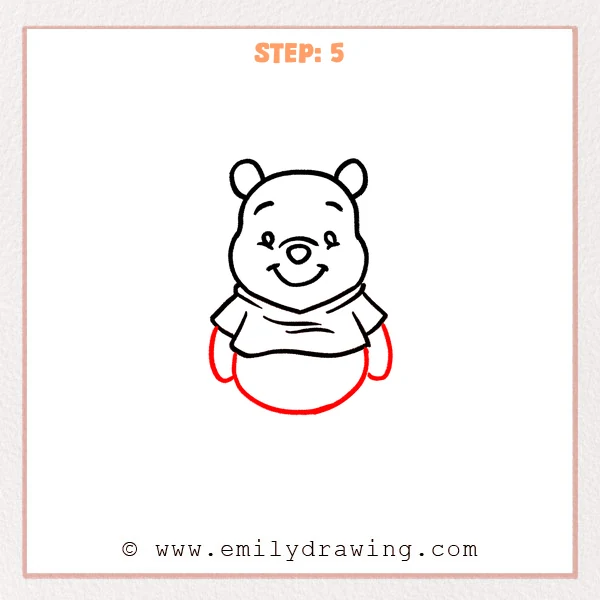
Under the shirt, draw a large rounded curve to form Winnie the Pooh’s round belly. Add curved arms downward from both sleeves so they rest naturally beside the body.
Pro Tip: Make the belly curve wider than the shirt so Winnie the Pooh looks extra cute.
Step 6: Draw the Legs
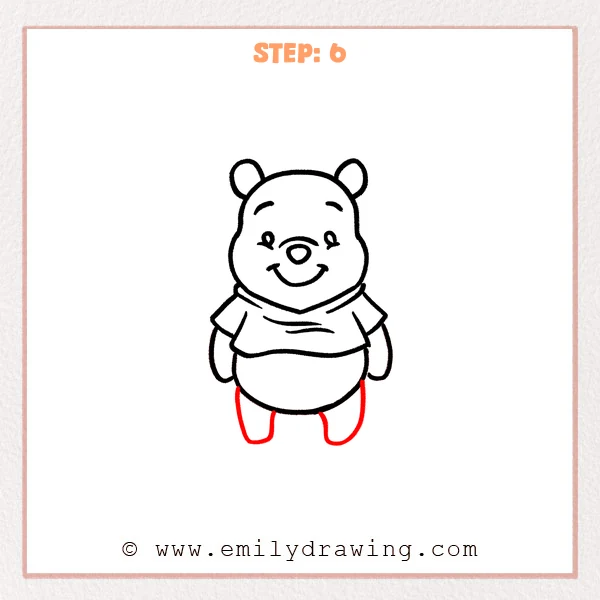
Add two short legs under the body so Winnie the Pooh stands firmly. Finish each leg with rounded lines, keeping the feet softly curved.
Pro Tip: Leave a small gap between the legs so the body shape looks clearer.
Step 7: Color in your drawing!
Fun Facts
- Winnie the Pooh is often drawn with very round shapes, which makes him friendly and easy to recognize.
- His simple shirt and soft bear features make him a good subject for a drawing for beginners.
- Rounded ears, a small nose, and a gentle smile help give Winnie the Pooh his warm expression.
Pin it now, Draw later!
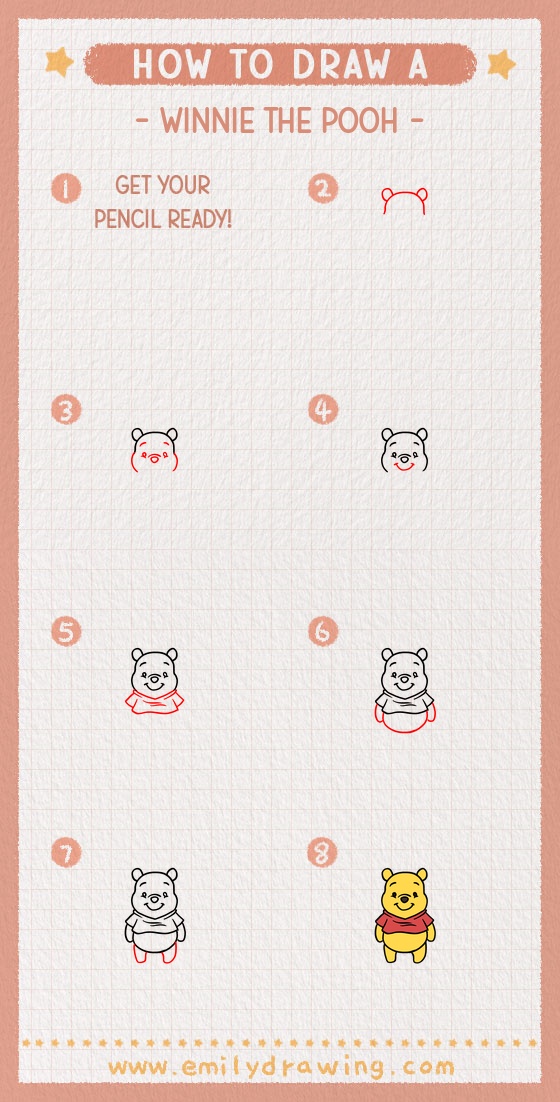
Now you know how to draw Winnie the Pooh using simple curves and rounded shapes. Trace your favorite lines with a marker, then erase any extra pencil marks. Add soft yellow coloring for the bear and red for the shirt to complete the drawing.
Take your time and enjoy each step of your easy drawing tutorial.
Get the FREE Printable Drawing Guide
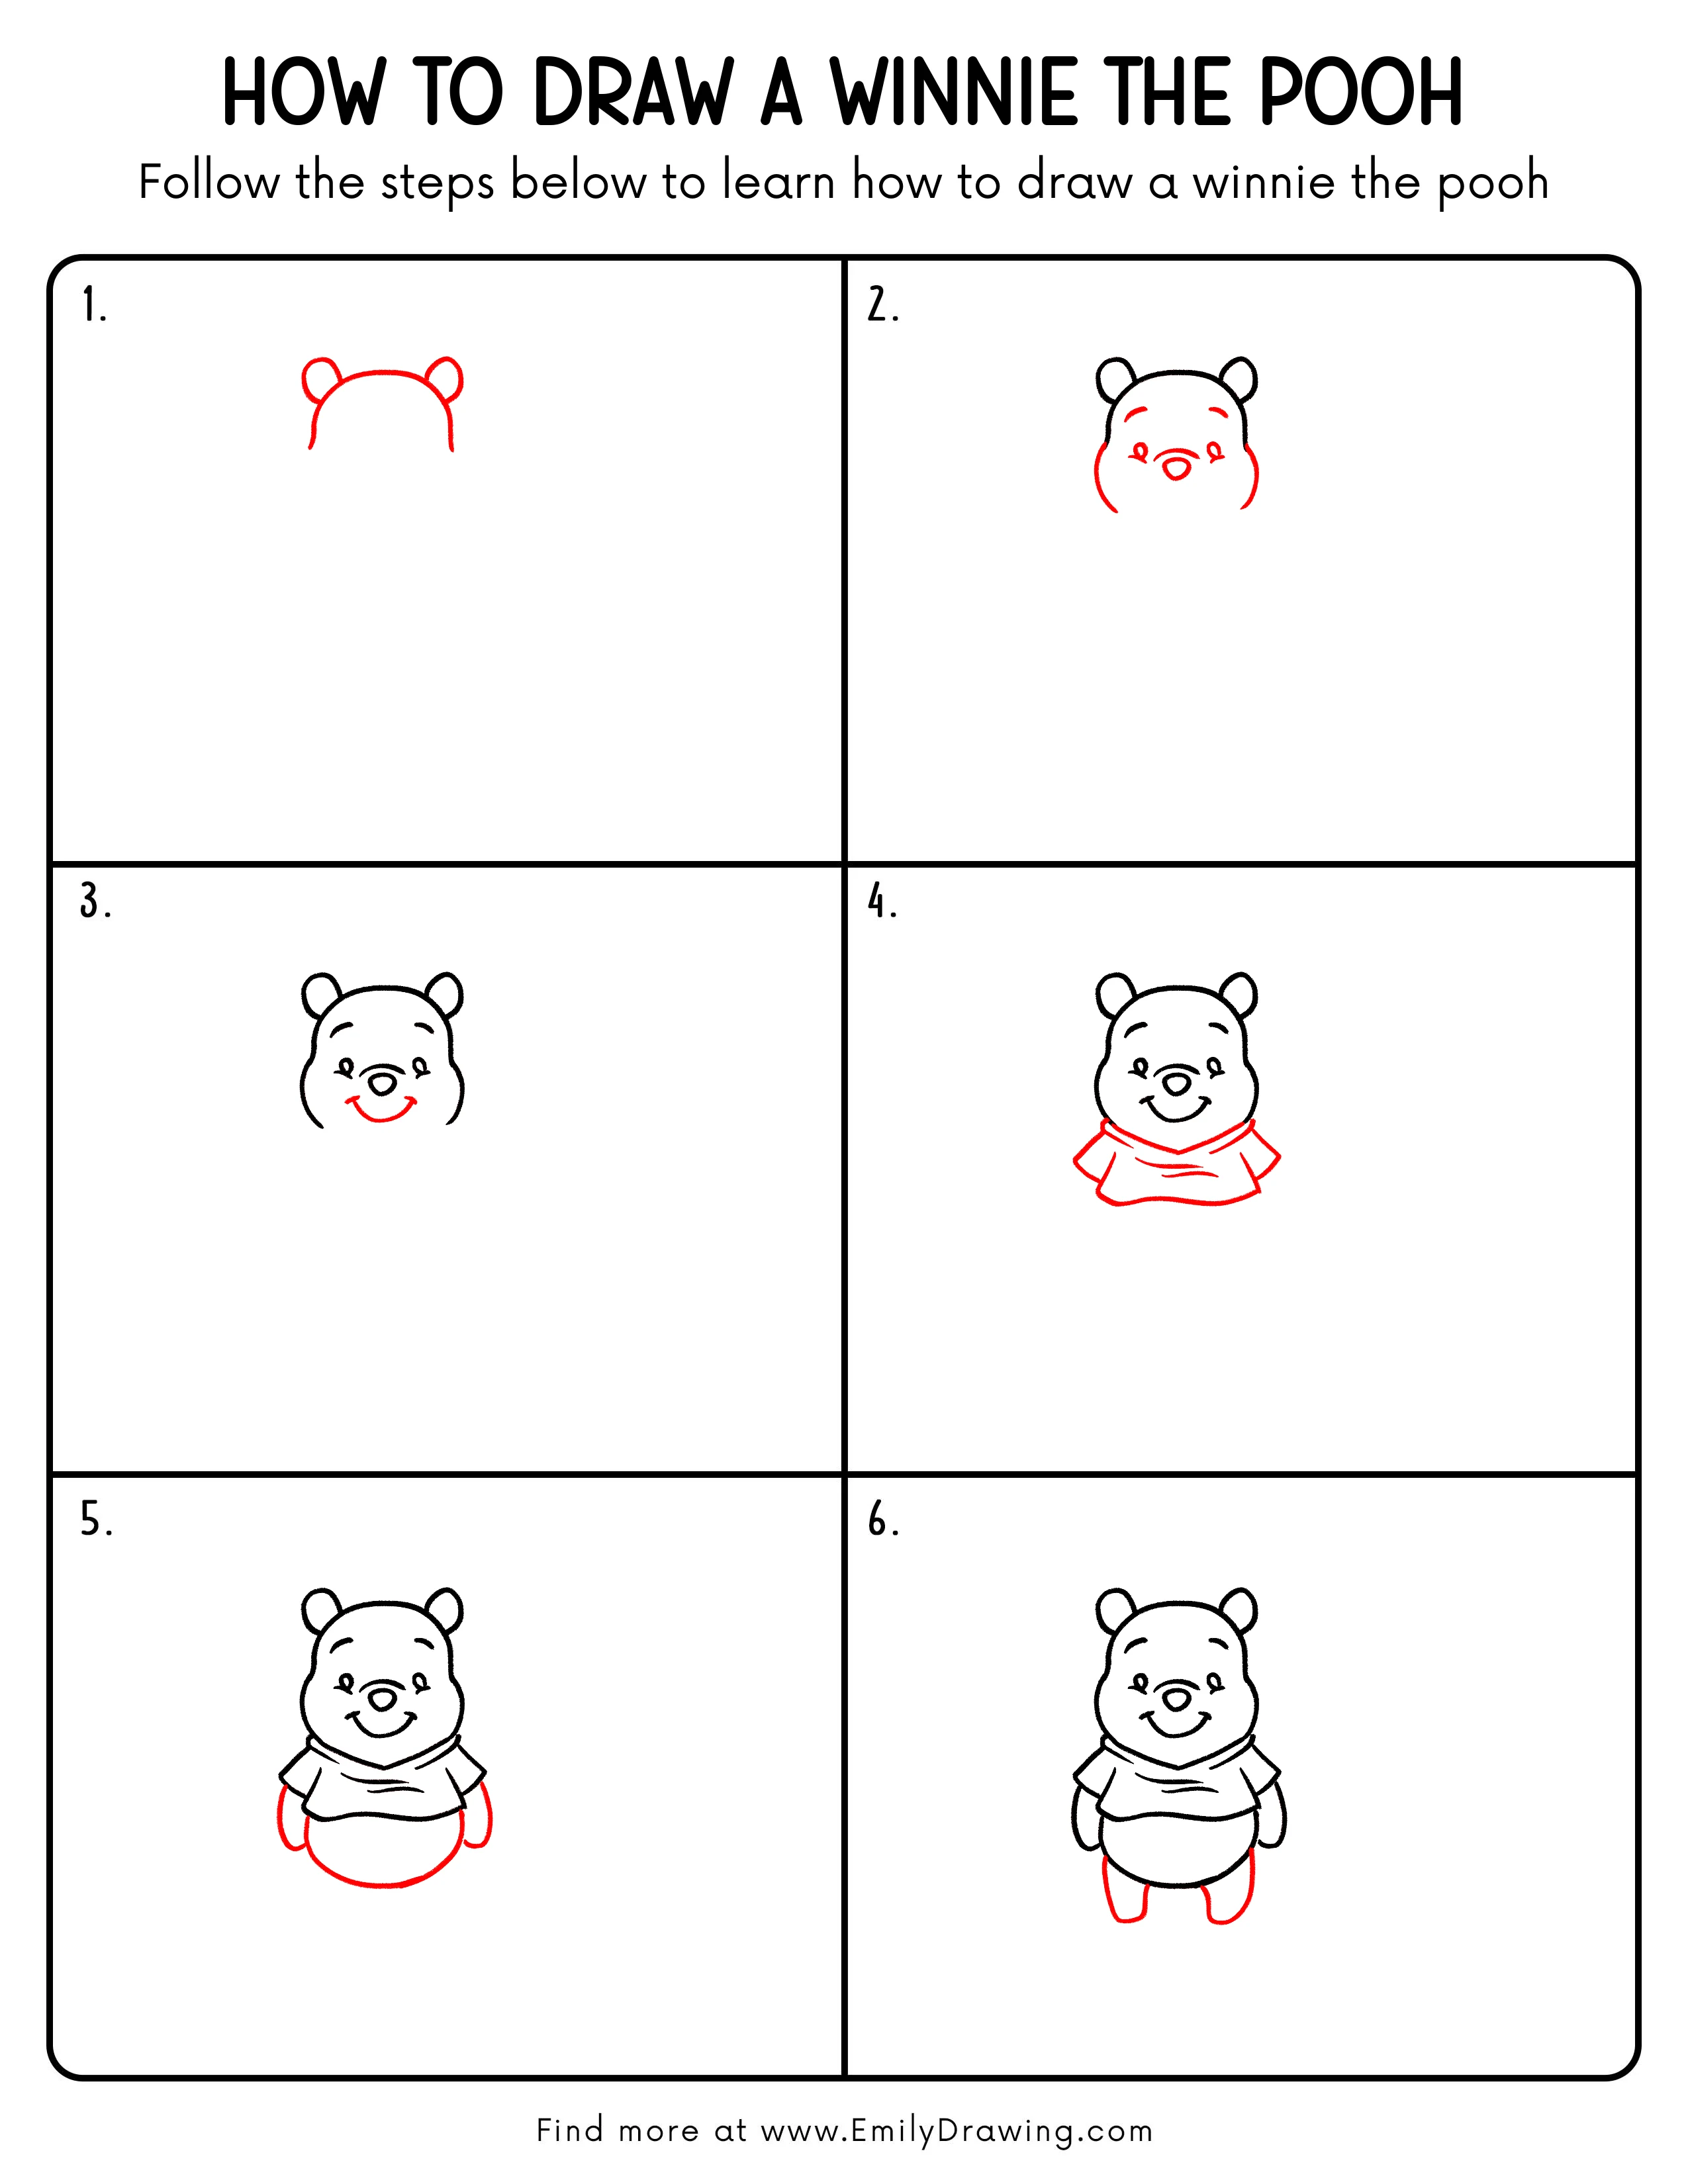
FREE Download Printable Winnie The Pooh Drawing Tutorial
Frequently Asked Questions
Is this Winnie the Pooh drawing good for beginners?
Yes, this step by step drawing is simple and friendly for beginners. Most parts use curves, circles, and rounded shapes.
How can I make Winnie the Pooh look softer?
Use gentle curves instead of sharp corners. Keep the ears, belly, arms, and legs rounded.
What colors should I use for Winnie the Pooh?
Use yellow or golden yellow for the bear. Use red for the shirt, and keep the face details black.