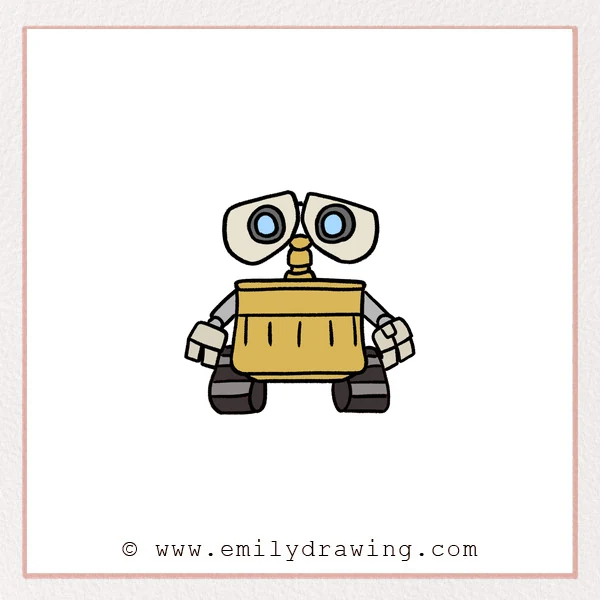
Learn how to draw Wall-E with a simple step by step drawing guide.
This easy drawing tutorial is made for beginners, using clear shapes and calm instructions.
Take your time, and build the robot piece by piece.
What You Will Need
- Pencil
- Eraser
- Black marker or pen
- Drawing paper
- Colored pencils or crayons
Here are my RECOMMENDED Art Supplies!
- Crayola Coloring Set (140 Pieces – Mega Value!)
- 24 Colored Crayon Set
- A4 Printer Paper
- Crayola Coloring Pencils
- HP Home Printer with Instant Ink!
Time needed:
12 minutes.
Step-by-Step Drawing Guide
Step 1: Draw Wall-E’s Eye Shapes
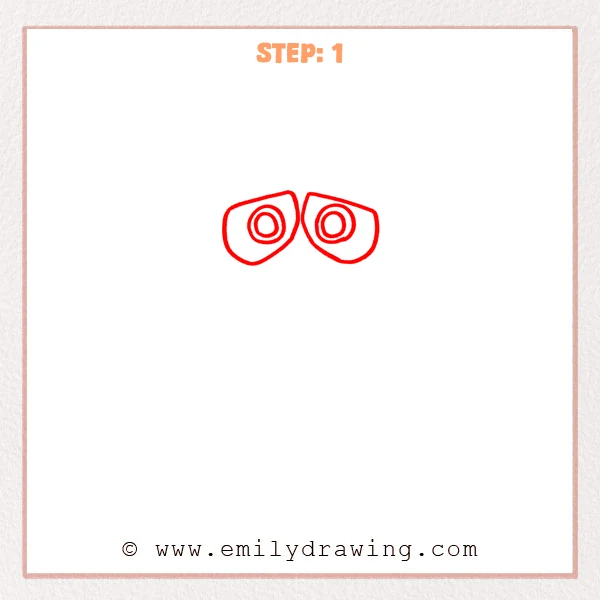
Start with two rounded trapezoid shapes, like a pair of goggles.
Add two circles inside each shape to build Wall-E’s lens structure.
Keep the shapes open and simple while you place the eyes.
Pro Tip: Keep both eyes similar in size, with a narrow gap between them.
Step 2: Add the Head Connector and Neck
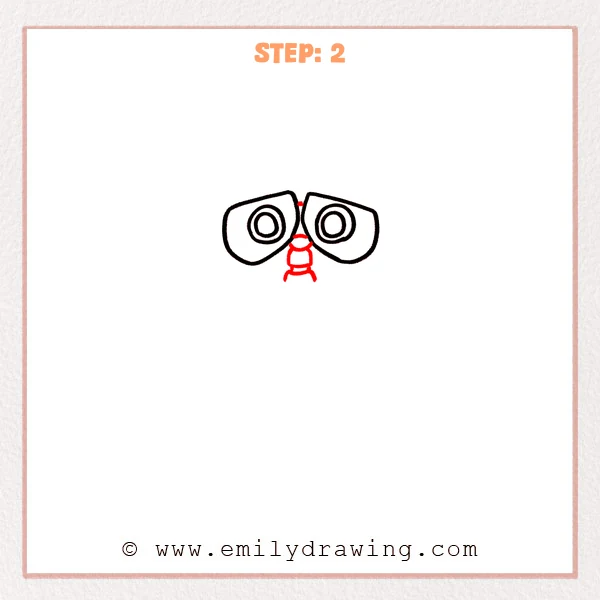
Draw a small connector between the two eyes to make Wall-E’s eye unit feel complete.
Add a short neck and small support below the eyes, like a simple mechanical base.
Place these parts directly under the center gap.
Pro Tip: Place the neck directly under the eyes so the body will stay balanced.
Step 3: Draw the Boxy Body
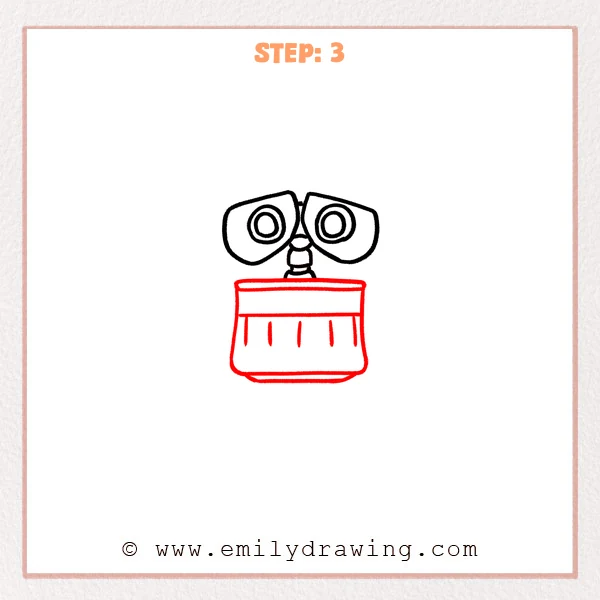
Under the neck, draw a wide rounded rectangle for Wall-E’s body.
Add a top band, a bottom curve, and a few vertical lines to make the box look mechanical.
Keep the body wide and sturdy for a beginner-friendly robot shape.
Pro Tip: Make the body wider than the eyes so Wall-E looks stable and cute.
Step 4: Add the Left Arm and Claw
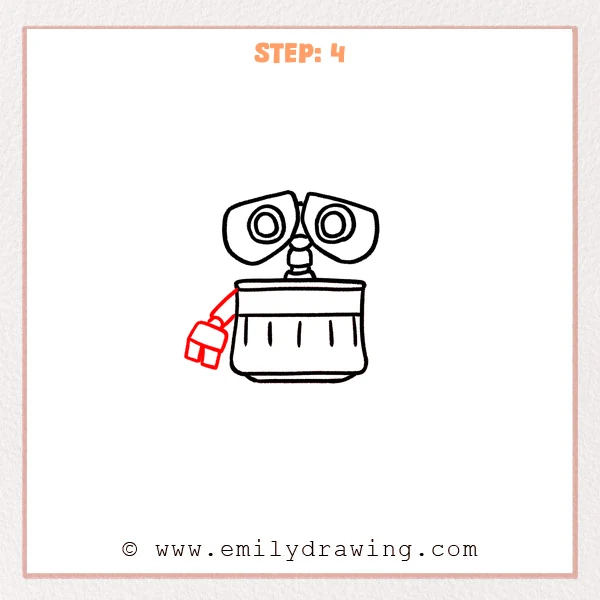
From the upper left side of the body, draw a bent mechanical arm reaching outward.
Add a small claw at the end, using simple boxy shapes and angled lines.
This gives Wall-E a more active robot pose.
Pro Tip: Keep the arm joints clear so the claw looks more like a robot part.
Step 5: Add the Track Base
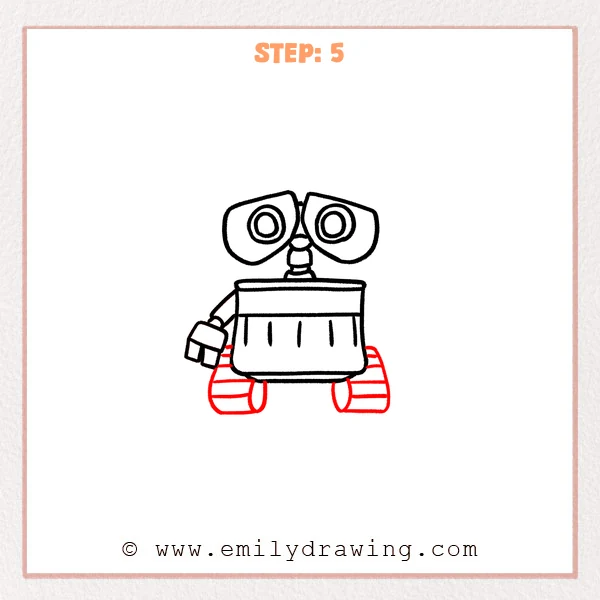
Draw two rounded tracks under both sides of the body so Wall-E can stand firmly.
Add horizontal divider lines on the tracks, then add small connector lines near the body.
These tank-like shapes help finish the lower part of the robot.
Pro Tip: Keep both tracks close in height so the bottom looks steady.
Step 6: Add the Right Arm and Claw
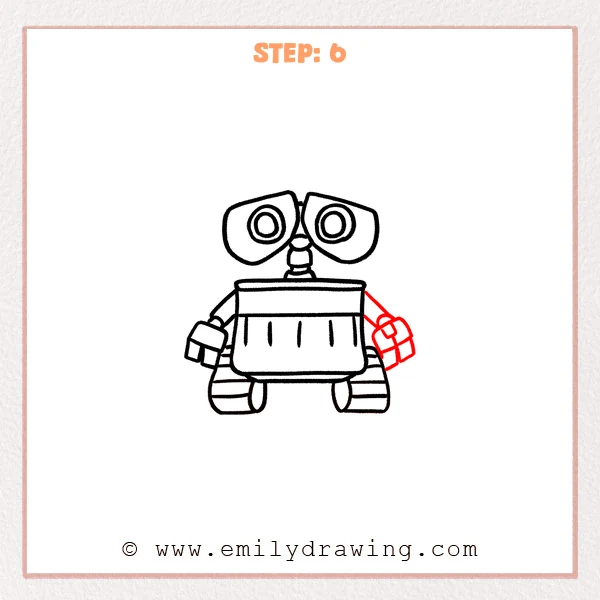
Draw another bent mechanical arm from the upper right side of the body, reaching outward.
Add a boxy claw at the end so Wall-E’s two arms feel complete.
Use the new arm to balance the whole drawing.
Pro Tip: The right arm can use a different angle from the left arm to make the pose feel natural.
Step 7: Color in your drawing!
Fun Facts
Wall-E has large expressive eyes, which help show emotion without many facial features.
His body is mostly made from simple boxy shapes, which makes him great for drawing for beginners.
The track base helps him look like a small working robot.
Pin it now, Draw later!
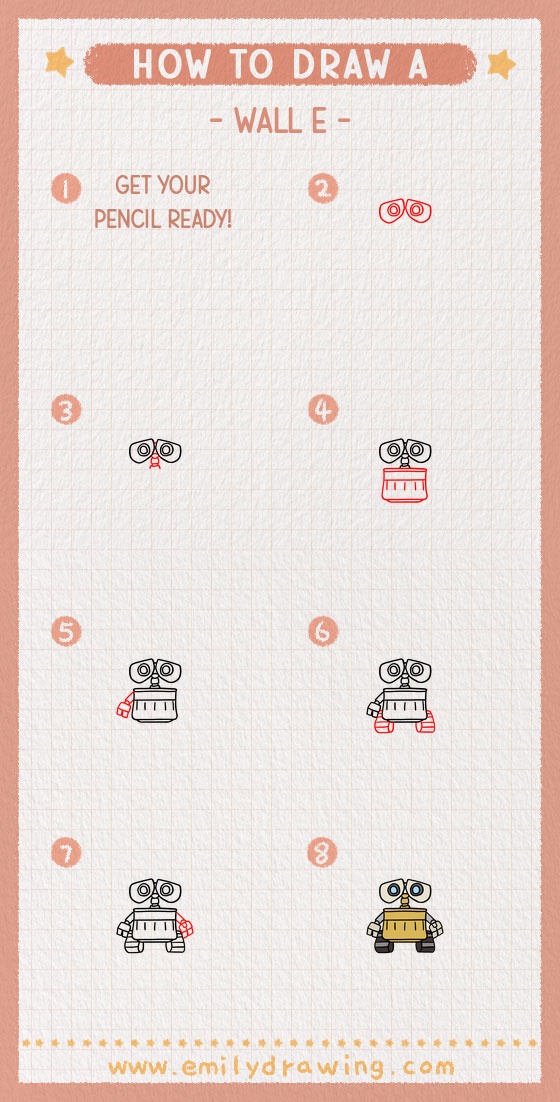
Now you know how to draw Wall-E using simple shapes and clear steps.
Trace your final lines with a marker, then erase any extra pencil marks.
You can color the body warm yellow, shade the tracks dark gray, and add soft highlights to the eyes.
Try this easy drawing tutorial again to make your lines cleaner and more confident.
Get the FREE Printable Drawing Guide
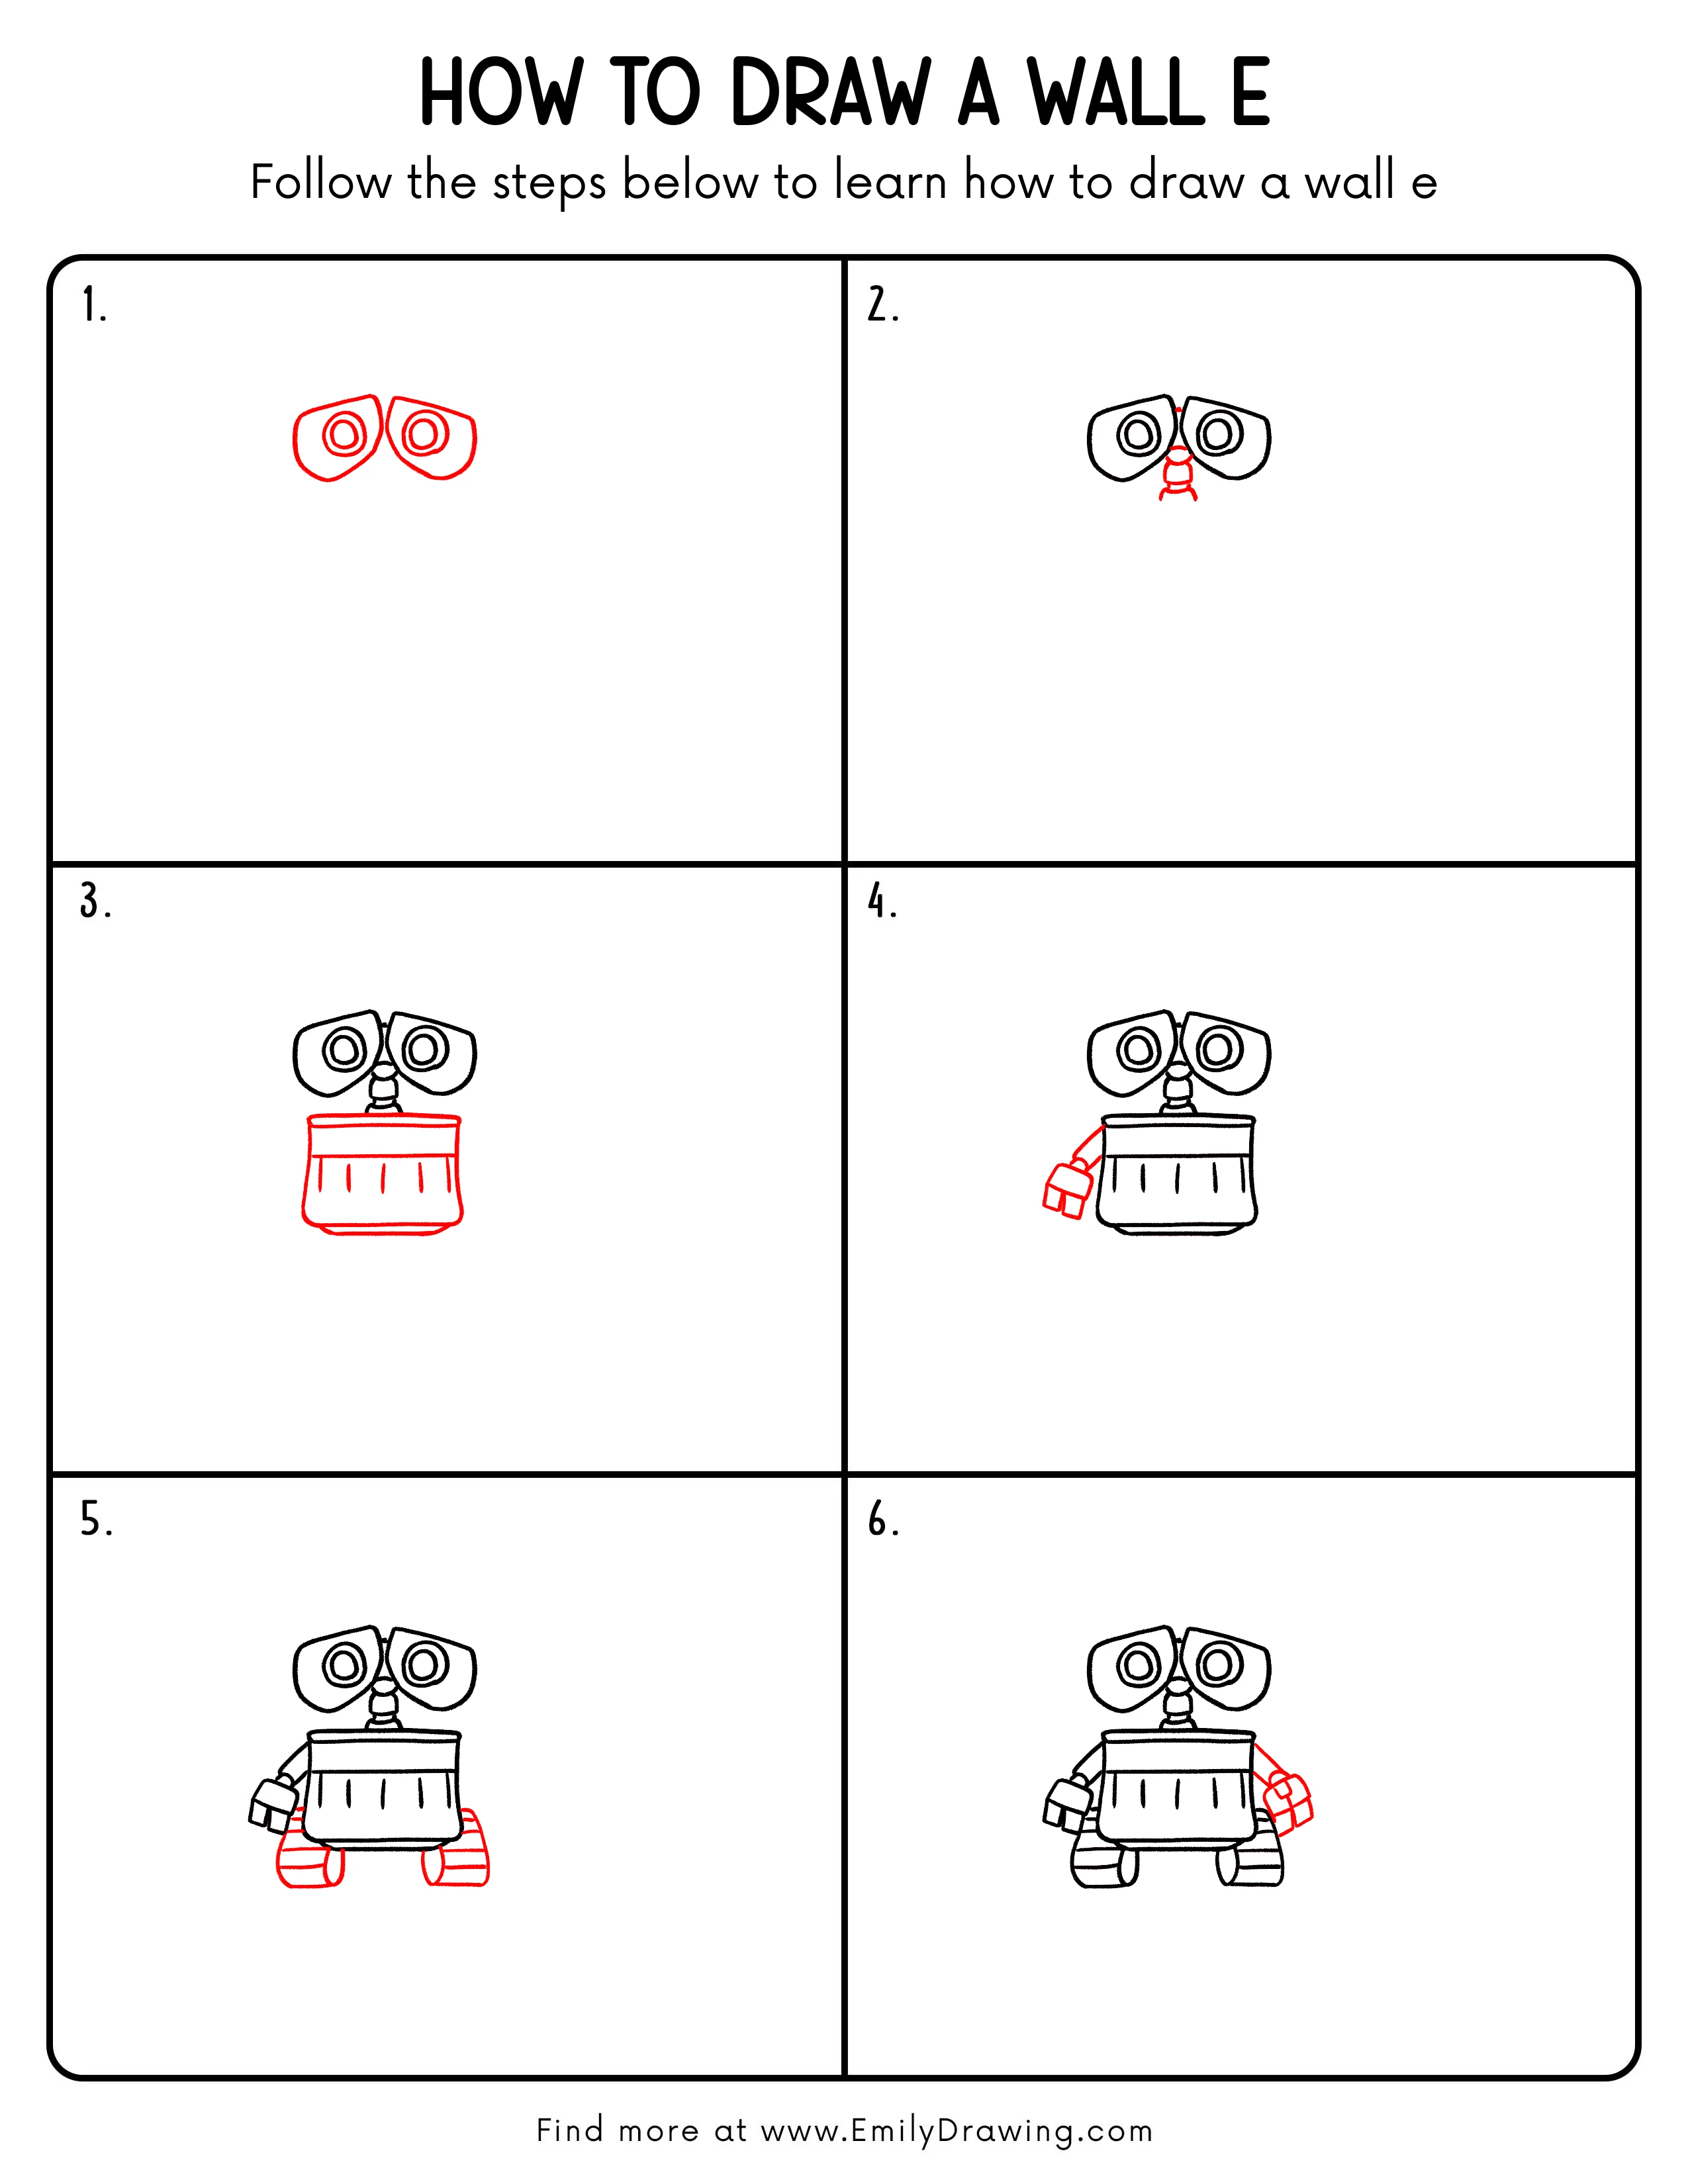
FREE Download Printable Wall E Drawing Tutorial
Frequently Asked Questions
Is this Wall-E drawing good for beginners?
Yes, this Wall-E step by step drawing uses circles, rounded rectangles, and simple lines.
It is a friendly drawing for beginners because each part is added slowly.
What is the hardest part of drawing Wall-E?
The eyes may take the most care because they need to look balanced.
Start lightly, then refine the shape before tracing.
How can I make my Wall-E drawing look more finished?
Add small shadows under the body, darker lines on the tracks, and gentle highlights in the lenses.
These details make the robot look more complete without making the drawing too difficult.