Learning how to draw trumpet can be simple when you build it one part at a time.
This step by step drawing guide uses easy shapes, rounded lines, and clear details.
Take your time with each stage, and keep your pencil lines light at first.
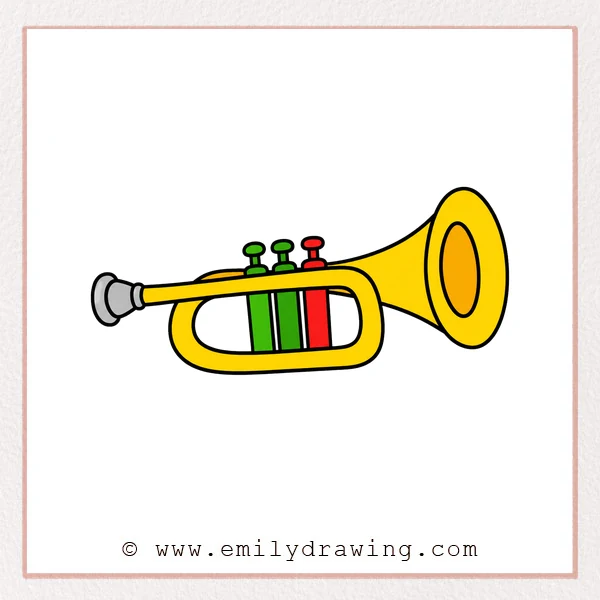
What You Will Need
- A pencil
- An eraser
- Drawing paper
- A black marker or pen
- Yellow, gold, or brass-colored crayons or pencils
Here are my RECOMMENDED Art Supplies!
- Crayola Coloring Set (140 Pieces – Mega Value!)
- 24 Colored Crayon Set
- A4 Printer Paper
- Crayola Coloring Pencils
- HP Home Printer with Instant Ink!
Time needed:
16 minutes.
Step-by-Step Drawing Guide
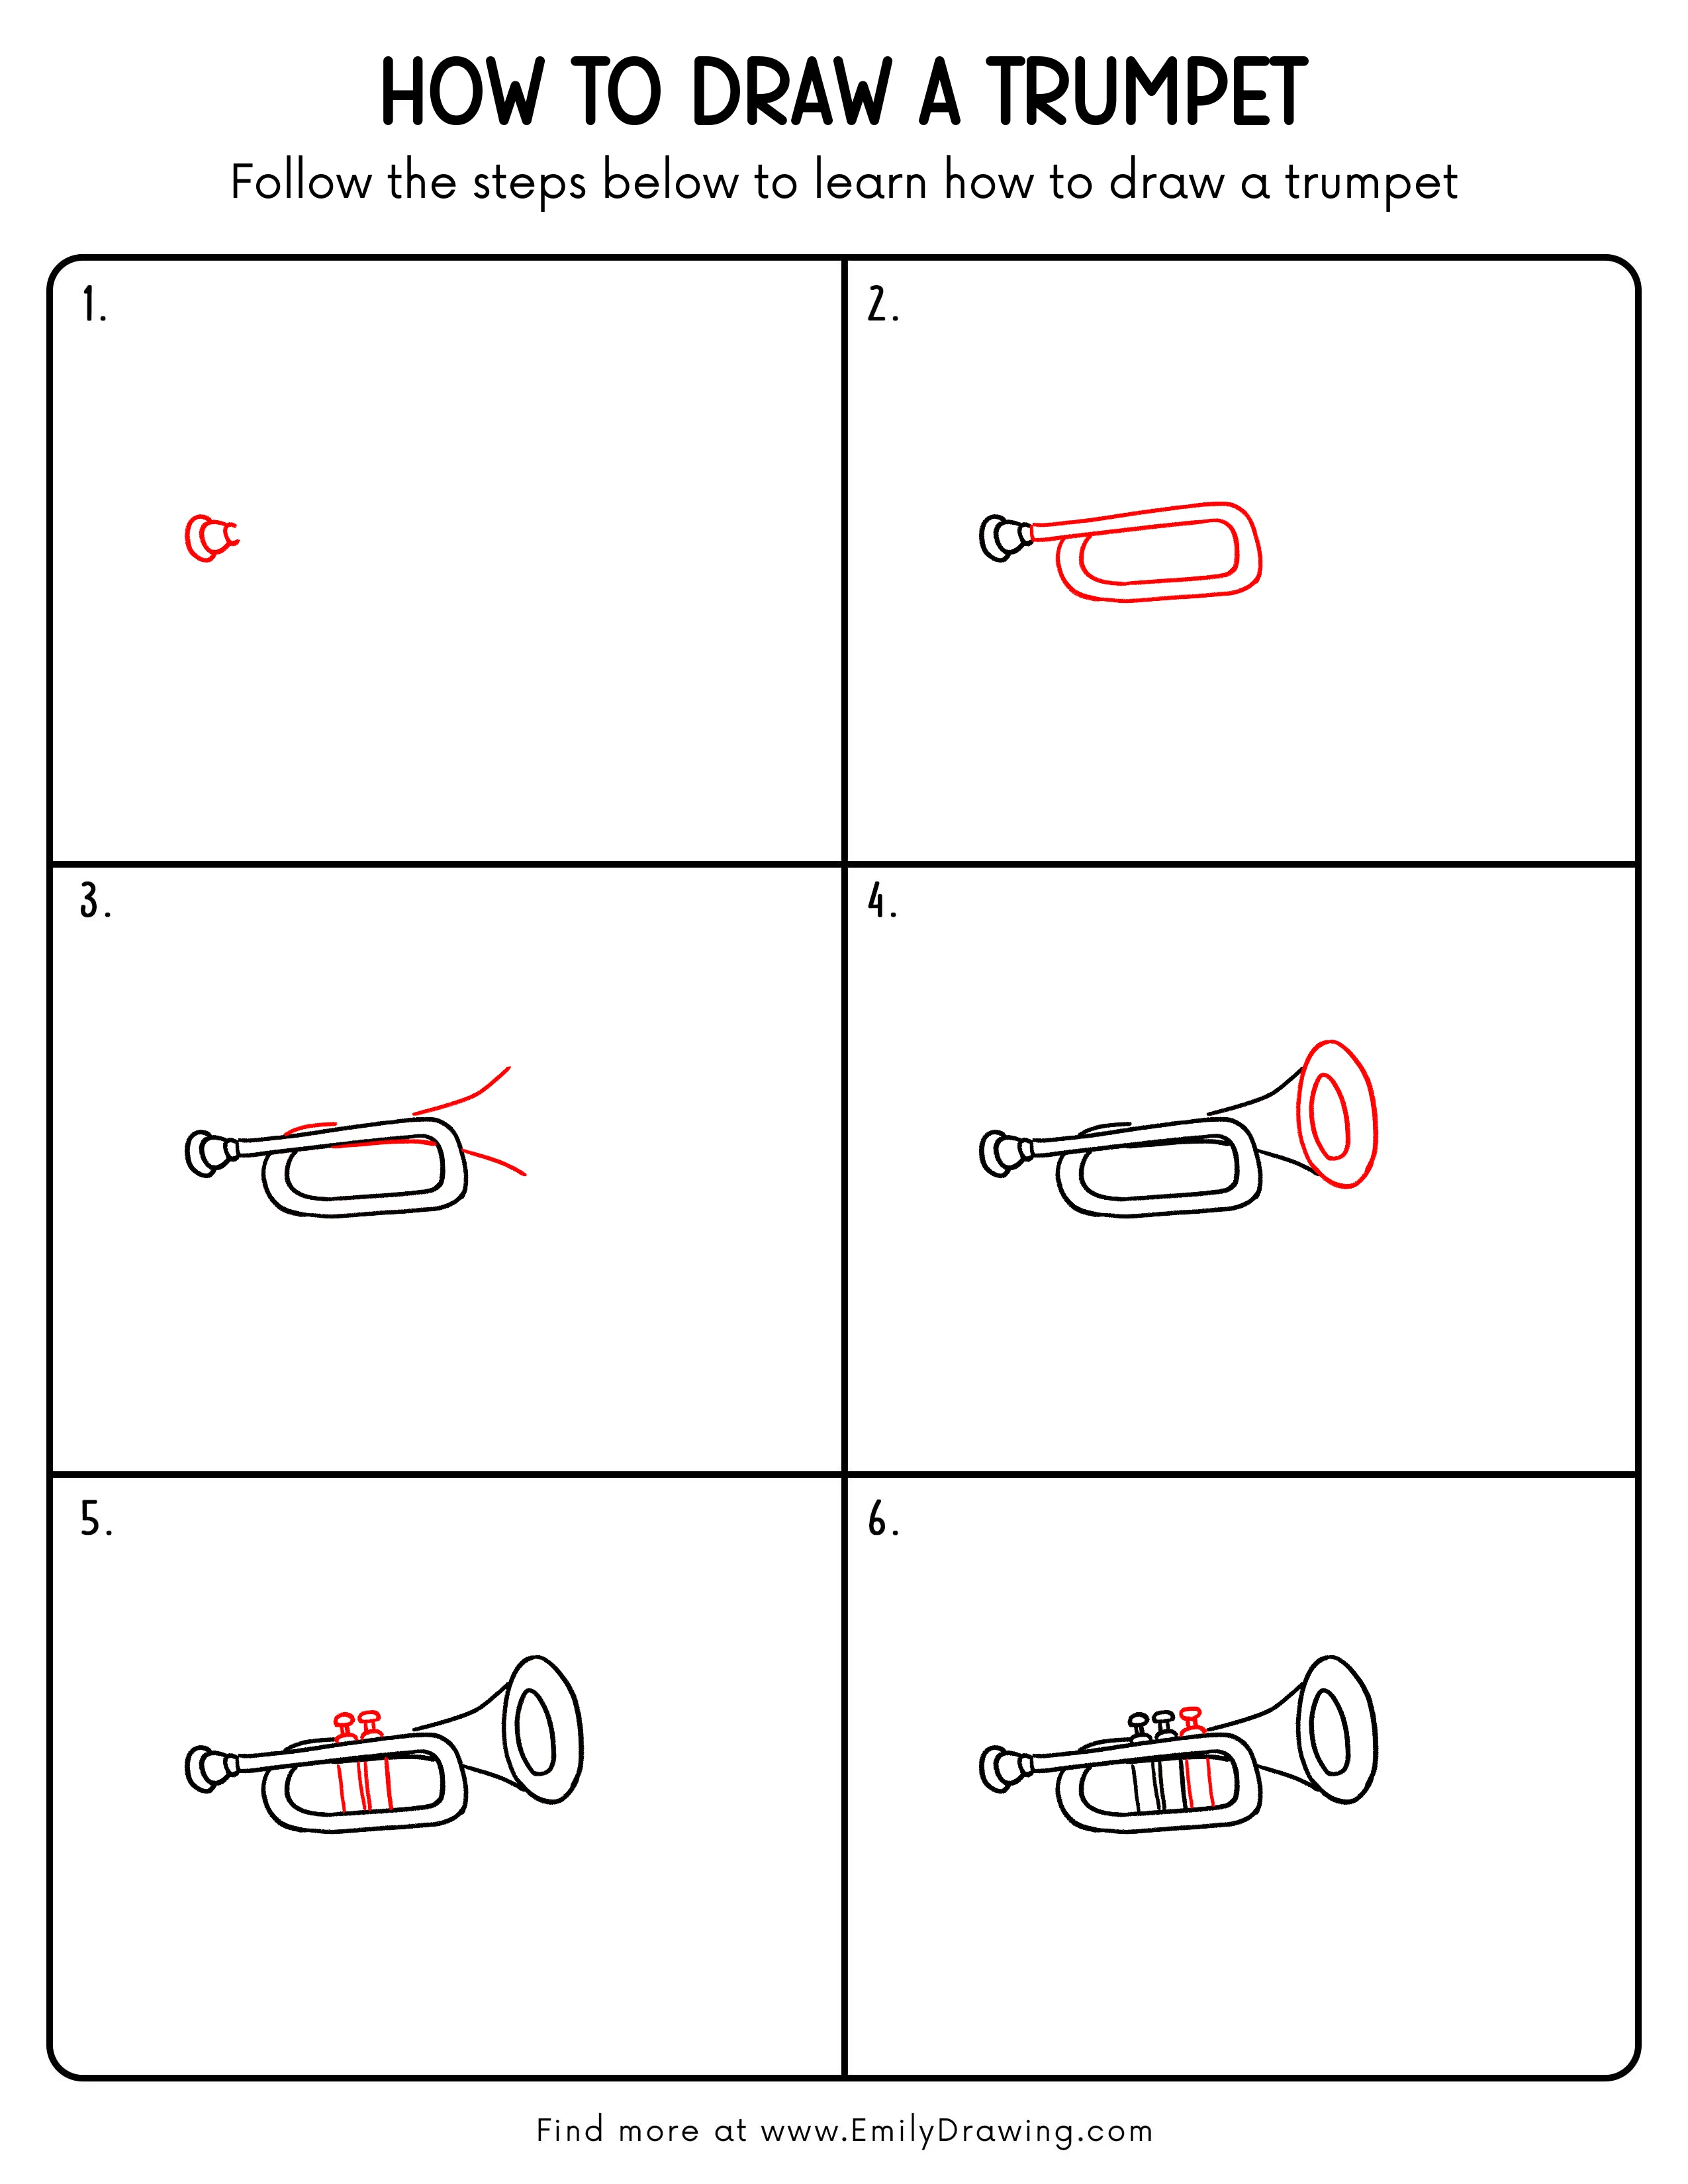
Step 1: Draw the Bell and Mouth Opening
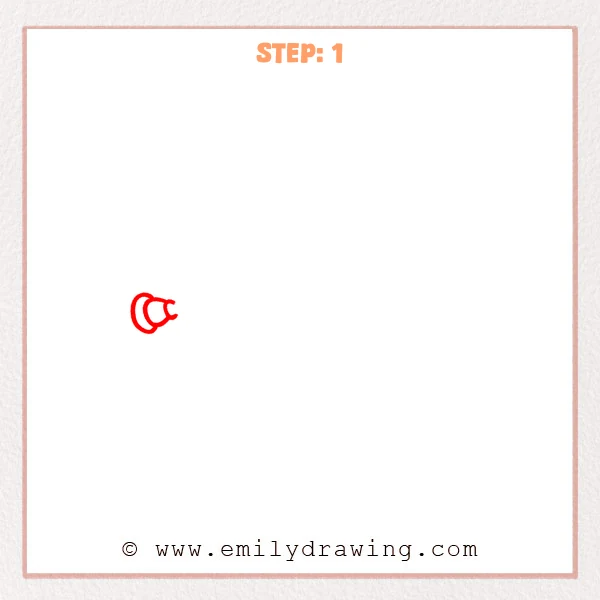
Start on the left with a rounded outer bell shape.
Add a smaller curved opening on the right, then use a short curve to show the tube direction.
Pro Tip: Let the curved shapes overlap slightly so the trumpet opening feels layered.
Step 2: Extend the Main Tube
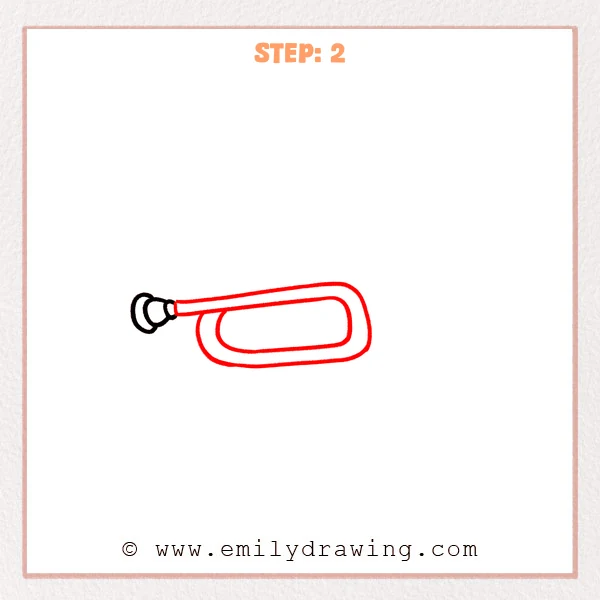
From the trumpet opening, draw a long tube stretching to the right.
Round the far end, then bring the line back toward the lower left to form a large looped pipe.
Pro Tip: Keep the two long lines evenly spaced so the tube looks neat and steady.
Step 3: Add the Upper Curved Tube Lines
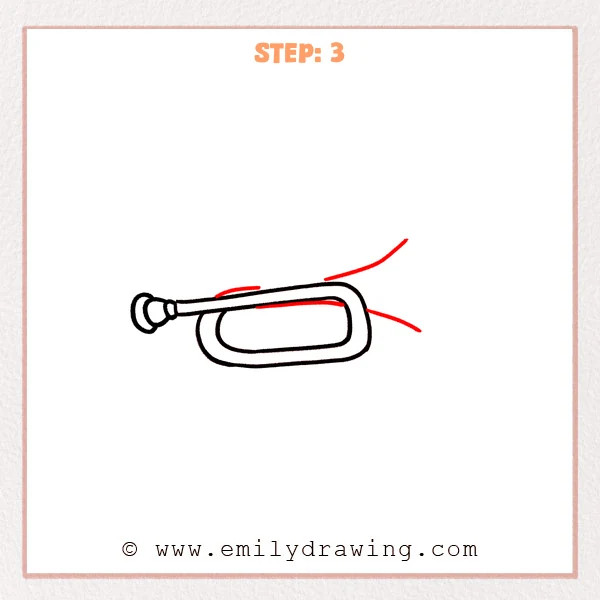
Draw a curved line rising above the main tube.
Add a short arc from the right outer bend to suggest where the next pipe will continue.
Pro Tip: Let the new curves grow naturally from the body so they do not look separate.
Step 4: Draw the Large Bell Opening
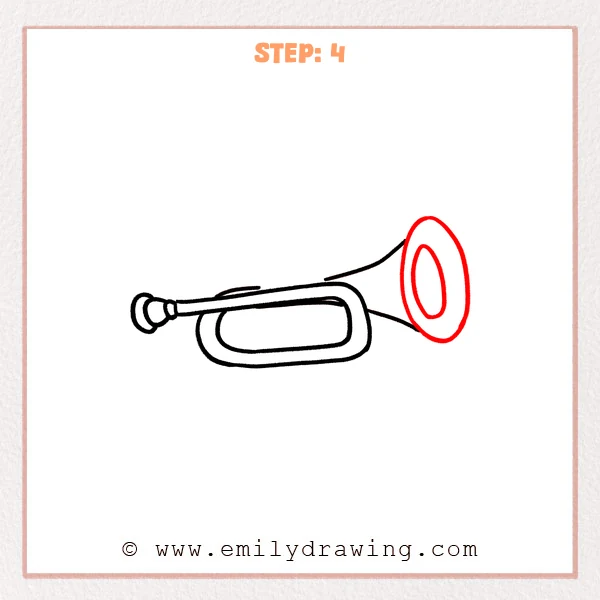
At the right end of the tube, draw a large vertical oval for the trumpet’s flared bell.
Add a smaller oval inside it so the bell looks thick and deep.
Pro Tip: Keep both ovals sharing the same center so the bell looks balanced.
Step 5: Add the Valve Buttons
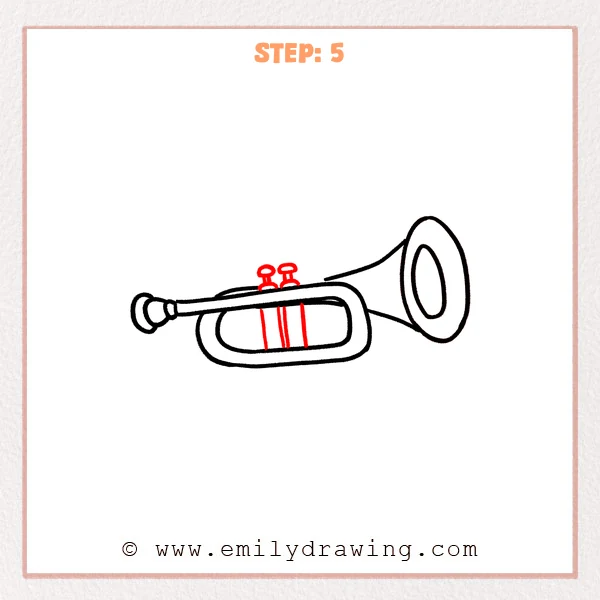
Draw two small valve buttons above the main body, each with a short stem and rounded top.
Add several vertical lines below them to connect into the lower tube area.
Pro Tip: Keep the two buttons close in height so they look like one matching set.
Step 6: Complete the Valve Set
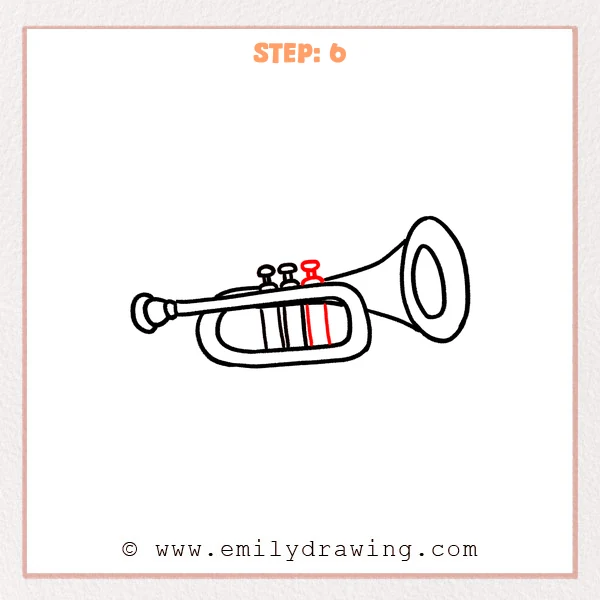
Add one more matching valve button to the right of the first two.
Draw two vertical connector lines downward so the third valve joins the lower tube.
Pro Tip: Leave even spaces between the three buttons so the valve set looks clear.
Step 7: Color in your drawing!
Fun Facts
Trumpets are brass instruments with a bright, clear sound.
Players change notes by pressing the three valves in different combinations.
The wide bell helps the sound project forward, which makes the trumpet easy to hear.
Pin it now, Draw later!
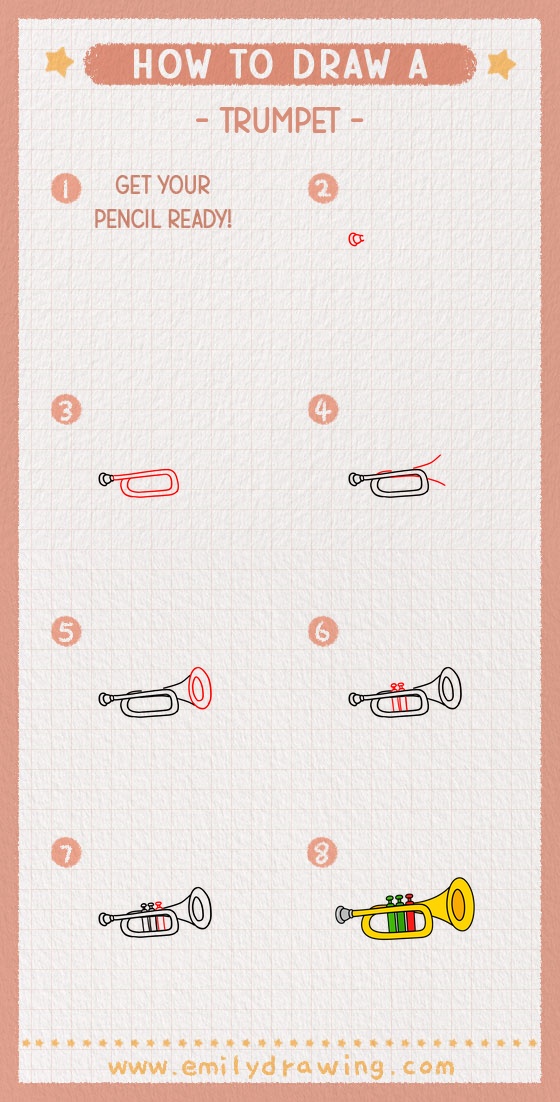
Trace your best lines with a black marker after the pencil sketch looks clean.
Color the trumpet with yellow, gold, or warm orange to create a brass effect.
You can also add simple shine marks on the bell and tubes for a polished look.
Now you have finished an easy drawing tutorial for beginners.
Keep practicing how to draw trumpet, and try drawing it again with smoother curves.
Get the FREE Printable Drawing Guide
FREE Download Printable Trumpet Drawing Tutorial
Frequently Asked Questions
Is a trumpet hard to draw?
A trumpet can look complex, but it becomes easier with simple tubes, ovals, and valves.
Follow the step by step drawing slowly, and focus on one new part each time.
What shape should I start with?
Start with rounded bell shapes and a small opening on one side.
These shapes help set the direction and size of the trumpet.
How can I make my trumpet drawing look more realistic?
Keep the tubes evenly spaced and make the bell oval smooth.
Small shine lines and careful coloring can also make the trumpet look more finished.