Learn how to draw trophy with this calm, simple step by step drawing guide. This easy drawing tutorial is made for beginners, using smooth curves and clear shapes. Take your time with each step, and your trophy will look bright, balanced, and proud.

What You Will Need
- A pencil
- An eraser
- Drawing paper
- A black marker or pen
- Colored pencils or crayons
Here are my RECOMMENDED Art Supplies!
- Crayola Coloring Set (140 Pieces – Mega Value!)
- 24 Colored Crayon Set
- A4 Printer Paper
- Crayola Coloring Pencils
- HP Home Printer with Instant Ink!
Time needed:
10 minutes.
Step-by-Step Drawing Guide
Step 1: Draw the Trophy Cup Outline
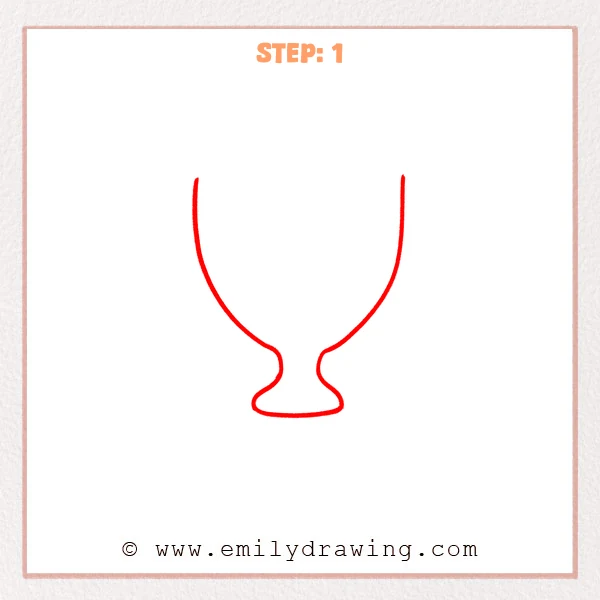
Start near the upper sides and draw two long curved lines downward. Let the lines narrow near the bottom, then curve outward slightly to form the lower edge of the trophy cup.
Pro Tip: Keep both curved sides as even as possible so the trophy looks balanced.
Step 2: Add the Rim and Highlights
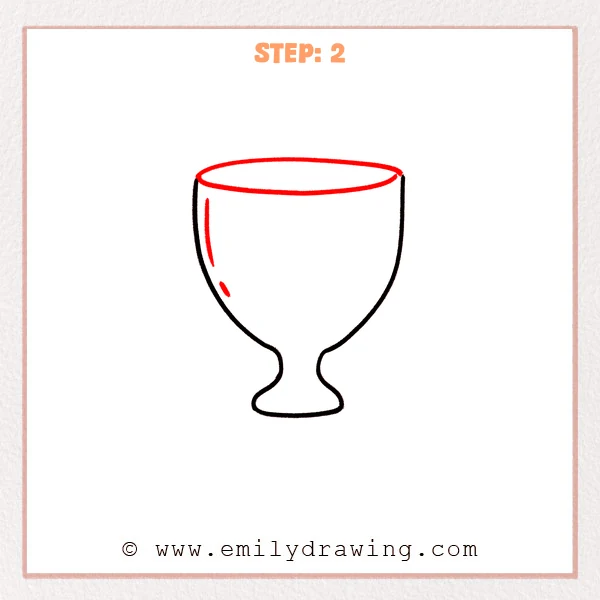
Draw a wide horizontal oval across the top to show the trophy rim. Add two short curved marks inside the left side as shiny highlight details.
Pro Tip: Keep the rim oval smooth, with both ends lined up evenly.
Step 3: Draw the Trophy Base
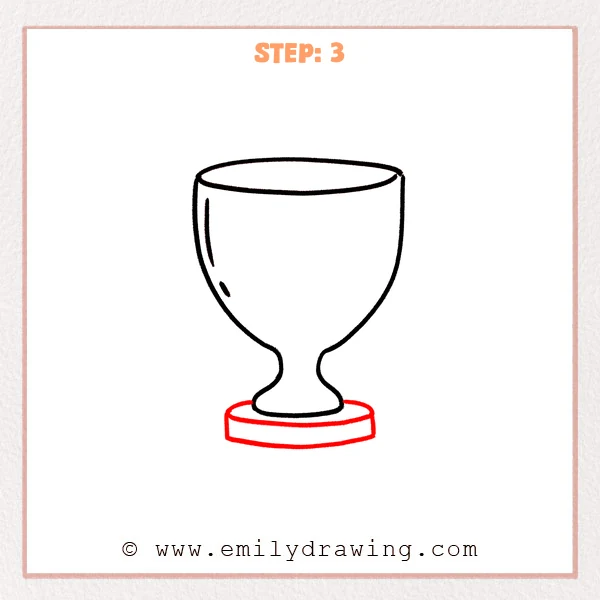
Draw a wide oval base under the cup so the trophy stem sits firmly on it. Then add short vertical sides from the oval and connect them with a slightly curved bottom line.
Pro Tip: Make the base much wider than the stem so the trophy feels sturdy.
Step 4: Add the Right Handle
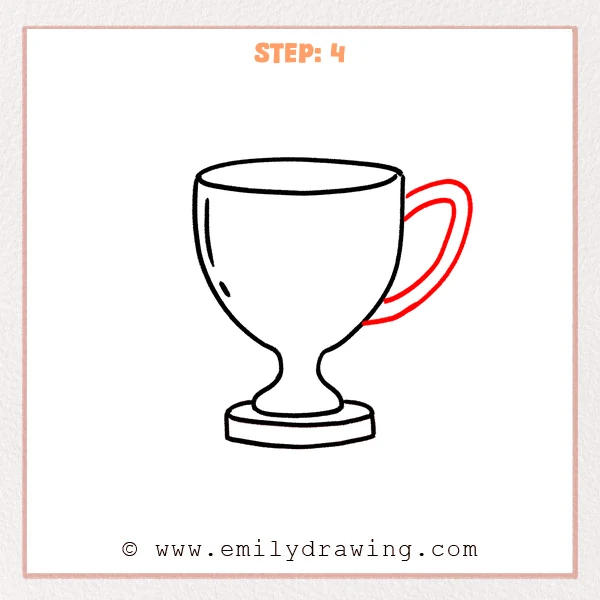
Draw a large outward curve on the right side of the cup to form the handle’s outer edge. Add a smaller curve inside it so the handle looks thick and rounded.
Pro Tip: Place the handle’s top and bottom joins close to the cup edge, and keep the curves smooth.
Step 5: Add the Left Handle
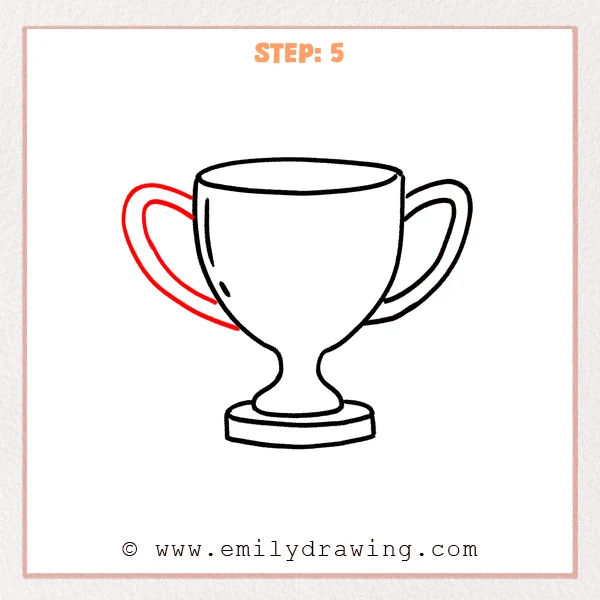
Draw a large outward curve on the left side of the cup to match the right handle. Add a smaller curve inside it so the left handle also has clear thickness.
Pro Tip: Keep both handles close in size so the trophy looks more symmetrical.
Step 6: Add the Heart Decoration
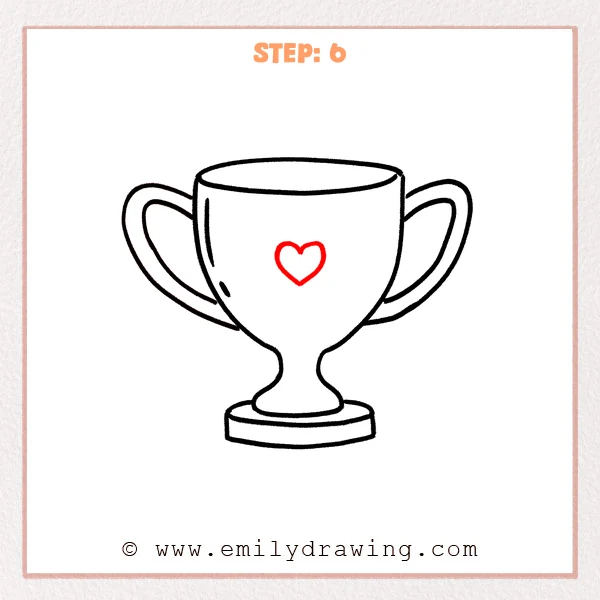
Draw a small heart in the center of the trophy cup as a front decoration. Place the heart slightly above the middle of the cup, and keep the shape simple and clear.
Pro Tip: Keep both sides of the heart nearly equal so the decoration looks neat.
Step 7: Color in your drawing!
Fun Facts
Trophies are often used to celebrate effort, teamwork, and achievement. Many trophies have wide handles because they are inspired by old ceremonial cups. A heart decoration can make your trophy feel friendly and personal.
Pin it now, Draw later!
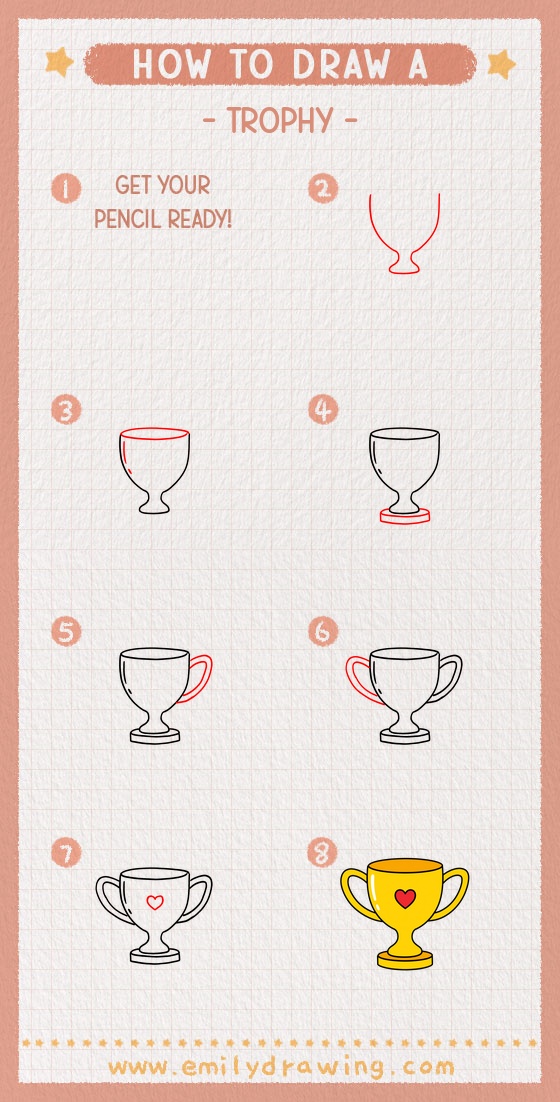
Now you know how to draw trophy using simple curved lines, a strong base, and cheerful details. Trace your favorite lines with a marker, then color the cup gold or any bright color you like. Keep practicing this drawing for beginners, and try adding stars, ribbons, or your name on the base.
Get the FREE Printable Drawing Guide
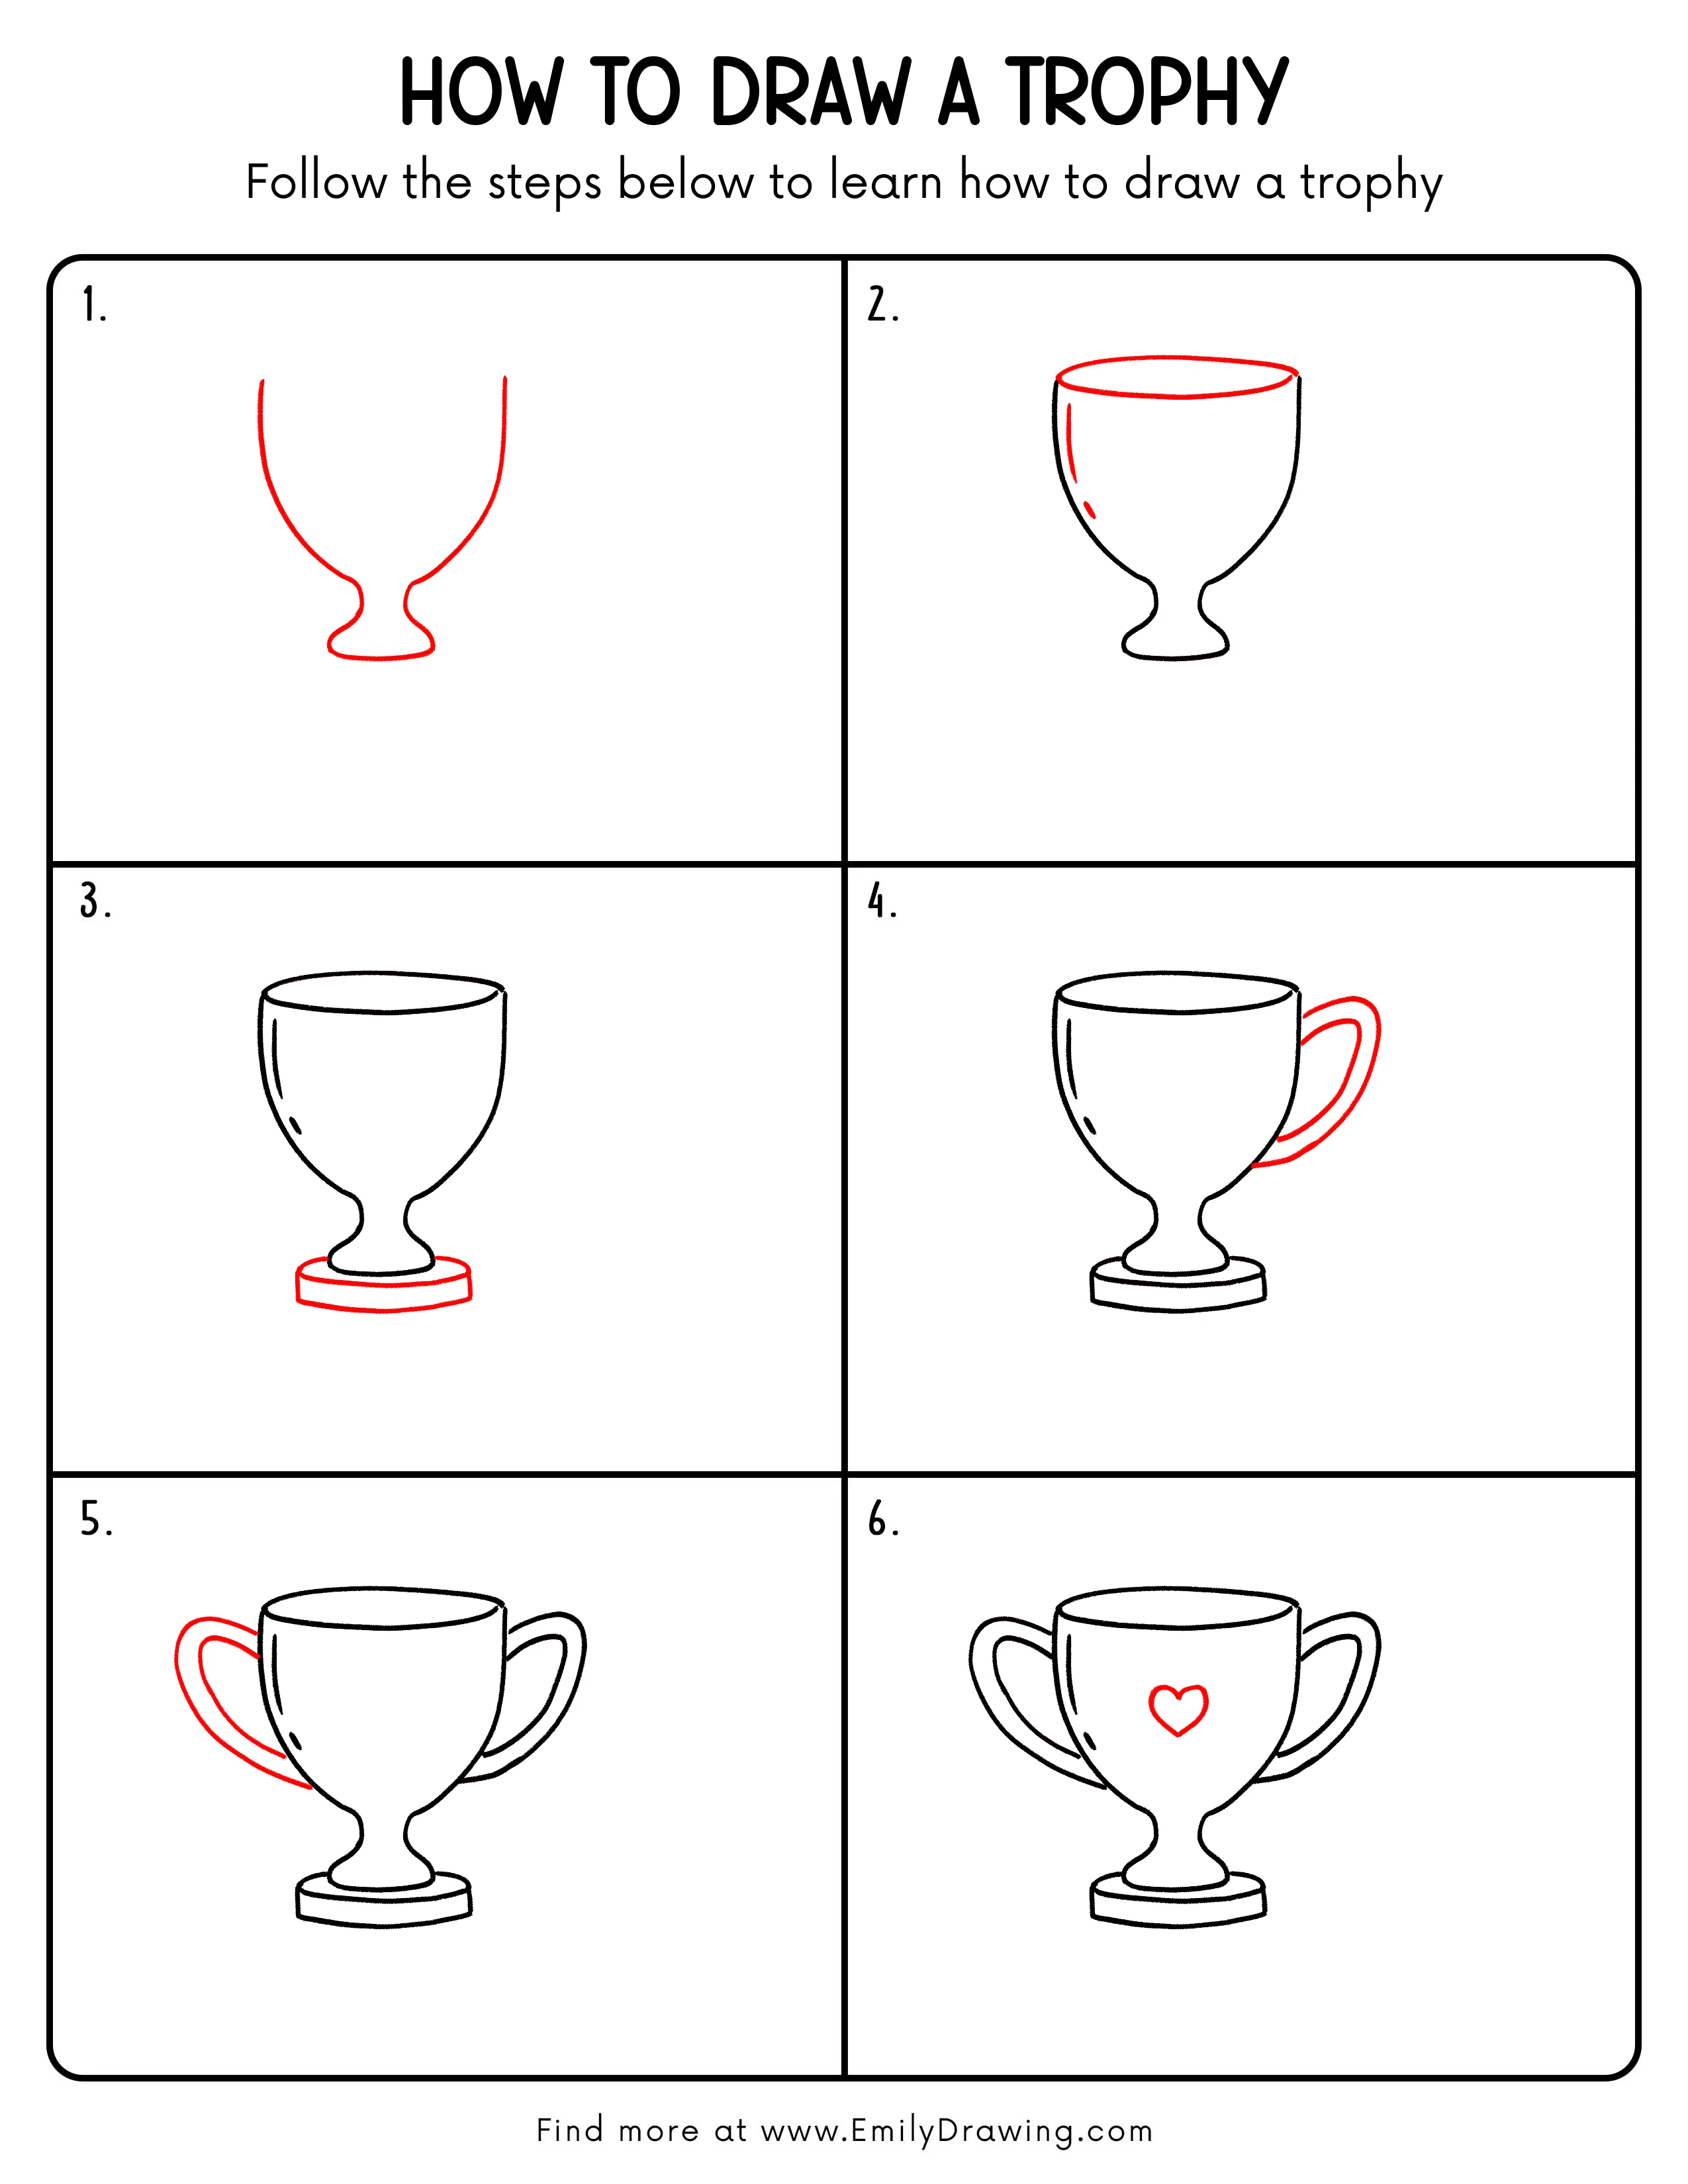
FREE Download Printable Trophy Drawing Tutorial
Frequently Asked Questions
Is this trophy drawing good for beginners?
Yes, this step by step drawing is beginner-friendly because it uses basic curves, ovals, and short detail lines.
What color should I use for the trophy?
Gold is a classic choice, but yellow, silver, or rainbow colors can also look fun and creative.
Can I change the heart decoration?
Yes, you can replace the heart with a star, number, letter, or small badge shape.