
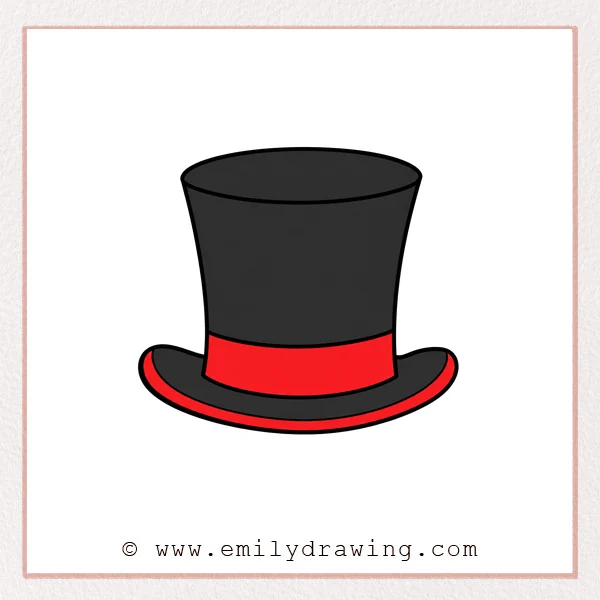
Learning how to draw top hat is a simple way to practice ovals, curves, and smooth proportions. This easy drawing tutorial is designed for beginners, with each step adding one clear part. Take your time, and keep your lines light at first.
What You Will Need
- Pencil
- Eraser
- Drawing paper
- Black marker or pen
- Coloring tools, if you want to add color
Here are my RECOMMENDED Art Supplies!
- Crayola Coloring Set (140 Pieces – Mega Value!)
- 24 Colored Crayon Set
- A4 Printer Paper
- Crayola Coloring Pencils
- HP Home Printer with Instant Ink!
Time needed:
11 minutes.
Step-by-Step Drawing Guide
Step 1: Draw the Brim and Left Side
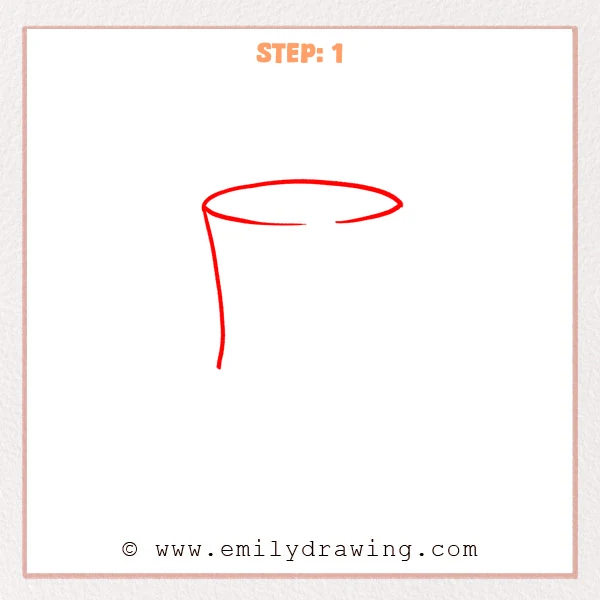
Start with a wide, flat oval for the brim of the top hat. From the left edge of the brim, draw a slightly curved long line downward to begin the hat body.
Pro Tip: Keep both ends of the oval level so the brim looks steady.
Step 2: Complete the Hat Body
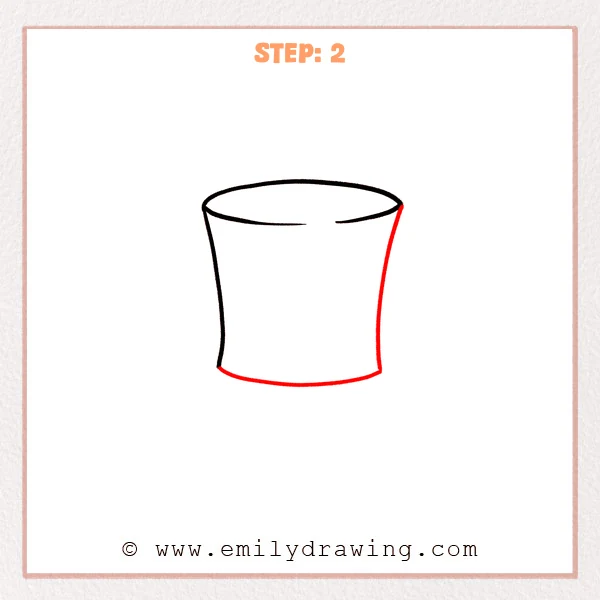
Draw a long curved line downward on the right side to form the body of the top hat. Then connect the bottom with a shallow curved line so the hat body feels complete and steady.
Pro Tip: Keep the two side curves similar in height so the hat body looks upright.
Step 3: Add the Hatband Divider
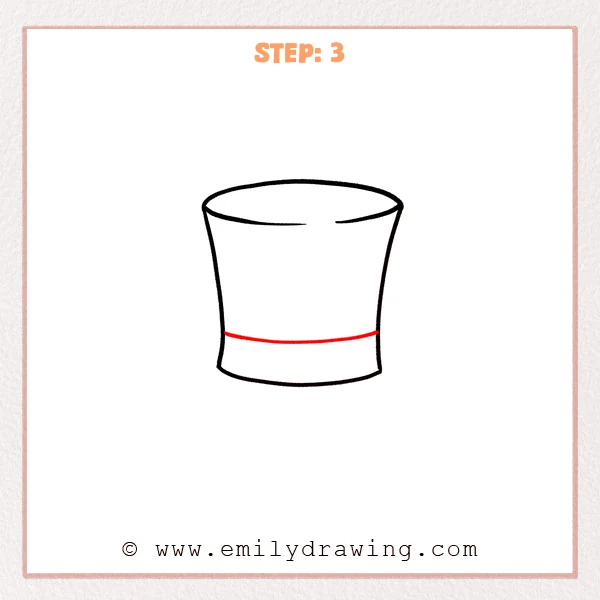
Draw a gently curved horizontal line near the lower part of the top hat body. Let it stretch from the left side to the right side, dipping slightly with the hat’s curve.
Pro Tip: Match the hatband line with the bottom curve so it looks more natural.
Step 4: Draw the Left Brim
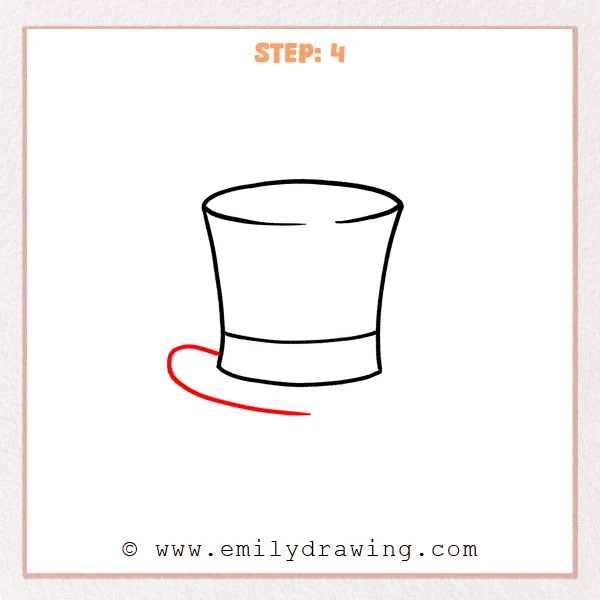
Extend a large curved line from the lower left side of the top hat. Let it sweep outward to the left, then gently return right to make the brim look wide and smooth.
Pro Tip: Make the outer curve wide, but keep it below the hatband level.
Step 5: Complete the Right Brim
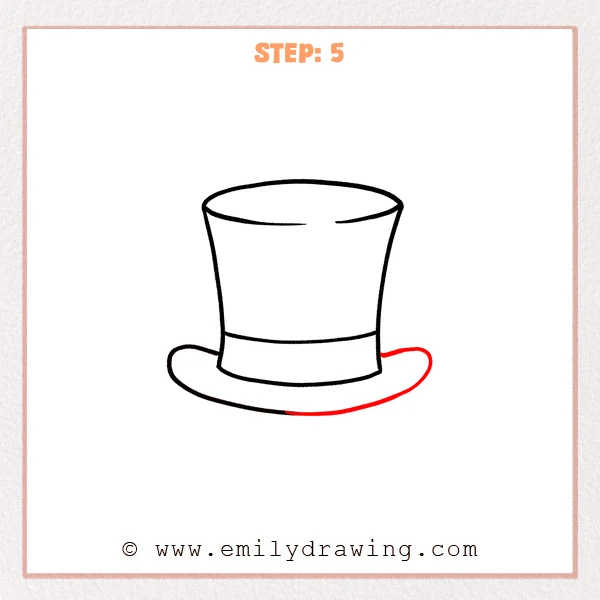
Continue the curved line from the lower right side of the top hat. Let it stretch outward, curve downward, and connect smoothly with the earlier brim line.
Pro Tip: Keep the right brim close in width to the left so the hat looks balanced.
Step 6: Add the Inner Brim Curve
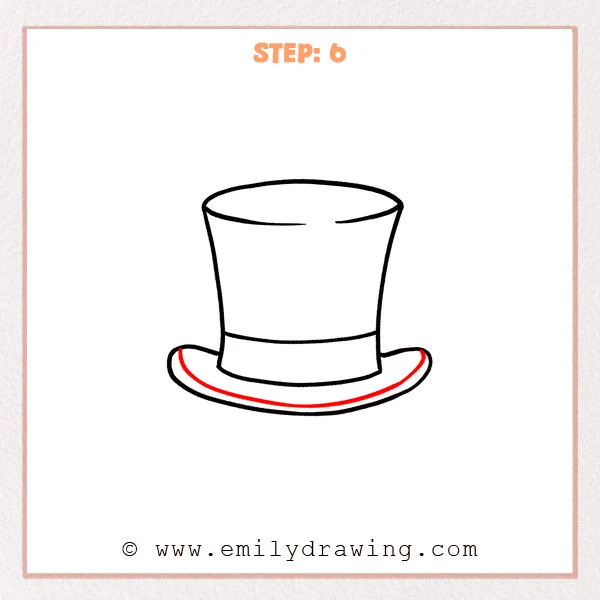
Draw a smaller curved line inside the wide brim to show the thickness of the top hat brim. Let it bend from the left side to the right side, following the outer brim shape closely.
Pro Tip: Keep an even gap between the inner curve and outer edge so the brim looks neat.
Step 7: Color in your drawing!
Fun Facts
Top hats became especially popular as formal wear in the 1800s. Their tall shape makes them easy to recognize in cartoons, costumes, and classic character designs. This step by step drawing also helps beginners practice ellipses and smooth curved lines.
Pin it now, Draw later!
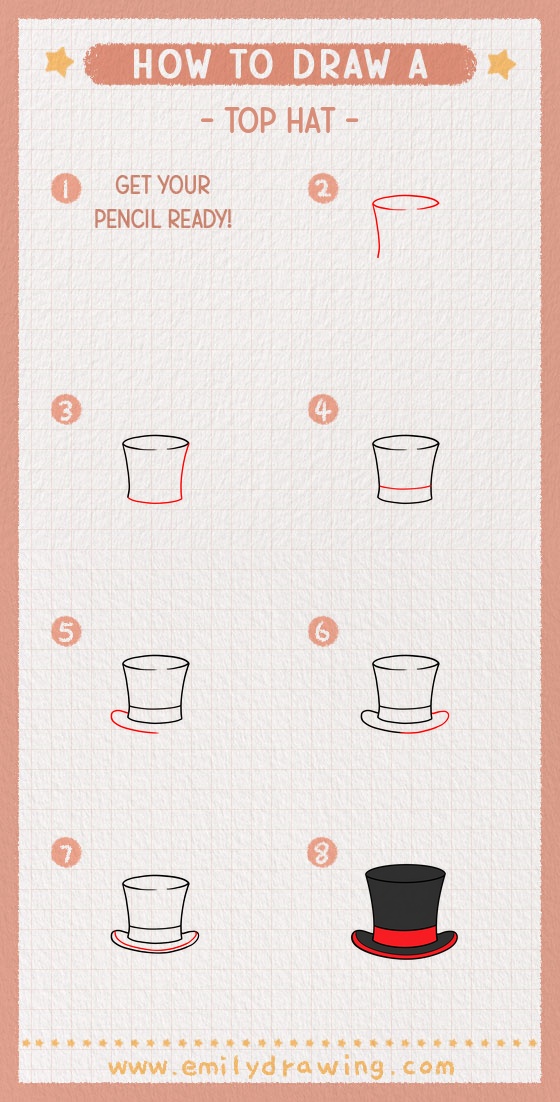
Now your top hat outline is ready for final details. You can trace the clean lines with a marker, erase extra pencil marks, and color the hat black, gray, or any fancy shade you like. Keep practicing this drawing for beginners, and try adding a bow, stars, or a small magic wand beside it.
Get the FREE Printable Drawing Guide
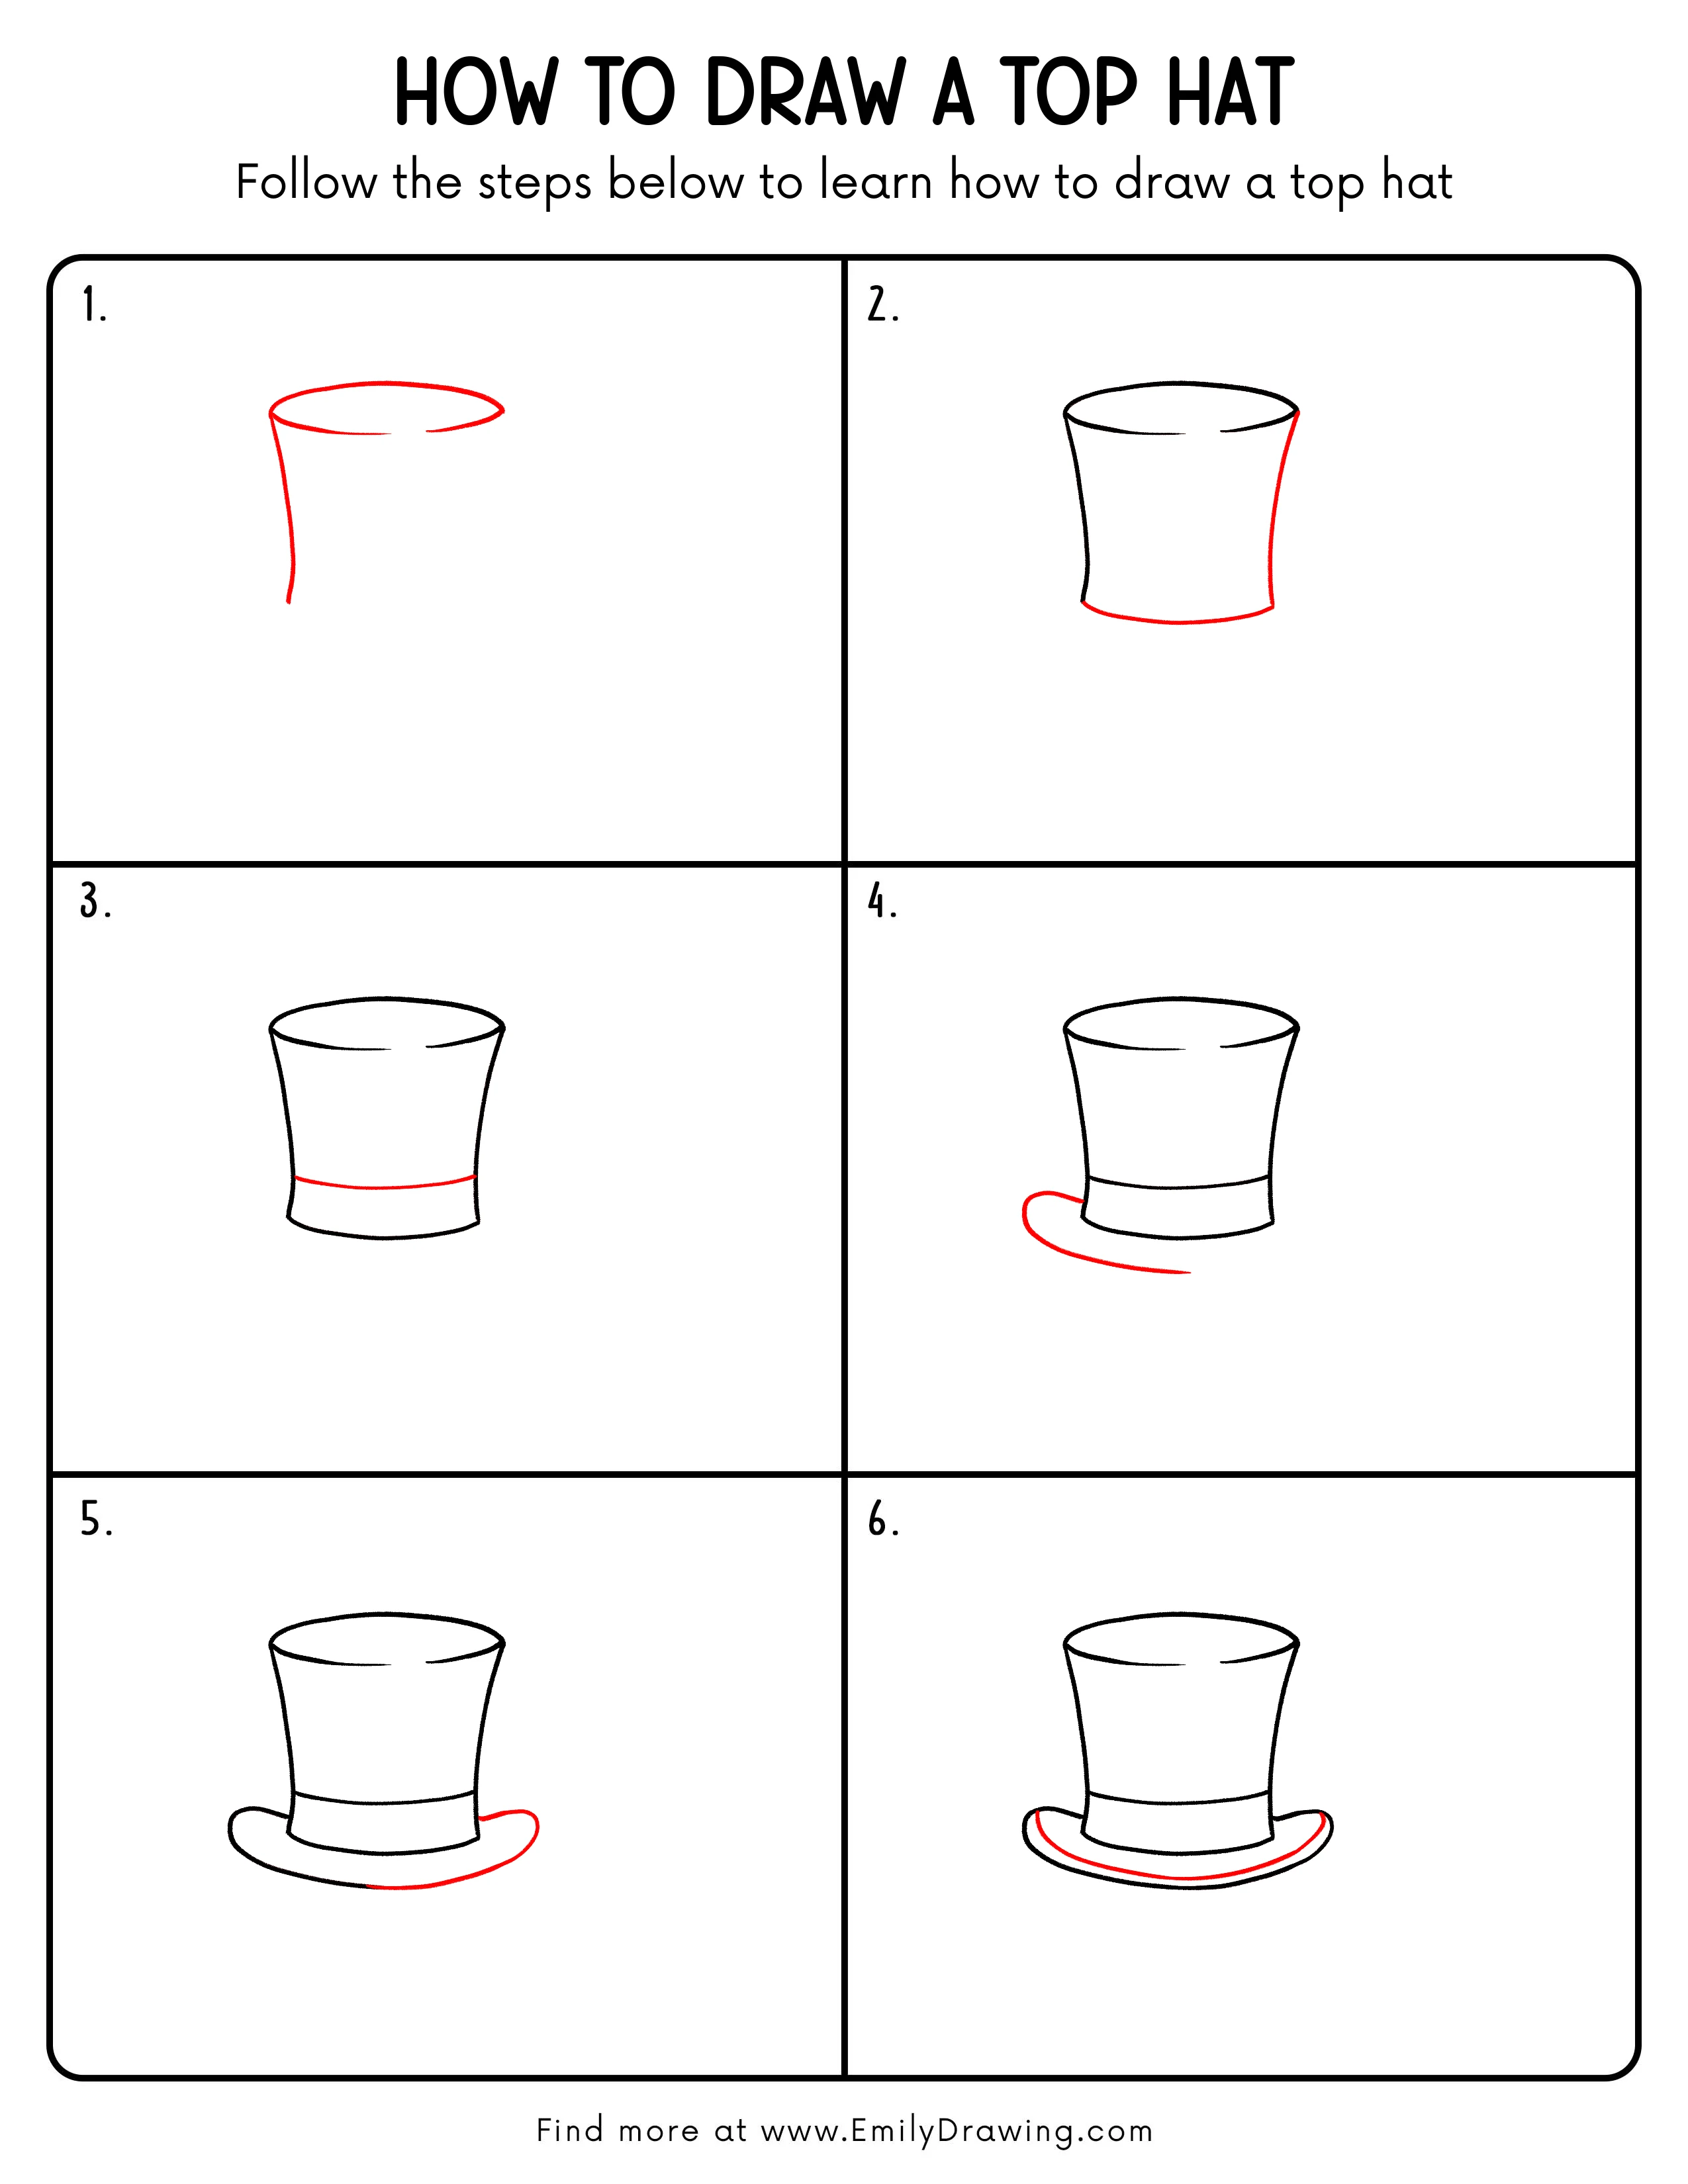
FREE Download Printable Top Hat Drawing Tutorial
Frequently Asked Questions
Is this top hat drawing good for beginners?
Yes, this easy drawing tutorial uses simple ovals and curved lines, so it works well for beginners.
How can I make the top hat look more three-dimensional?
Keep the top oval wide and flat, then curve the side lines slightly inward. The inner brim curve also helps show thickness.
What colors work best for a top hat?
Black and dark gray are classic choices, but bright colors can make the top hat look playful or magical.



