It is a well-known fact that all the swans in the UK were owned by the Queen of England. It means they are cherished and famous for their royal beauty and elegance throughout the world.
That’s why kids, novice artists, and experts want to draw the royal swan to enhance their drawing collection. But, they find it a difficult task as it is a regal bird with beauty—though similar in elegance, drawing a duck offers a slightly simpler introduction to bird sketches. Drawing its elegance on the paper requires expertise.
But, our simple nine-step guide could help you in drawing a swan as effortlessly as floating on the lake is. With some simple and basic shapes, anyone could draw a realistic swan here—much like this guide on drawing a duck, which also starts with smooth, flowing lines.
So, without wasting any time, let’s dive into this step-by-step swan drawing tutorial.
Grab the Art Supplies
Preparing yourself thoroughly before drawing is always a good idea. What do you think?
It feels good when you don’t have to stand up repeatedly to grab art supplies or resources in between doing your magic on the paper.
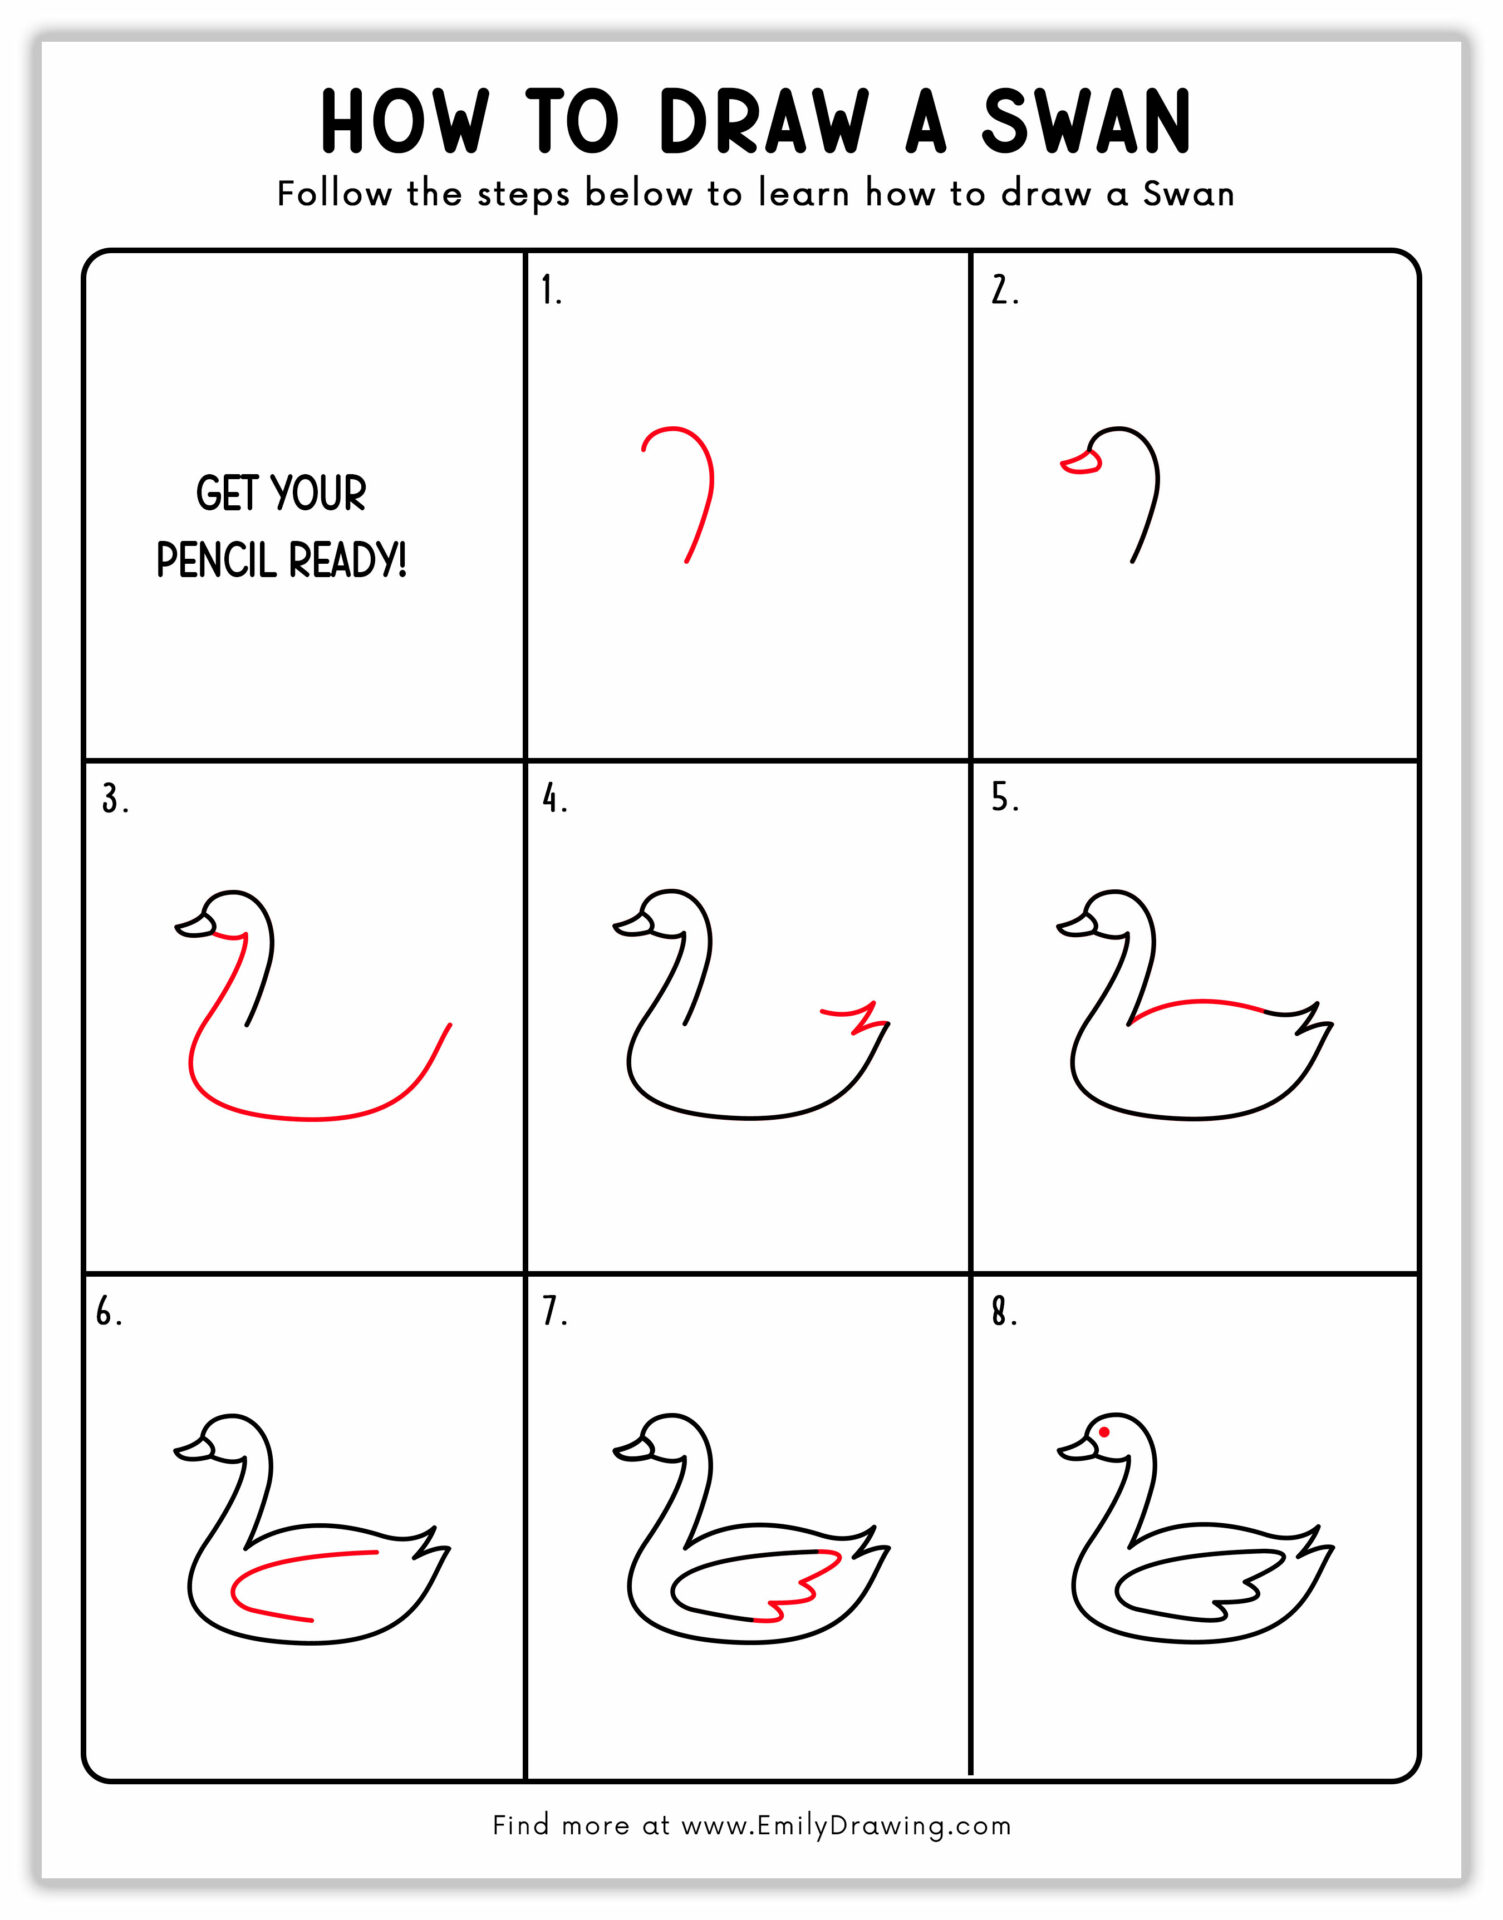
9-Step Tutorial of Drawing Swans
Materials:
- a piece of paper
- a pencil for the guiding lines and sketching
- an eraser
- a black sharpie or a pen for the outlines
- markers or colored pencils for coloring
- our printable drawing guide (Join my Email List below to get this Tutorial)
Here are my RECOMMENDED Art Supplies!
- Crayola Coloring Set (140 Pieces – Mega Value!)
- 24 Colored Crayon Set
- A4 Printer Paper
- Crayola Coloring Pencils
- HP Home Printer with Instant Ink!
Time needed:
15 minutes.
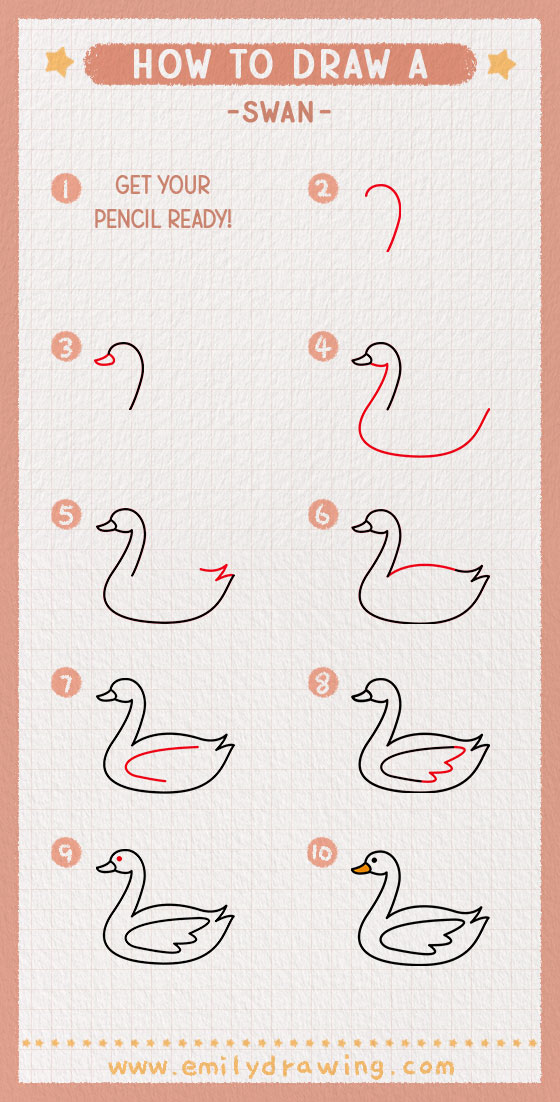
How to Draw a Swan — Let’s get started!
Step 1 – Draw the Swan’s Head and Neck
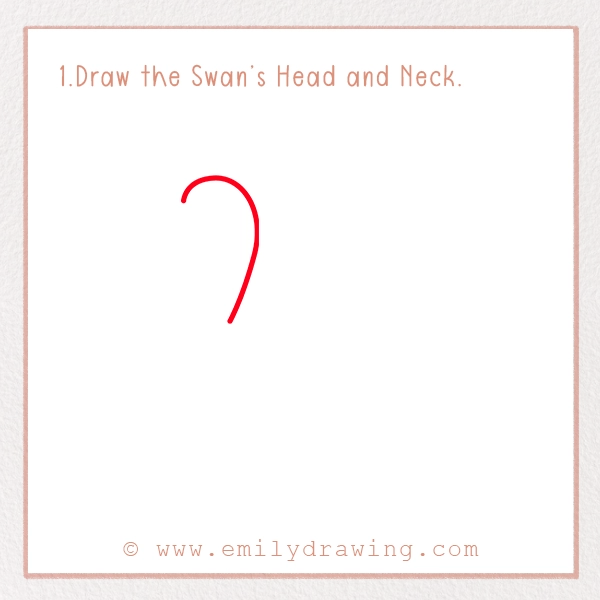
The easiest way of drawing a swan is to start with the outline of its head and neck. As it is an elegant bird, you need to be careful while drawing the head and neck.
It is recommended to keep your hands light while making the first attempt. Because it would be easy to erase any mistakes.
First, put your pencil near the top center of the page. Draw a smooth curved line that resembles a backward “S”.
Make sure that your S is narrow at the top as it is making your head. But, it should widen when you come down to make an elegant neck.
Step 2 – Add the Beak
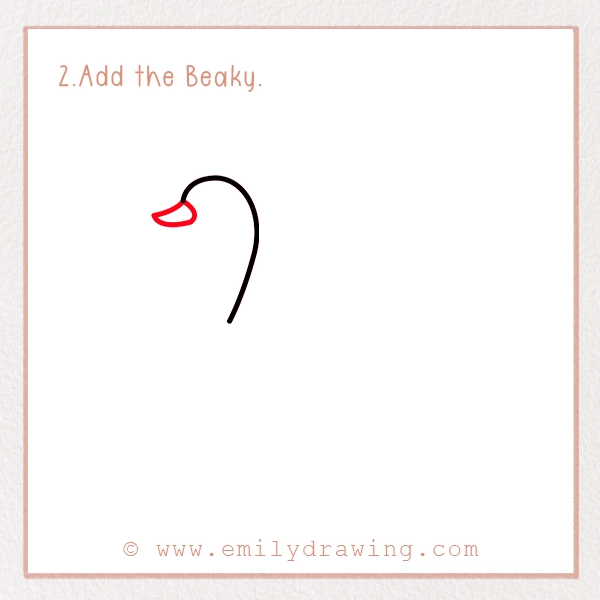
This step will focus on drawing the beak of your swan. For this, you need to create a small, rounded triangular shape on the head. You can see the reference picture for a better idea.
Here, make sure that the bottom of your beak is slightly flatter to resemble the real shape of a swan’s beak.
Finally, add a distinguishing line to differentiate the beak and the head.
Step 3 – Outline The Body
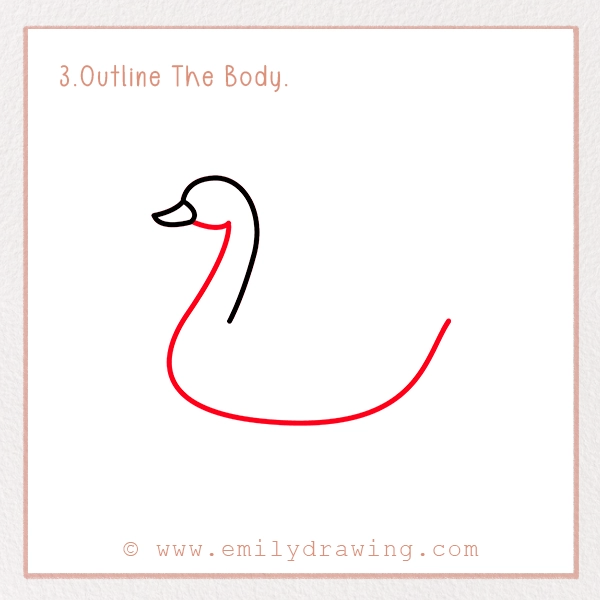
In this step, we need to focus on the lower body side of the swan.
For this, draw a small curved line, extending the beak, to give the shape to the swan’s head.
Next, draw a curved line in the downward direction. Make sure to keep it parallel to the back line of the swan’s neck, much like the arched silhouette in this heron drawing tutorial. In the reference picture, you can see the distance between these two lines. So, make sure to keep it like that.
Finally, create an oval shape with the back open. It should resemble the picture of a sitting or floating swan.
Step 4 – Add Tail Feathers
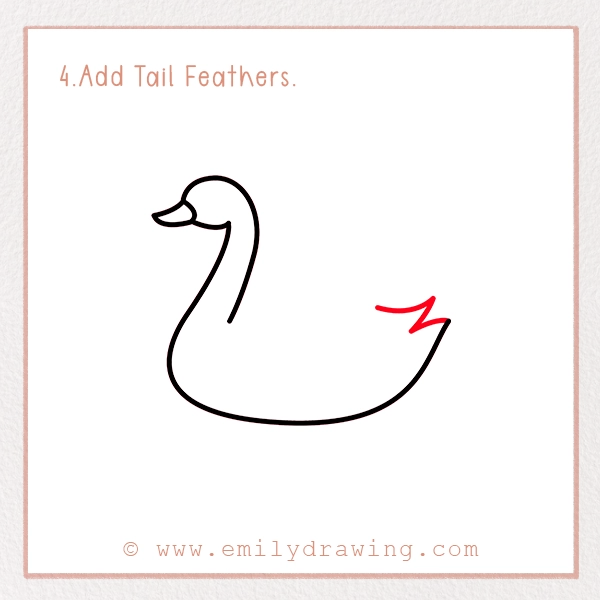
The swan drawing is incomplete without a tail. So, we are adding some tail feathers in this step, which is very easy and simple to do.
What you have to do is just add two to three small triangular shapes at the end of the swan’s body. You can see two sharp curves meeting at the point in our reference picture.
Here, make sure that the tail is small and taper neatly at the end of the body.
Step 5 – Add The Front of the Body
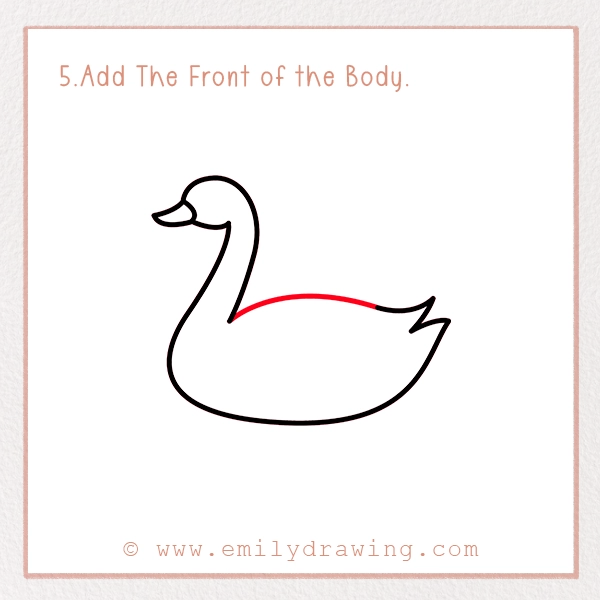
Until now, the front of our swan is open. So, it is time to close it to make a complete swan picture.
For this, connect the tail feathers with the base of the neck. Make sure to keep it in the oval shape as shown in our reference picture.
The body of the swan is plump and graceful so you have to keep it like this in your drawing—similar to how a heron’s form balances slenderness and poise.
Step 6 – Adding Body Details
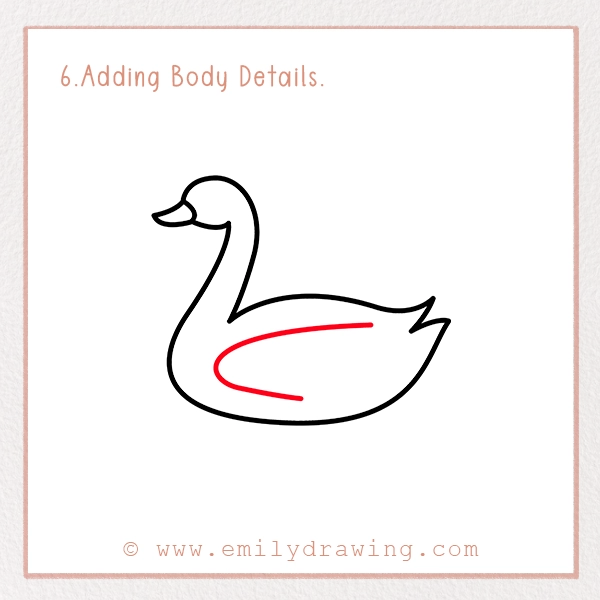
To this point, a beautiful swan must be staring you back from your paper or drawing tablet. But it needs some detailing to enhance its elegance.
So, you need to create a wing outline to give the swan a realistic look. Put your pencil or pen in the middle of the oval body and draw a curve shape.
It should be angled slightly upward toward the tail. Make sure it doesn’t overlap with the outline of your swan’s body.
Step 7 – Add Feather Details
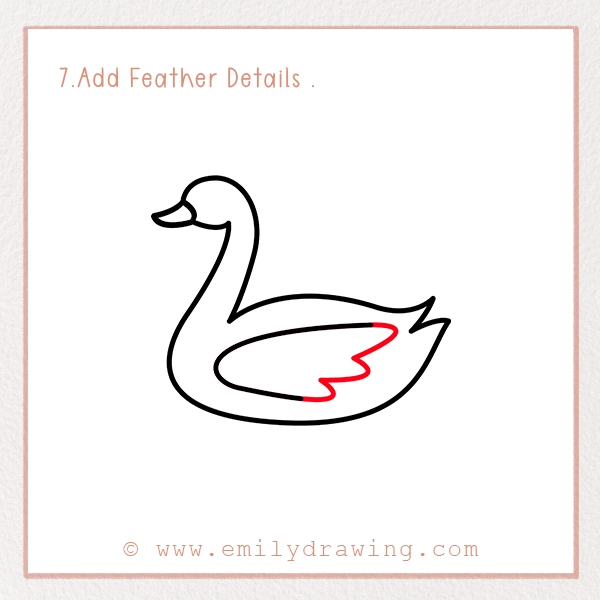
Don’t you think wings are incomplete without feathers? So, let’s make them in this short step.
Draw two to three small curved shapes starting from the top of the wing. They should be pointing toward the tail similar to our reference picture.
Step 8 – Add Eyes
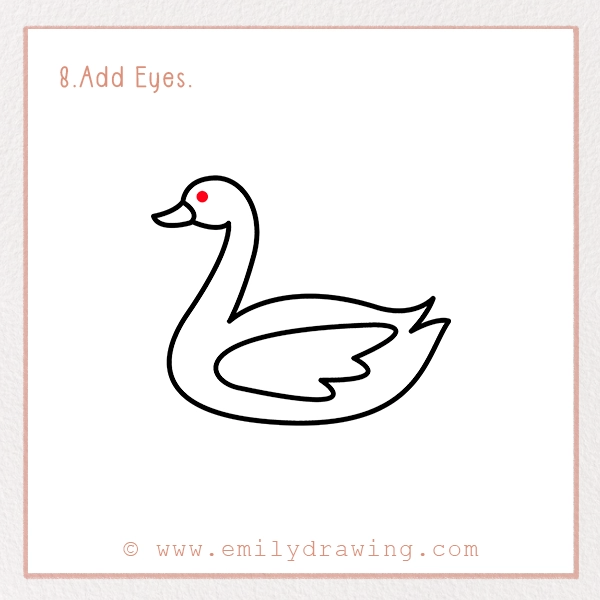
You must have a feeling that your swan is still incomplete. So, let’s make its eyes to give it an elegant look.
For this, add a small circle just on the backside of the beak. Darken it and add a tiny white dot in it for a light spot.
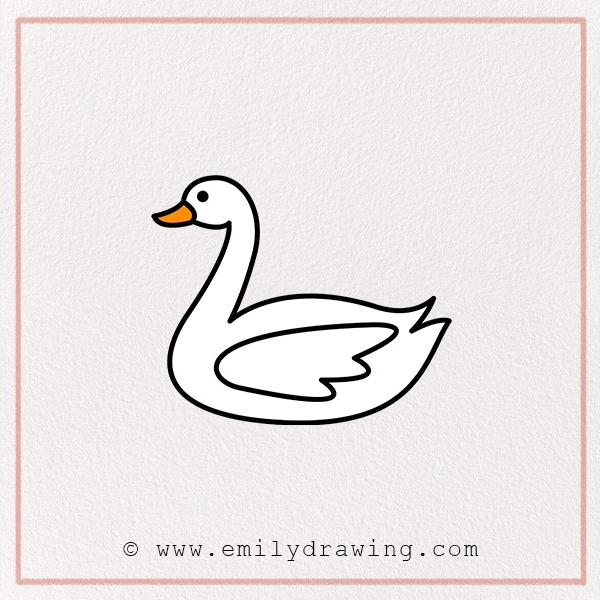
Here it is! Your realistic swan drawing is complete. You could cherish your hard work and could proudly add this drawing to your collection.
But, wait! There is one thing still missing: creativity. Let’s add it in our next step.
Step 9- Coloring
Grab your favorite colors and follow this swan coloring guide to bring your drawing to life. Watercolors, acrylic paints, pencil colors; everything will work here.
In our reference picture, we have colored the body in a beige color and beak in a dark orange color. But, you could go with any color of your liking.
We suggest you avoid dark colors here because swans are the symbol of peace and elegance. Dark colors will kill its realistic vibes, so stick to white, beige, or light blue color for the body.
Tips to Enhance Your Drawing
At this point, you have created a realistic swan picture. But, to make it a next-level drawing, you could do some experiments with it—perhaps pair it with another elegant bird from this flamingo tutorial.
You could add any background to it. We suggest a serene environment in the background such as the mountains or lake—or even draw another graceful bird alongside, like in our flamingo drawing guide. But, if you want, you could see some real pictures of swans to get more ideas.
Moreover, you could make a group of swans by following our guide repeatedly. You could make a baby swan by keeping the size of your swan drawing small.
The sky has no limit, so experiment with different things to enhance your drawing.
Pin it now, Draw later!
 />
/>Conclusion
The whole point of drawing is to enjoy and unleash your creativity in it. So, draw the swan by following this guide, and then have some fun with your colors and backgrounds.
Once you are satisfied with your drawing, share it with your friends and family members. If you want to continue your drawing journey, don’t forget to check our other drawing guides.
Get the FREE Printable Drawing Guide