Hello, and welcome to another ten-step tutorial by Emily Drawing! Today’s tutorial is all about creating an arctic wolf drawing! We’re going to take you through ten simple steps to draw this four-legged animal.
Arctic wolves are white with two layers of fur coats, similar to their close cousins—arctic foxes—who share the same icy habitat. The first layer is their waterproof inner coat, and their outer coat is thick. These wolves also have smaller ears and legs and shorter muzzles than gray wolves, measuring 1m to 1.8m, including their tail. However, their short bodies help them to retain their body heat in colder temperatures.
These wolves howl for several reasons, from communicating with their pack to simply playing. Every wolf has its own unique howl, and several wolves howling together makes their pack sound bigger. For another arctic animal with a mysterious aura, try our snowy owl drawing tutorial.
Arctic wolves are amazing animals indeed, just like their fellow arctic dwellers—check out our guide on how to draw a polar bear! Now, it’s time to get to the tutorial. Grab your colored pencils or markers, and get ready for this easy wolf drawing tutorial.
Materials:
- a piece of paper
- a pencil for the guiding lines and sketching
- an eraser
- a black sharpie or a pen for the outlines
- markers or colored pencils for coloring
- our printable drawing guide (Join my Email List below to get this Tutorial)
Here are my RECOMMENDED Art Supplies!
- Crayola Coloring Set (140 Pieces – Mega Value!)
- 24 Colored Crayon Set
- A4 Printer Paper
- Crayola Coloring Pencils
- HP Home Printer with Instant Ink!
Time needed:
15 minutes.
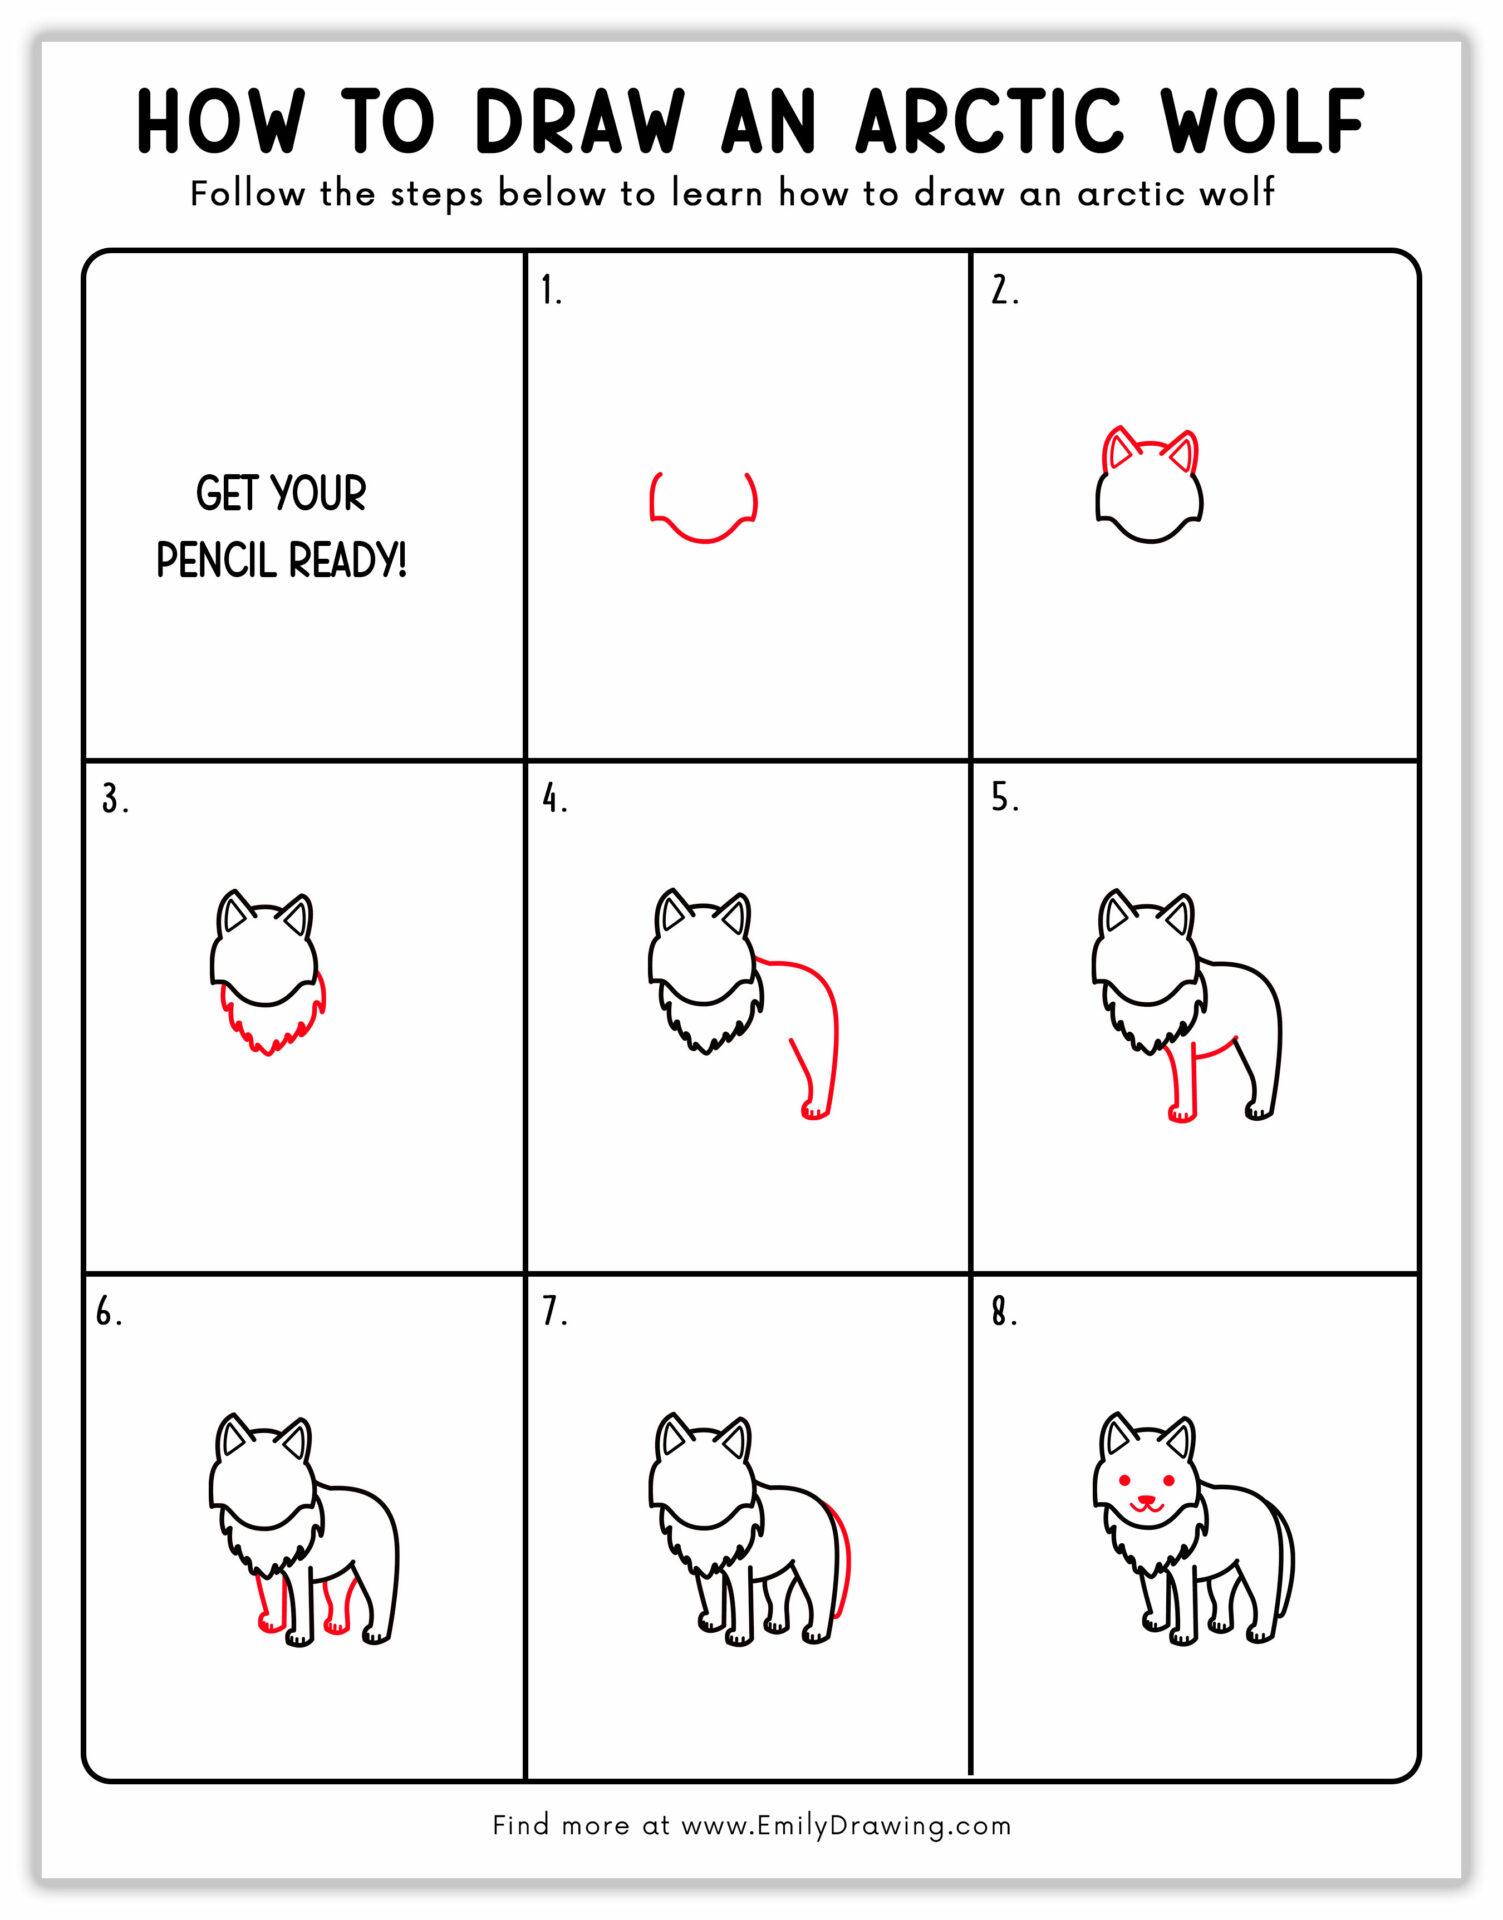
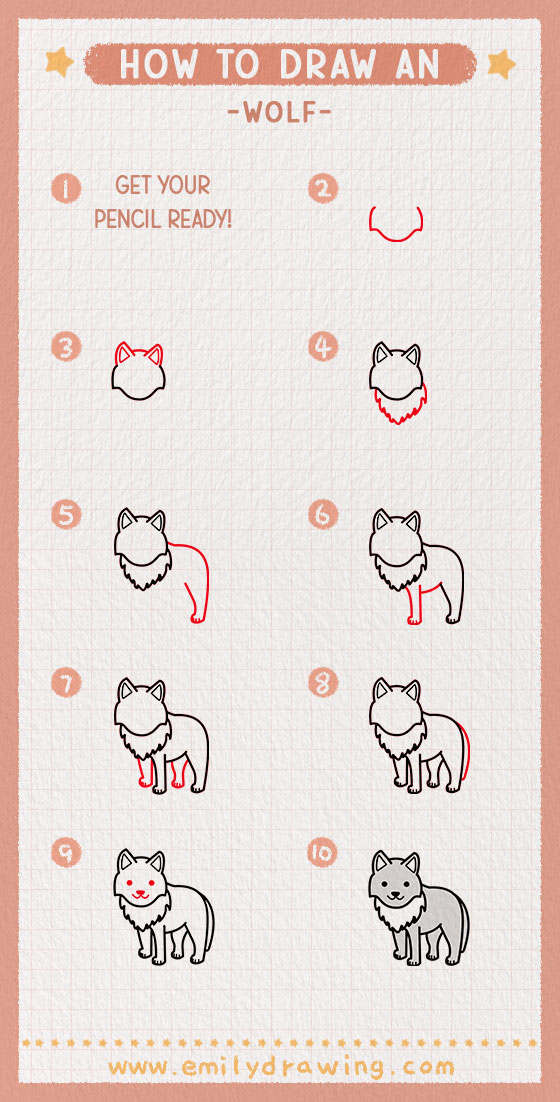
How to Draw an Arctic Wolf — Let’s get started!
Step 1 – Draw the bottom of the Arctic Wolf’s head.
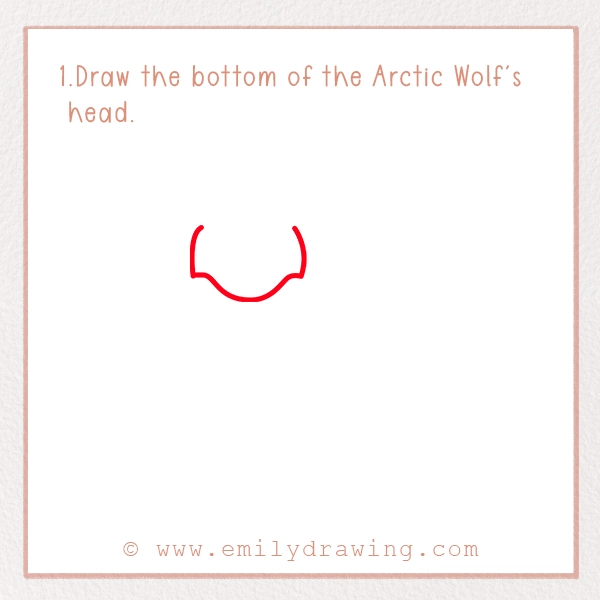
You’re going to begin with the bottom of the Arctic wolf’s head, which includes its chin and side fur. Start by drawing a line that slightly curves outward. Next, you’re going to draw a line curving downward; this is the chin. Finish it off by drawing another line upward, but be sure it slightly curves outward, just like on the other side of the head. Don’t close the top of the head yet.
Step 2 – Draw the top of the head and ears of the Arctic Wolf’s body.
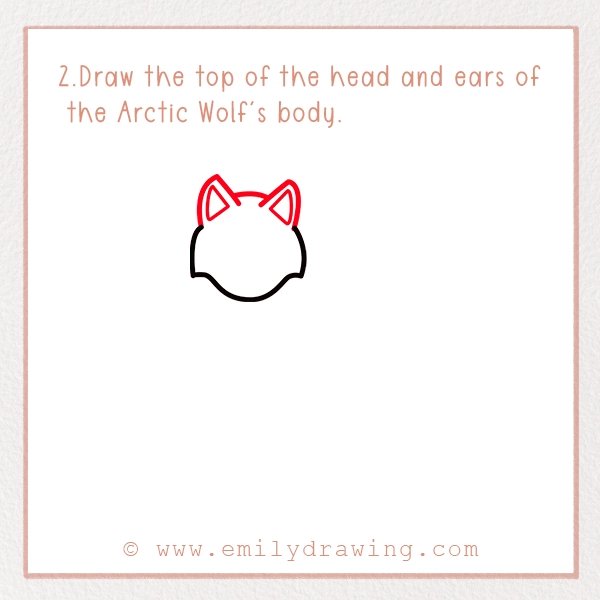
Close the top of the Arctic wolf’s head by drawing its small, triangle-shaped ears. You’re going to add the details to the ears in this step to pinpoint the inner and outer ear. Next, draw a small line that slightly curves upward between the ears, as this is the top of the wolf’s head. By the way, Arctic wolves can move their ears independently to identify a sound.
Step 3 – Draw the Arctic Wolf’s neck fur.
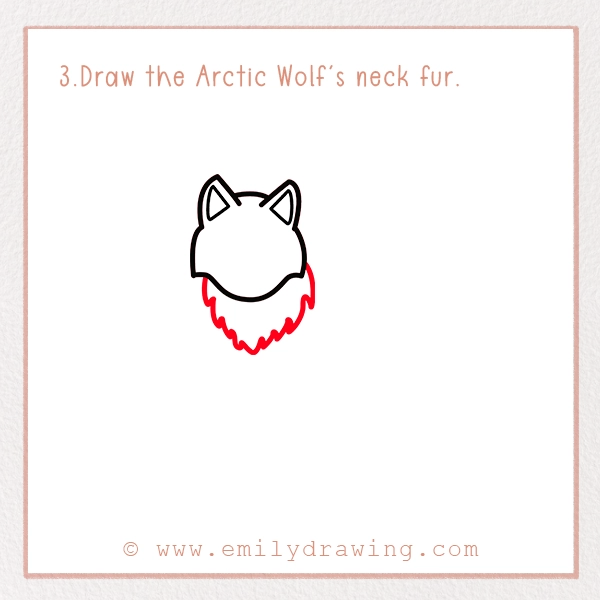
The next step is to draw the Arctic wolf’s neck fur. It almost looks like a beard at first, but it’ll look more like neck fur once the body is added. Did you know Arctic wolves aren’t white when they’re born? They’re brown or black and turn white by the end of their first year. A small patch of dark fur may remain above their tail’s base for several more years.
Step 4 – Draw one side of the Arctic Wolf’s body.
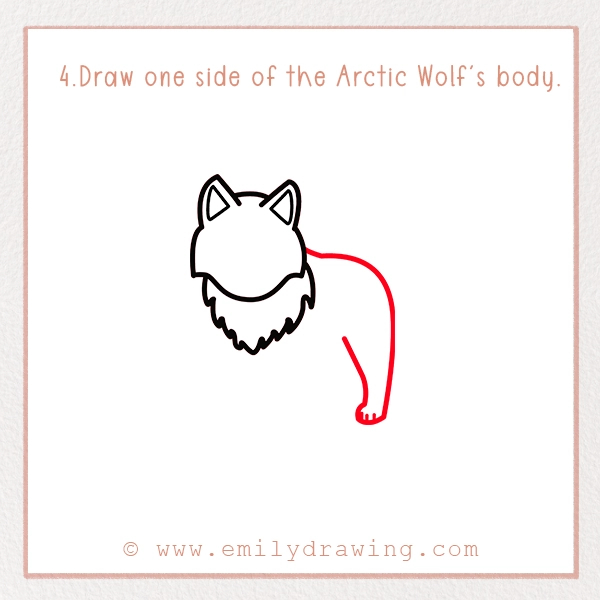
Now, you’re going to draw one side of the wolf’s body. For this step, you’re just drawing the back and one back leg. You’ll start with the top of the back, which slightly curves to create a realistic body shape. Then you’ll move onto the back leg, including the foot and front of the leg. The line for the front leg should go upward, but not to the top of the body.
Step 5 – Draw the other side of the Arctic Wolf’s body.
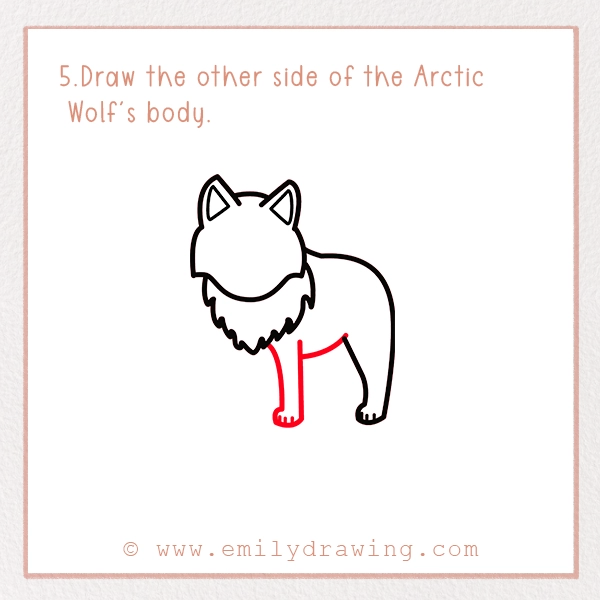
Use this step to draw the wolf’s belly and one of its front legs. The back of this leg slightly overlaps the belly, and the front line of the leg goes up to the neck fur. Did you know the Arctic wolf can run up to 30 to 40 miles per hour? While they cannot maintain this speed for long distances, they can use bursts of speed to catch their prey.
Step 6 – Draw the Arctic Wolf’s other legs.
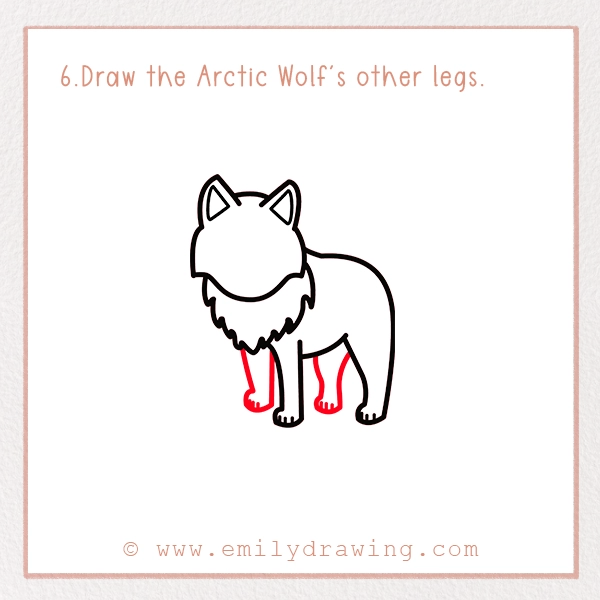
For this step, you’re going to draw the Arctic wolf’s left legs. The back leg is slightly overlapped by the belly and front back leg, as the wolf is standing in a left-facing position. When drawing, the front leg comes down from the neck fur. Following the visual tutorial, this step is easier than it sounds.
Step 7 – Draw the Arctic Wolf’s tail.
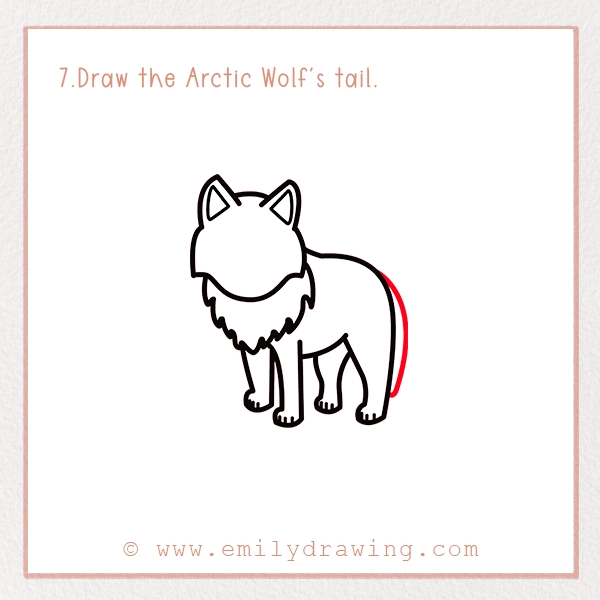
It’s time to add the Arctic wolf’s tail, which is one of the easiest steps of this tutorial. All you’re going to do is add a curved shape to the backside of the wolf. The tail is going to be facing downward, so you can run it along the shape of the backside. Fun fact: an Arctic wolf uses its tail to protect its face from the cold while asleep. It can also use its tail to communicate with other Arctic wolves. Believe it or not, this includes showcasing its feelings, as well as showing dominance.
Step 8 – Draw the Arctic Wolf’s face.
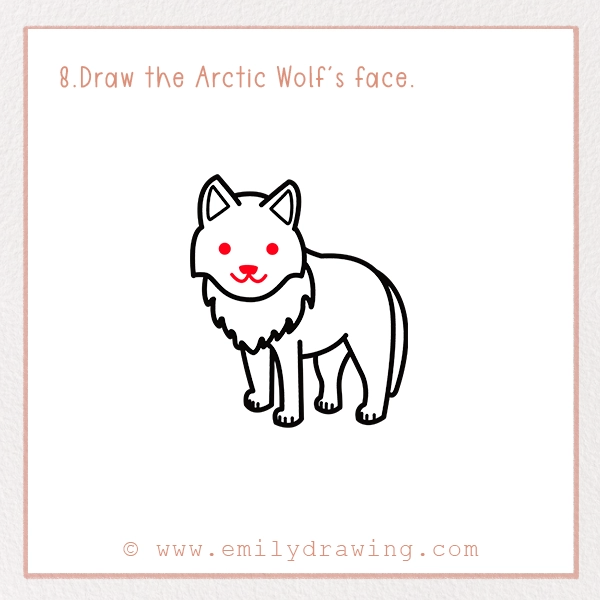
The final step of drawing the Arctic wolf is adding its face, starting with two dots for the eyes. Like other animal tutorials, the nose is an upside-down triangle shape, and two curves come down from the nose to indicate the mouth. We wanted to appeal to all ages, so we’ve decided to use an adorable, smiling face instead of a wolf with an opposite expression. Of course, you can change the facial expression if you’d prefer something different.
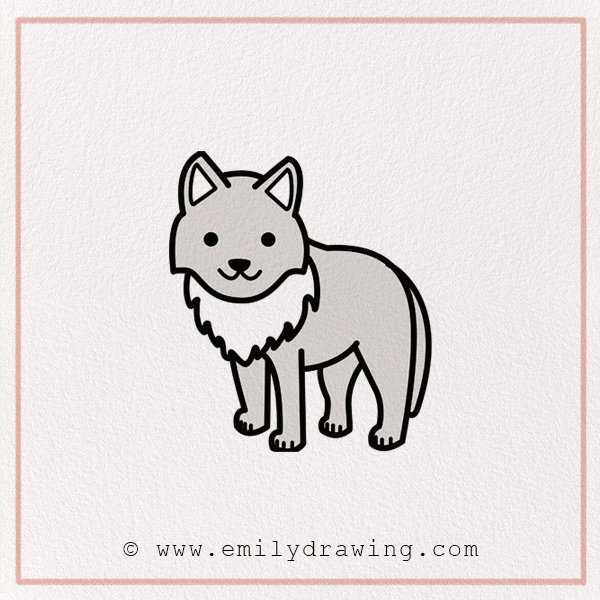
Step 9 – Color In Your Drawing!
Wait a minute, there’s one more step in this Arctic wolf tutorial! You still need to color your wolf—this is where our wolf coloring guide comes in! We wanted to ensure there was a pop of color, so our wolf features a gray fur coat, and the inner ear and neck fur of our wolf is white. You can think of it as a young wolf who has not turned completely white yet. You may decide to color your Arctic wolf white, or off-white to ensure the color shows up, or you can go crazy with an entirely different color scheme. After all, the key to our tutorials is to have fun while learning a new skill.
Pin it now, Draw later!
We’ve just completed our how-to-draw an Arctic wolf tutorial together—want more wintry vibes? Learn how to draw a snowy owl next! Did you enjoy drawing this small but adaptable animal? If so, you might also love learning how to draw an arctic fox—another iconic snowy creature! If you want to explore other animal tutorials, feel free to check out our site. We offer a range of simple drawing tutorials, including this frosty friend—learn how to draw a polar bear in just a few easy steps!
Get the FREE Printable Drawing Guide