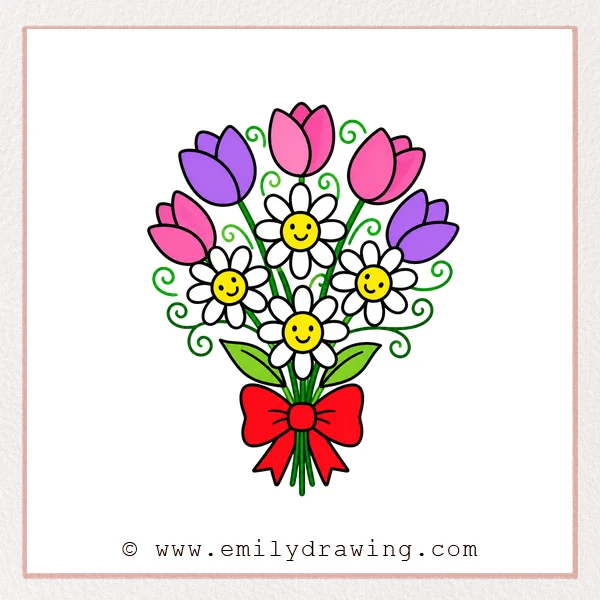
Learning how to draw spring flowers is a cheerful way to practice simple shapes. This easy drawing tutorial uses round flower centers, soft petals, tulip buds, stems, curls, leaves, and a bow. Take your time with each step, and enjoy building a bright bouquet for beginners.
What You Will Need
- Pencil
- Eraser
- Black marker or pen
- Coloring tools
- Drawing paper
Here are my RECOMMENDED Art Supplies!
- Crayola Coloring Set (140 Pieces – Mega Value!)
- 24 Colored Crayon Set
- A4 Printer Paper
- Crayola Coloring Pencils
- HP Home Printer with Instant Ink!
Time needed:
21 minutes.
Step-by-Step Drawing Guide
Step 1: Draw the Basic Shapes of Three Spring Flowers
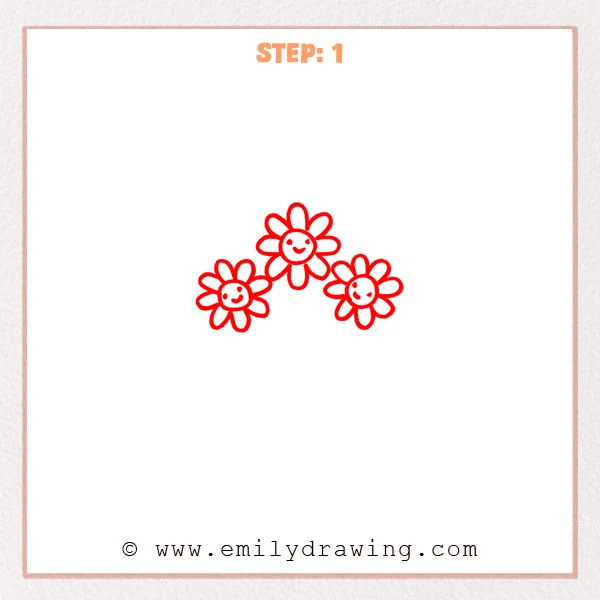
Start with three cheerful spring flowers across the page. Draw a round center for each flower, then add rounded petals around each center. Add small smiling faces inside the flower centers for a friendly look.
Pro Tip: Make the middle flower slightly larger to create a stronger sense of depth.
Step 2: Add the Fourth Flower and Left Leaves
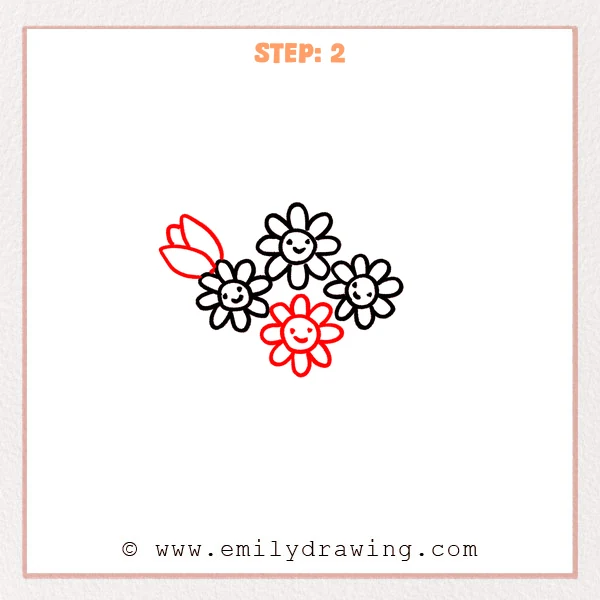
Add a fourth flower in the lower middle to make the group fuller. Draw three long rounded leaves at the upper left, with the tips gently reaching outward. Keep the new shapes close enough to feel like one bouquet.
Pro Tip: Place the new flower slightly lower to create a natural height variation.
Step 3: Add the Tulip Buds Above
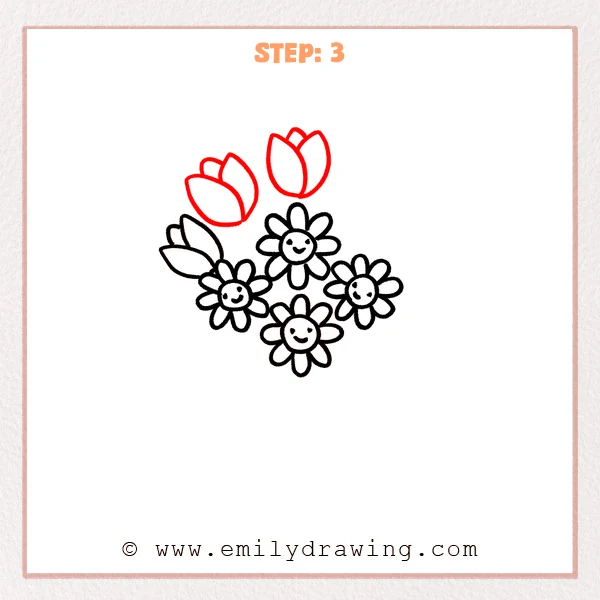
Draw two tulip-shaped spring flowers above the flower group. Use a few curved lines on each bud to separate the petals. Keep the tops gently open so the buds look soft and fresh.
Pro Tip: Place the buds higher than the round flowers so the drawing feels more like a bouquet.
Step 4: Add the Tulip Buds on the Right
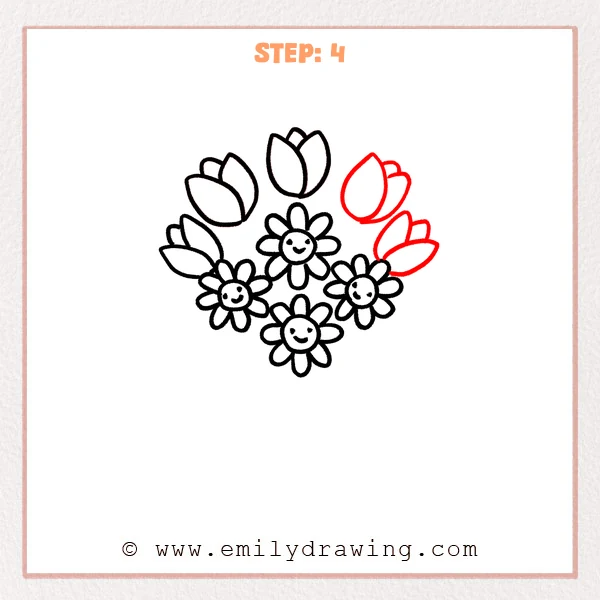
Draw two more tulip-shaped spring flowers on the upper right. Place one bud higher and the other closer to the small flower on the right. This helps build a natural bouquet outline.
Pro Tip: Tilt the right-side buds slightly to make the bouquet look relaxed and natural.
Step 5: Draw the Stems and Curly Accent Lines
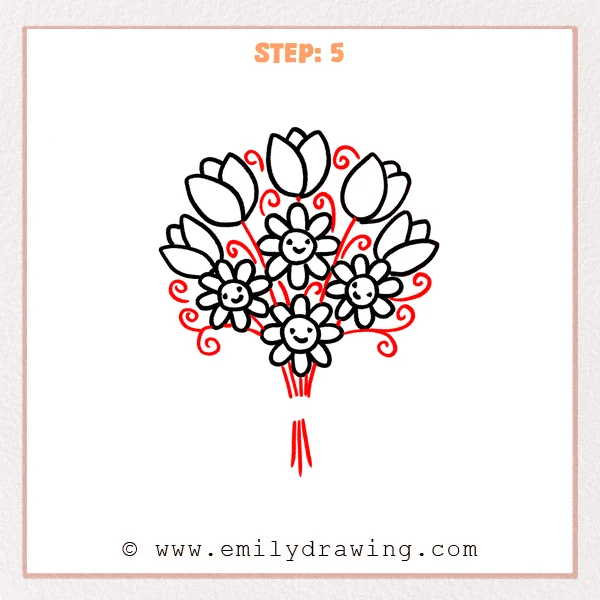
Add slim stems between the flowers to connect the spring flowers into one bouquet. Then draw a few curly lines reaching outward around the bouquet. These light accents make the step by step drawing feel lively and decorative.
Pro Tip: Let the stems gather downward so the bottom of the bouquet looks neat.
Step 6: Add the Bow and Lower Leaves
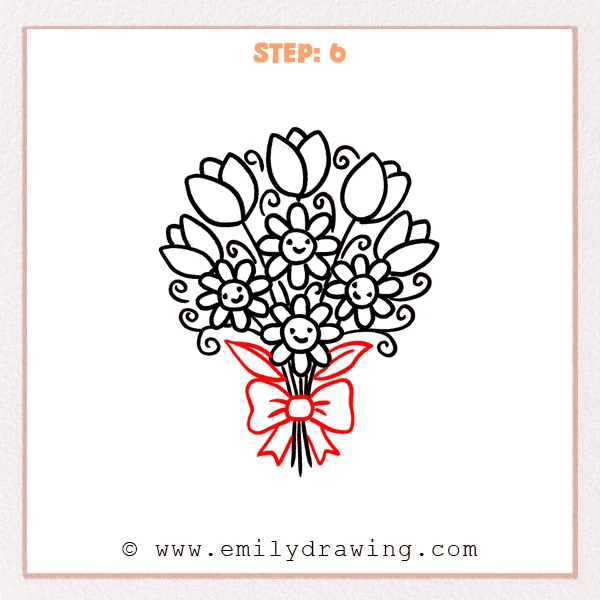
Draw a large bow where the stems meet so the spring flowers look like a finished bouquet. Add two long leaves above the bow, then extend the stems downward below it. This final shape completes the drawing for beginners with a sweet wrapped-bouquet look.
Pro Tip: Keep the bow center aligned with the stems so the bouquet looks stable and neat.
Step 7: Color in your drawing!
Fun Facts
Spring flowers often symbolize fresh starts and warmer days. Tulips can come in many colors, including red, yellow, pink, purple, and white. Simple smiling flower faces can make a bouquet drawing feel friendly and welcoming.
Pin it now, Draw later!
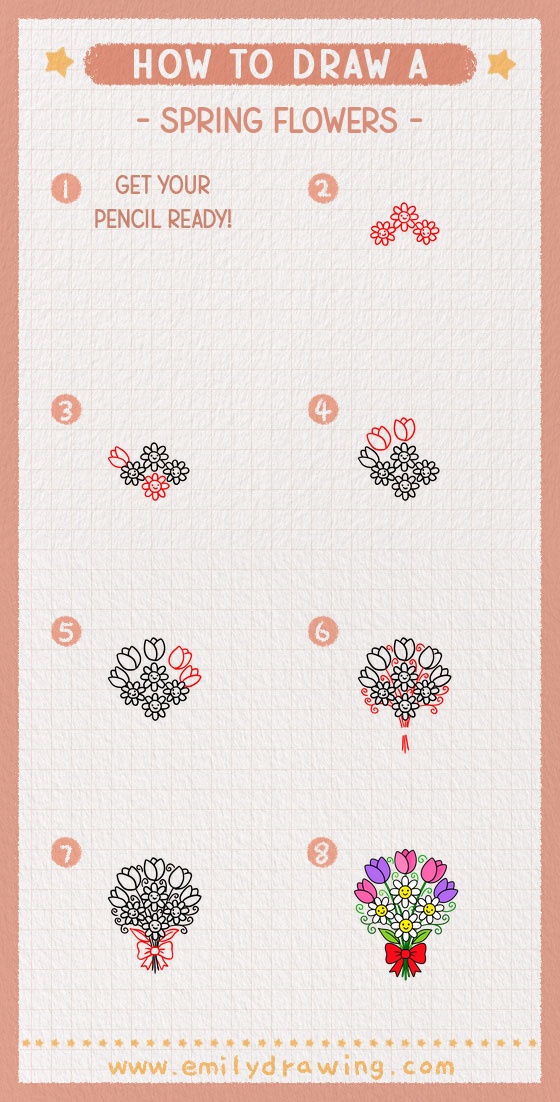
Trace your favorite lines with a black marker, then erase any extra pencil marks. Add soft colors to the petals, leaves, stems, and bow. Now you have completed an easy drawing tutorial on how to draw spring flowers, step by step.
Try drawing another bouquet with different colors, taller stems, or extra tiny flowers.
Get the FREE Printable Drawing Guide
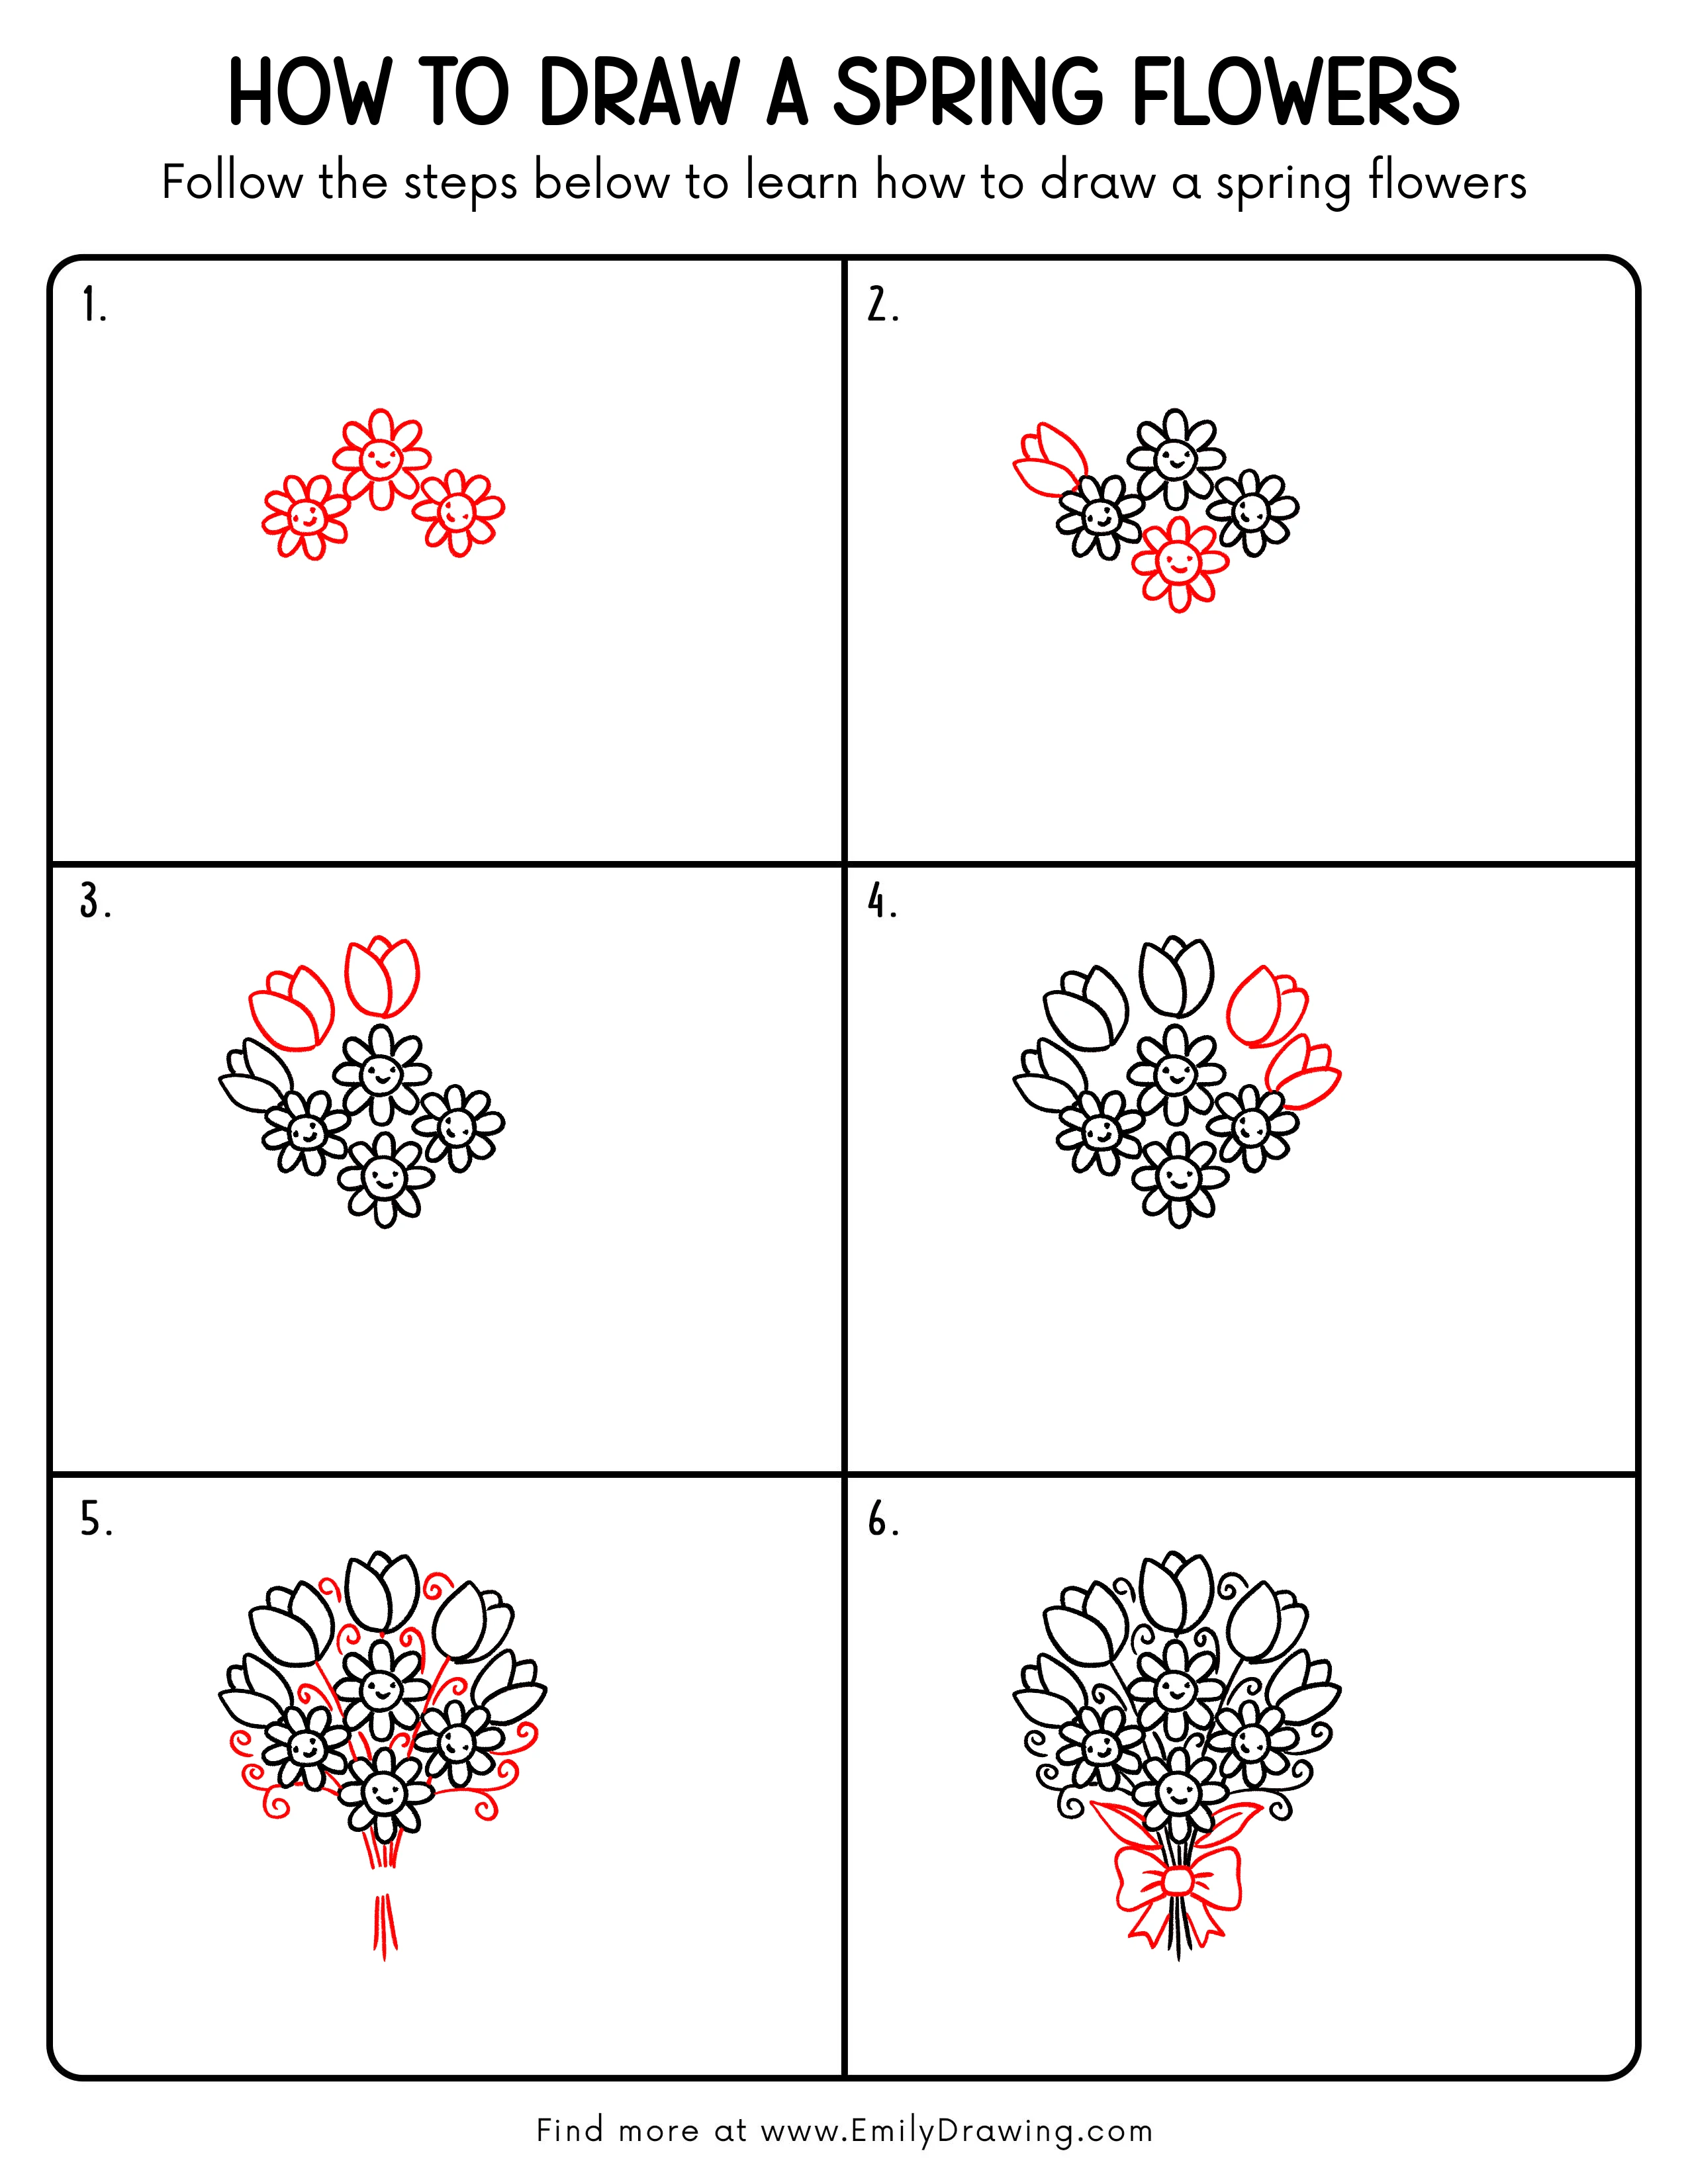
FREE Download Printable Spring Flowers Drawing Tutorial
Frequently Asked Questions
Is this spring flowers drawing good for beginners?
Yes, this spring flowers tutorial uses simple circles, ovals, curves, and leaf shapes. It is a friendly drawing for beginners.
What colors should I use for the flowers?
You can use bright spring colors like pink, yellow, red, purple, and orange. Green works well for the leaves and stems.
Can I add more flowers to the bouquet?
Yes, you can add smaller flowers around the edges. Keep them light and simple so the bouquet stays balanced.