
Learning how to draw spiderweb shapes is a fun way to practice straight lines and curved lines together. This easy drawing tutorial is made for beginners, using simple supports and gentle web strands. Take your time with each step, and let the web grow from the center outward.
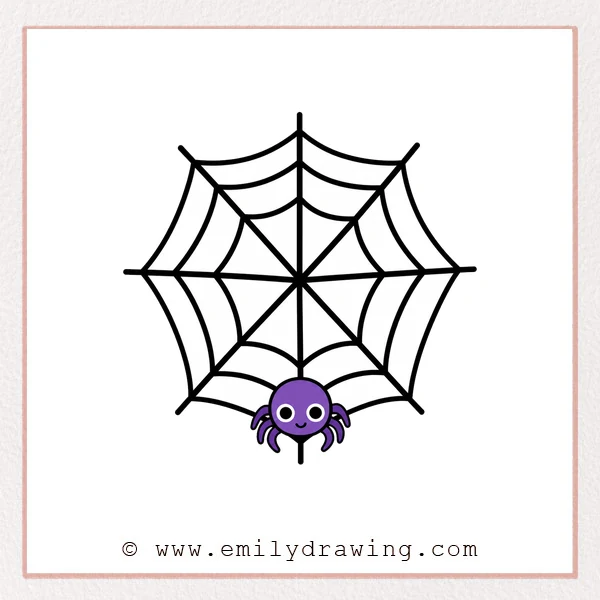
What You Will Need
- Pencil
- Eraser
- Black marker or pen
- Red pencil or marker for practice lines
- Drawing paper
Here are my RECOMMENDED Art Supplies!
- Crayola Coloring Set (140 Pieces – Mega Value!)
- 24 Colored Crayon Set
- A4 Printer Paper
- Crayola Coloring Pencils
- HP Home Printer with Instant Ink!
Time needed:
11 minutes.
Step-by-Step Drawing Guide
Step 1: Draw the Basic Spiderweb Rays
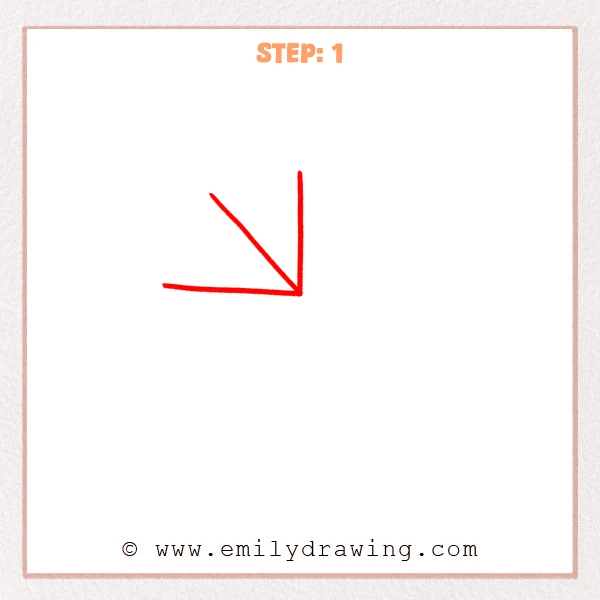
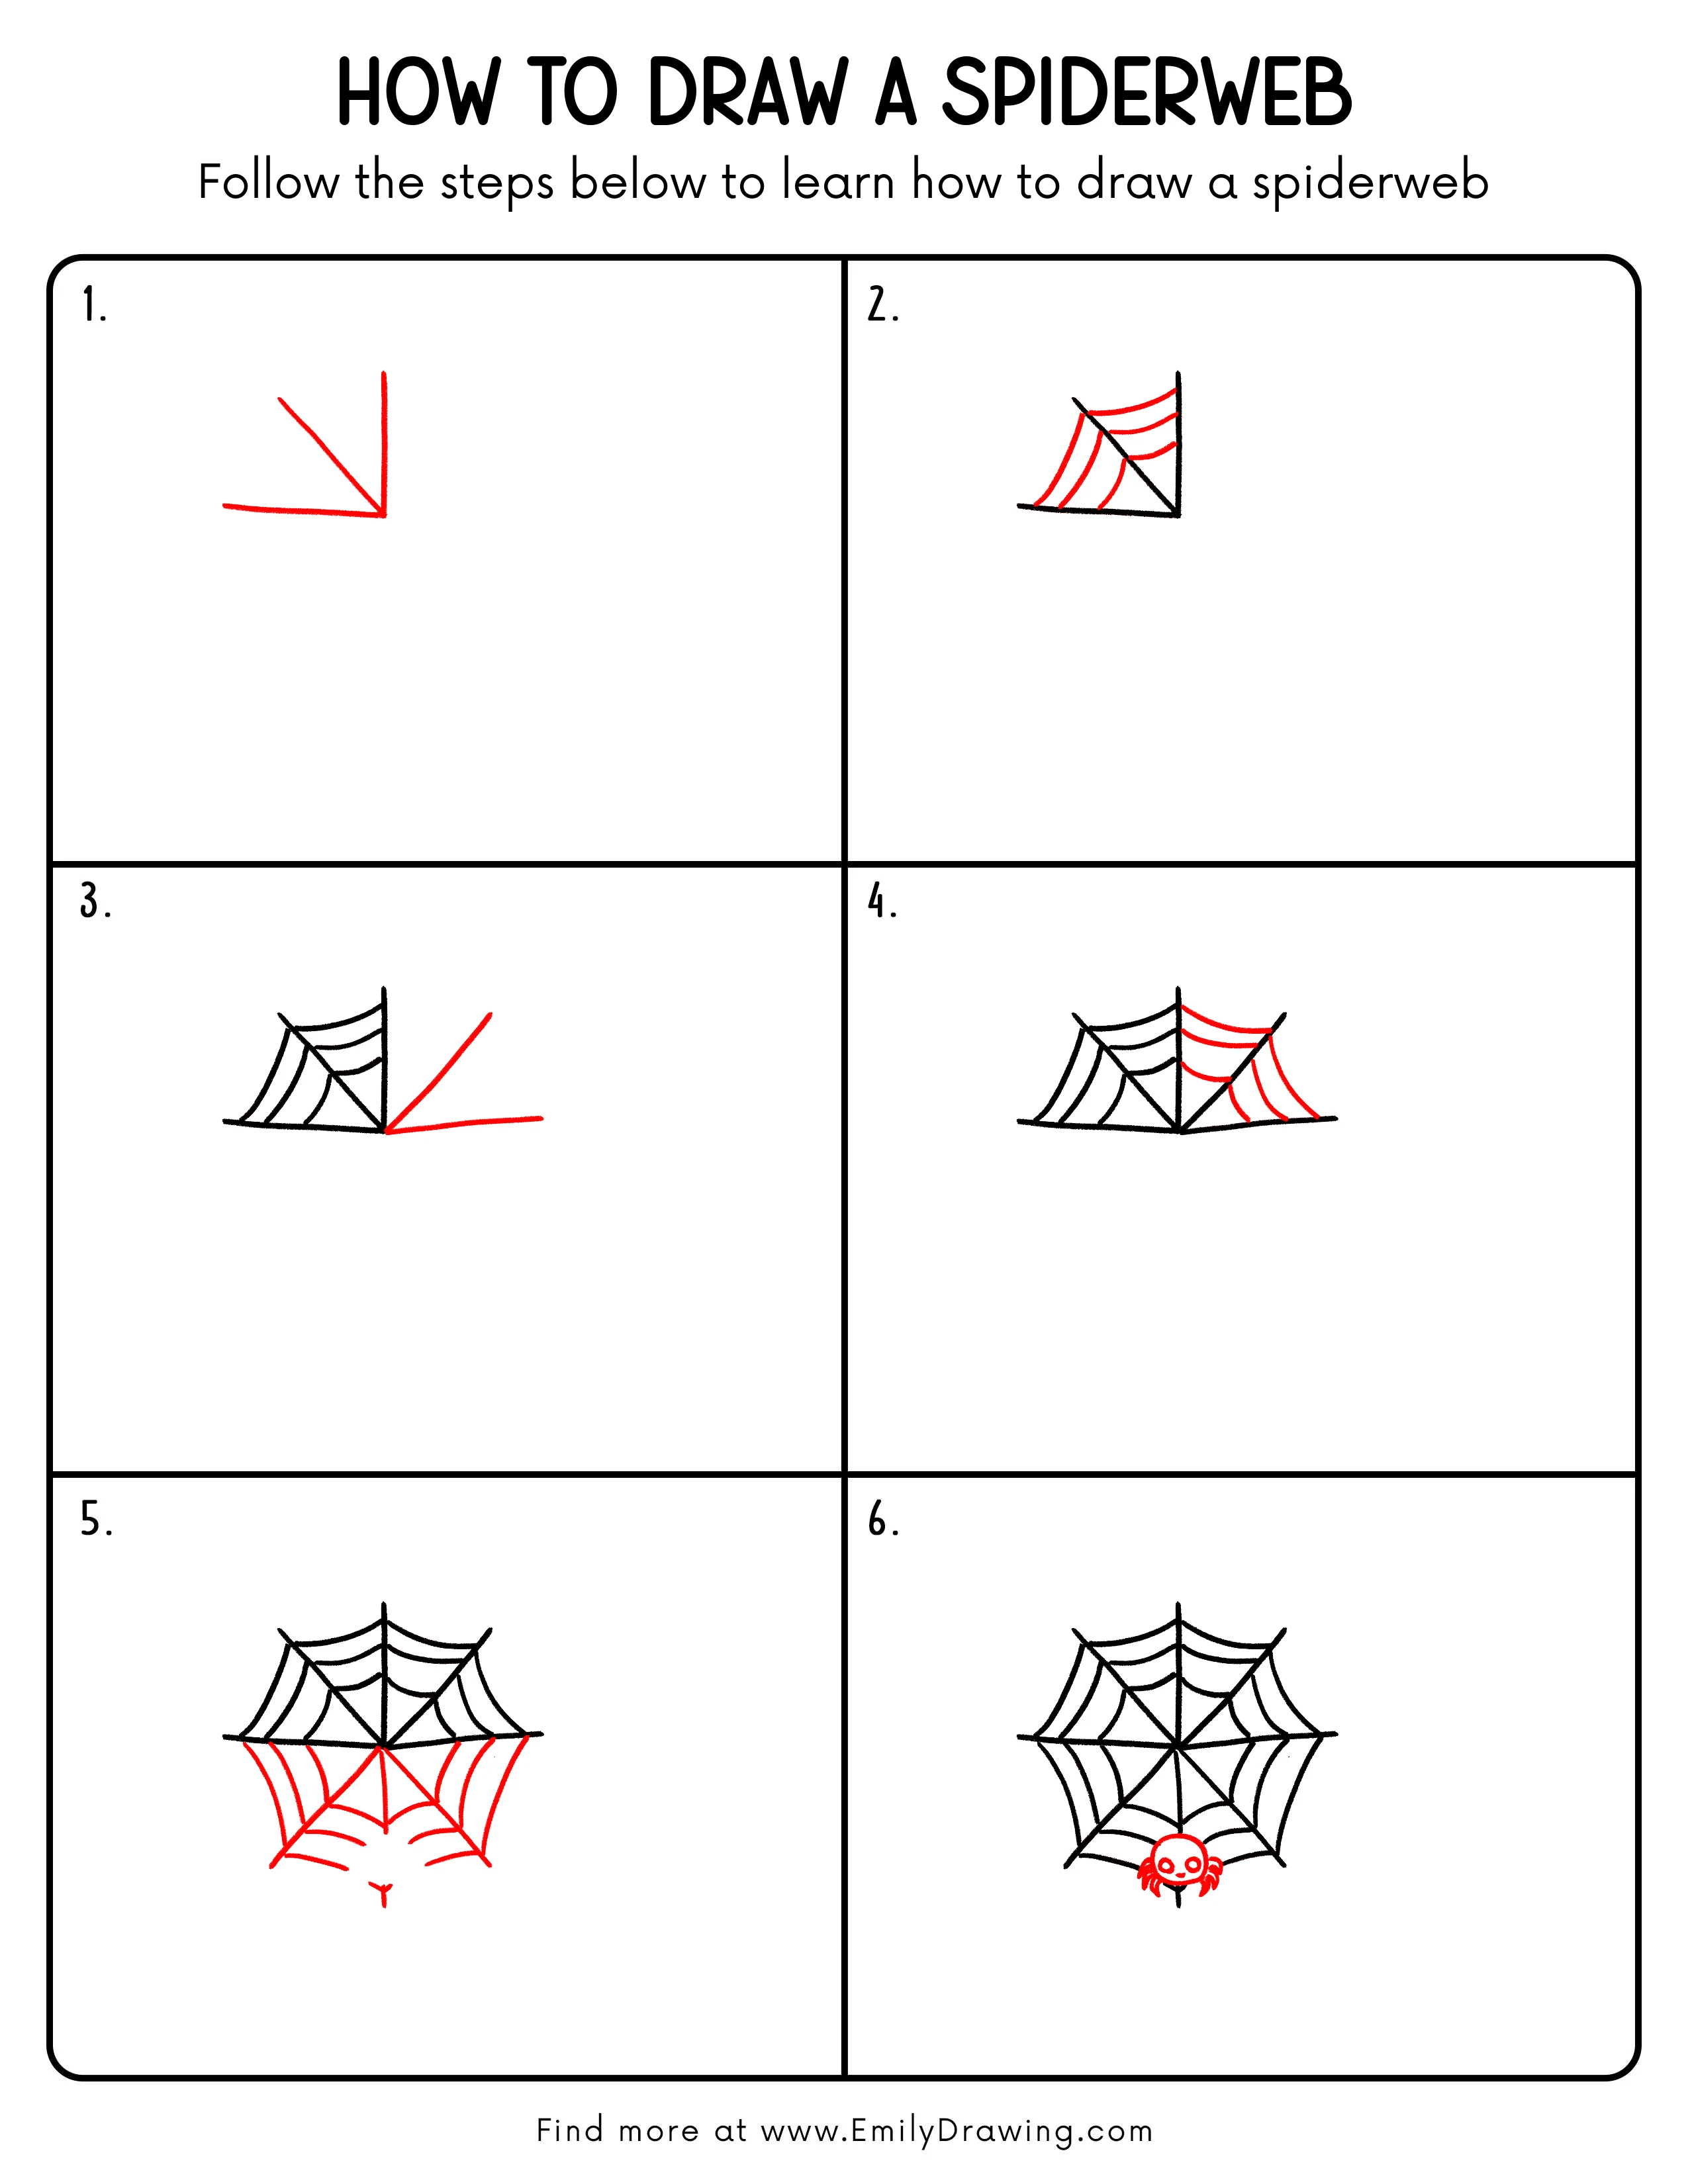
Start from one center point and draw a vertical line upward. From the same point, draw a horizontal line to the left, then add a diagonal line toward the upper left. These straight lines will become the main supports of the spiderweb.
Pro Tip: Keep all three lines starting from the same point so the spiderweb looks neat.
Step 2: Add the Curved Web Lines
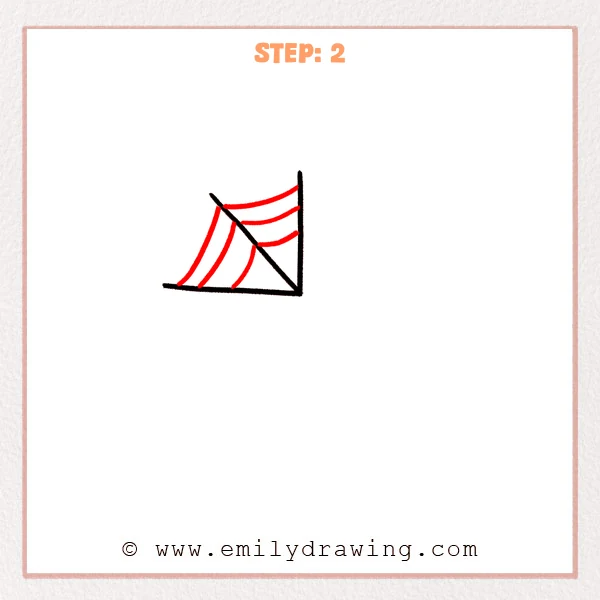
Darken the original support lines in black so the spiderweb structure is clearer. Draw several curved lines between the supports, connecting from lower to higher areas. Let each curve bow gently outward to form the first web strands.
Pro Tip: Keep similar spacing between the curved lines so the spiderweb looks even.
Step 3: Extend New Support Lines to the Right
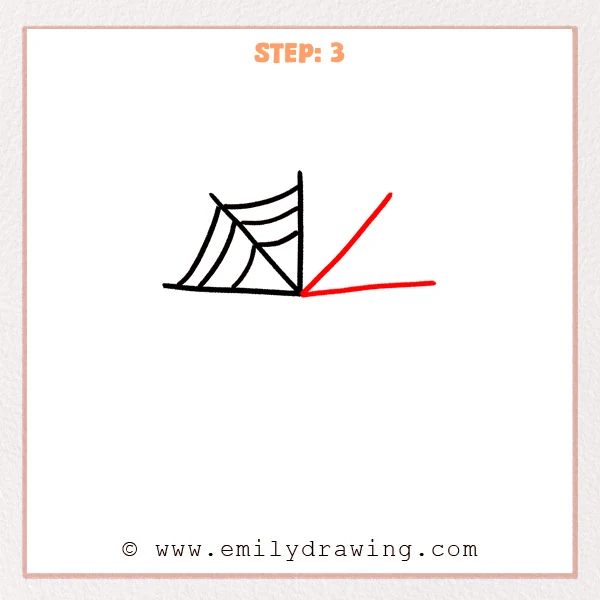
Darken the finished web lines on the left to keep the structure clear. From the same center point, draw one line slanting upward to the right. Add another line that tilts slightly upward to the right as a new support for the spiderweb.
Pro Tip: Let the new support lines spread from the center point without making the angles too close.
Step 4: Complete the Right Web Strands
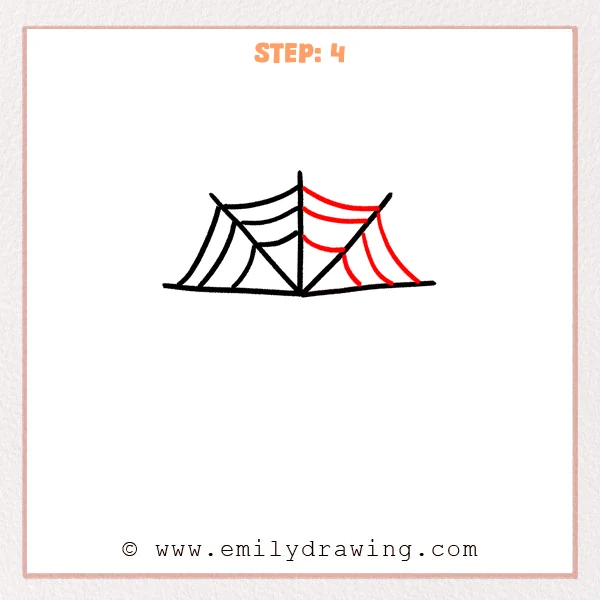
Darken the new right-side support lines so both sides of the spiderweb connect as one shape. Add several curved strands between the right supports, joining the upper, middle, and lower areas. These curves make the right half of the spiderweb look more complete.
Pro Tip: Use the left-side spacing as a guide so the right curves feel balanced.
Step 5: Extend the Spiderweb Downward
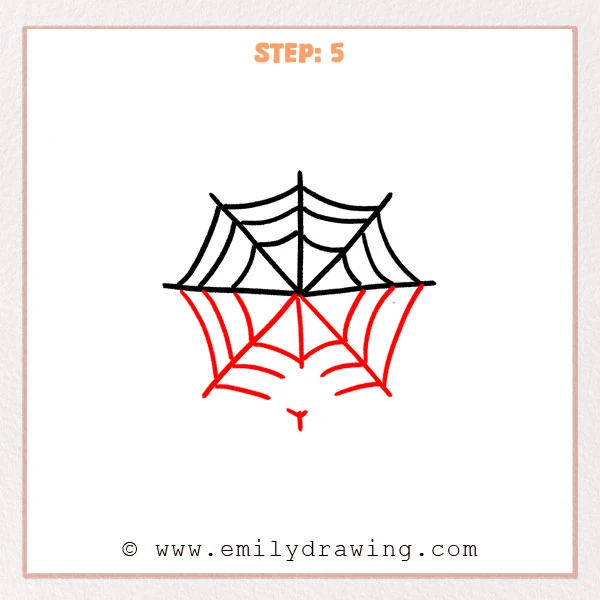
Darken the upper web lines to complete the top structure. From the center and lower edge, draw new support lines spreading downward to both sides. Add several downward-curving strands so the spiderweb begins extending along the bottom.
Pro Tip: Widen the lower support angles slightly so the spiderweb looks more spread out.
Step 6: Add the Little Spider
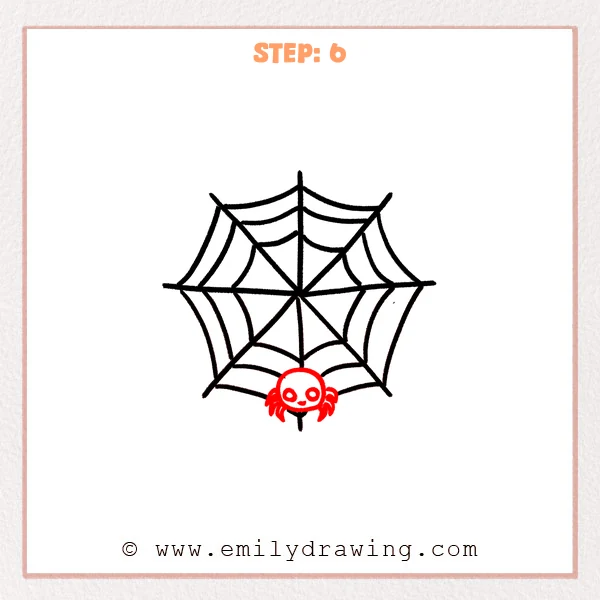
Darken the lower spiderweb lines so the whole web looks complete. Draw a small round spider body at the bottom center, then add two round eyes. Add short curved legs on both sides so the spider hangs below the web.
Pro Tip: Place the spider body below the center line so the drawing feels balanced.
Step 7: Color in your drawing!
Fun Facts
Spiderwebs are made from silk that spiders produce from tiny spinnerets. Many webs use radial support lines and curved spiral lines, which makes them useful for drawing practice. A spiderweb drawing for beginners also helps artists learn balance, spacing, and repeating patterns.
Pin it now, Draw later!
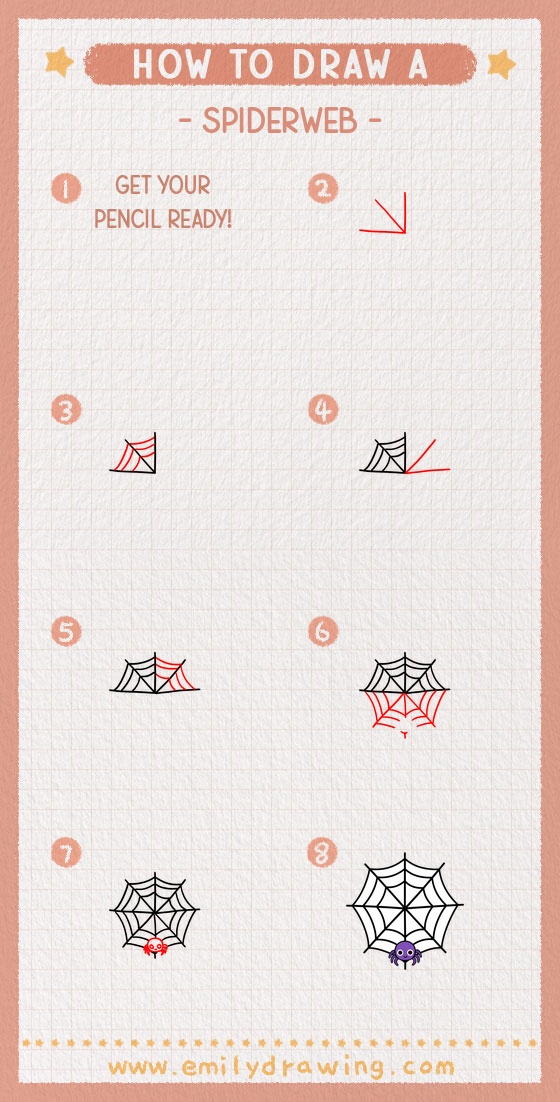
Trace the final spiderweb carefully with a black marker when you like the shape. Erase any extra pencil marks, then color the little spider or add a soft background. Keep practicing this step by step drawing, and try making your next spiderweb wider, smaller, or tilted in a new direction.
Get the FREE Printable Drawing Guide
FREE Download Printable Spiderweb Drawing Tutorial
Frequently Asked Questions
Is this spiderweb drawing good for beginners?
Yes, this easy drawing tutorial uses simple straight lines and curved lines. Beginners can follow each step slowly and build the spiderweb piece by piece.
How can I make my spiderweb look more even?
Start all main support lines from the same center point. Keep the curved strands spaced evenly between each pair of supports.
Can I add more details to the spiderweb?
Yes, you can add more web strands, a longer hanging thread, or extra small spiders. Keep the added details light so the main spiderweb stays clear.



