
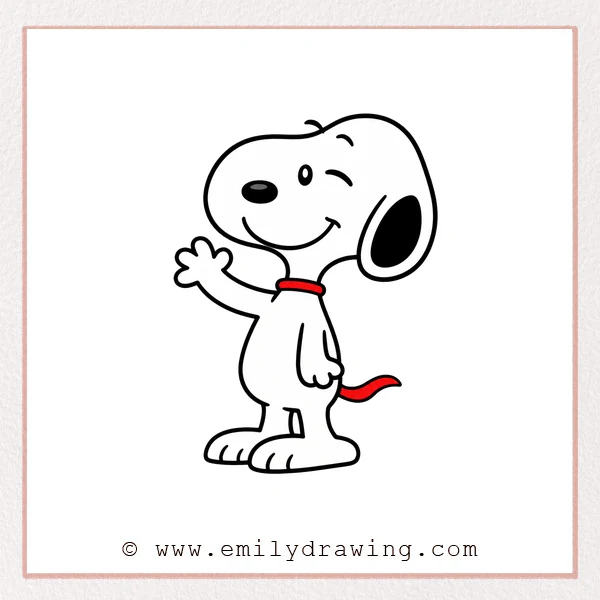
Learning how to draw Snoopy is a fun project for beginners. This easy drawing tutorial uses simple curves, rounded shapes, and clear steps. Take your time with each part, and let the cheerful pose build slowly.
What You Will Need
- Drawing paper
- Pencil
- Eraser
- Black marker or pen
- Colored pencils or crayons, if you want to color
Here are my RECOMMENDED Art Supplies!
- Crayola Coloring Set (140 Pieces – Mega Value!)
- 24 Colored Crayon Set
- A4 Printer Paper
- Crayola Coloring Pencils
- HP Home Printer with Instant Ink!
Time needed:
19 minutes.
Step-by-Step Drawing Guide
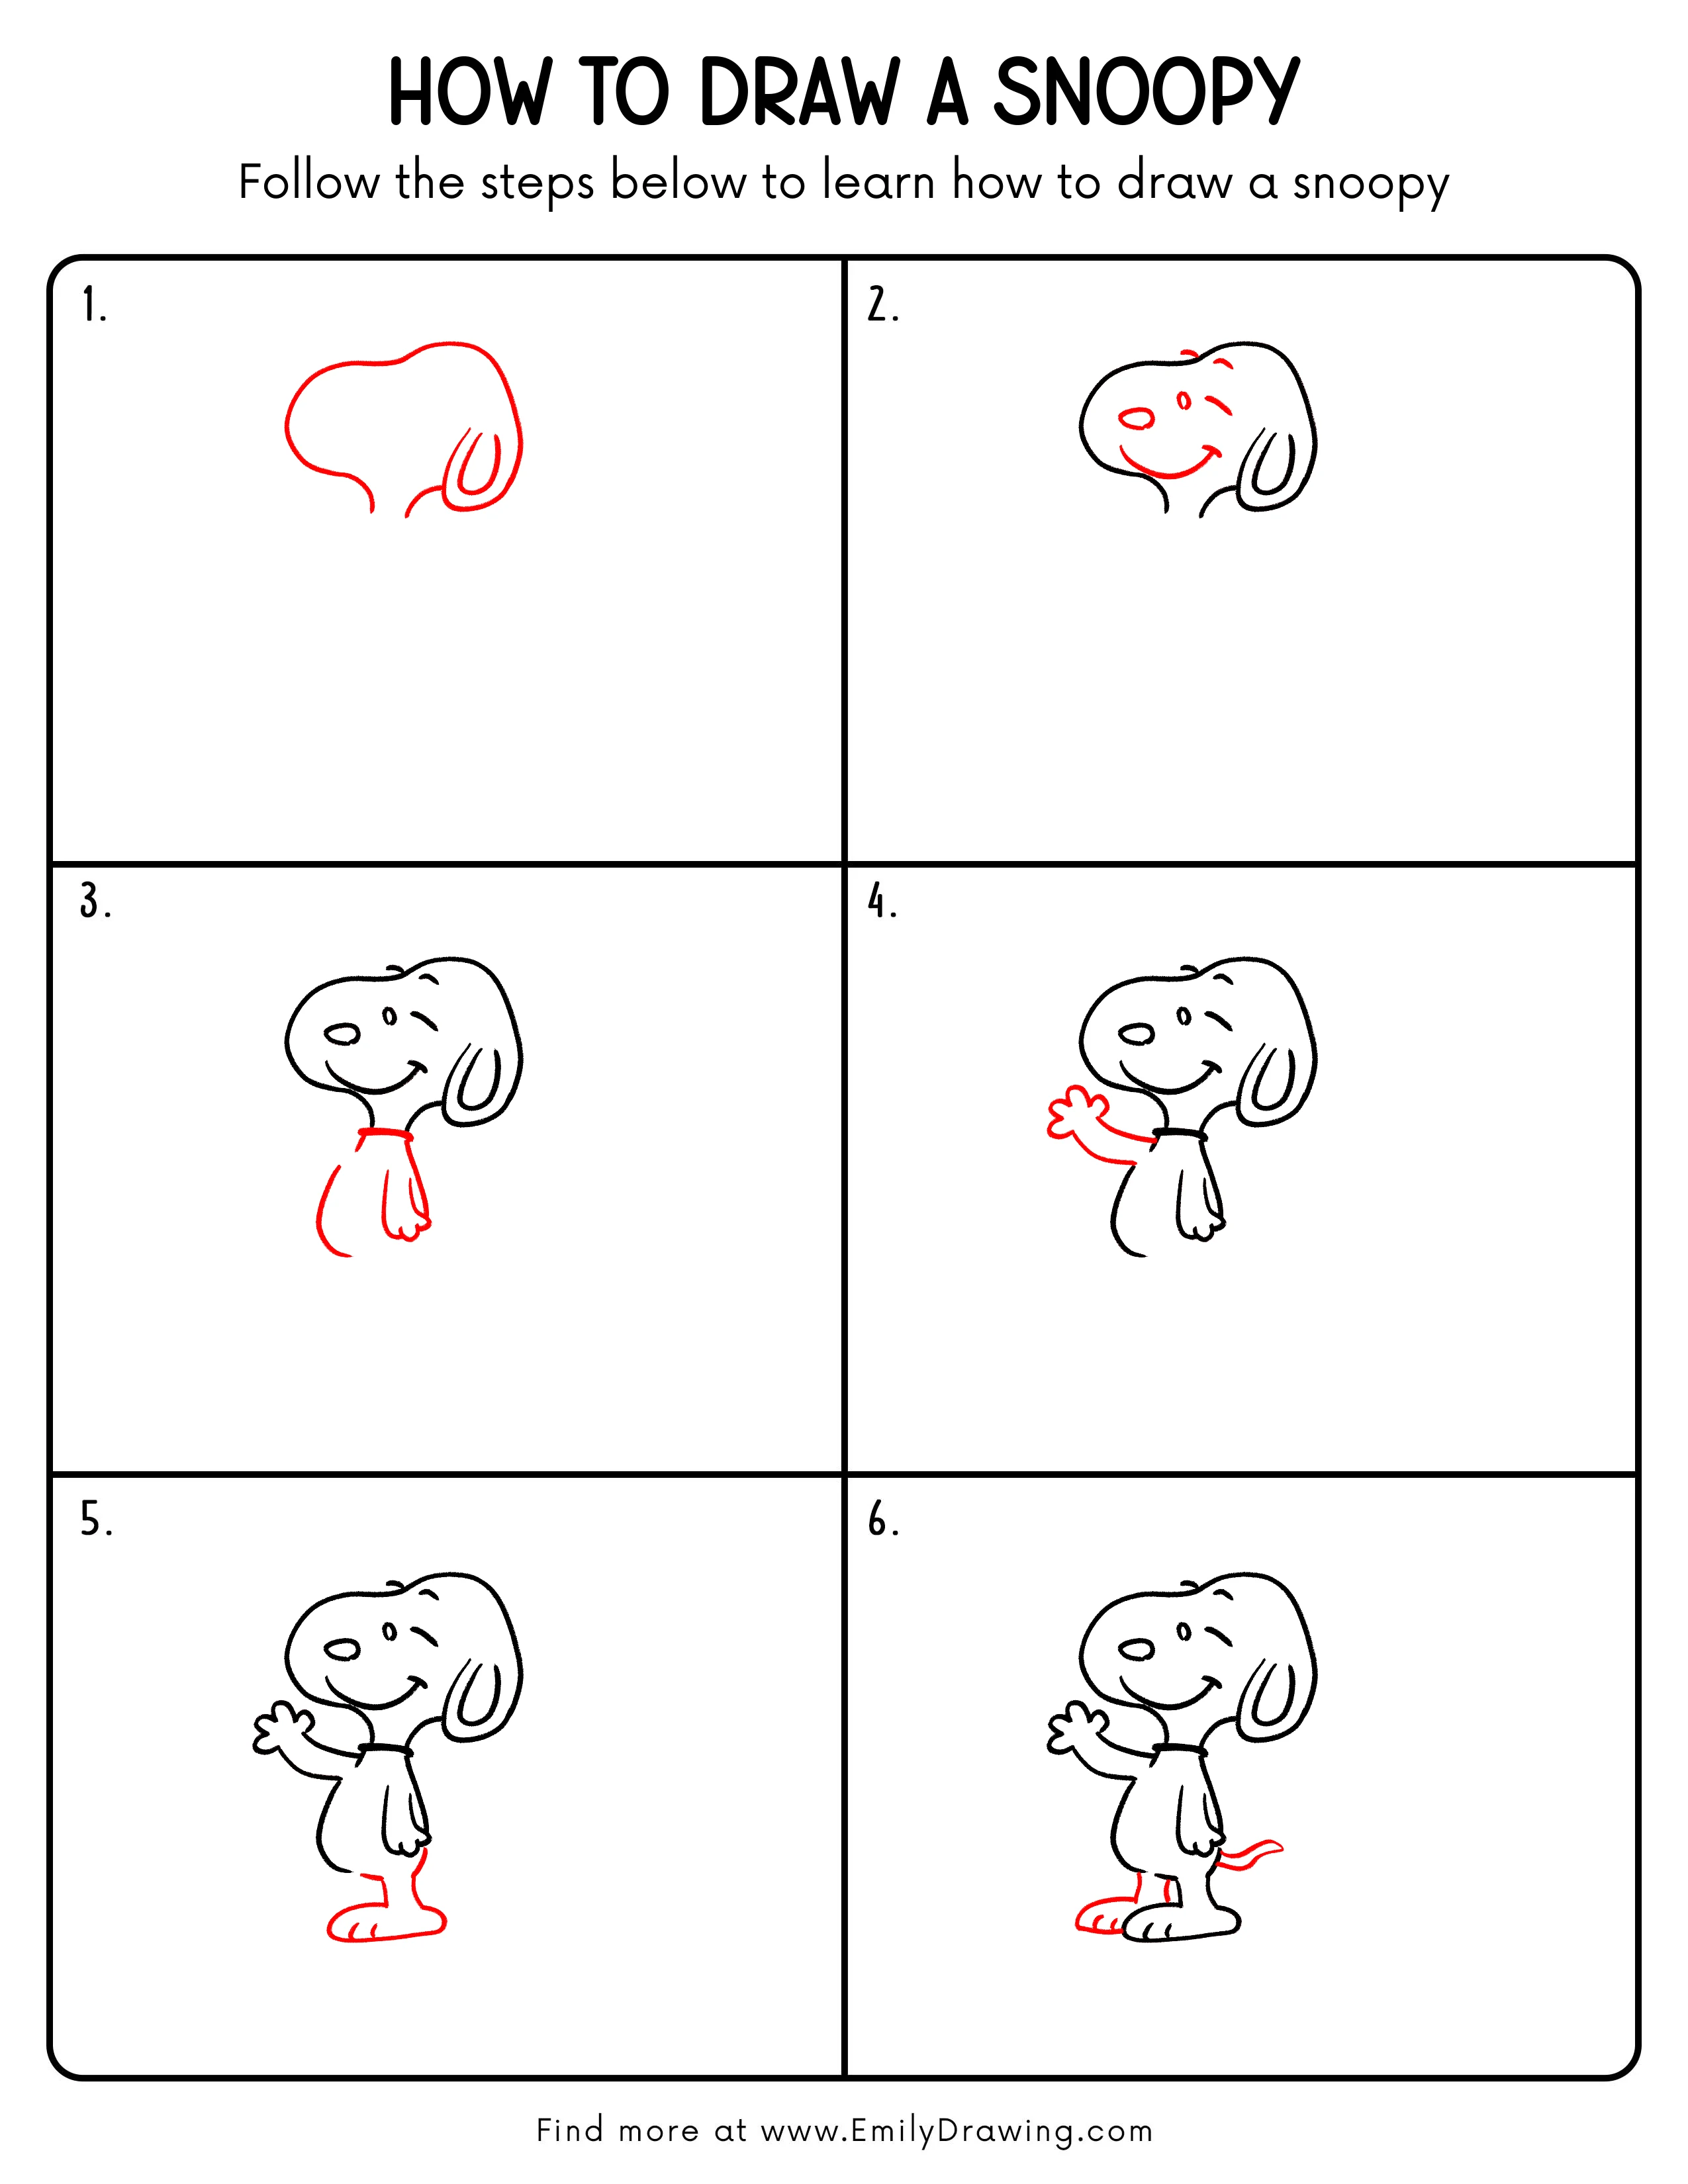
Step 1: Draw Snoopy’s Head Outline
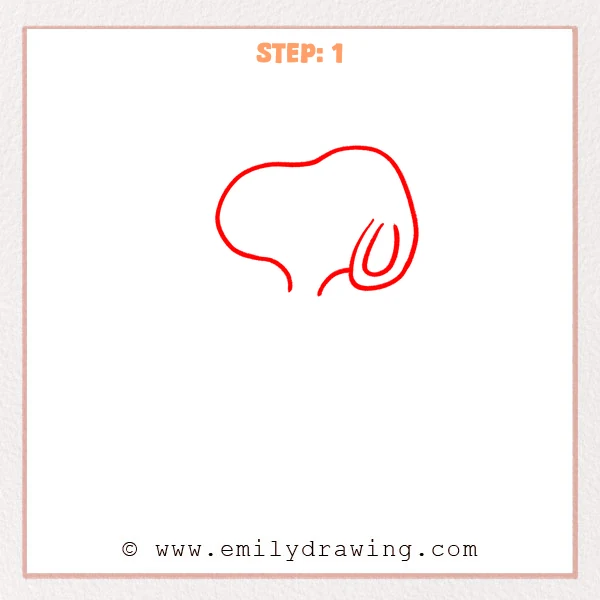
Start with a large rounded head shape that bulges gently on the left. Narrow the right side into the face, leaving space below for the body. Add a curved ear shape inside the right side, like a soft teardrop.
Pro Tip: Keep the head wide and rounded so Snoopy looks extra cute.
Step 2: Add the Facial Expression
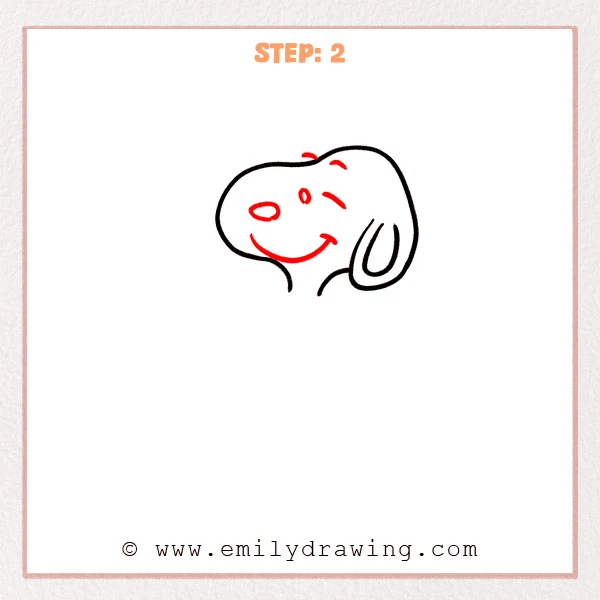
Draw a small oval nose on the left side of the face, slightly stretched sideways. Add a small eye, curved eyebrows, and a few short expression lines. From below the nose, draw a wide smiling curve with the end gently lifted.
Pro Tip: Keep the smile line smooth, without any sharp breaks in the curve.
Step 3: Draw the Collar, Body, and Arm
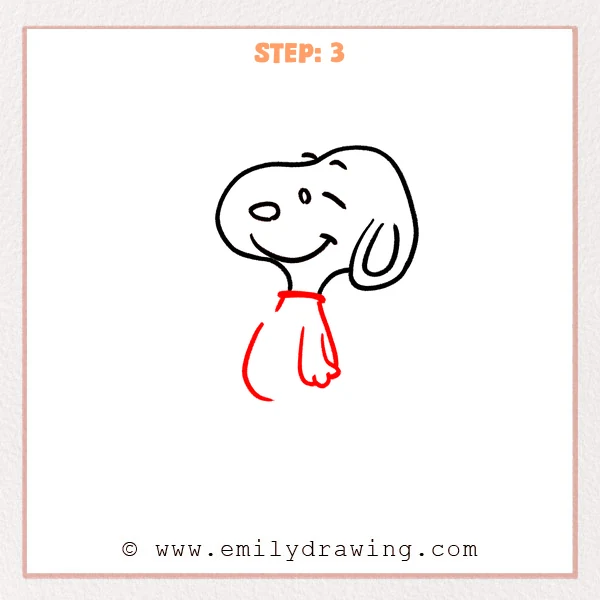
Add a short horizontal collar below the head, connecting to the neck area. Draw the body outline downward from both sides of the collar, keeping the left side rounder. Add one hanging arm on the right side, using small curves to separate the fingers.
Pro Tip: Make the body narrower than the head so Snoopy’s proportions feel natural.
Step 4: Add the Waving Arm
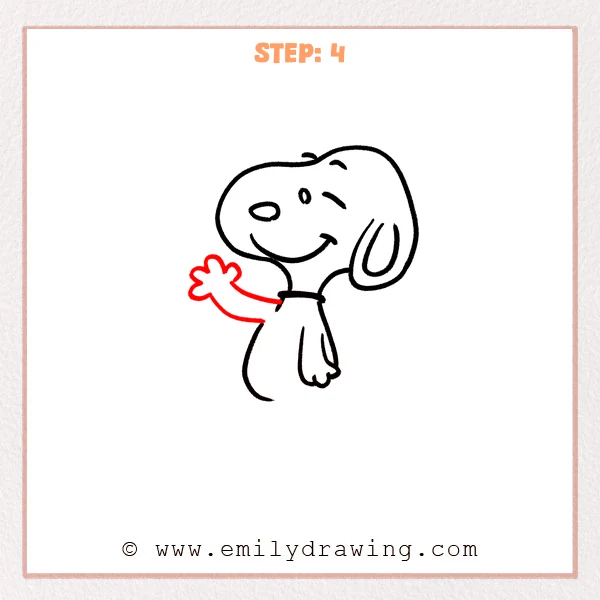
From the left side of the collar, draw a raised arm curving gently upward. At the end, add a rounded hand with petal-like curves for the fingers. Draw the lower curve back toward the body so the arm looks like it is waving.
Pro Tip: Make the hand a little wider than the arm so the waving pose reads clearly.
Step 5: Draw the Leg and Foot
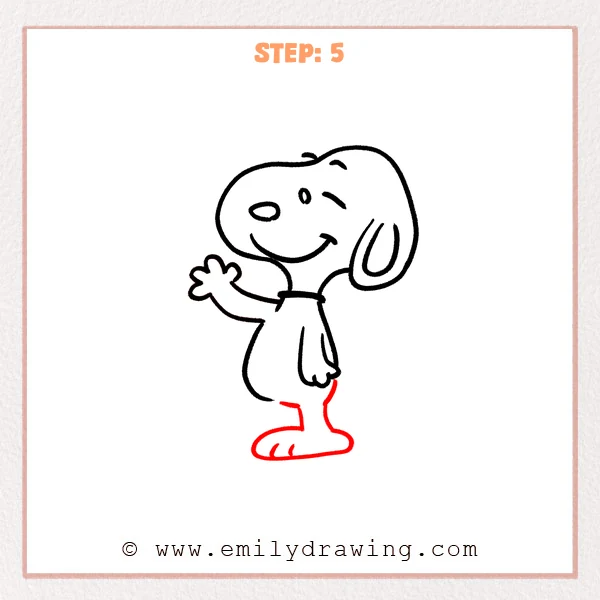
Add a curved leg below the body, moving down and forward into the foot. Draw a long oval-like foot, keeping the bottom line steady and flat. Add two short curves near the front of the foot to show small toe separations.
Pro Tip: Make the foot a little long so it supports Snoopy’s large head shape.
Step 6: Complete the Other Leg and Tail
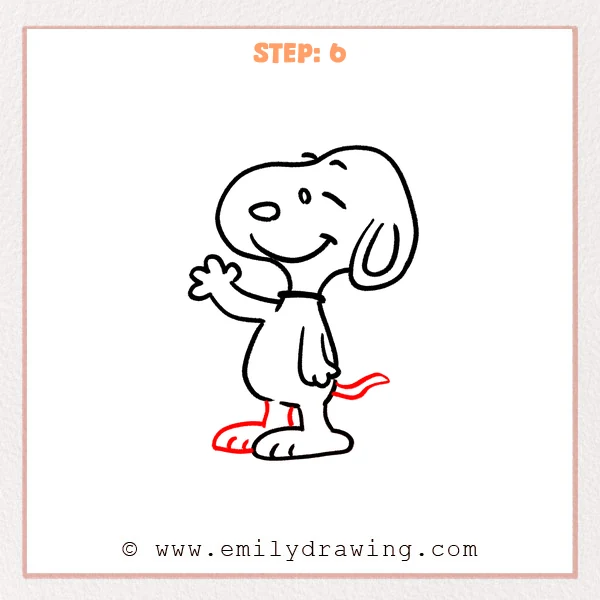
Add the other leg below the left side of the body, stretching backward into the rear foot. Draw the shorter back foot, then mark the toes with small curved lines. Add a long, thin curved tail on the right side, lifting the tip gently upward.
Pro Tip: Keep the back foot shorter than the front foot to create a clearer standing pose.
Step 7: Color in your drawing!
Fun Facts
- Snoopy is known for his simple shapes, which makes him great for drawing for beginners.
- His large head and small body create a cute, friendly cartoon style.
- A few curved lines can show a lot of personality in Snoopy’s face.
Pin it now, Draw later!
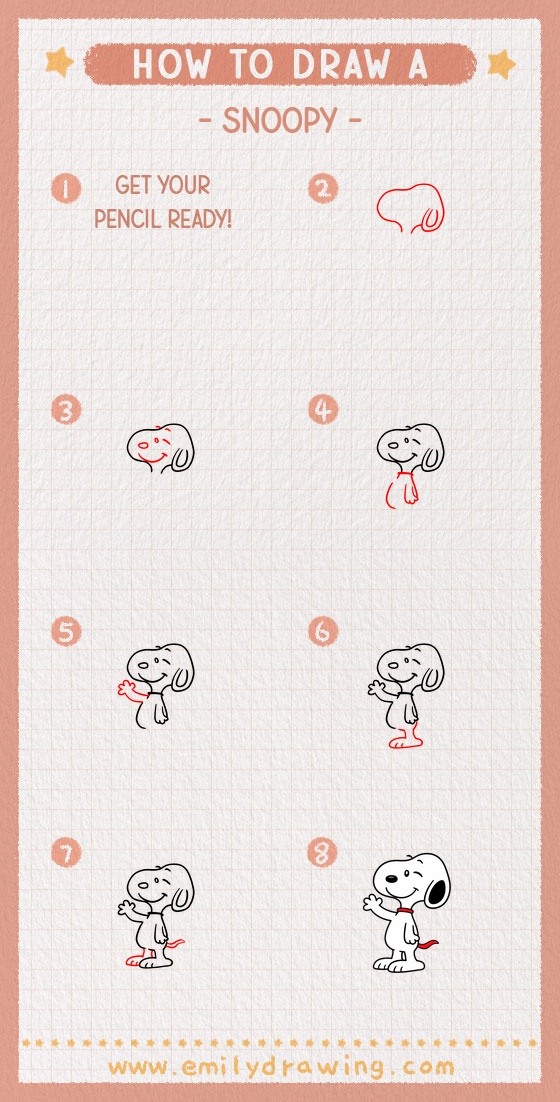
Trace your final lines with a black marker when you are happy with the sketch. Erase any extra pencil marks, then add light color or leave Snoopy clean and classic. You have finished a cheerful step by step drawing, so keep practicing with the same calm shapes.
Try drawing Snoopy again in a different pose when you feel ready.
Get the FREE Printable Drawing Guide
FREE Download Printable Snoopy Drawing Tutorial
Frequently Asked Questions
Is this Snoopy drawing tutorial good for beginners?
Yes, this easy drawing tutorial uses rounded shapes and simple curved lines. It is designed as a drawing for beginners.
What is the hardest part when learning how to draw Snoopy?
The head shape can be the trickiest part because it is large and rounded. Take your time and adjust the curve gently.
Can I color Snoopy after finishing the drawing?
Yes, you can color the nose, ear, and outline areas in black. You can also add a soft background to make the drawing feel complete.



