
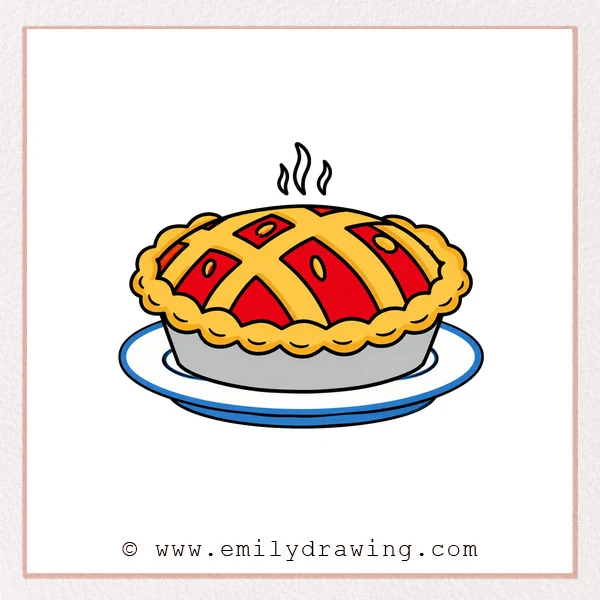
Learning how to draw pie is a fun way to practice curves, folds, and simple details. This easy drawing tutorial breaks the pie into small steps, so beginners can build the shape calmly. Take your time with each line, and let the warm pie come together piece by piece.
What You Will Need
- Pencil
- Eraser
- Black marker or pen
- Drawing paper
- Colored pencils, crayons, or markers
Here are my RECOMMENDED Art Supplies!
- Crayola Coloring Set (140 Pieces – Mega Value!)
- 24 Colored Crayon Set
- A4 Printer Paper
- Crayola Coloring Pencils
- HP Home Printer with Instant Ink!
Time needed:
10 minutes.
Step-by-Step Drawing Guide
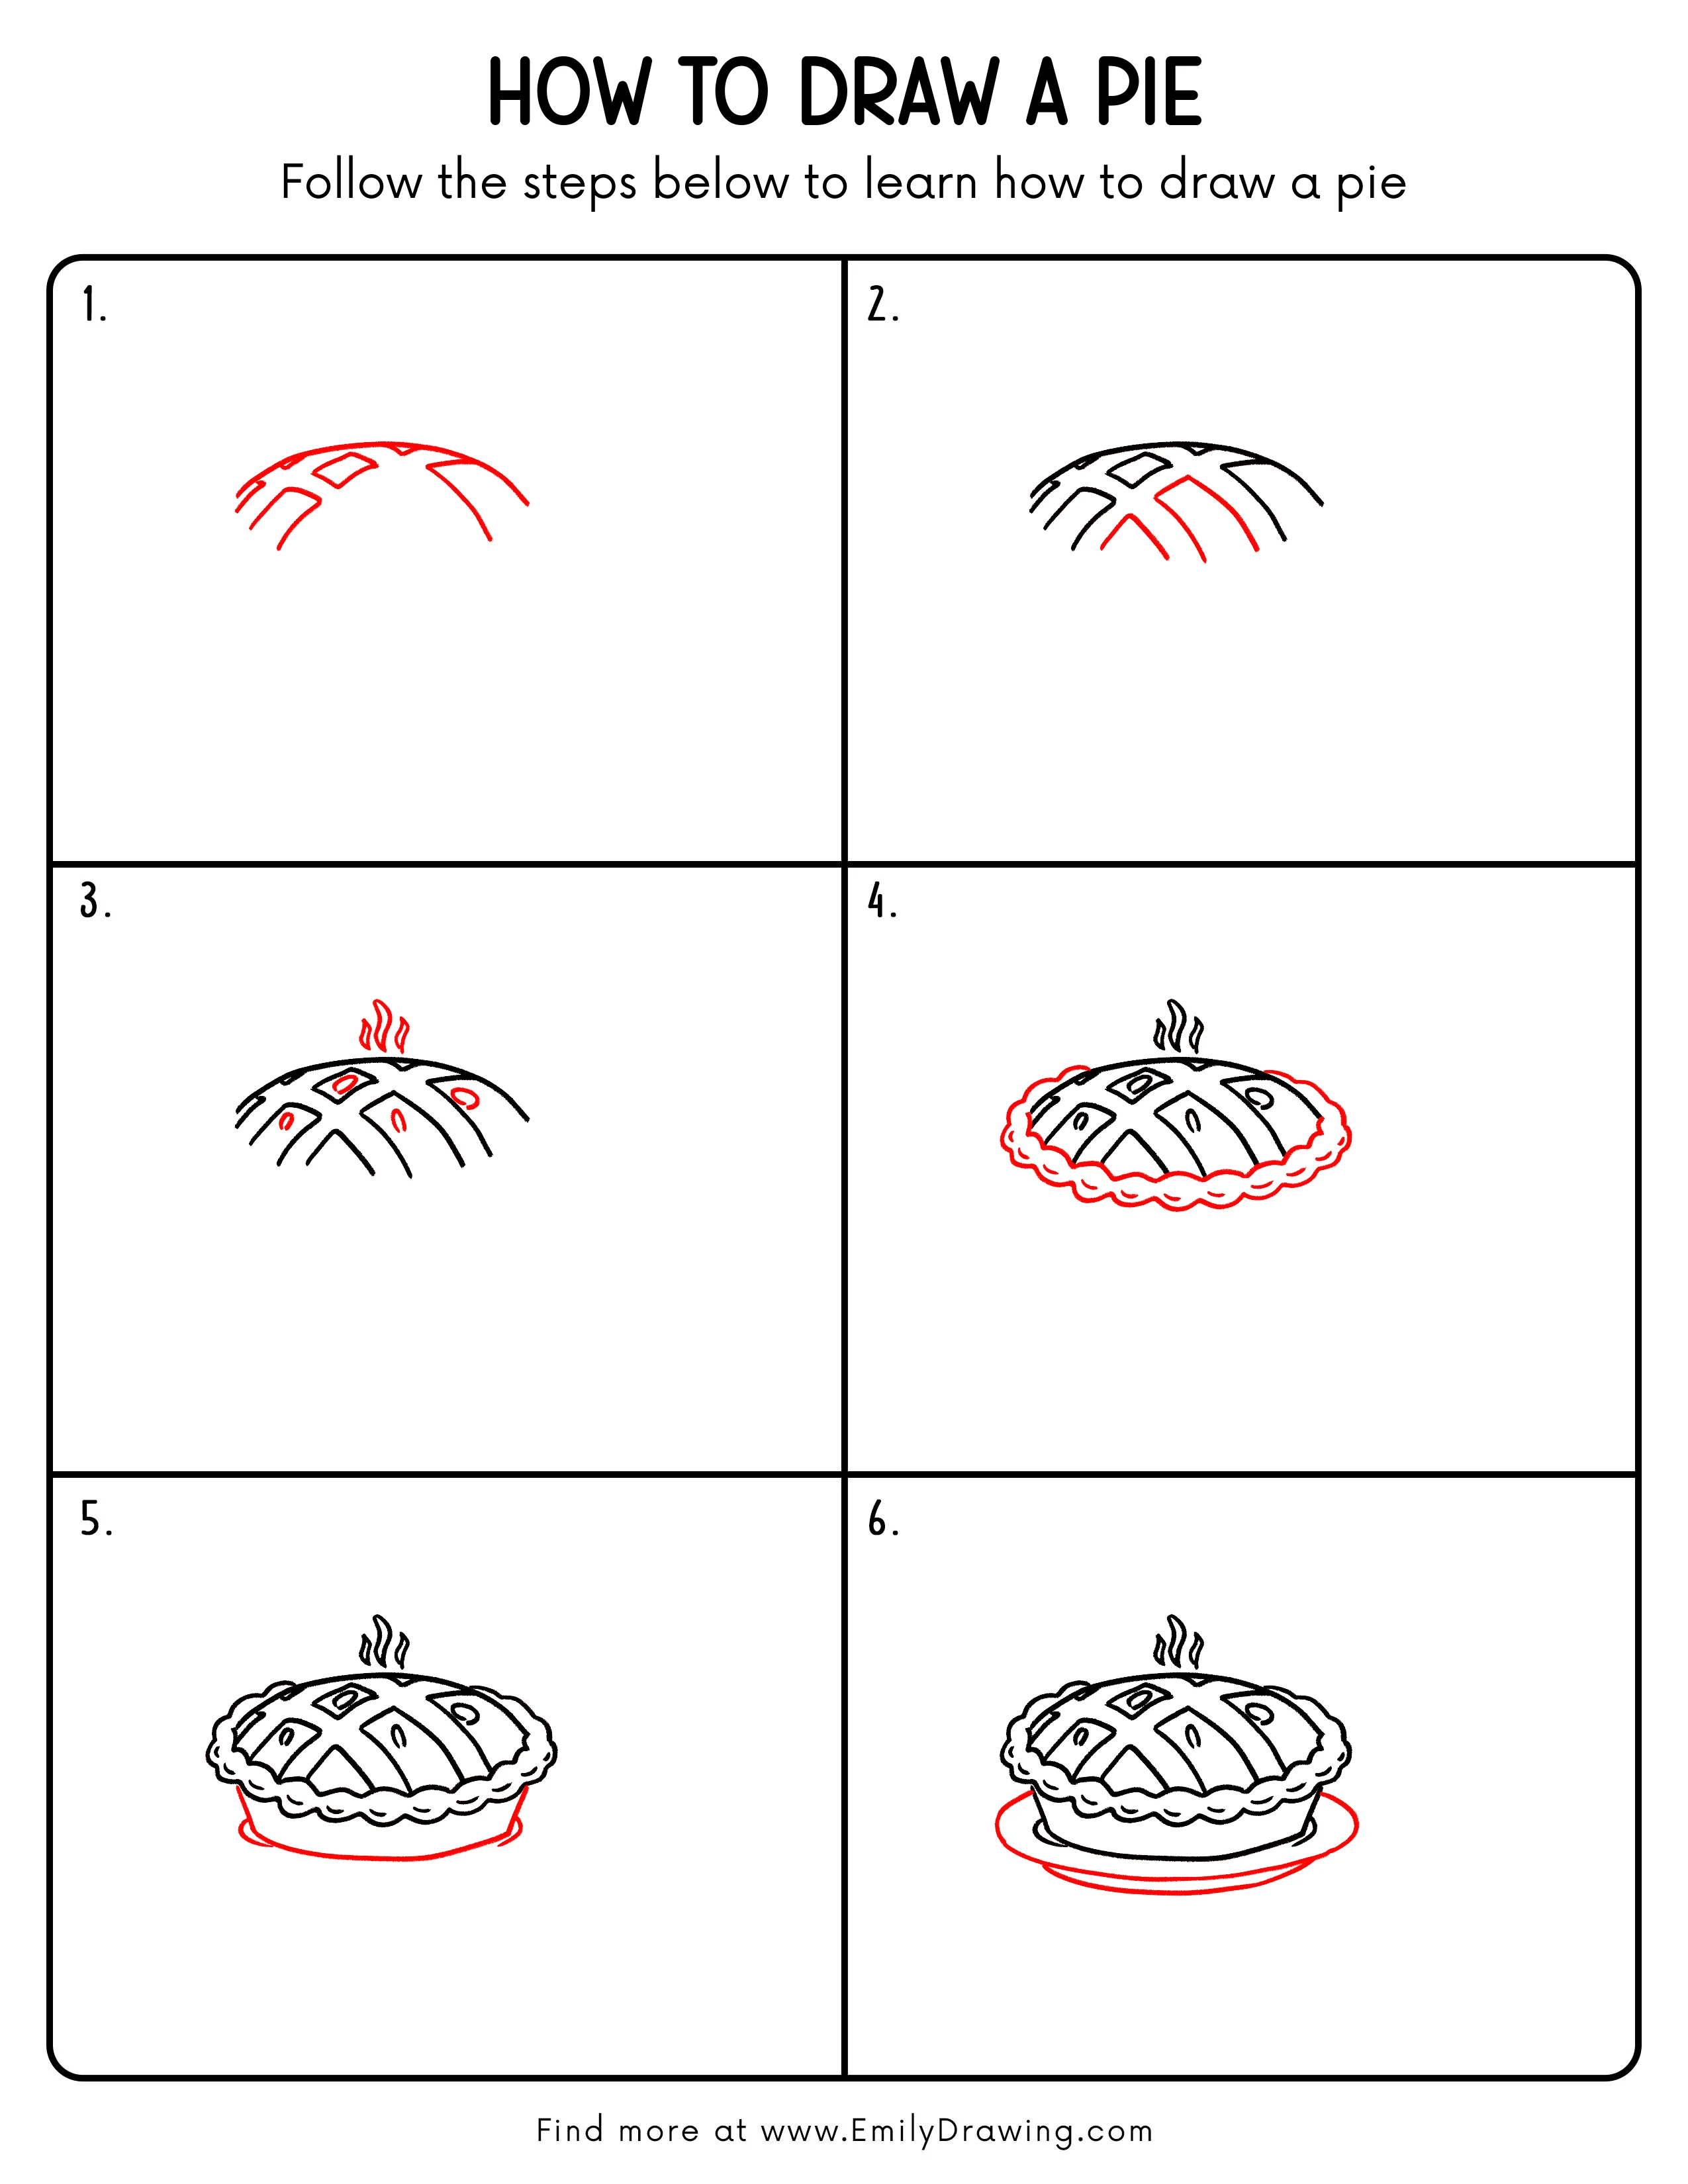
Step 1: Draw the Top Outline of the Pie
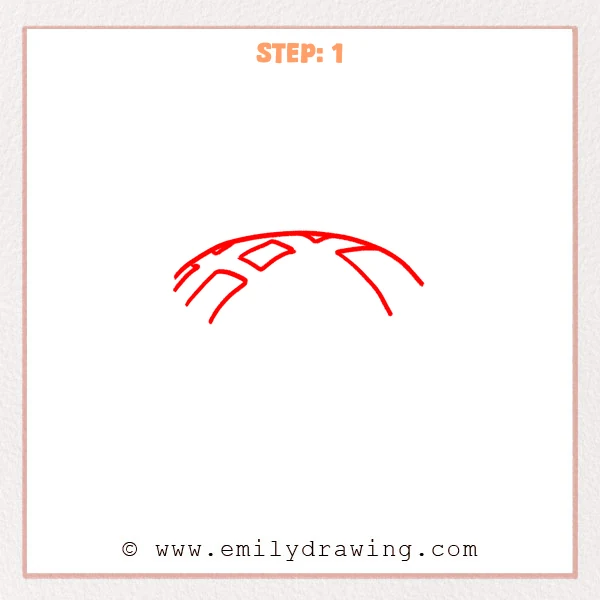
Start with a wide curved line to form the top edge of the pie. Add a few short slanted lines and small diamond shapes below it to lightly mark the crust and surface cuts.
Pro Tip: Keep the top curve smooth so the pie looks round and full.
Step 2: Add the Lower Crust Folds
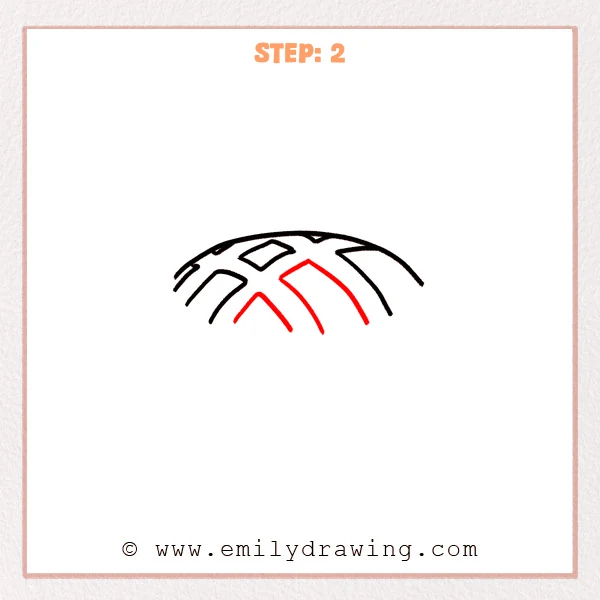
Add two sets of downward-bending angled lines near the lower middle of the pie. Let these new lines extend from beneath the top outline, helping the pie thickness begin to form.
Pro Tip: Keep the spacing between the new folds even so the crust looks neat.
Step 3: Add Filling Details and Steam
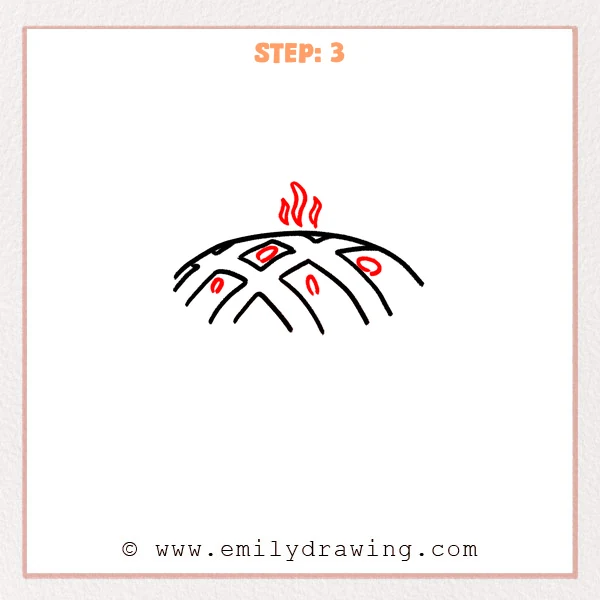
Add a few small oval shapes on the crust to show bits of filling. Draw three softly curved wavy lines above the pie to make it look freshly baked.
Pro Tip: Make the steam lines slightly different lengths so the drawing feels more natural.
Step 4: Draw the Wavy Pie Edge
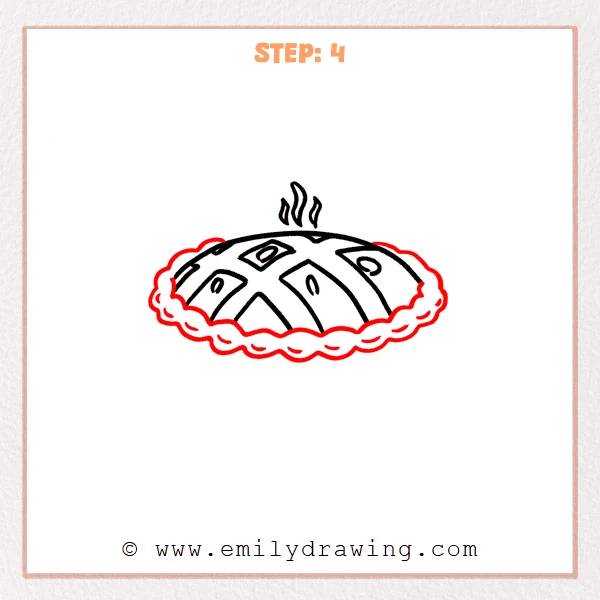
Add a wavy line around the outside of the pie to form the fluffy crust edge. Add a few short curved marks along the bottom to make the edge look layered and thick.
Pro Tip: Keep each wave similar in size but not exactly the same, so the crust edge looks natural.
Step 5: Add the Pie Dish Outline
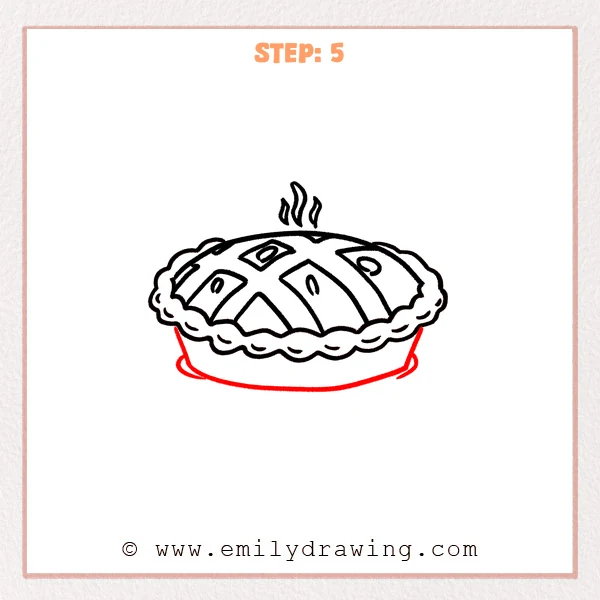
Draw a wide, shallow curve below the wavy crust edge to form the bottom of the pie dish. Add short curved side lines to connect the dish edge beneath the crust.
Pro Tip: Make the bottom curve flatter than the crust edge so the dish looks steady under the pie.
Step 6: Draw the Plate Rim
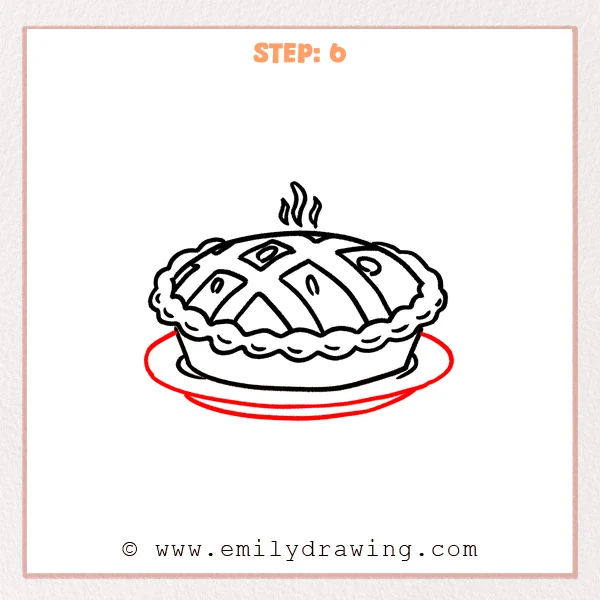
Add a large oval rim around the bottom of the pie dish to make the plate look complete. Draw one lower curved line to show the plate’s thickness and bottom edge.
Pro Tip: Keep the outer oval balanced on both sides so the plate looks steady.
Step 7: Color in your drawing!
Fun Facts
- Pies can be sweet or savory, depending on the filling.
- A lattice crust uses strips of dough woven across the top.
- Steam lines in drawings help warm food look freshly baked.
Pin it now, Draw later!
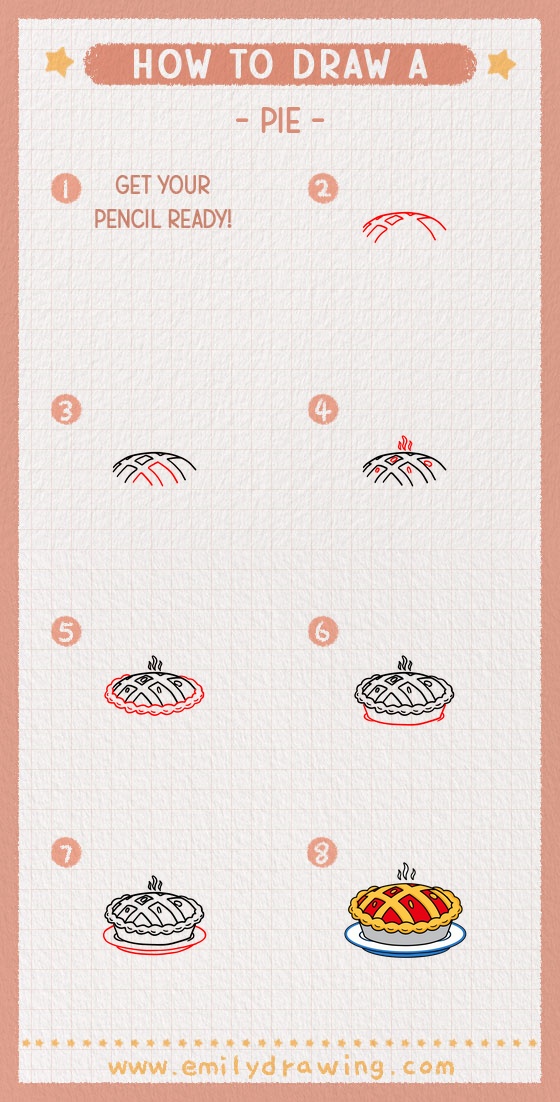
Now you have finished a cozy pie drawing for beginners. You can trace the main lines with a marker, then color the crust golden brown and the filling red, purple, or orange. Try this step by step drawing again with a different filling or plate shape to make your own pie design.
Get the FREE Printable Drawing Guide
FREE Download Printable Pie Drawing Tutorial
Frequently Asked Questions
Is this pie drawing good for beginners?
Yes, this tutorial uses simple curves, ovals, and wavy lines, so beginners can follow it easily.
How can I make my pie look warmer?
Add soft steam lines above the crust and use warm colors like golden brown, orange, and red.
What can I change after finishing the drawing?
You can change the filling shapes, decorate the plate, or add shadows under the pie.



