
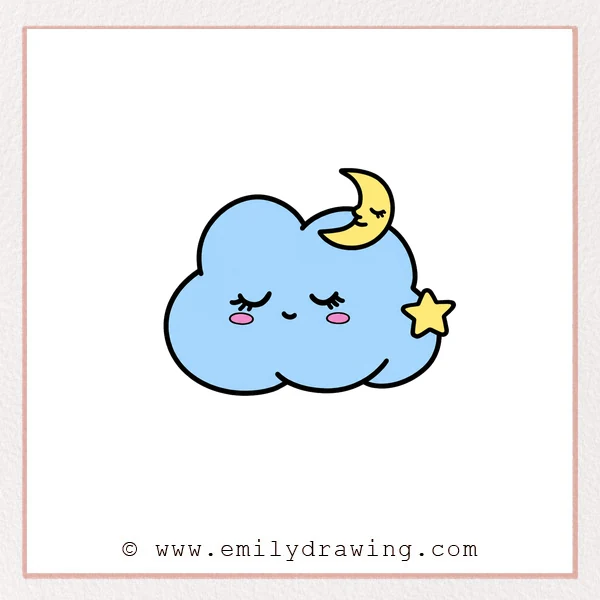
In this easy drawing tutorial, you will learn how to draw night sky with a sleepy cloud and a small star.
This step by step drawing is gentle and simple, making it a nice drawing for beginners.
What You Will Need
- Pencil
- Eraser
- Black marker
- Red or colored pencil for guide lines
- Coloring tools
- Drawing paper
Here are my RECOMMENDED Art Supplies!
- Crayola Coloring Set (140 Pieces – Mega Value!)
- 24 Colored Crayon Set
- A4 Printer Paper
- Crayola Coloring Pencils
- HP Home Printer with Instant Ink!
Time needed:
28 minutes.
Step-by-Step Drawing Guide
Step 1: Draw Part of the Cloud Shape
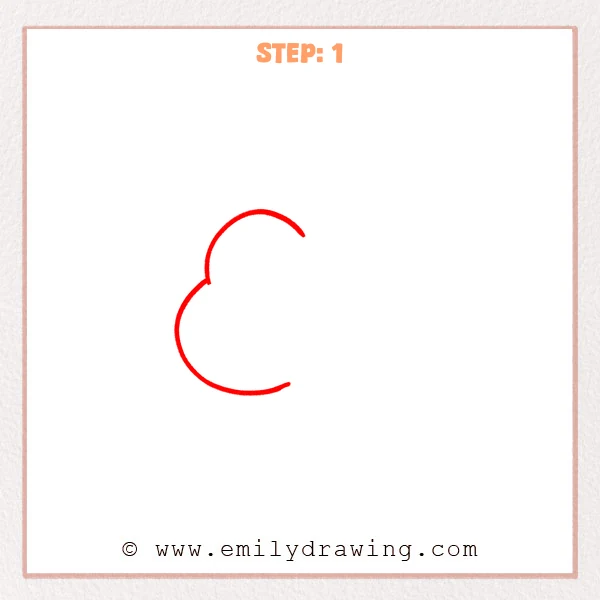
Start near the lower left and draw a large curved line for the cloud’s bottom edge.
Add a taller curved line above it to form the soft top outline of a cloud in the night sky.
Pro Tip: Let the two curves connect naturally, but keep the right side open for the next shapes.
Step 2: Extend the Cloud Bottom
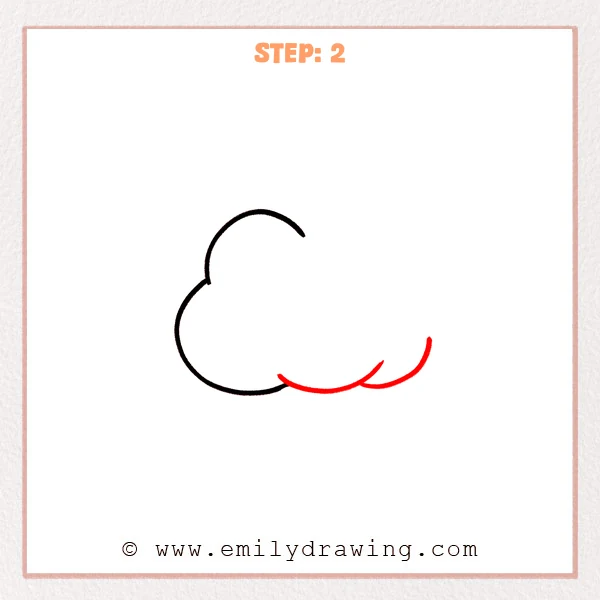
Continue from the open bottom edge and add two shallow curved bumps to the right.
Curve the far-right line upward so the cloud edge feels soft and floating.
Pro Tip: Keep the new curves lower and flatter than the left curve to create layered cloud shapes.
Step 3: Add the Upper-Right Cloud Curves
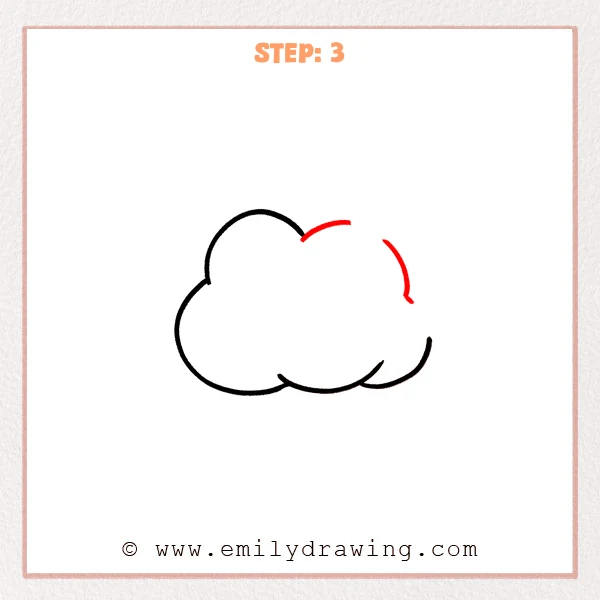
At the open top area, draw a small rounded curve extending to the right.
Add a downward curve on the right side to begin shaping the cloud’s outer edge.
Pro Tip: Leave a small gap between the right curve and the bottom so the outline can connect later.
Step 4: Draw the Small Star
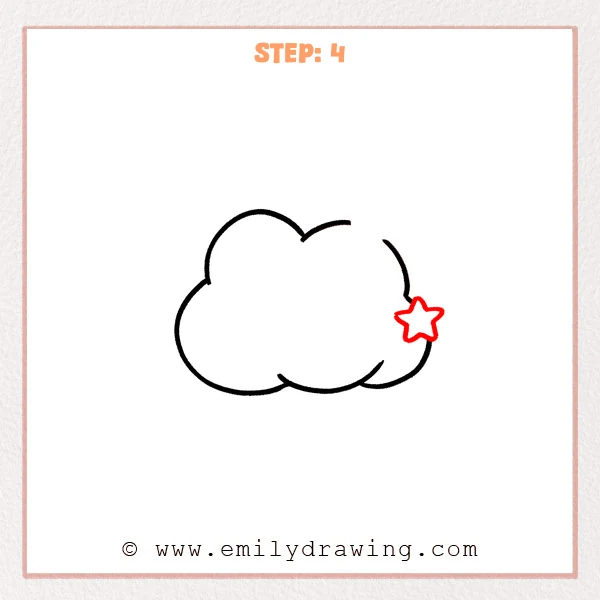
Add a small five-point star along the cloud’s right edge.
Place it close to the cloud outline so it looks like a bright night sky detail.
Pro Tip: Keep the five points close in size so the star shape looks balanced.
Step 5: Add the Sleeping Face
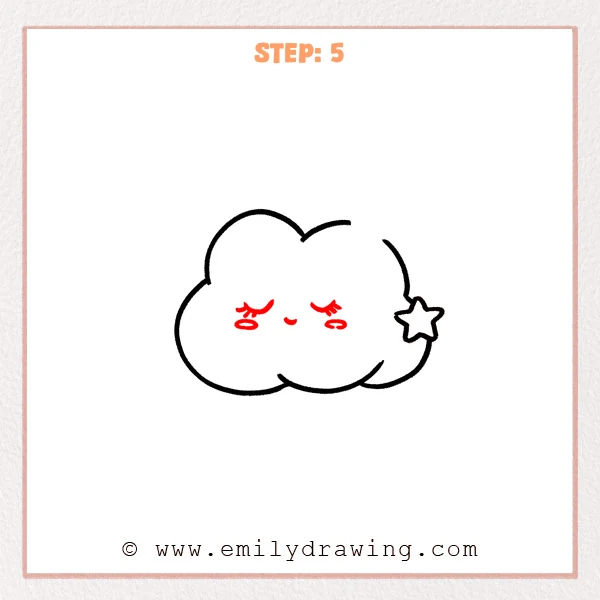
Draw two closed curved eyes in the center of the cloud, then add short lashes on the outer sides.
Add two small oval blush marks below the eyes and a tiny curve for the quiet mouth.
Pro Tip: Keep both eyes at the same height so the expression looks peaceful and cute.
Step 6: Color in your drawing!
Fun Facts
- Clouds can look soft and fluffy because they are made of many tiny water droplets or ice crystals.
- Stars often appear to twinkle because Earth’s atmosphere bends their light.
- A sleepy cloud makes a night sky drawing feel calm, gentle, and friendly.
Pin it now, Draw later!
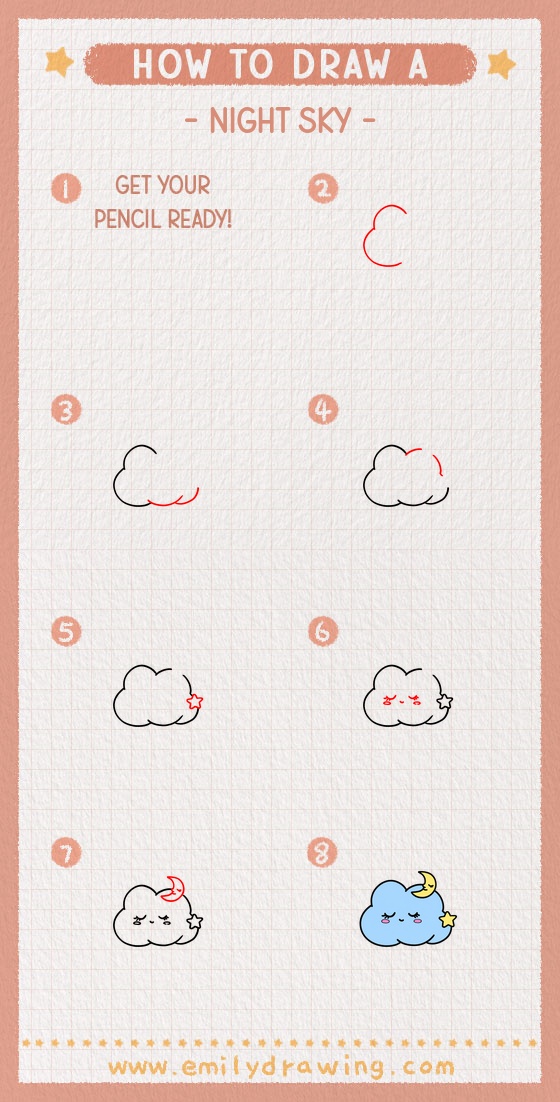
Now you have completed a cute night sky drawing with a soft cloud, a star, and a peaceful sleepy face.
Trace the final lines carefully, erase any guide marks, and add gentle colors to finish your artwork.
Keep practicing this drawing for beginners, and try adding more stars or a moon next time.
Get the FREE Printable Drawing Guide
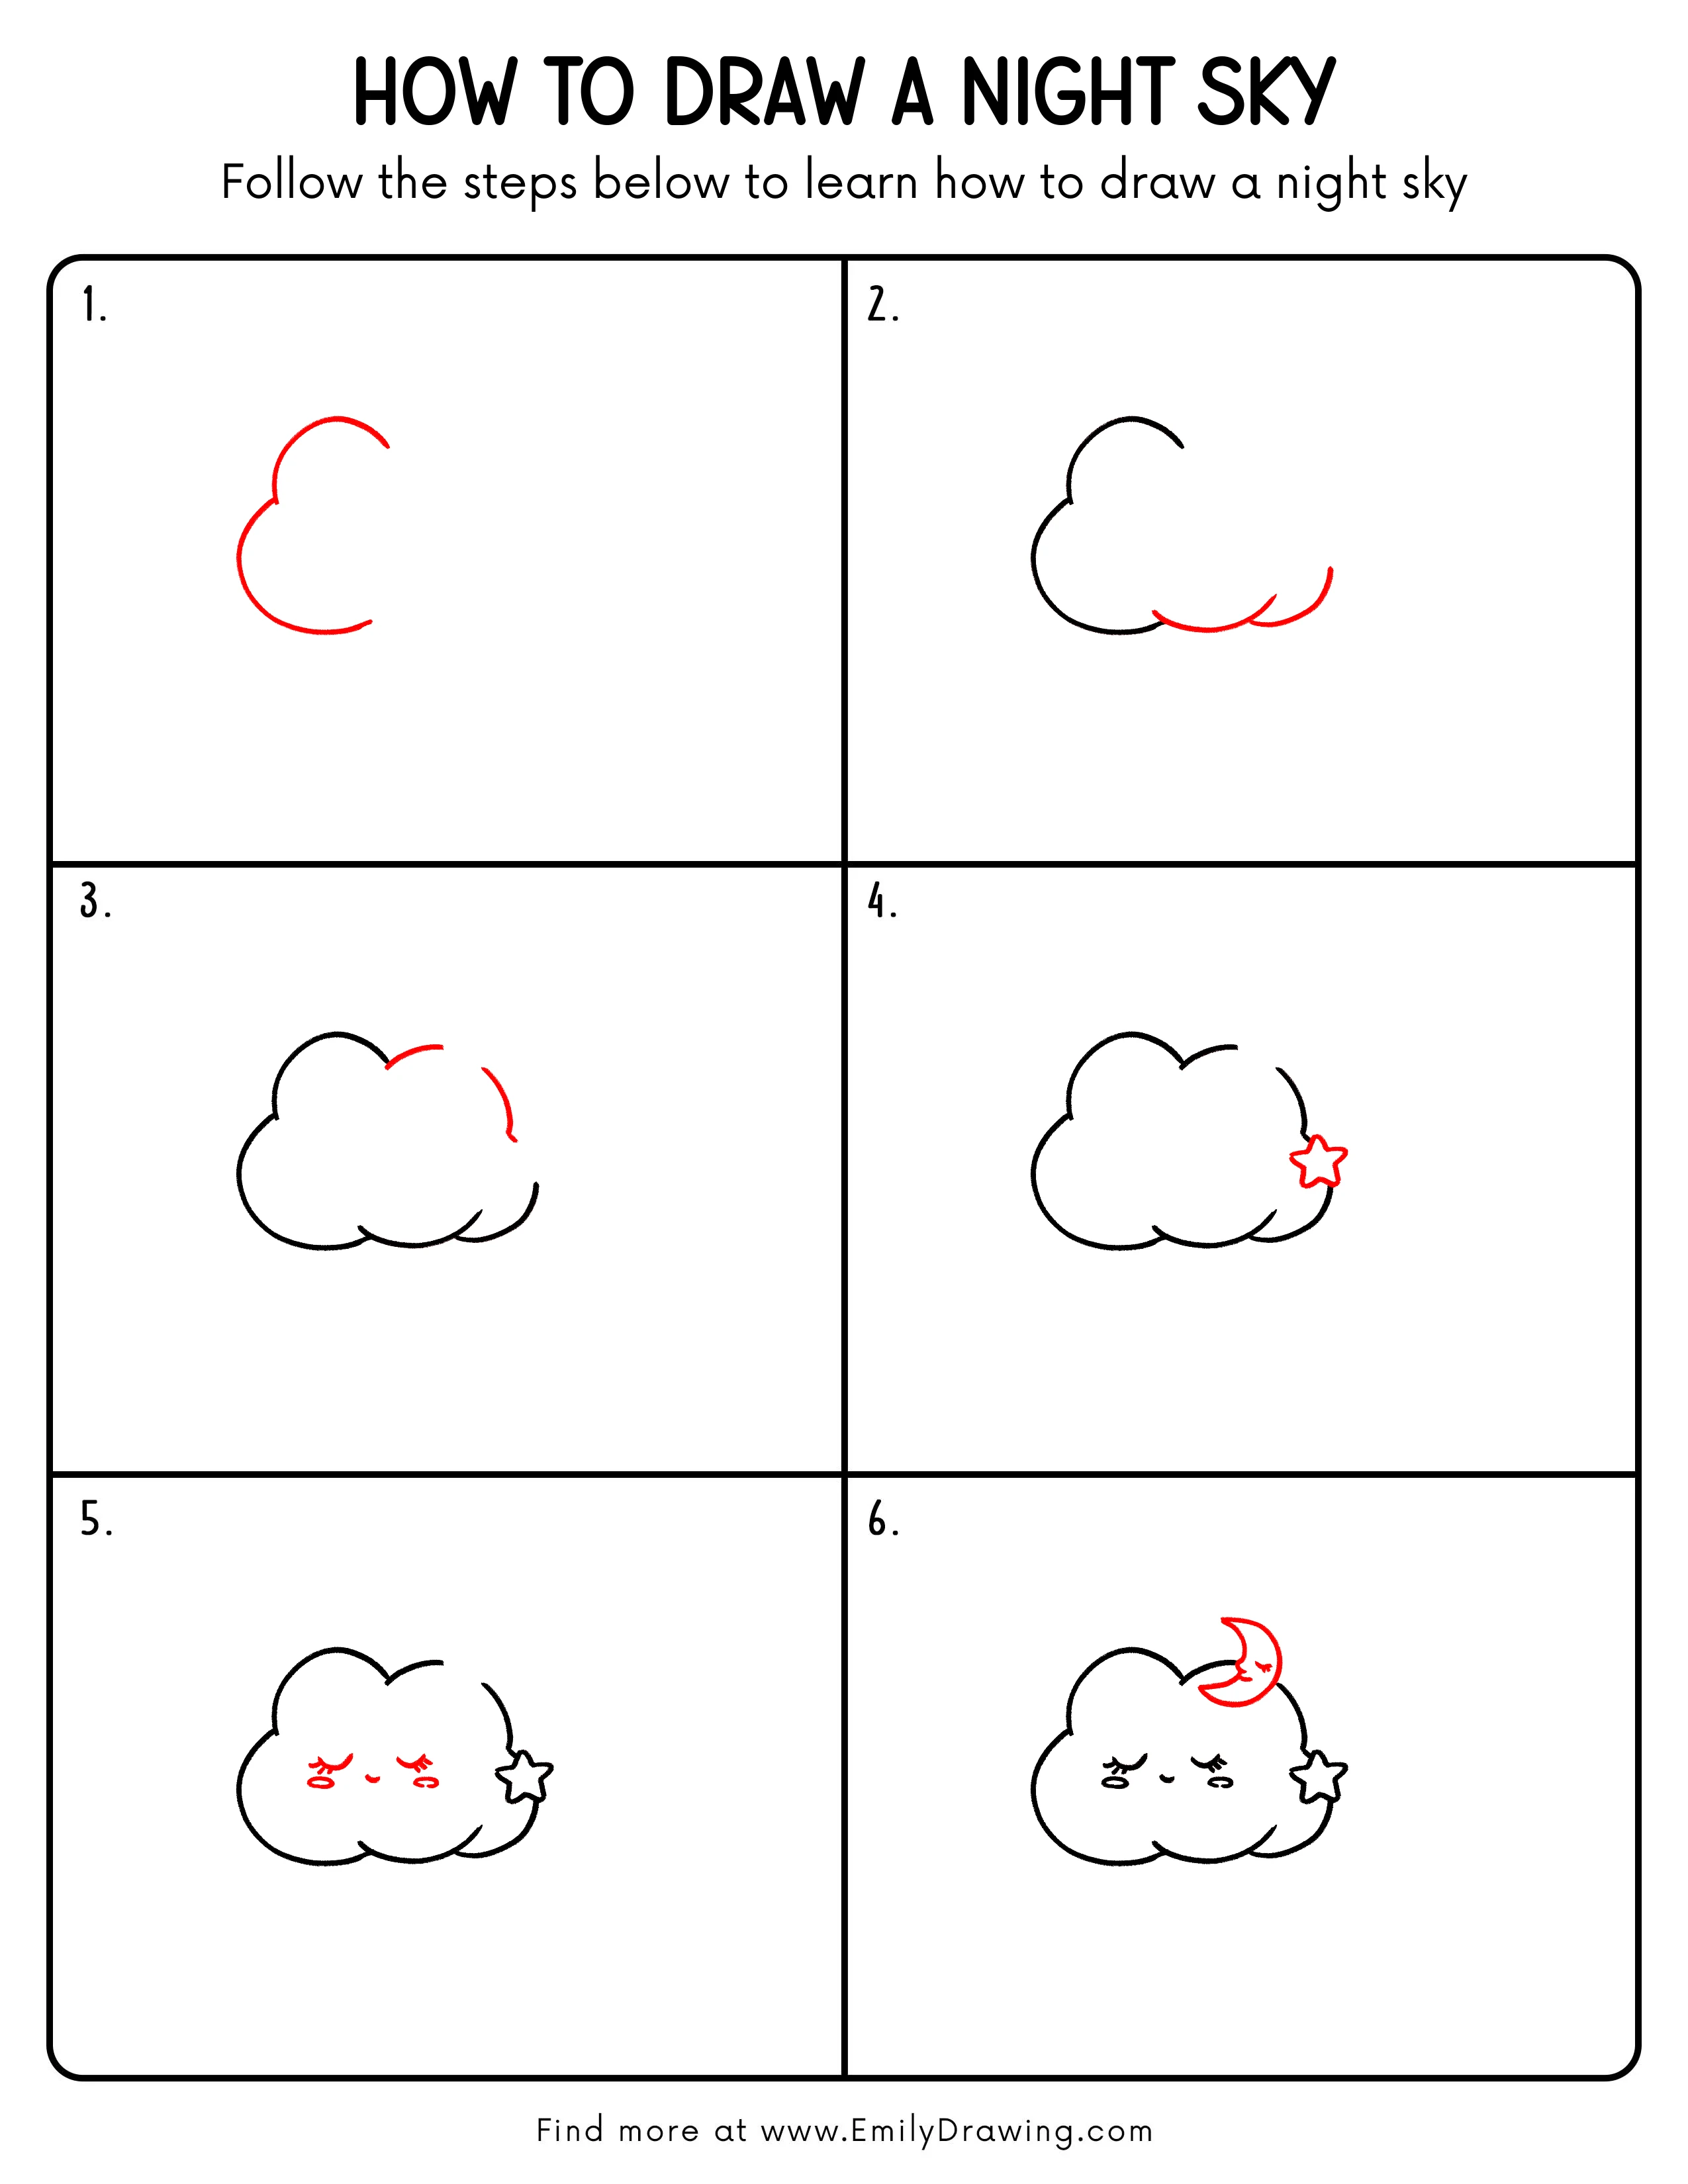
FREE Download Printable Night Sky Drawing Tutorial
Frequently Asked Questions
Is this night sky drawing good for beginners?
Yes, this easy drawing tutorial uses simple curves, small shapes, and clear steps.
How can I make my night sky drawing more detailed?
You can add a crescent moon, extra stars, or soft blue shading around the cloud.
What should I color first?
Start with the cloud, then color the star and add a darker background last.



