
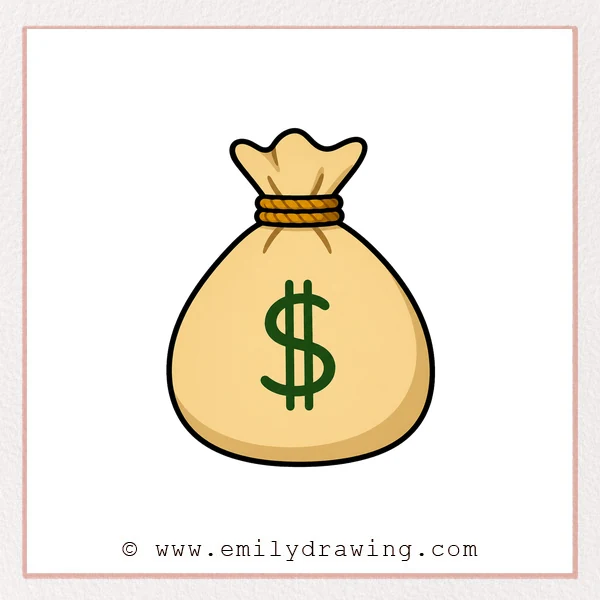
If you want to learn how to draw a money bag, this easy drawing tutorial will guide you through each stage. This step by step drawing lesson is great for beginners, kids, and anyone who enjoys simple cartoon-style sketches. Take your time with each shape, and you will build a clear and neat money bag drawing from start to finish.
What You Will Need
- Drawing paper
- Pencil
- Black pen or marker
- Red pencil or marker for step highlights
- Eraser
Here are my RECOMMENDED Art Supplies!
- Crayola Coloring Set (140 Pieces – Mega Value!)
- 24 Colored Crayon Set
- A4 Printer Paper
- Crayola Coloring Pencils
- HP Home Printer with Instant Ink!
Time needed:
30 minutes.
Step-by-Step Drawing Guide
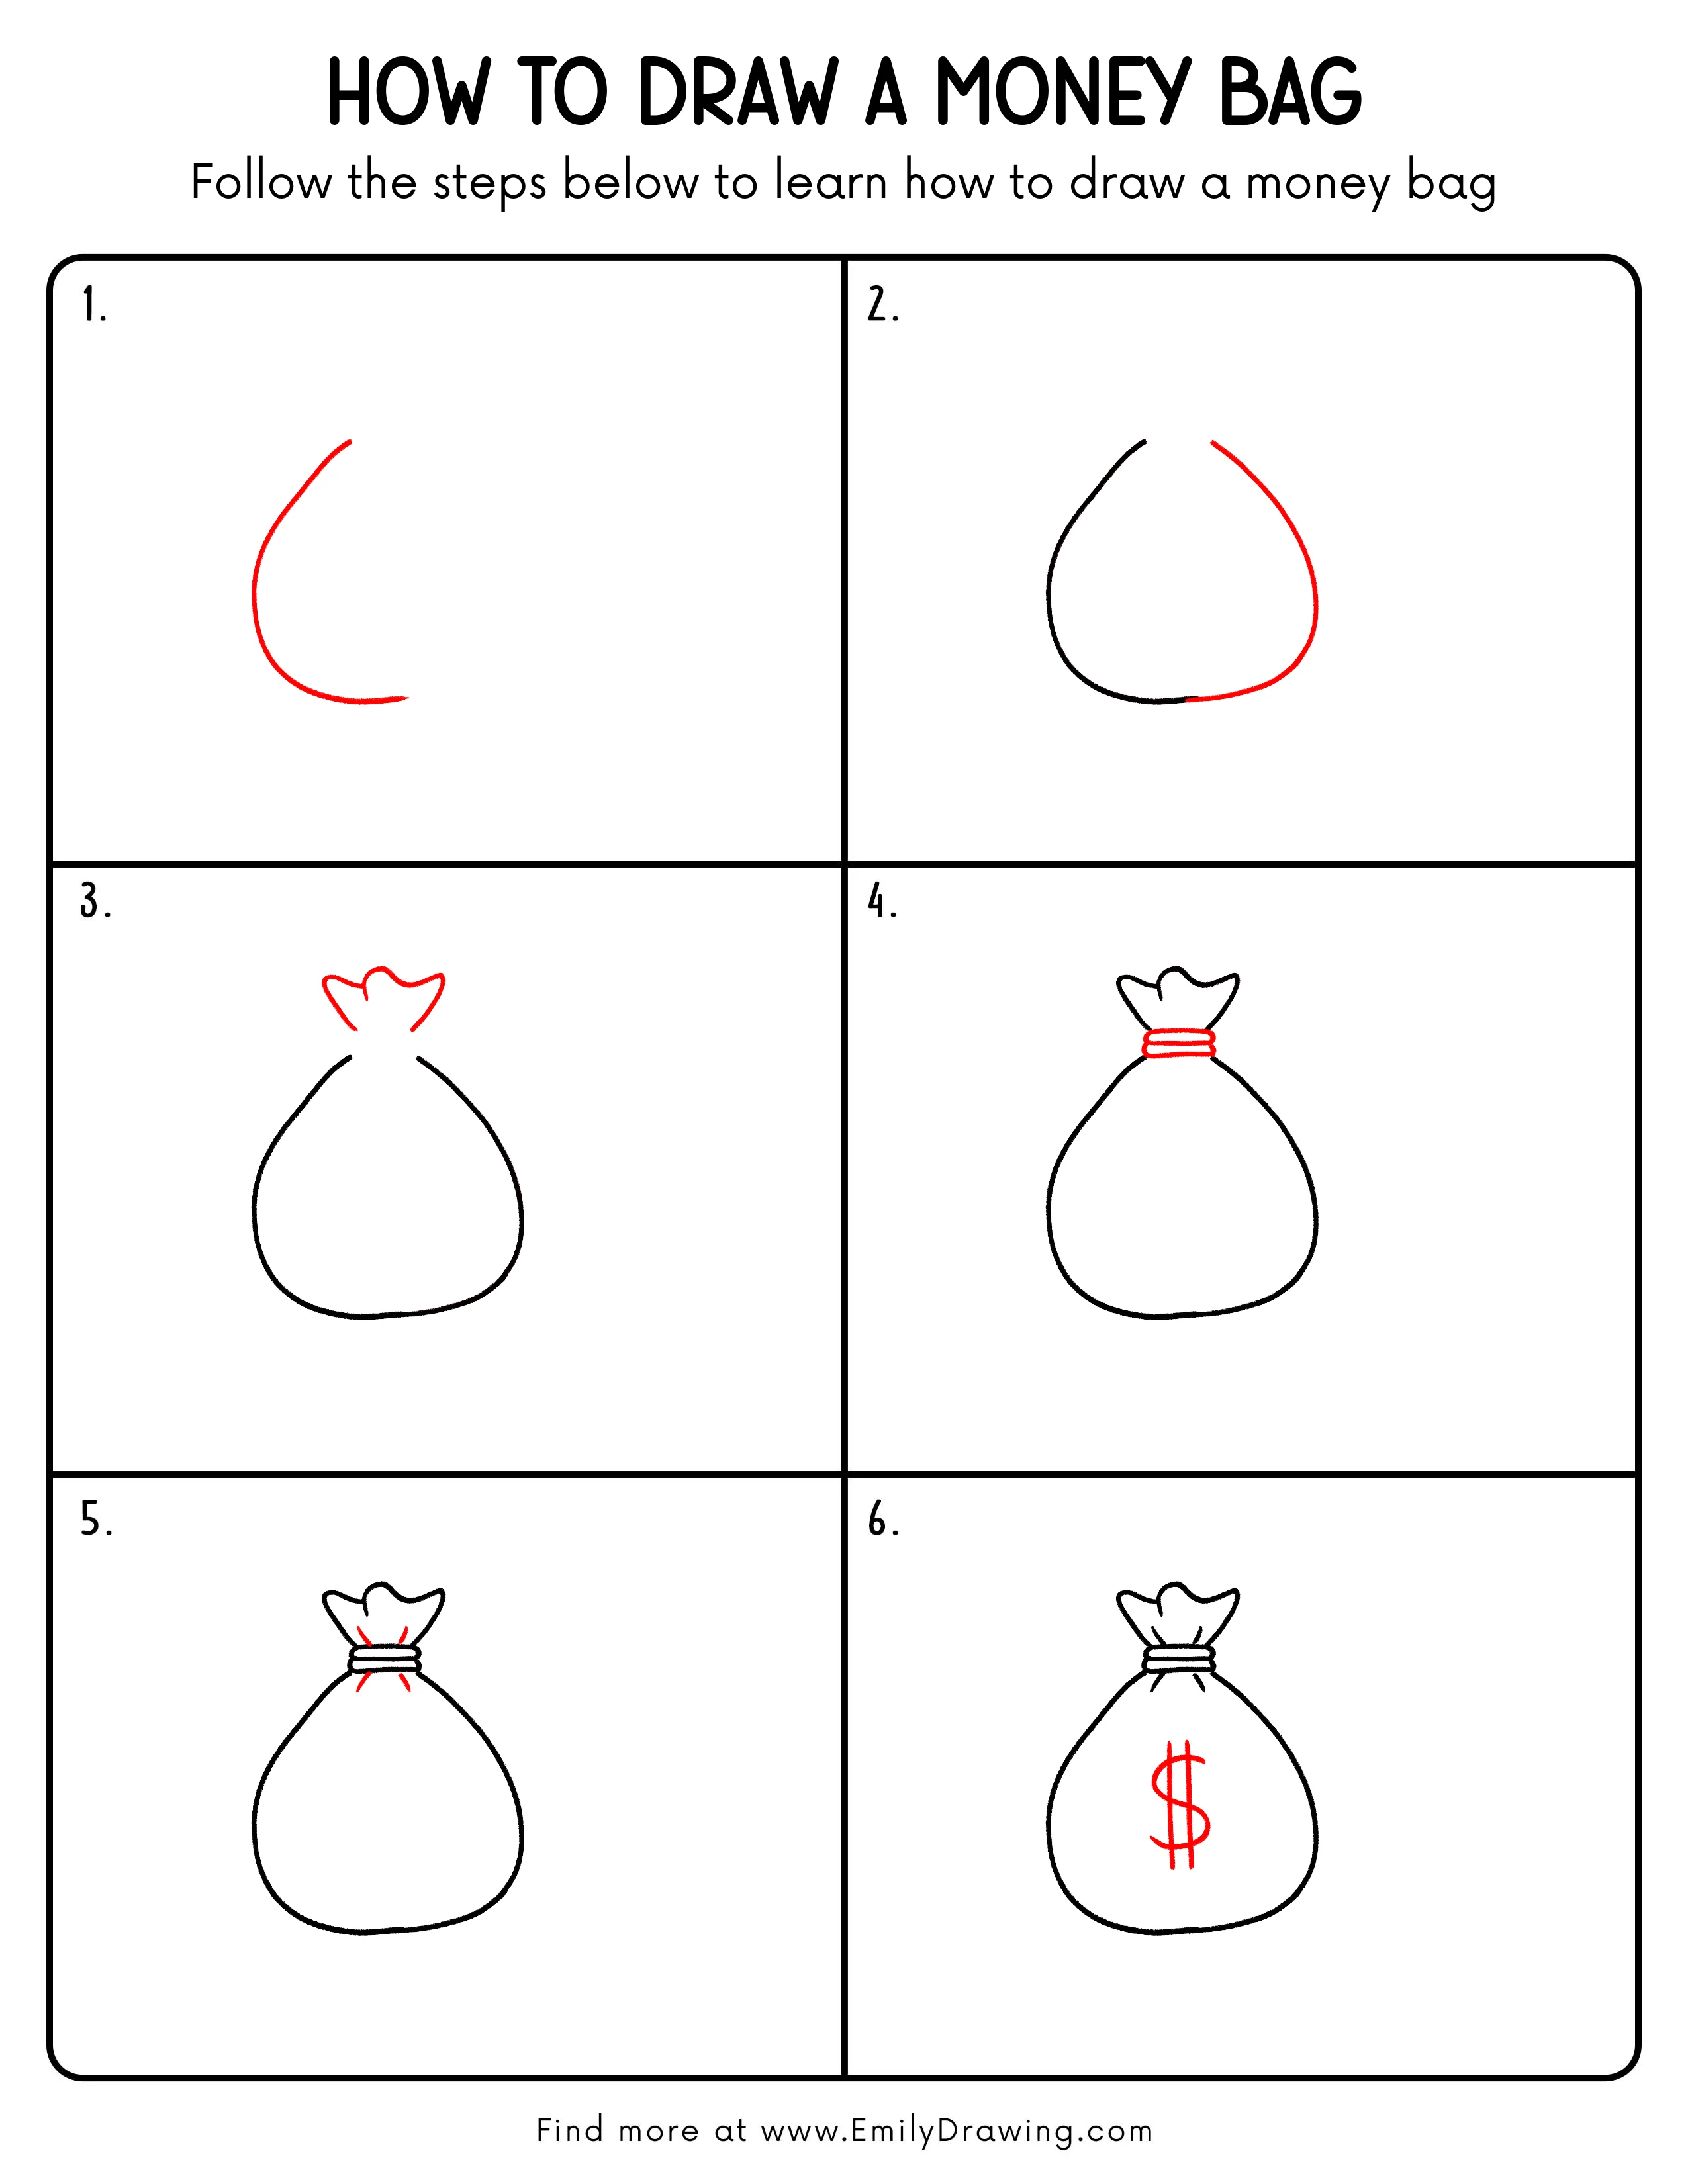
Step 1: Draw the Left Outer Shape
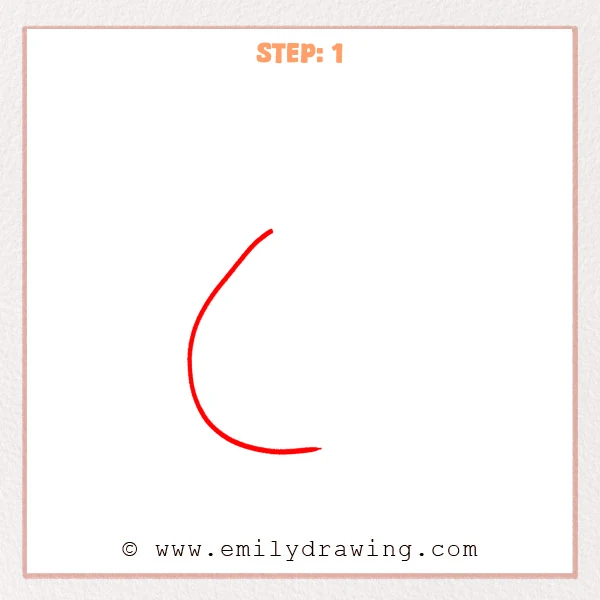
Start with a long curved line that opens toward the right, like a soft hook. Let the bottom curve gently outward to begin the rounded base of the money bag. Keep the shape simple and smooth.
Pro Tip: Keep the bottom curve slightly flatter so the money bag looks more stable.
Step 2: Add the Right Outer Shape
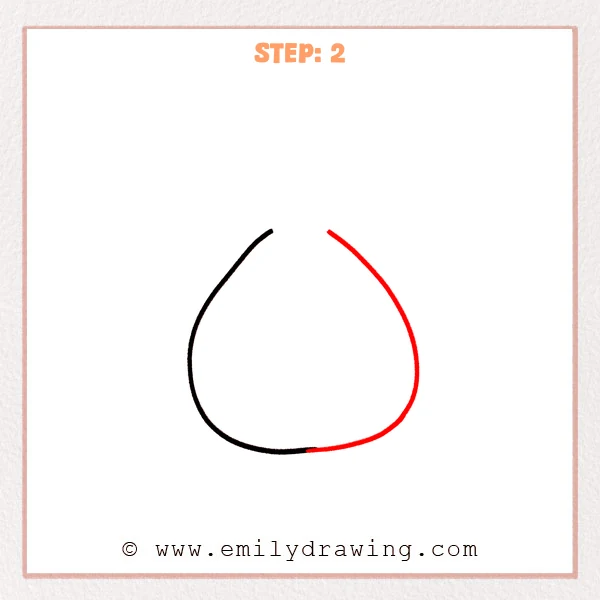
Draw a new curved line from the upper right, bending down toward the base. Connect it smoothly to the bottom line to create a rounded bag body with an open top. The shape should look full and soft.
Pro Tip: The two sides do not need to match perfectly, but keep the base rounded and steady.
Step 3: Draw the Gathered Top
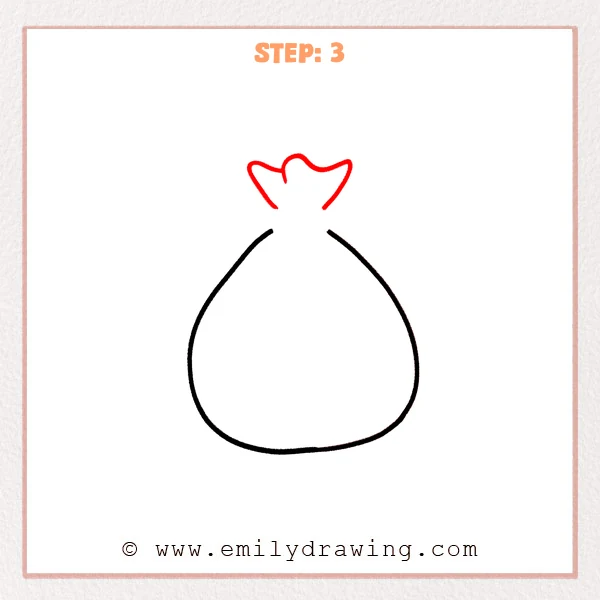
Add a wavy tied opening above the bag body, like fabric gathered together. Draw short curved lines downward on both sides to connect the top to the neck of the bag. This makes the upper section look like folded cloth.
Pro Tip: Let the top waves vary in height so the fabric looks more natural.
Step 4: Add the Cinching Band
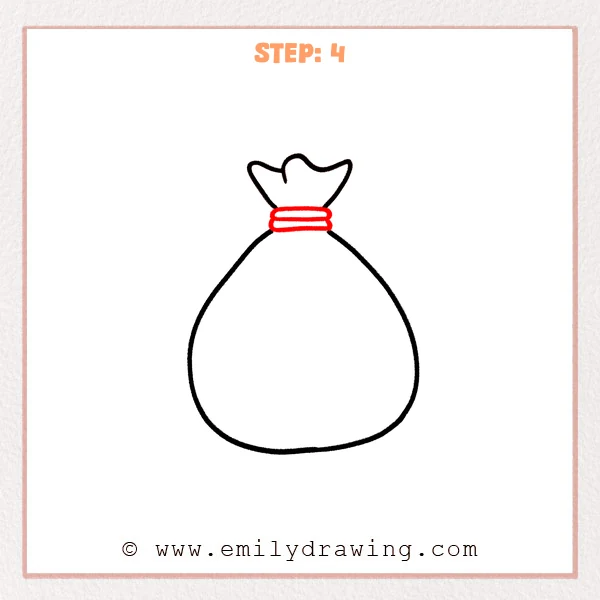
Draw two horizontal curved lines between the bag body and the top fabric. Round the ends slightly so the band looks wrapped tightly around the opening. This helps separate the tied section from the main body.
Pro Tip: Keep the band width even so the cinched opening looks clear.
Step 5: Add Tightened Fold Lines
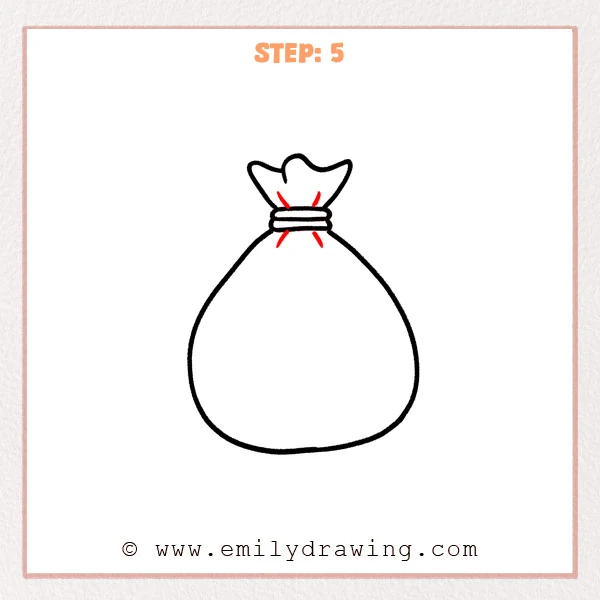
Add a few short slanted lines above and below the band to show gathered fabric folds. Let the lines spread outward from the band so the tied area looks tighter and more detailed. These small marks give the drawing more structure.
Pro Tip: Keep the fold lines short so the cinched opening looks clean.
Step 6: Draw the Dollar Sign
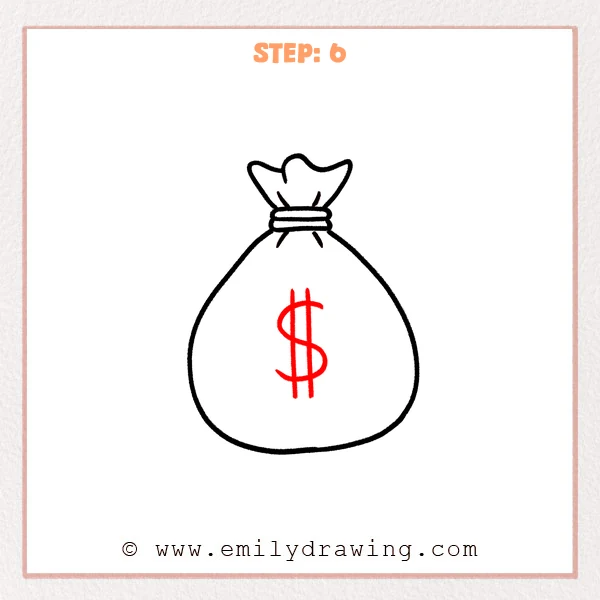
Add a large dollar sign in the center of the money bag. Draw the straight vertical lines first, then add the curved “S” shape across them. Place the symbol neatly so the bag is easy to recognize.
Pro Tip: Place the dollar sign slightly above the center to keep the drawing balanced.
Step 7: Color in your drawing!
Fun Facts
- A money bag is often used as a symbol for savings, wealth, or treasure.
- In cartoons, money bags are usually tied at the top with a rope or band.
- The dollar sign helps make the drawing easy to identify at a glance.
Pin it now, Draw later!
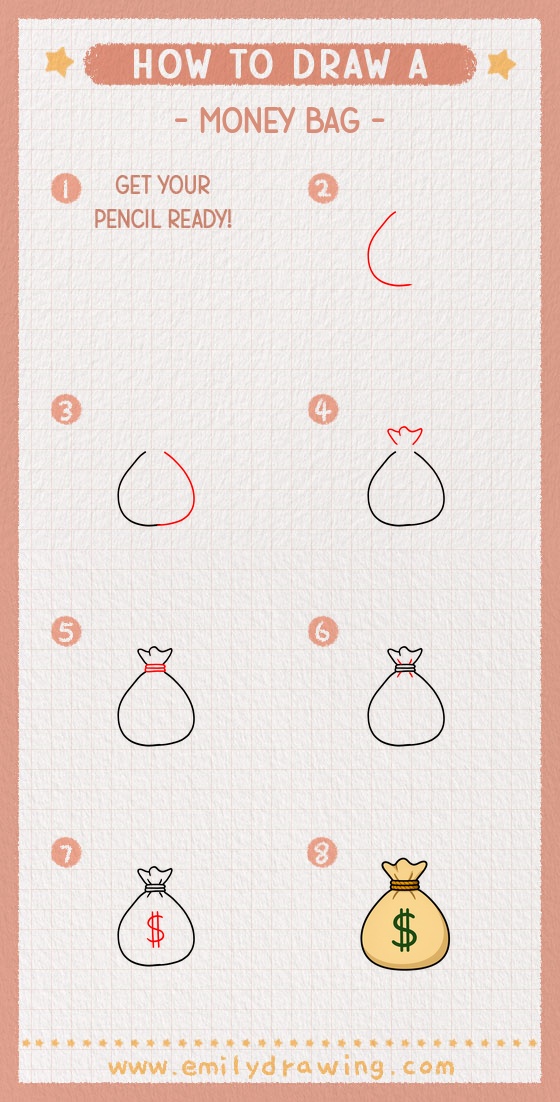
You have now completed an easy drawing tutorial on how to draw a money bag. You started with the outer shape, added the tied top, drew the band and folds, and finished with the dollar sign. You can now trace your final lines, erase any rough marks, and color the bag if you like. Keep practicing this step by step drawing and try drawing more simple objects next.
Get the FREE Printable Drawing Guide
FREE Download Printable Money Bag Drawing Tutorial
Frequently Asked Questions
Can beginners draw a money bag easily?
Yes. This drawing for beginners uses simple curved lines and small details, so it is easy to follow.
What can I use to color my money bag?
You can use crayons, colored pencils, markers, or digital brushes. Brown, tan, or gold tones work well.
How can I make the money bag look more realistic?
Add a few extra fabric folds, light shading, and a slightly uneven cloth top to give it more depth.



