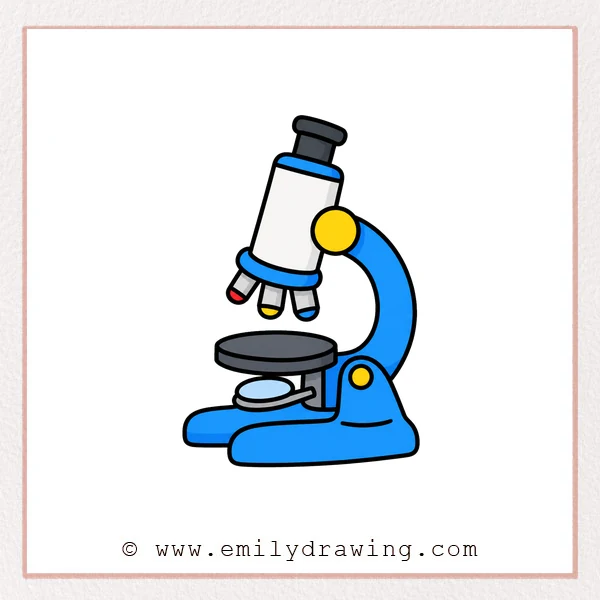
This easy drawing tutorial shows you how to draw a microscope in simple steps. It is a calm, beginner-friendly guide that breaks the shape into clear parts. If you enjoy step by step drawing, this microscope lesson is a great choice for drawing for beginners.
What You Will Need
- Plain paper
- Pencil or black marker
- Eraser
- Red pencil or crayon for guide lines, if you like
- Colored pencils or markers for finishing touches
Here are my RECOMMENDED Art Supplies!
- Crayola Coloring Set (140 Pieces – Mega Value!)
- 24 Colored Crayon Set
- A4 Printer Paper
- Crayola Coloring Pencils
- HP Home Printer with Instant Ink!
Time needed:
12 minutes.
Step-by-Step Drawing Guide
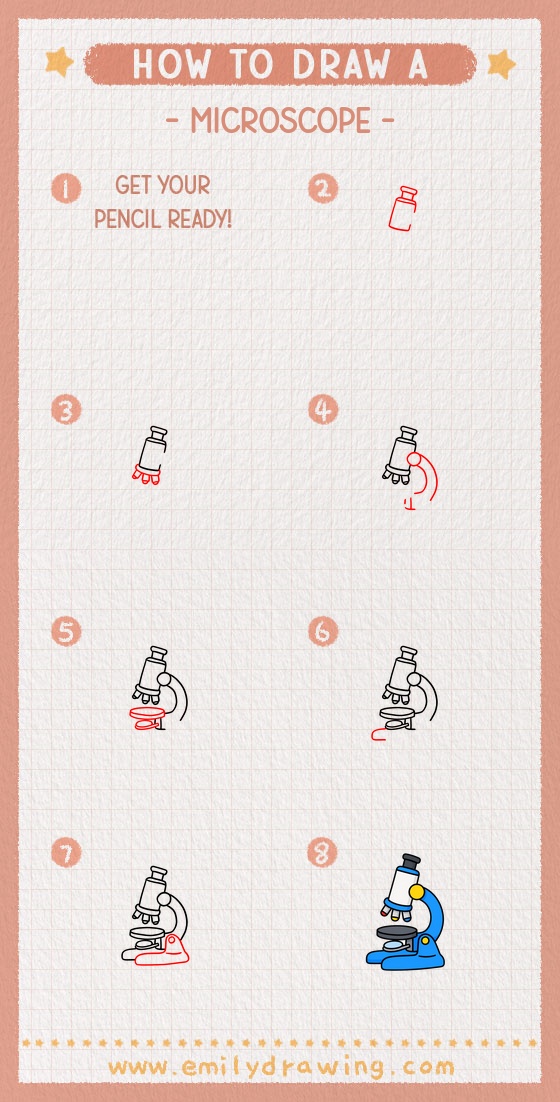
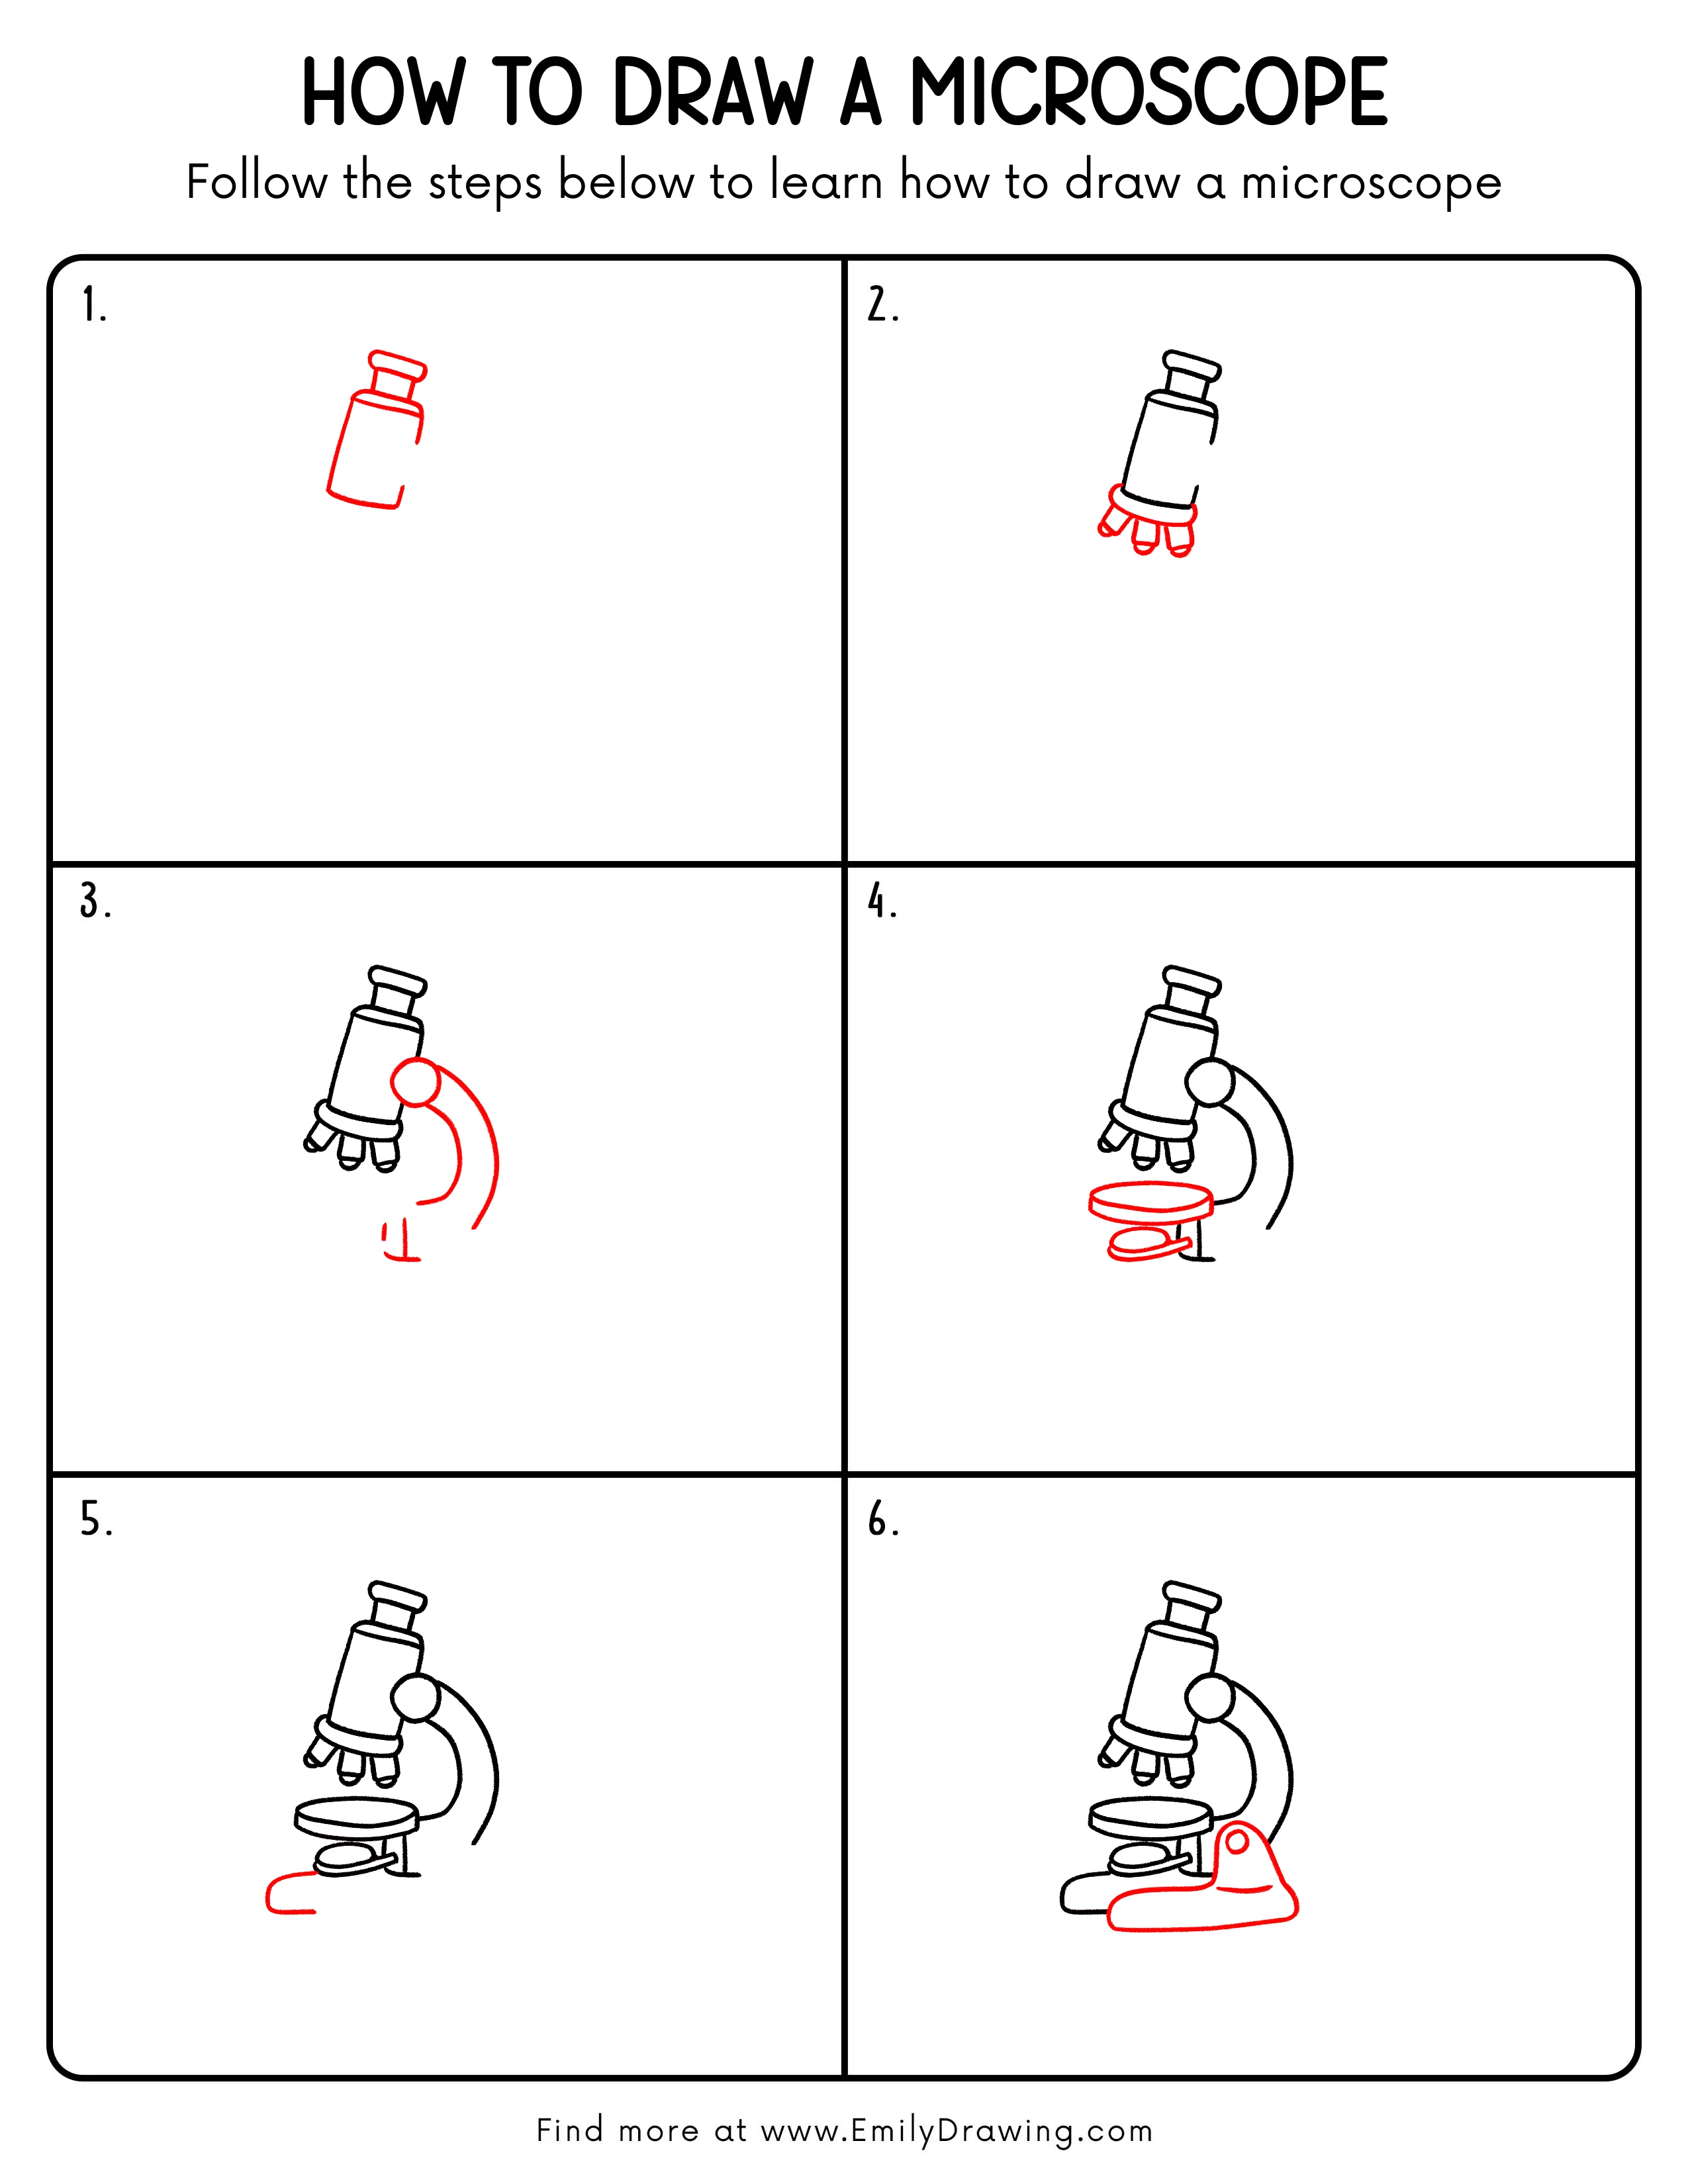
Step 1: Draw the Main Microscope Outline
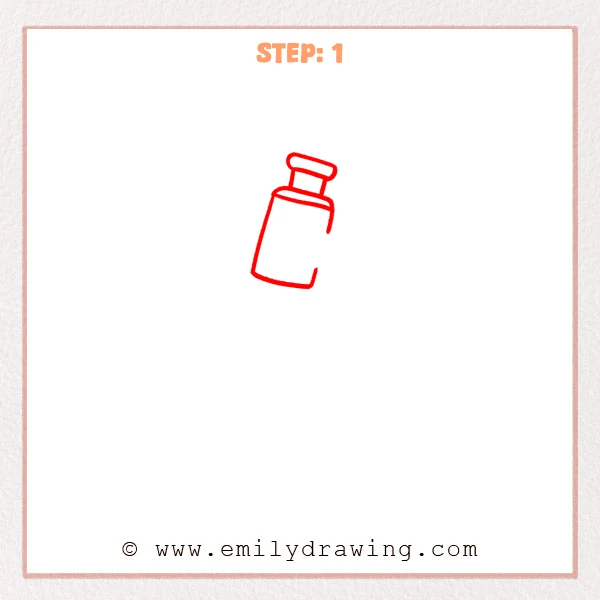
Start with a tilted rectangle for the main body of the microscope. Add a short tube and a rounded eyepiece on top. Keep the right side open for now so you can add more parts later.
Pro Tip: Tilt the body slightly to the left so the microscope looks more natural.
[Alt Text: First sketch step for a microscope drawing, showing the main tilted body, short tube, and rounded eyepiece outline.]
Step 2: Add the Nosepiece and Lenses
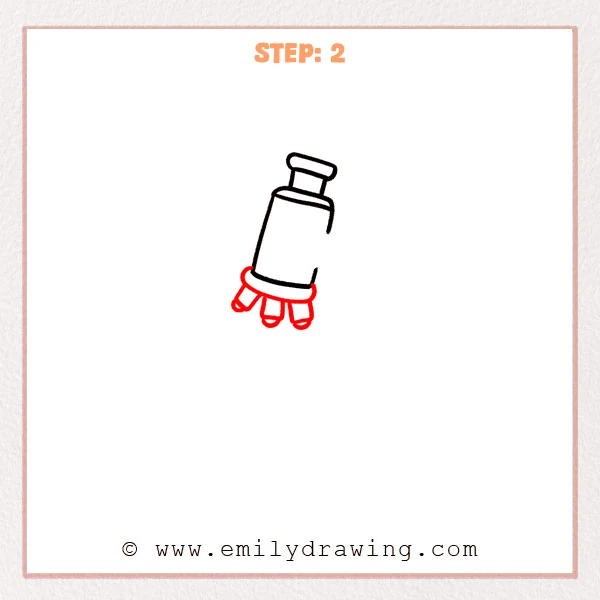
Draw a curved oval nosepiece under the body. Then add three short objective lenses hanging down from it. Close each lens with a small curved end so they look neat and balanced.
Pro Tip: Space the lenses a little apart so the nosepiece stays easy to see.
[Alt Text: Second sketch step for a microscope drawing, adding a curved nosepiece and three small objective lenses under the body.]
Step 3: Draw the Arm and Adjustment Knob
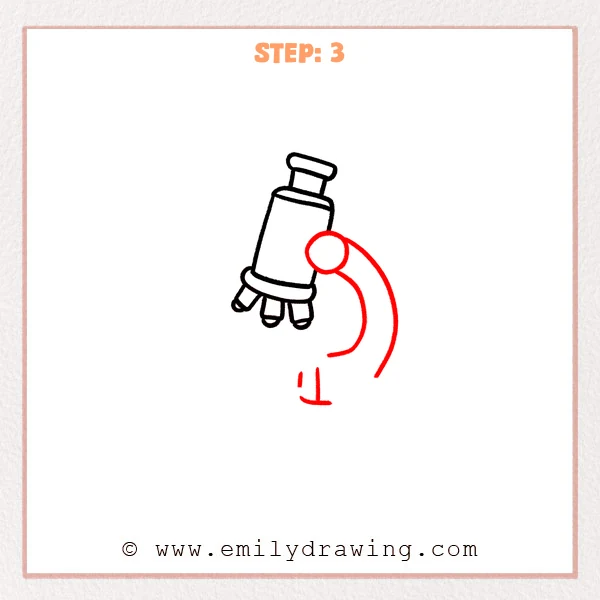
Add a round adjustment knob on the right side of the body. From that area, draw two long curved lines downward to form the microscope arm. Leave room below so the lower parts can fit comfortably.
Pro Tip: Curve the arm in the same direction as the body for a smooth connection.
[Alt Text: Third sketch step for a microscope drawing, adding a round adjustment knob and a curved support arm behind the body.]
Step 4: Add the Stage and Lower Support
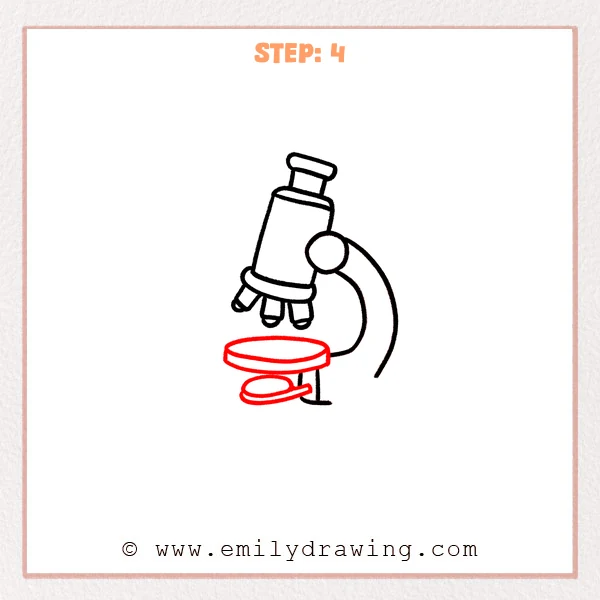
Draw a wide oval stage below the lenses. Add a short side edge to give the stage some thickness. Under it, draw a small oval support and vertical support lines to help the microscope stand firmly.
Pro Tip: Make the stage wider than the lenses so the microscope feels balanced.
[Alt Text: Fourth sketch step for a microscope drawing, adding a wide stage, lower oval support, and vertical support lines beneath the lenses.]
Step 5: Draw the Microscope Base
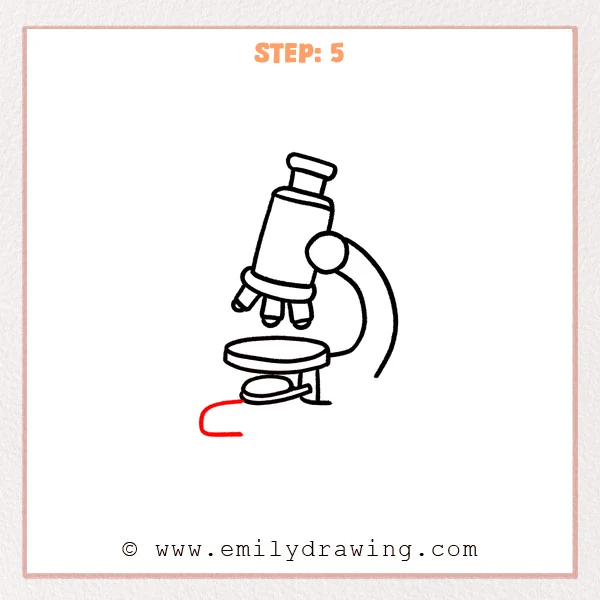
Add a broad curved line on the lower left side of the microscope. Let it stretch out and bend back to begin the base shape. This gives the drawing a stronger and steadier bottom structure.
Pro Tip: Make the base a little wide so the microscope does not look like it is tipping.
[Alt Text: Fifth sketch step for a microscope drawing, showing a wide curved base outline being added under the lower support.]
Step 6: Complete the Base and Fastening Details
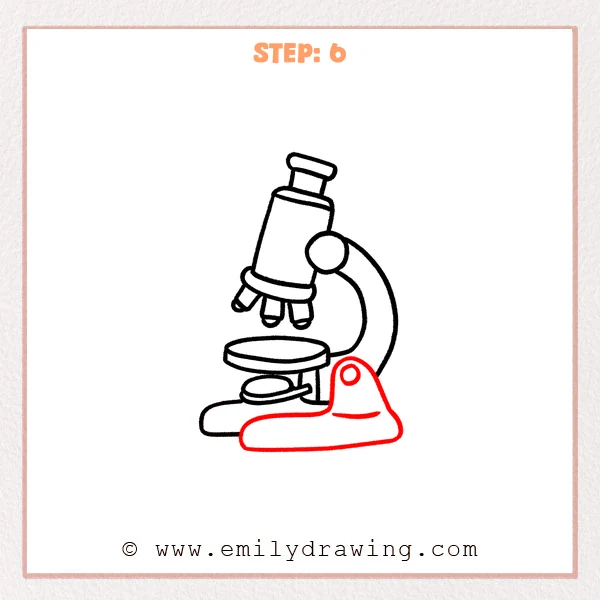
Extend the base to the right and shape it into a wide rounded triangle. Add a small circular hole near the support and a short curved detail line on the base. These final parts make the microscope look complete and sturdy.
Pro Tip: Make the right side of the base slightly taller so it connects naturally to the back arm.
[Alt Text: Sixth sketch step for a microscope drawing, completing the wide base with a rounded triangular shape, a small circular hole, and fastening details.]
Step 7: Color in your drawing!
Fun Facts
- A microscope helps us see very tiny things that our eyes cannot see alone.
- Some microscopes can make objects look hundreds of times bigger.
- Scientists use microscopes to study cells, plants, and tiny living things.
- The word “microscope” comes from words that mean “small” and “to look at.”
Pin it now, Draw later!
You can trace your final lines and erase any sketch marks. Try coloring the microscope with gray, blue, or green shades to make it stand out. Now you know how to draw a microscope with an easy drawing tutorial that is simple and fun, so keep practicing and enjoy your next step by step drawing.
Get the FREE Printable Drawing Guide
FREE Download Printable Microscope Drawing Tutorial
Frequently Asked Questions
Can beginners draw a microscope easily?
Yes, this drawing for beginners uses simple shapes and adds one part at a time. If you go slowly, the microscope becomes much easier to draw.
How can I make my microscope drawing look better?
Keep your lines smooth and check the size of each part. A wide base, a curved arm, and evenly spaced lenses will help the drawing look more balanced.
What can I draw next after a microscope?
You can try drawing other science tools like a beaker, test tube, or telescope. These also work well as easy step by step drawing practice.