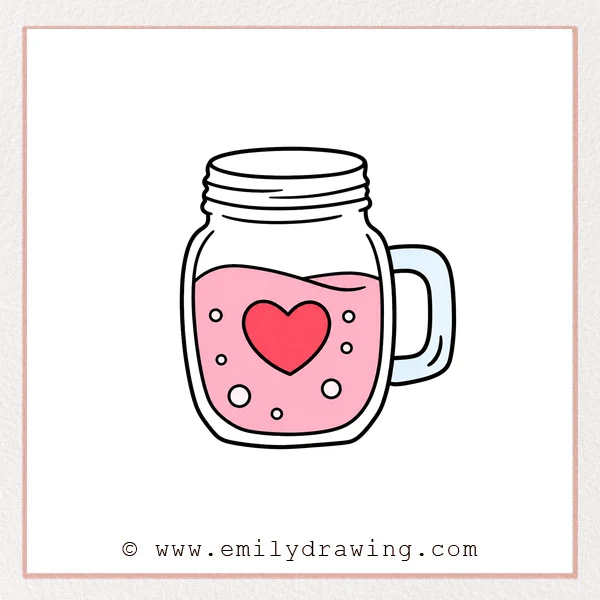
This easy drawing tutorial will show you how to draw a mason jar in a calm, simple way.
If you enjoy step by step drawing, this lesson is a great choice for beginners.
We will build the shape slowly, then add water, bubbles, a heart, and a handle.
What You Will Need
- Drawing paper
- Pencil
- Eraser
- Black pen or marker
- Red pencil or colored marker for guide lines
- Colored pencils or crayons if you want to finish the drawing
Here are my RECOMMENDED Art Supplies!
- Crayola Coloring Set (140 Pieces – Mega Value!)
- 24 Colored Crayon Set
- A4 Printer Paper
- Crayola Coloring Pencils
- HP Home Printer with Instant Ink!
Time needed:
28 minutes.
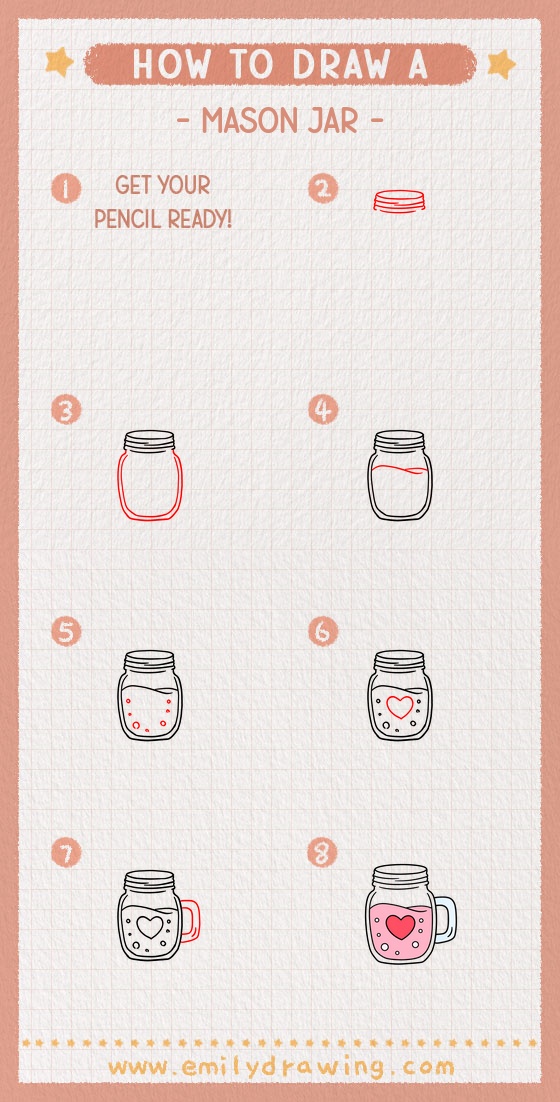
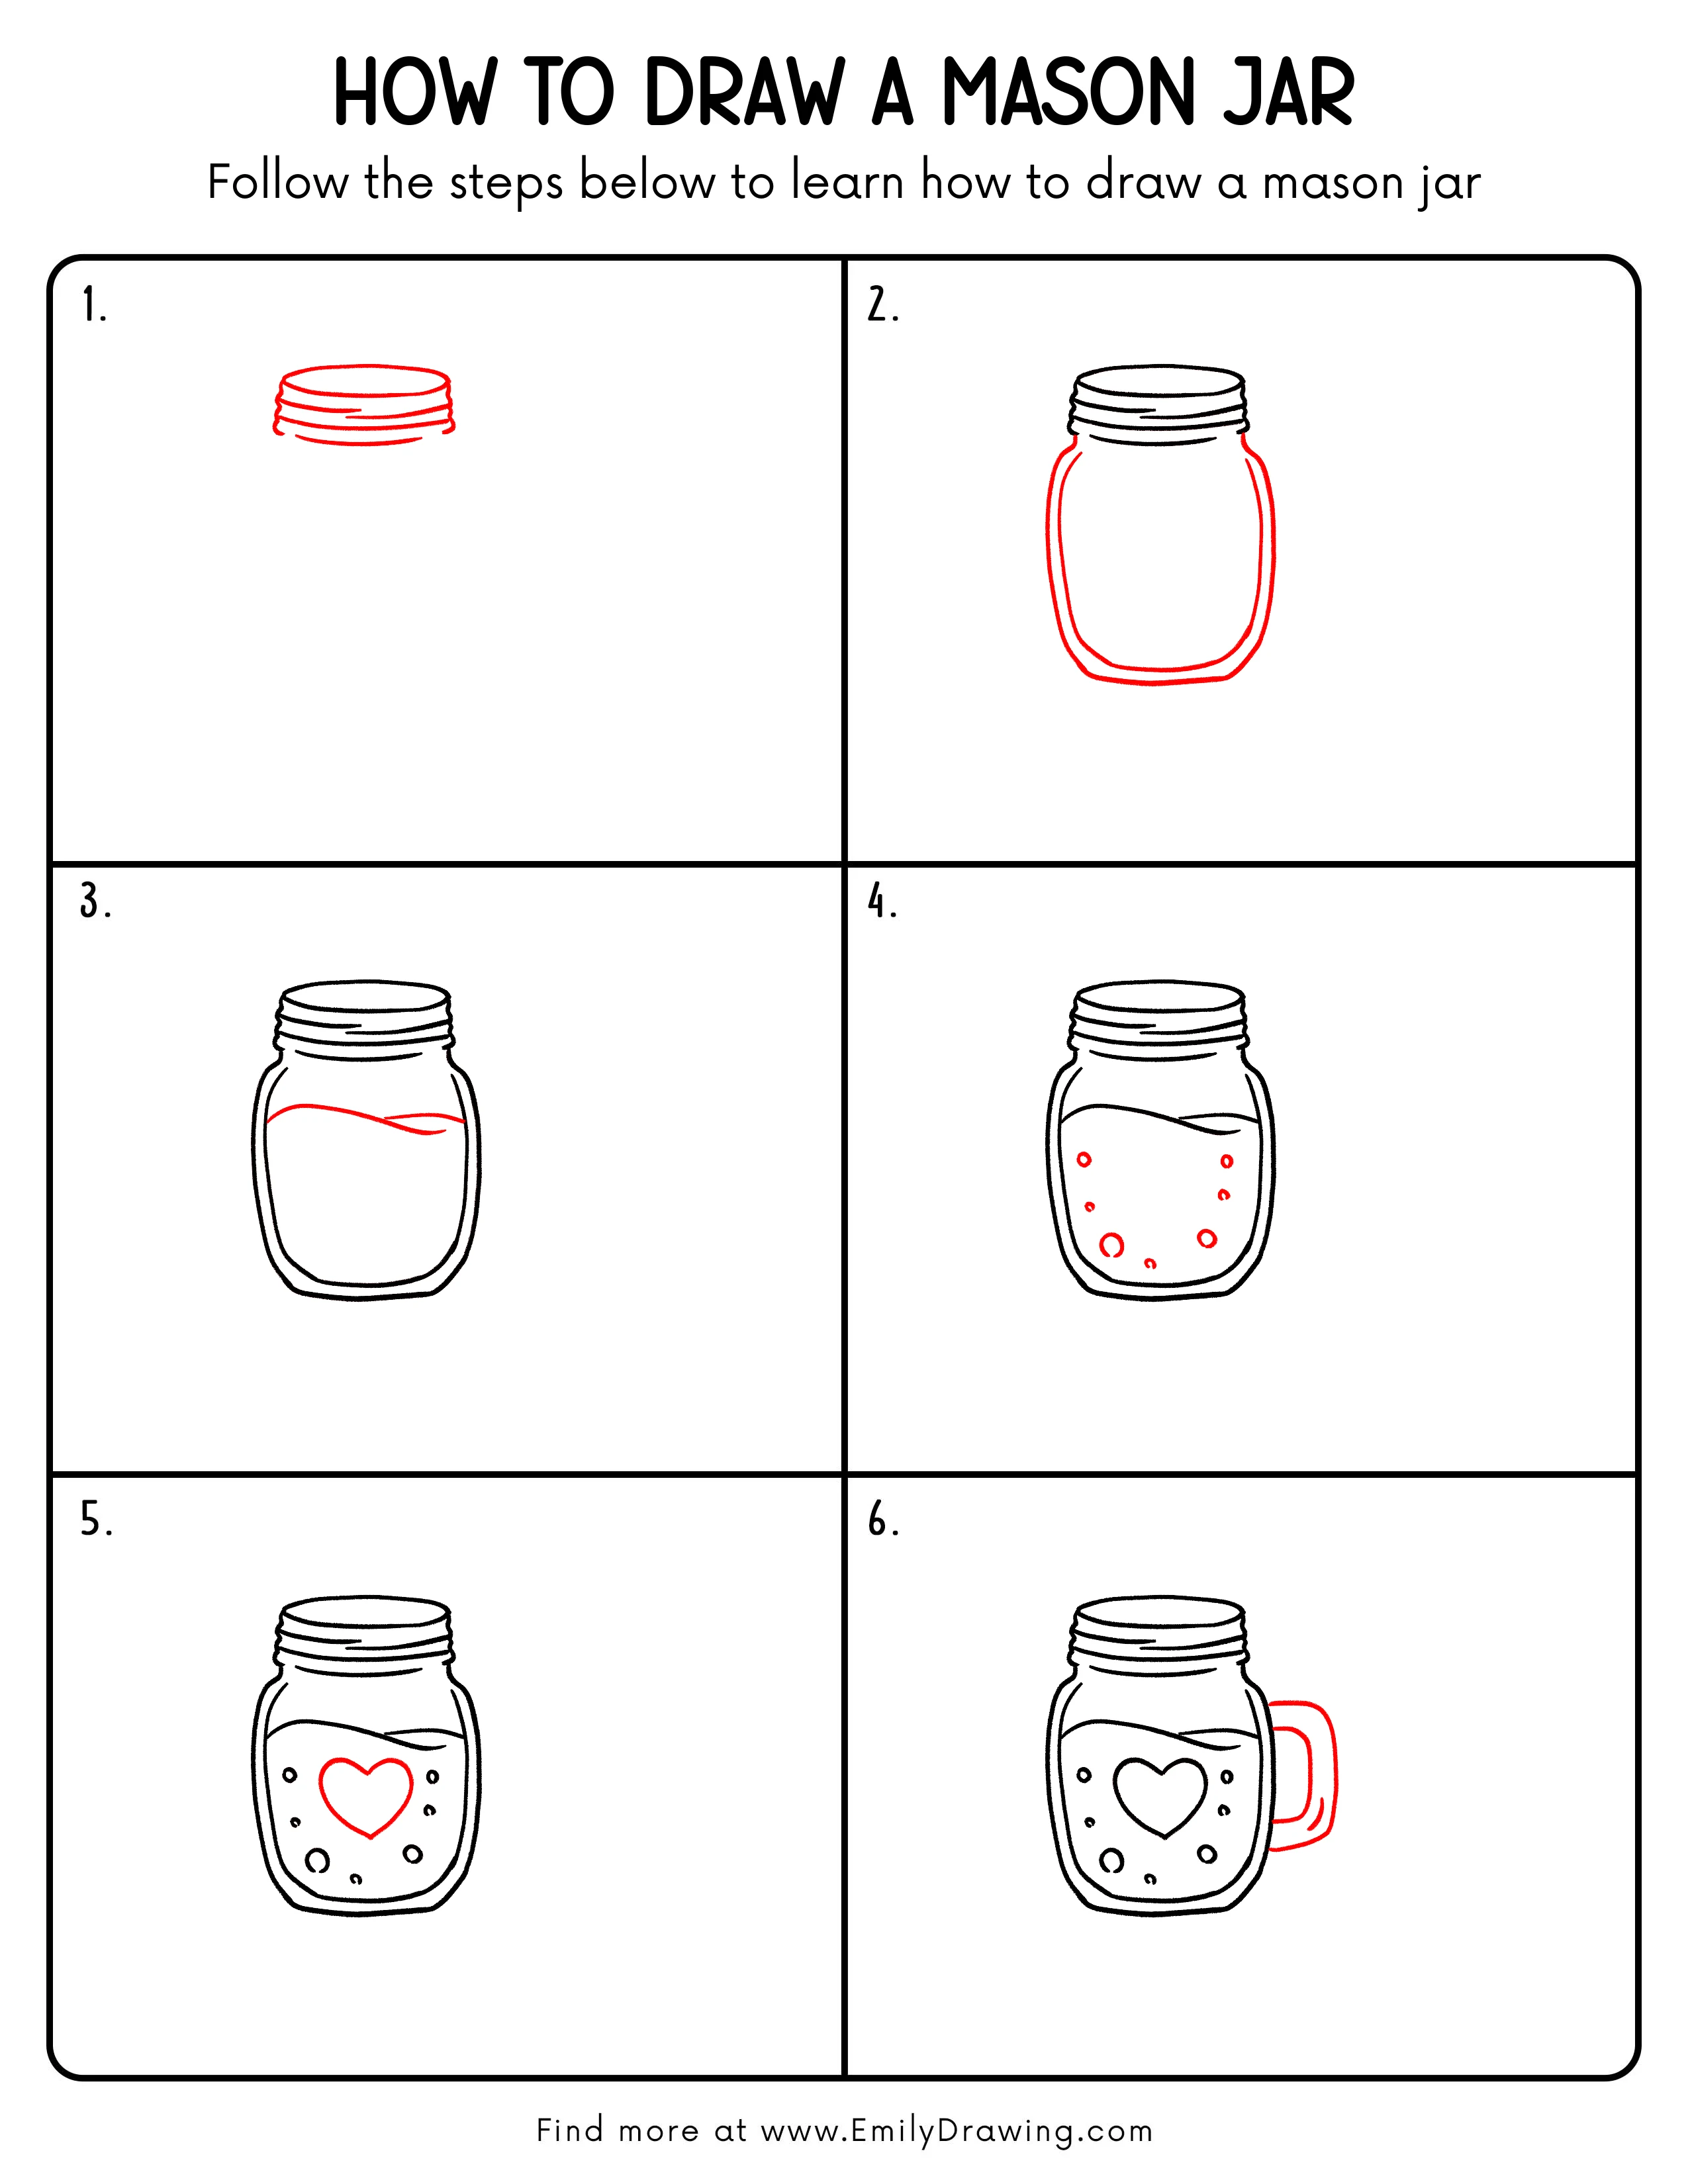
Step-by-Step Drawing Guide
Step 1: Draw the Rim and Thread Lines
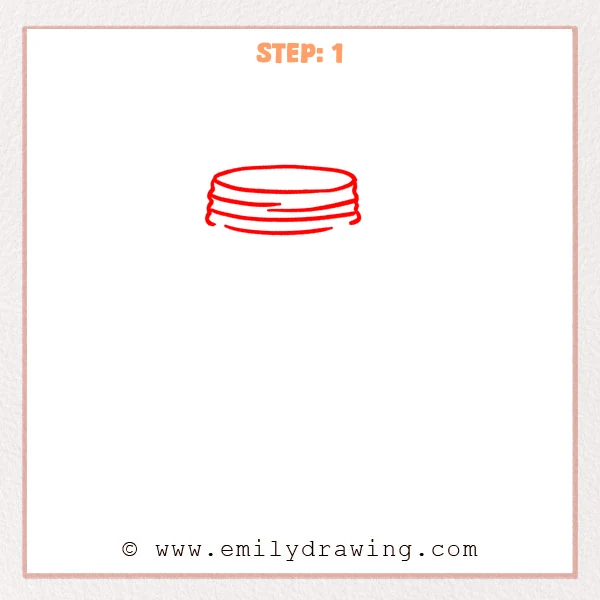
Start with a wide horizontal oval to create the top opening of the mason jar.
Add a few gently curved lines below it to show the threaded rim of the glass jar.
Keep the lines soft and even so the top looks round and smooth.
Pro Tip: Keep each horizontal line following the oval curve so the rim feels more three-dimensional.
[Alt Text: A beginner mason jar sketch starts with a wide oval rim and several curved thread lines under the opening.]
Step 2: Draw the Outer Jar Shape
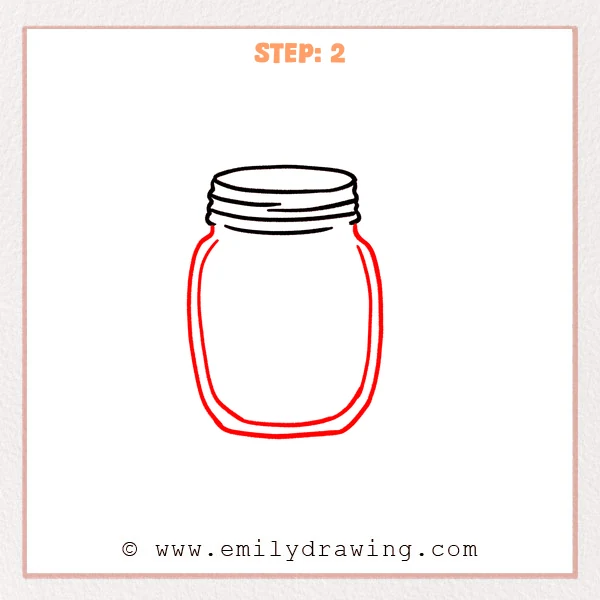
From both sides of the rim, draw rounded shoulders that gently widen outward.
Continue downward with long curved sides, then connect them with a wide, soft bottom curve.
This creates the full outer shape of the mason jar.
Pro Tip: Keep both side curves similar so the mason jar looks balanced and steady.
[Alt Text: The mason jar drawing now includes a full rounded outer body extending down from the threaded rim.]
Step 3: Add the Wavy Water Line
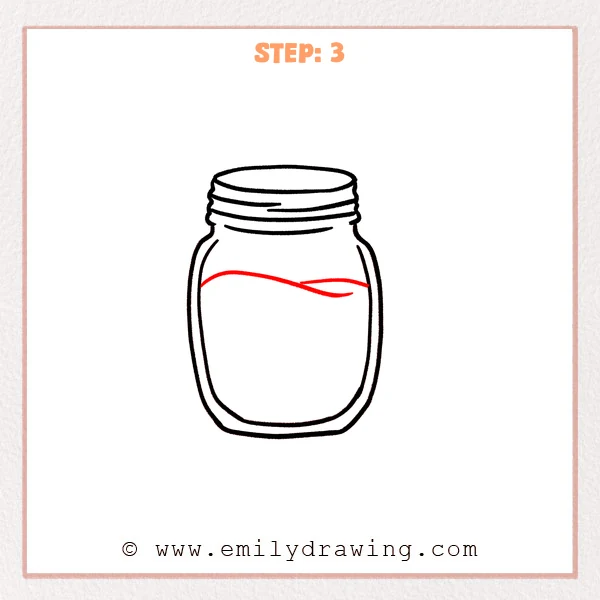
Draw a gentle wavy line across the upper body of the mason jar to show the water level.
Add a shorter curved line on the right side to make the water feel softly moving.
This small detail helps the jar look more lively and decorative.
Pro Tip: Avoid making the water line too straight, because a slight wave looks more natural inside the glass jar.
[Alt Text: A mason jar drawing adds a wavy water line across the upper part of the jar interior.]
Step 4: Add Bubble Details
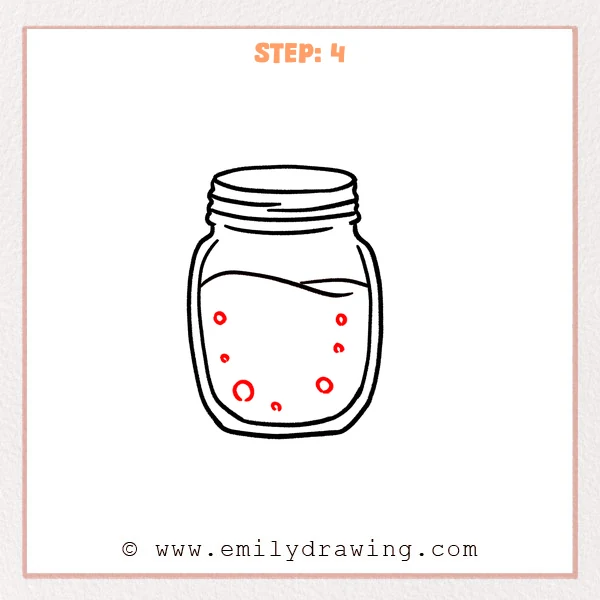
Draw several small circles of different sizes below the water line to show bubbles inside the mason jar.
Spread the bubbles across both sides and near the bottom to make the drawing feel more layered.
Leave a little open space in the center for the next detail.
Pro Tip: Avoid lining the bubbles up too evenly, because varied sizes and positions make the water look more natural.
[Alt Text: The mason jar drawing now includes scattered bubbles of different sizes below the wavy water line.]
Step 5: Draw the Heart Decoration
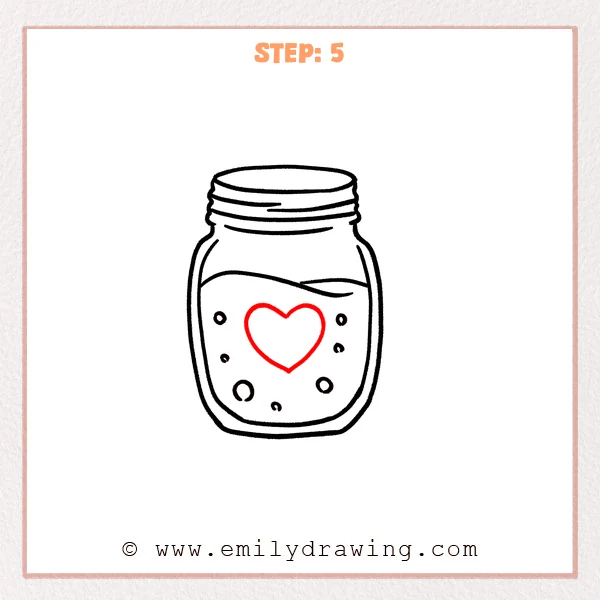
Draw a large heart in the center of the jar, below the water line and between the bubbles.
Make the bottom slightly pointed, while keeping both top curves soft and rounded.
This gives the mason jar a cute and friendly design.
Pro Tip: Lightly mark the heart’s center line first to help both sides look more even.
[Alt Text: A large heart decoration appears in the center of the mason jar, surrounded by bubbles.]
Step 6: Add the Handle
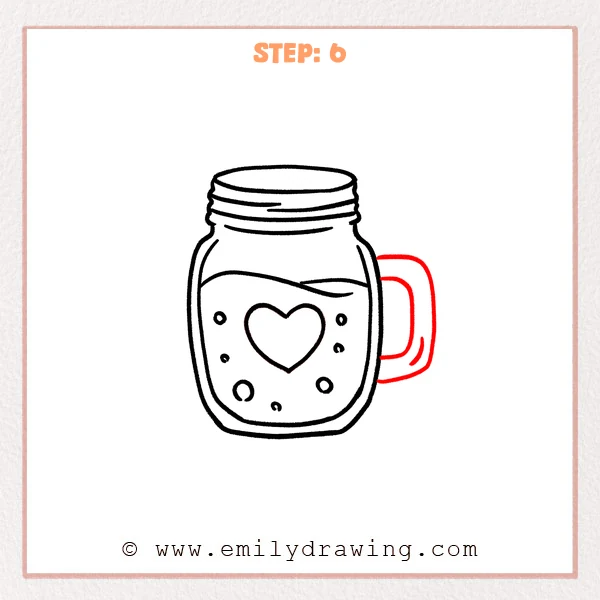
Draw a large rounded handle on the right side of the mason jar, curving outward and back in.
Add a smaller curved line inside the handle to show the open space for holding it.
Now the jar looks like a mason jar mug and the easy drawing tutorial is complete.
Pro Tip: Align the handle’s top and bottom connection points with the jar side so it looks sturdy.
[Alt Text: The finished mason jar drawing includes a rounded side handle, turning the jar into a mug-like glass.]
Step 7: Color in your drawing!
Fun Facts
- Mason jars were first made for storing food safely.
- Their threaded tops help lids fit tightly onto the jar.
- Today, people also use mason jars for drinks, crafts, and decorations.
Pin it now, Draw later!
You can color the water light blue, make the heart bright red, and leave soft highlights on the glass.
This step by step drawing is a fun way to practice smooth curves, simple details, and symmetry.
Keep drawing for beginners simple and enjoyable, and try making another mason jar with different decorations next time.
Get the FREE Printable Drawing Guide
FREE Download Printable Mason Jar Drawing Tutorial
Frequently Asked Questions
Can beginners draw a mason jar easily?
Yes, this is an easy drawing tutorial because the jar uses simple curves and basic shapes.
Taking one step at a time makes the drawing much easier.
Do I need to draw the bubbles and heart?
No, those details are optional.
You can keep the jar plain or add your own decorations.
How can I make the jar look more like glass?
Use light colors, leave a few blank highlight areas, and keep the outlines smooth.
A gentle shine effect will help the mason jar look transparent.