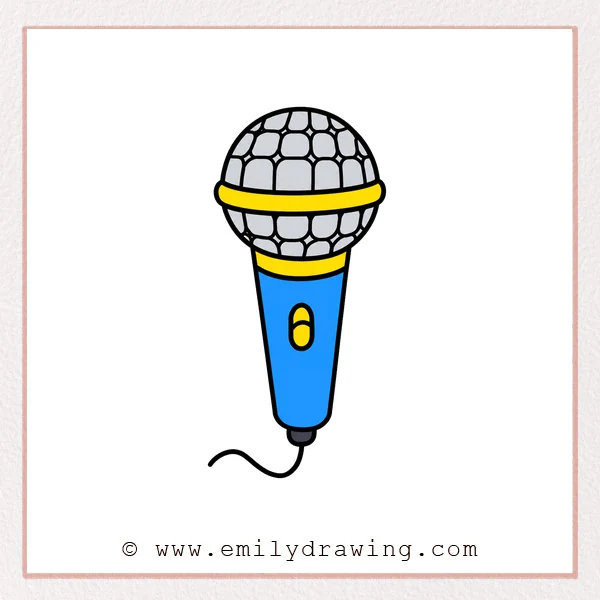
If you want to learn how to draw a microphone, this easy drawing tutorial will guide you step by step. The shapes are simple, and each stage builds gently on the last one, so it is perfect for drawing for beginners. Take your time, and enjoy turning basic lines into a finished microphone drawing.
What You Will Need
- Drawing paper
- Pencil
- Eraser
- Black pen or marker
- Colored pencils or crayons (optional)
Here are my RECOMMENDED Art Supplies!
- Crayola Coloring Set (140 Pieces – Mega Value!)
- 24 Colored Crayon Set
- A4 Printer Paper
- Crayola Coloring Pencils
- HP Home Printer with Instant Ink!
Time needed:
23 minutes.
Step-by-Step Drawing Guide
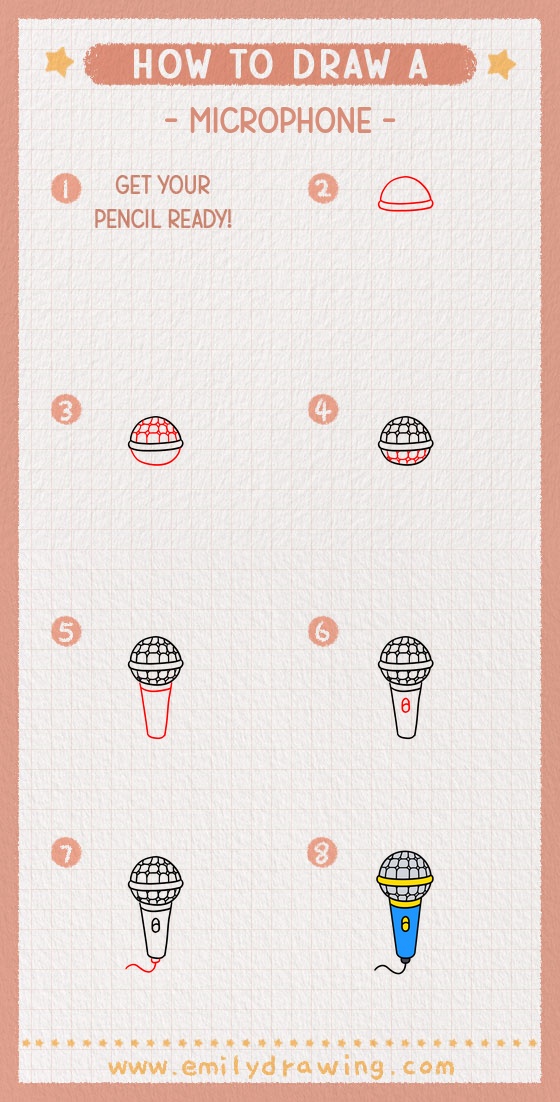
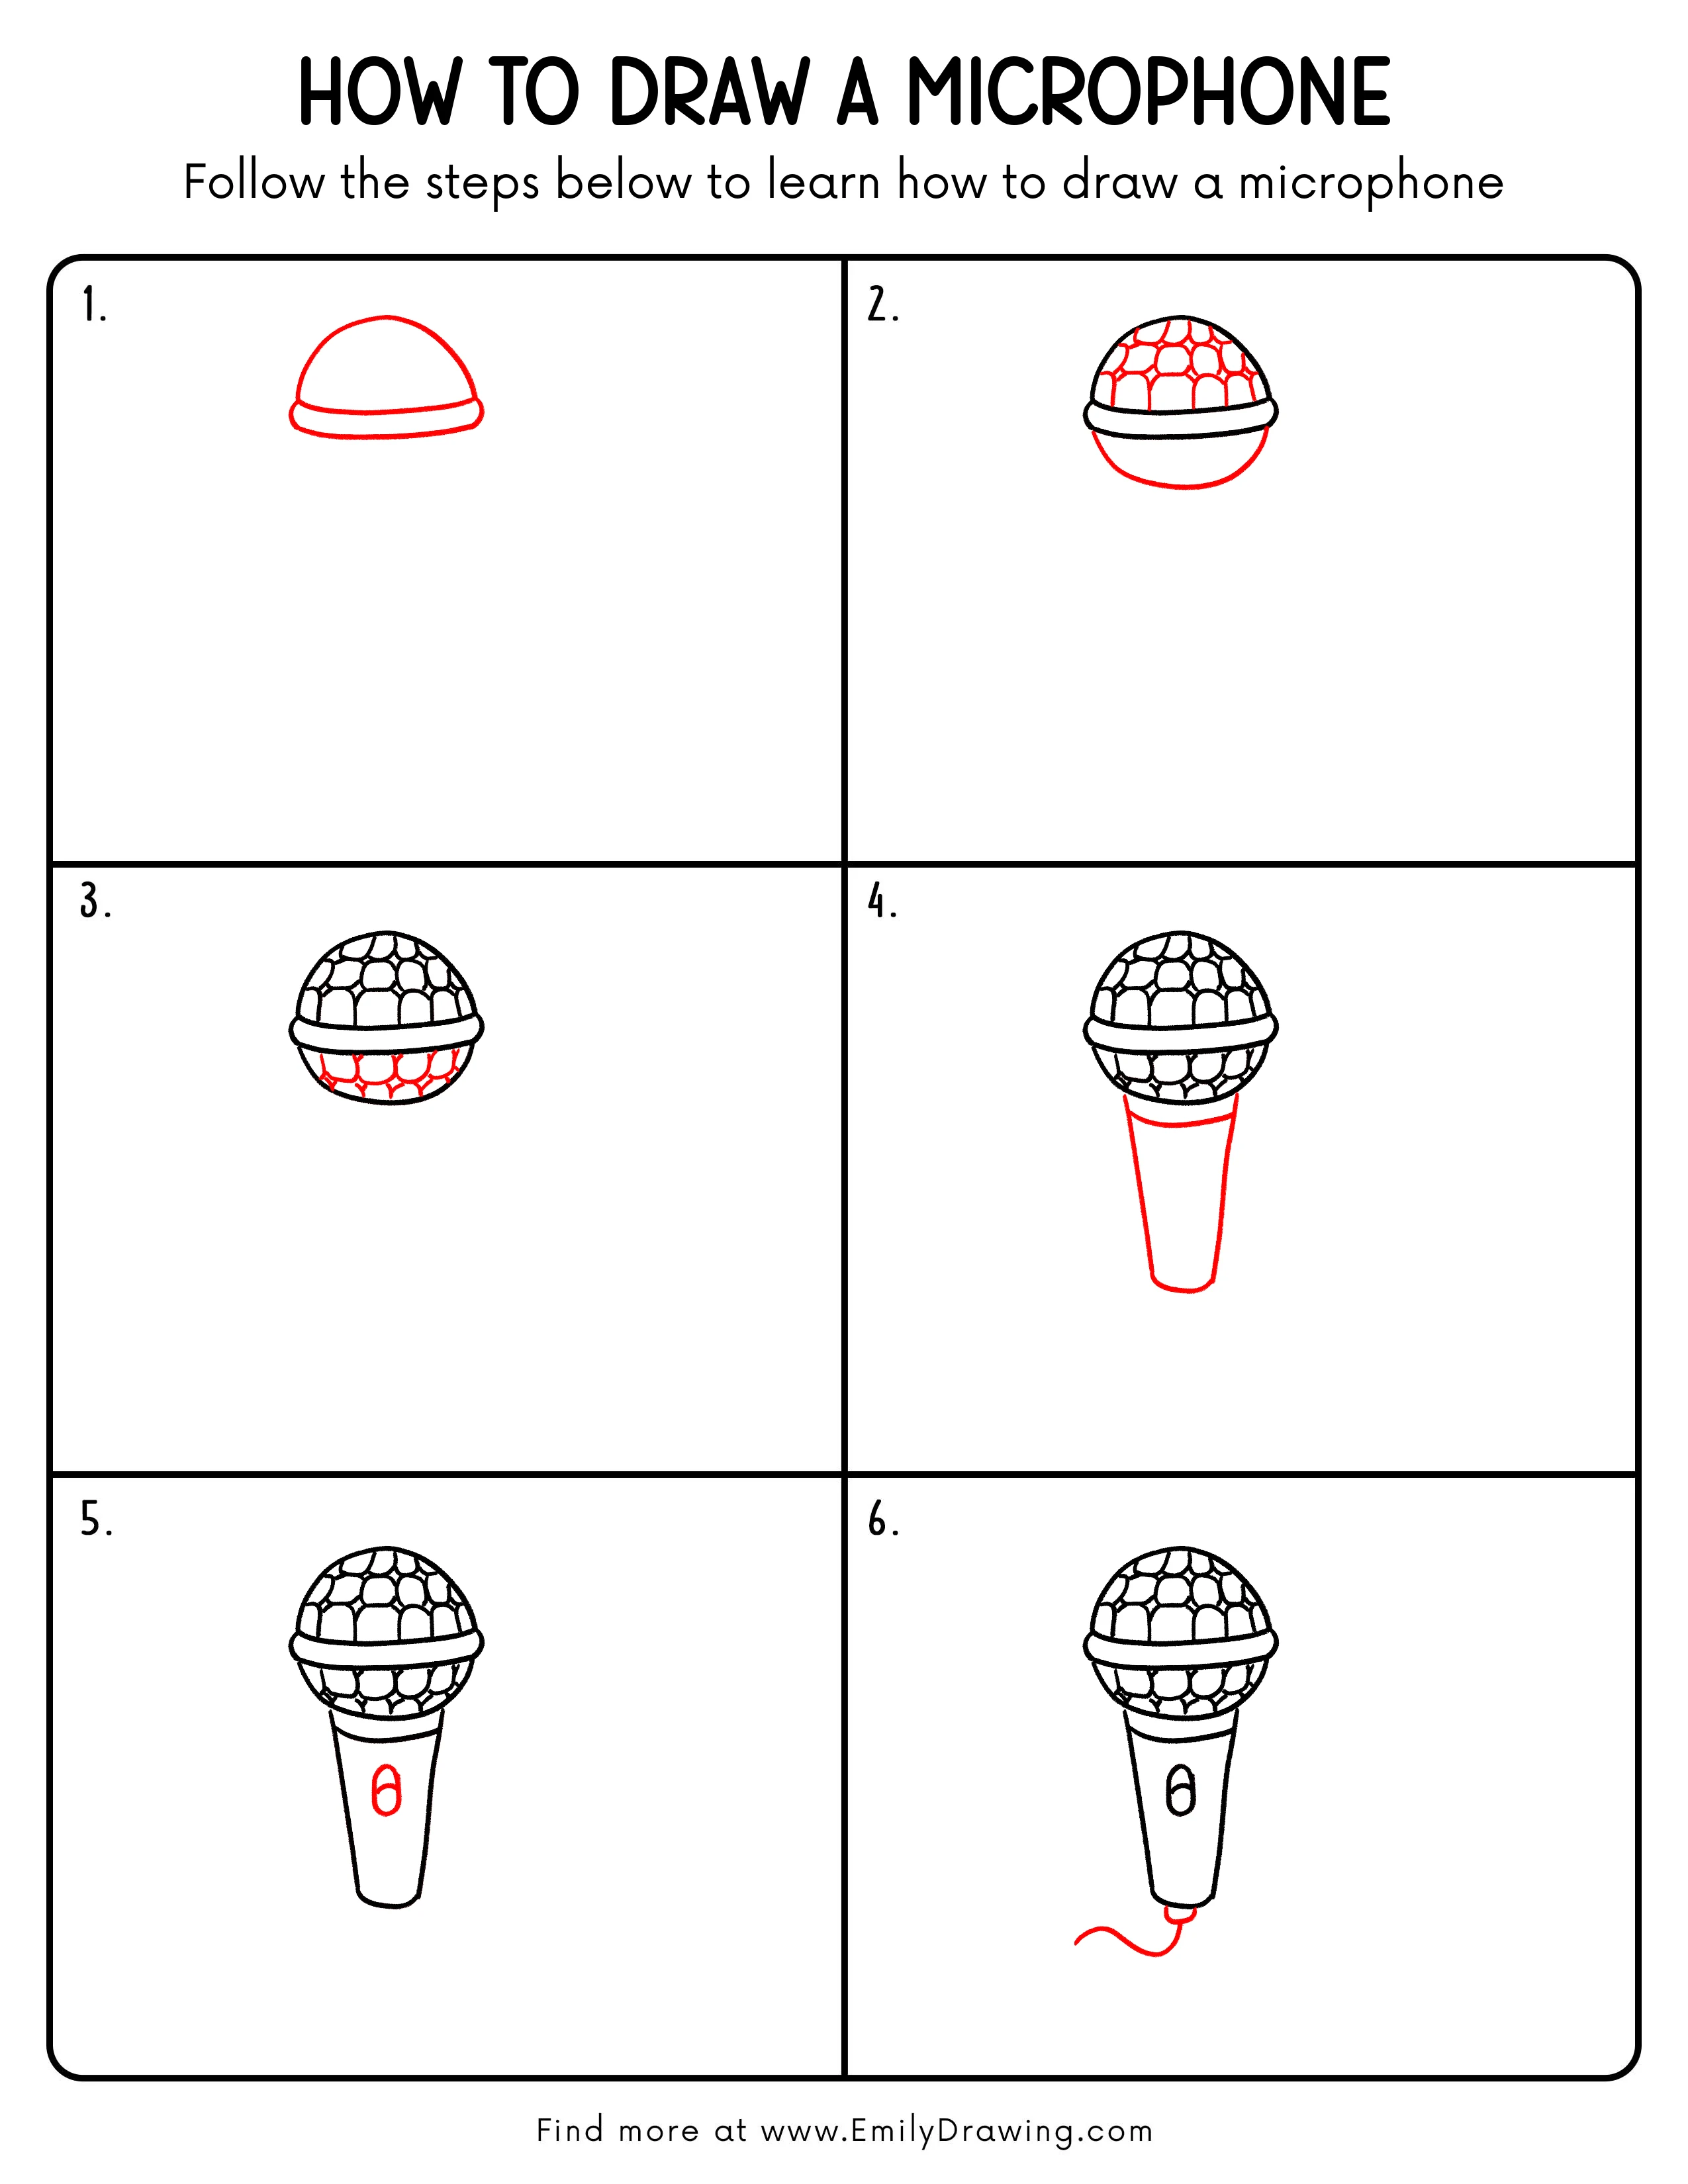
Step 1: Draw the Microphone Head Shape
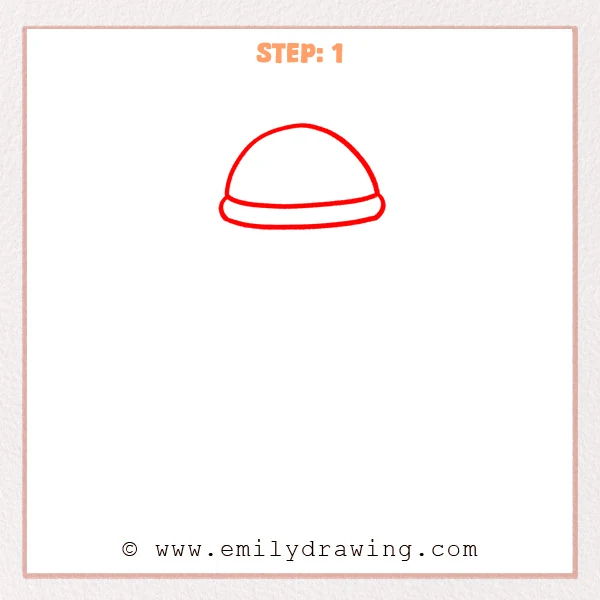
Start with a wide half-circle for the rounded top of the microphone. Then add a curved horizontal band along the bottom to form the lower edge of the microphone head.
Pro Tip: Keep both sides at a similar height so the microphone looks balanced.
[Alt Text: First sketch step for a microphone drawing, showing a rounded microphone head with a curved lower band.]
Step 2: Add the Mesh Texture and Lower Curve
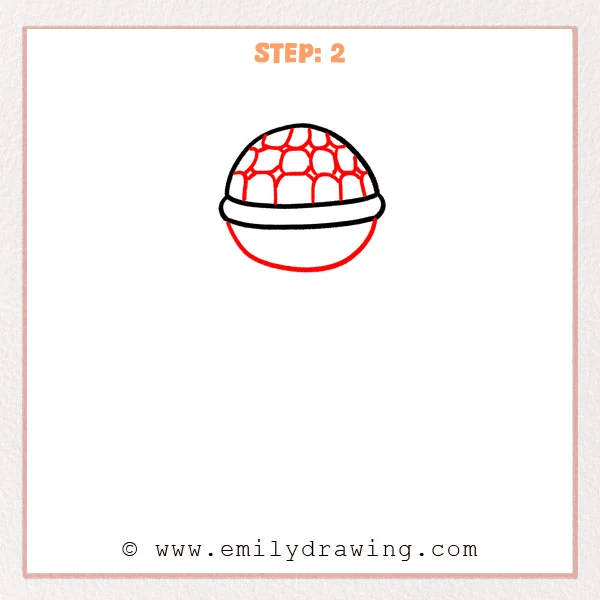
Add a set of small rounded grid shapes across the top to create the microphone mesh. Then draw a large curve downward from both sides to shape the lower half of the microphone head.
Pro Tip: Let the mesh lines curve slightly so they follow the round surface of the microphone.
[Alt Text: Second step of a microphone drawing, refining the rounded head with mesh details and a lower curved outline.]
Step 3: Complete the Lower Half and Add Texture
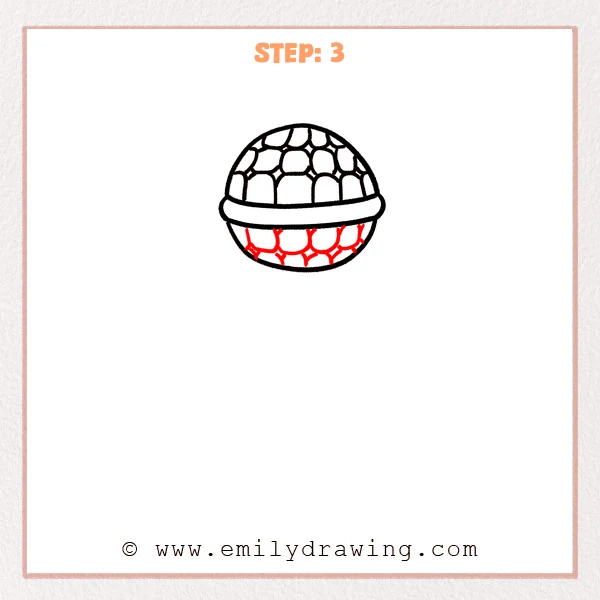
Close the outline of the lower section into a smooth rounded half-sphere to complete the microphone head. Then continue the rounded mesh pattern across the bottom so the texture connects with the top section.
Pro Tip: Make the lower mesh shapes slightly larger to match the way the curved surface expands outward.
[Alt Text: Third step of a microphone drawing, showing the lower half completed with a rounded outline and added mesh texture to match the top.]
Step 4: Draw the Handle
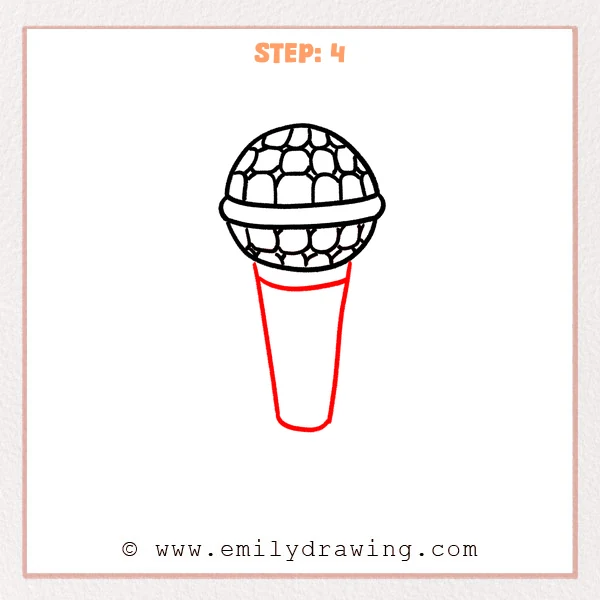
Add a gentle curved line under the microphone head to show the connecting edge. Then draw a long handle that is wider at the top and narrower at the bottom, finishing it with a rounded end.
Pro Tip: Keep both sides of the handle symmetrical, and make the bottom edge softly rounded.
[Alt Text: Fourth step of a microphone drawing, adding the connecting edge and a tapered handle beneath the textured microphone head.]
Step 5: Add Handle Details
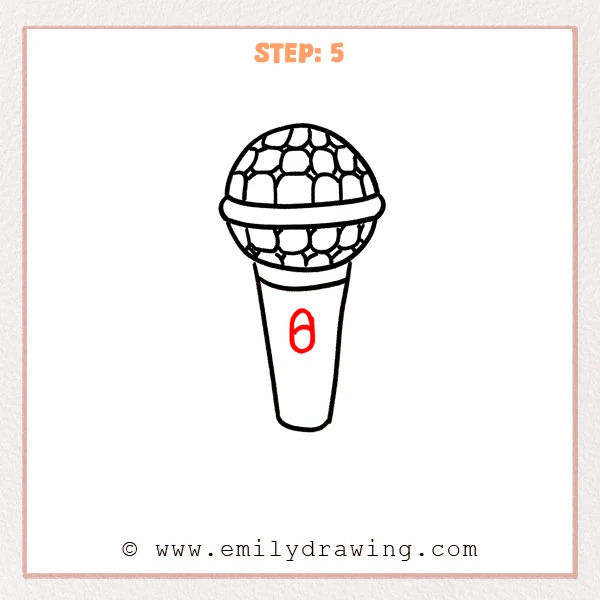
Draw a curved horizontal line near the top of the handle to make the connection clearer. Then add a small oval button in the center, with a short curved line inside it.
Pro Tip: Place the button on the center line of the handle so the microphone looks neat.
[Alt Text: Fifth step of a microphone drawing, refining the handle with a curved band and a small oval button detail.]
Step 6: Add the Cable
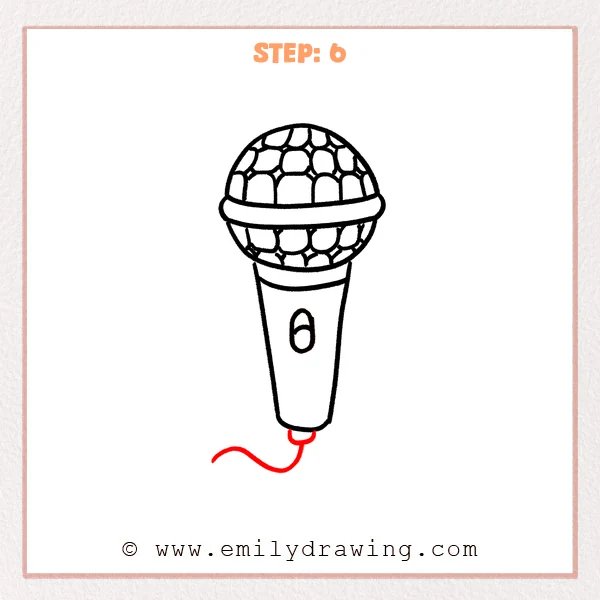
Draw a small rounded connector at the bottom of the handle to give the cable a clear starting point. Then add a curved line flowing down and left to show the microphone cable.
Pro Tip: Let the cable curve naturally, without trying to make it perfectly symmetrical.
[Alt Text: Sixth step of a microphone drawing, adding a small bottom connector and a curved cable to the finished microphone shape.]
Step 7: Color in your drawing!
Fun Facts
- Microphones change sound waves into electrical signals.
- Some microphones are used for singing, while others are used for recording or speaking.
- Handheld microphones are often seen on stage during concerts and performances.
Pin it now, Draw later!
You have now completed an easy step-by-step drawing of a microphone. You can trace your final lines with a pen and color the microphone in silver, gray, black, or any fun style you like. Keep practicing this step by step drawing method, and try drawing more music-themed objects next.
Get the FREE Printable Drawing Guide
FREE Download Printable Microphone Drawing Tutorial
Frequently Asked Questions
Can beginners learn how to draw a microphone?
Yes, this easy drawing tutorial is great for beginners. The drawing uses simple curved shapes and small details added one step at a time.
Do I need to draw every mesh shape perfectly?
No, you do not need perfect shapes. As long as the pattern looks rounded and evenly spaced, your microphone will look clear and convincing.
Can I color my microphone drawing?
Yes, you can color it after finishing the outline. Silver, gray, black, and blue are all good choices for a classic microphone look.