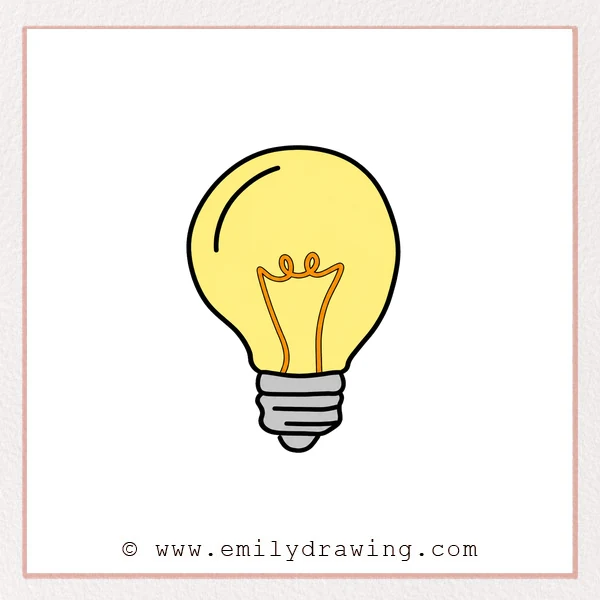
In this easy drawing tutorial, you will learn how to draw a light bulb step by step. This guide is made for beginners, using simple rounded shapes, short lines, and clear details. Take your time with each step, and your light bulb drawing will become neat and complete.
What You Will Need
- A pencil
- An eraser
- Drawing paper
- A black marker or pen
- Coloring tools, if you want to color the final drawing
Here are my RECOMMENDED Art Supplies!
- Crayola Coloring Set (140 Pieces – Mega Value!)
- 24 Colored Crayon Set
- A4 Printer Paper
- Crayola Coloring Pencils
- HP Home Printer with Instant Ink!
Time needed:
23 minutes.
Step-by-Step Drawing Guide
Step 1: Draw the Outer Bulb Shape
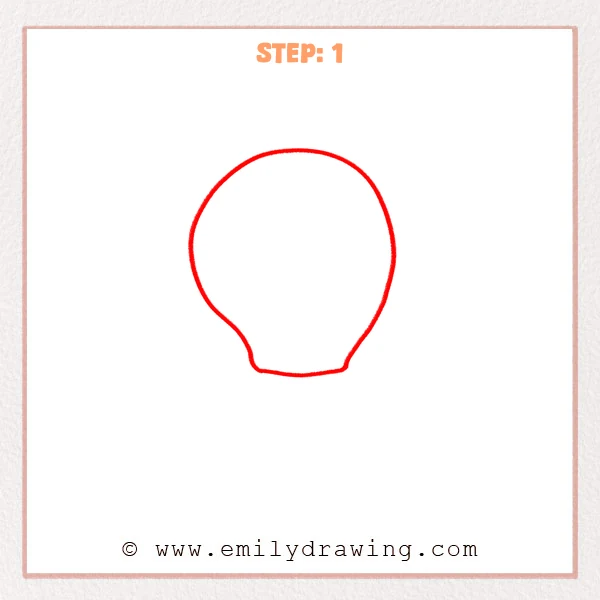
Start with a large rounded outline, like a slightly stretched balloon. Leave a short flat area at the bottom with small curved sides for the bulb base. Keep the line light so it is easy to adjust later.
Pro Tip: Keep the top smooth and rounded, while making the bottom slightly narrower for a natural bulb shape.
[Alt Text: A beginner sketch of a light bulb starting with the rounded outer glass outline and a narrow bottom opening.]
Step 2: Add the Bottom Base
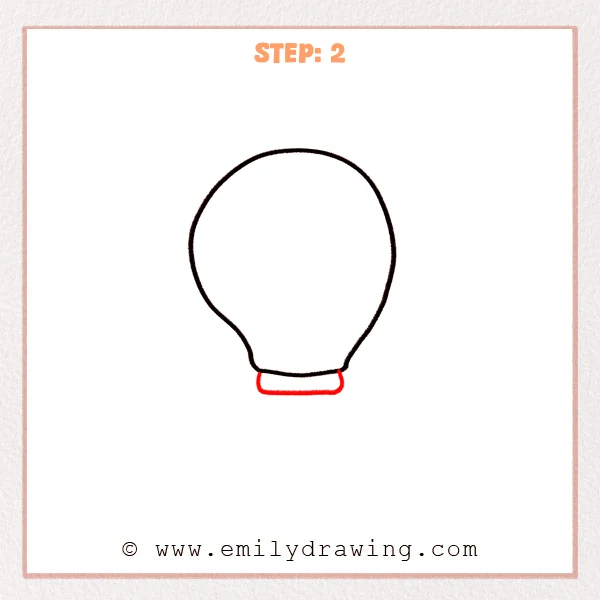
Draw a short rounded rectangle under the bulb to begin the metal base. Place it against the bottom of the glass shape, making it narrower than the bulb body. Keep the lower edge steady and soften the corners.
Pro Tip: Keep the base centered under the bulb so the whole light bulb looks balanced.
[Alt Text: A light bulb drawing refined with a rounded bottom base added beneath the glass outline.]
Step 3: Draw the Lower Screw Base

Add a short cylinder-like section under the base for the bulb’s screw part. Curve the sides slightly inward, then connect them with a rounded bottom line. This makes the bottom structure of the light bulb feel more complete.
Pro Tip: Keep the screw base close to the width of the upper base, but make the bottom slightly narrower.
[Alt Text: A light bulb drawing with the glass outline, rounded base, and lower screw section added step by step.]
Step 4: Add the Screw Lines
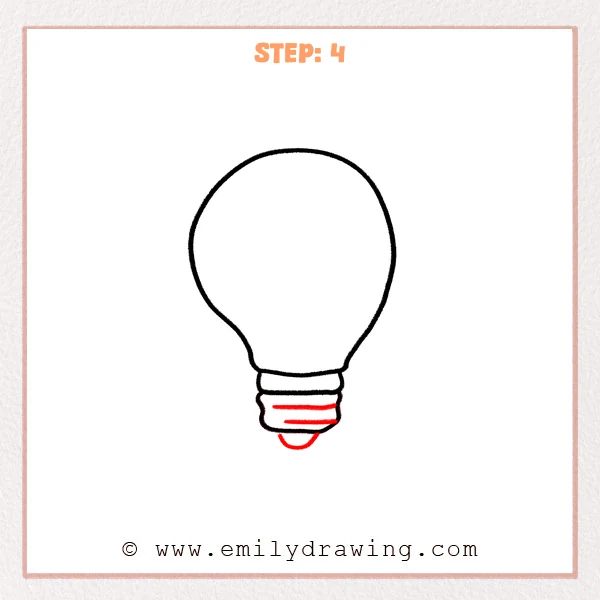
Draw two horizontal lines across the lower screw base to show the metal ridges. Add a small rounded bump at the very bottom for the contact point. Let the lines follow the width of the base and keep both sides mostly even.
Pro Tip: Do not place the horizontal lines too close to the edges, so the screw base stays clear.
[Alt Text: A light bulb drawing refined with screw lines and a small bottom contact point added to the base.]
Step 5: Add the Glass Highlight
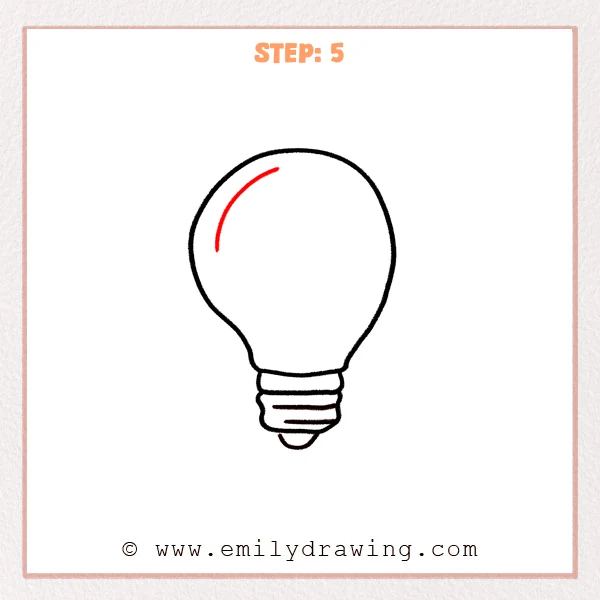
Draw a short curved line near the upper left side of the bulb to show a reflection on the glass. Let the line follow the curve of the outer bulb shape. Keep it inside the bulb, without touching the edge, so it looks like a highlight.
Pro Tip: Keep the highlight short and light, and place it high to make the bulb feel more glassy.
[Alt Text: A light bulb drawing refined with a curved highlight added inside the upper glass area.]
Step 6: Draw the Filament
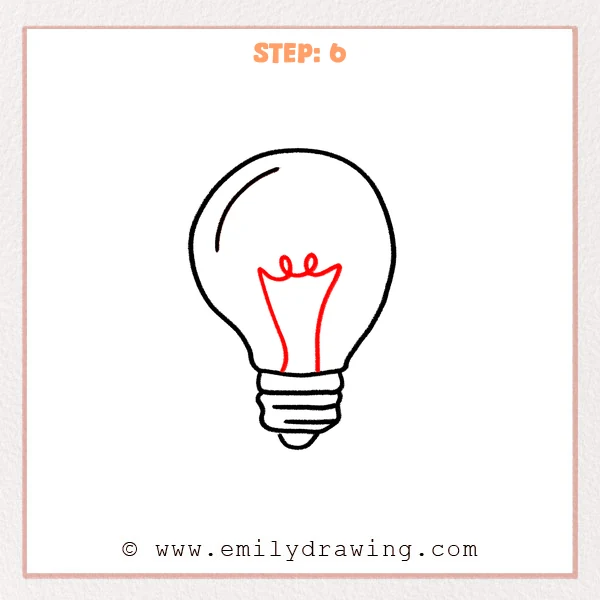
Inside the bulb, draw two upward support lines leading to a curly filament. Shape the filament with two small loops so it looks like a glowing metal wire. Start these lines above the base and keep them inside the glass outline.
Pro Tip: Place the filament slightly below the center of the bulb to keep the drawing balanced and natural.
[Alt Text: A light bulb drawing refined with an inner filament, support lines, and two small loops inside the glass.]
Step 7: Color in your drawing!
Fun Facts
- A light bulb works by using electricity to create light.
- The glass part protects the delicate parts inside the bulb.
- The curly filament shape helps make the bulb look bright and recognizable in drawings.
Pin it now, Draw later!
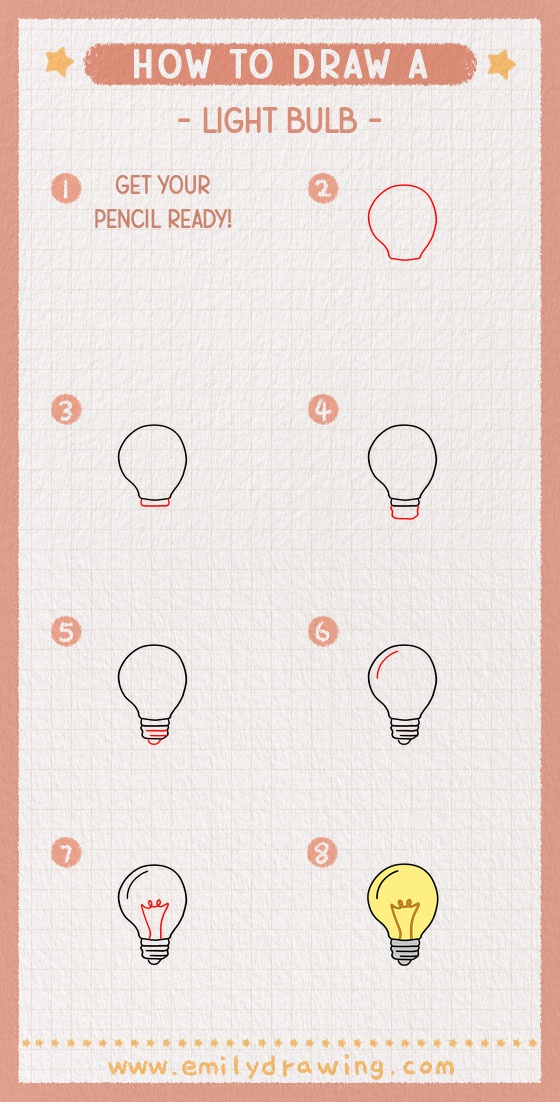
Now your light bulb drawing has a rounded glass body, a metal screw base, a shiny highlight, and a detailed filament inside. You can trace the final lines with a marker, erase extra pencil marks, and add soft yellow color to show glowing light. Try drawing another light bulb with a slightly different shape to practice this step by step drawing method.
Get the FREE Printable Drawing Guide
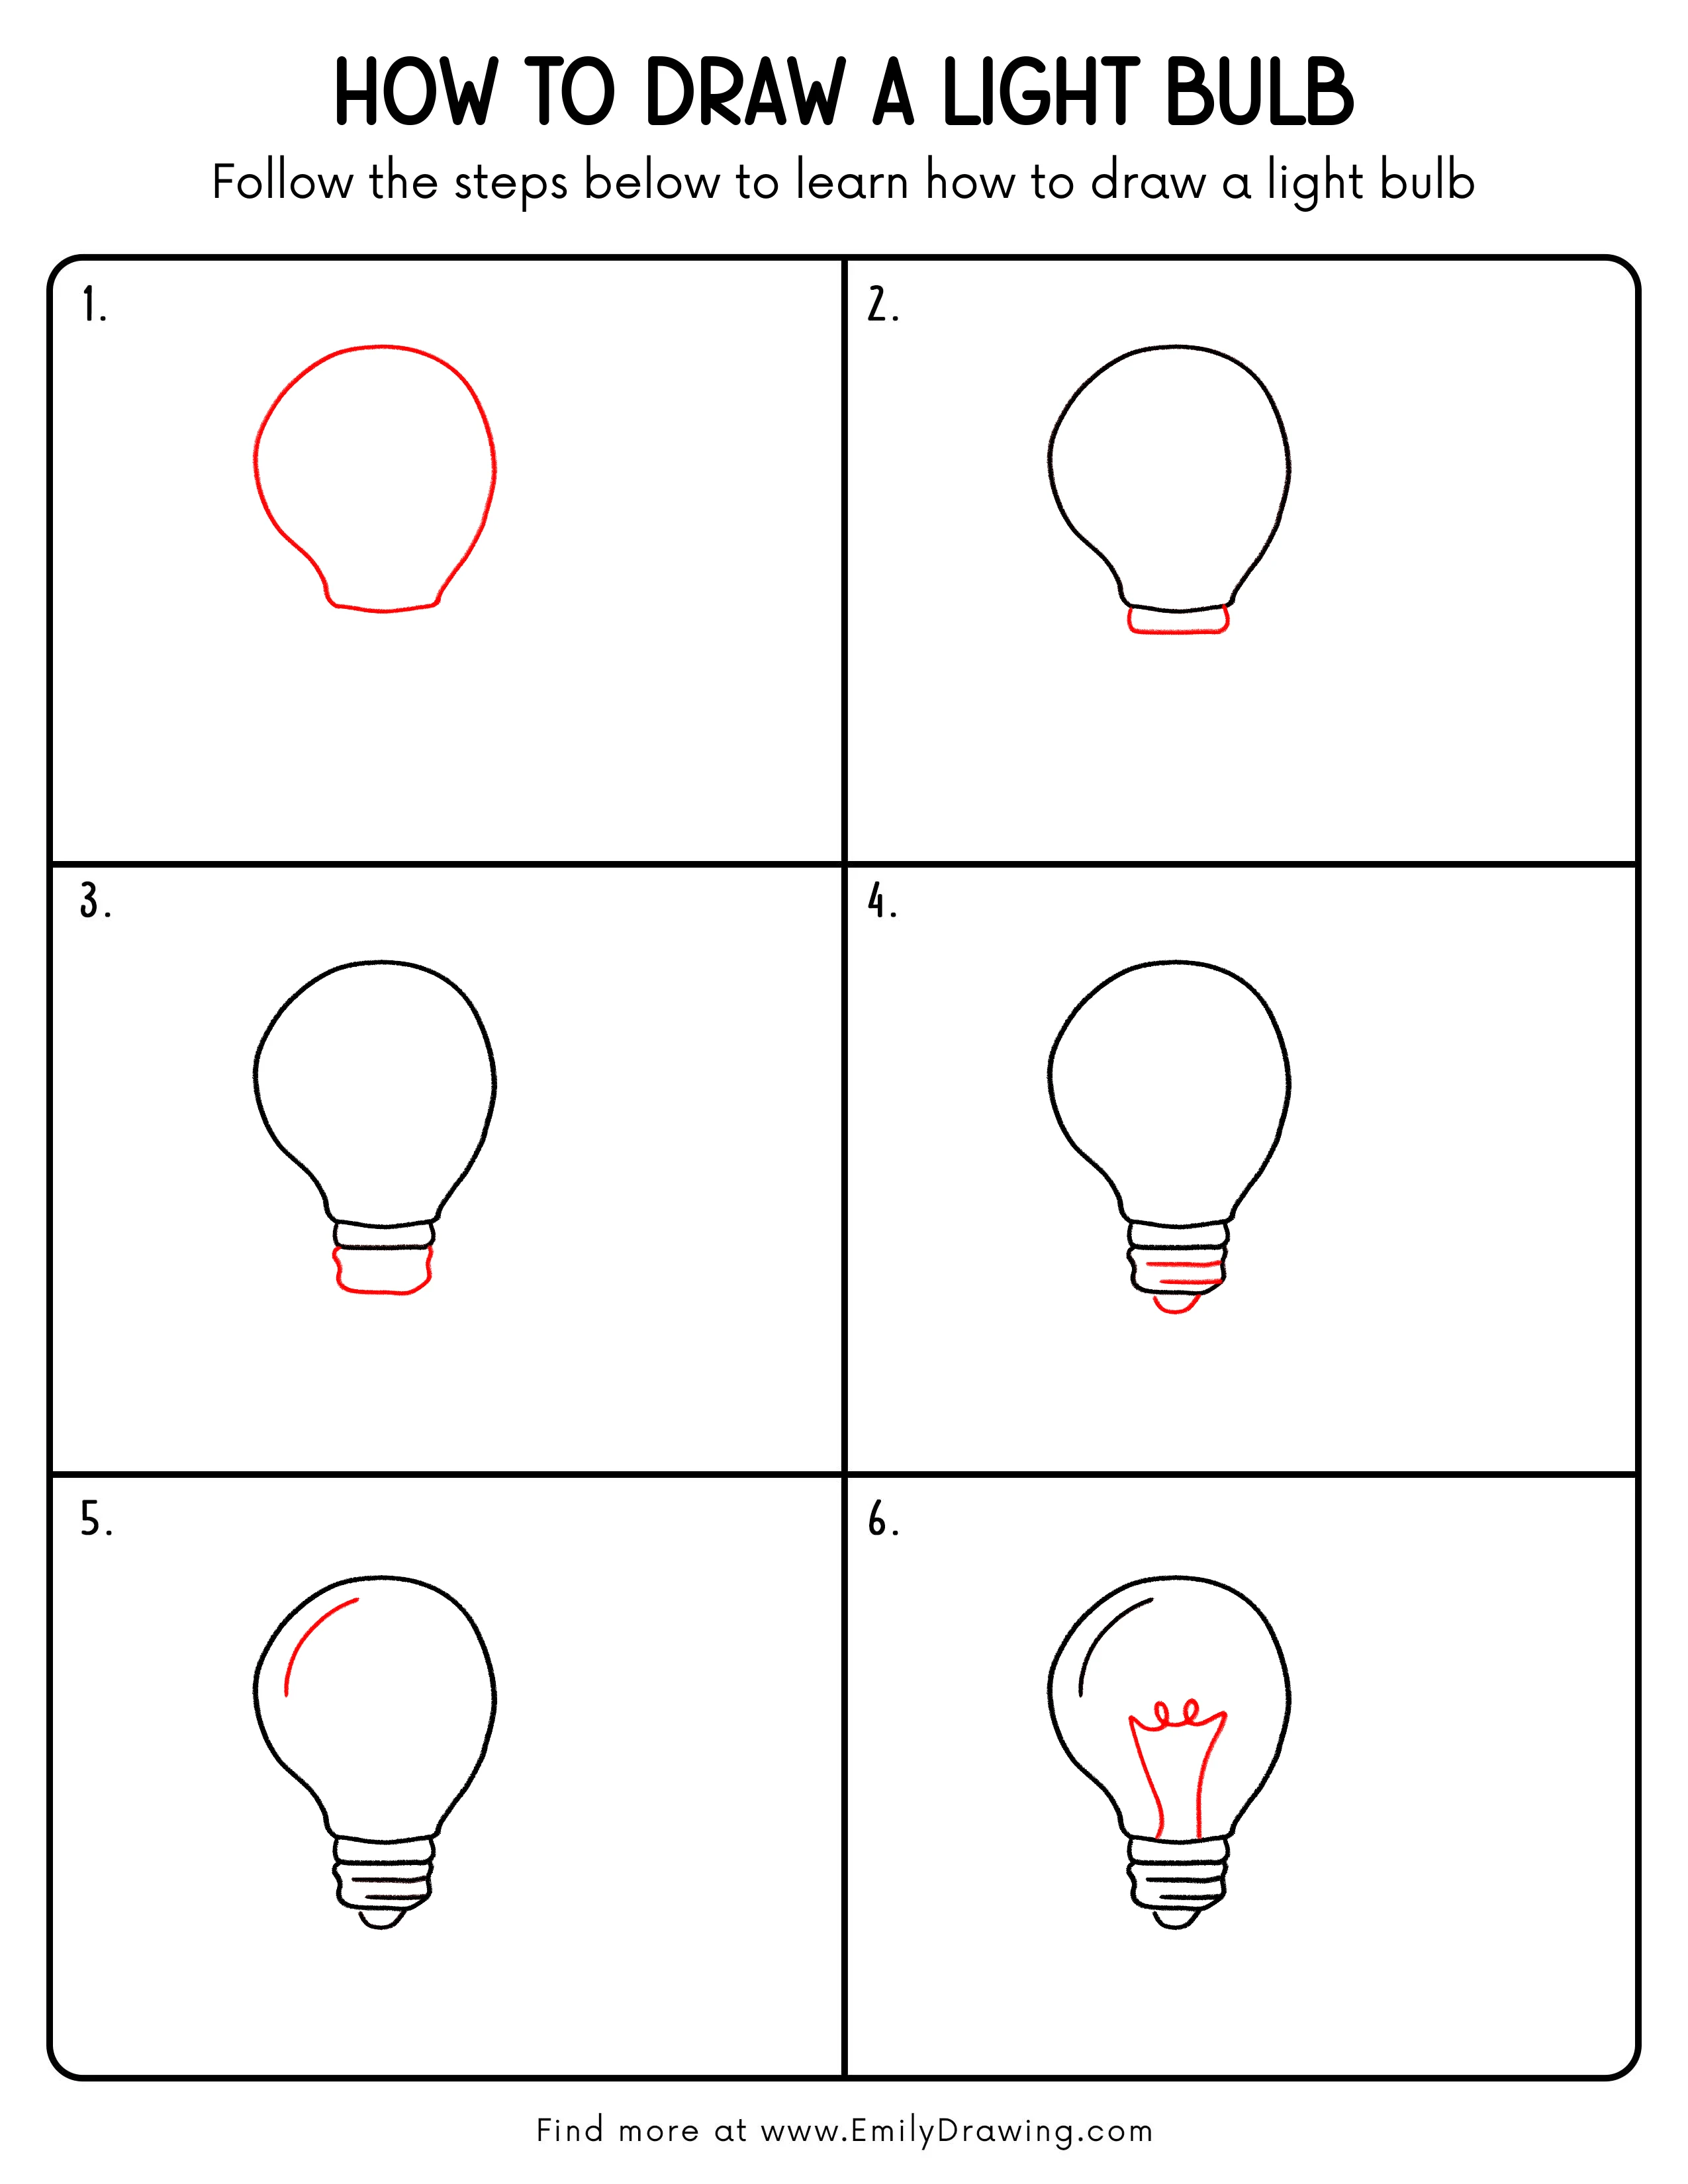
FREE Download Printable Light Bulb Drawing Tutorial
Frequently Asked Questions
Is this light bulb drawing good for beginners?
Yes. This easy drawing tutorial uses basic curves, rounded rectangles, and short lines, making it friendly for beginners.
How can I make the light bulb look brighter?
Add light yellow coloring inside the glass and draw small glow lines around the bulb. Keep the colors soft so the outline stays clear.
Can I change the shape of the light bulb?
Yes. You can make the glass part rounder, taller, or wider while keeping the base centered underneath.