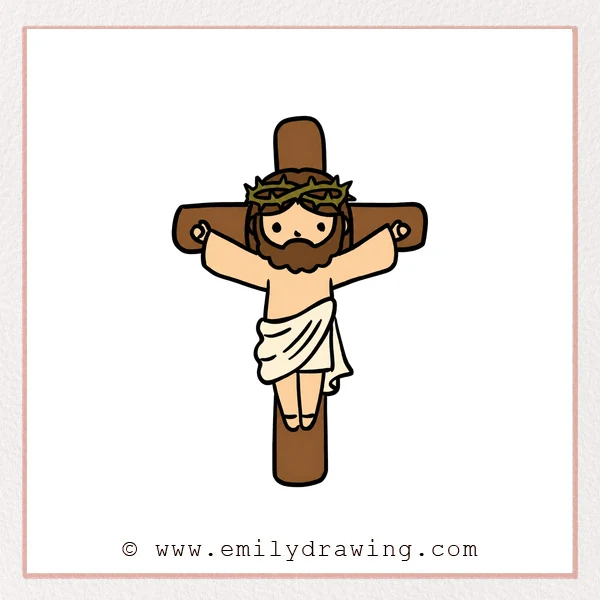
In this easy drawing tutorial, you will learn how to draw Jesus on the cross step by step. This drawing for beginners uses simple curved lines, soft shapes, and clear details to build the picture gently from top to bottom.
Take your time with each step. A calm pace will help the cross, face, robe, and body stay balanced.
What You Will Need
- A pencil or drawing marker
- An eraser
- Drawing paper
- Colored pencils or markers, if you want to color your finished drawing
Here are my RECOMMENDED Art Supplies!
- Crayola Coloring Set (140 Pieces – Mega Value!)
- 24 Colored Crayon Set
- A4 Printer Paper
- Crayola Coloring Pencils
- HP Home Printer with Instant Ink!
Time needed:
19 minutes.
Step-by-Step Drawing Guide
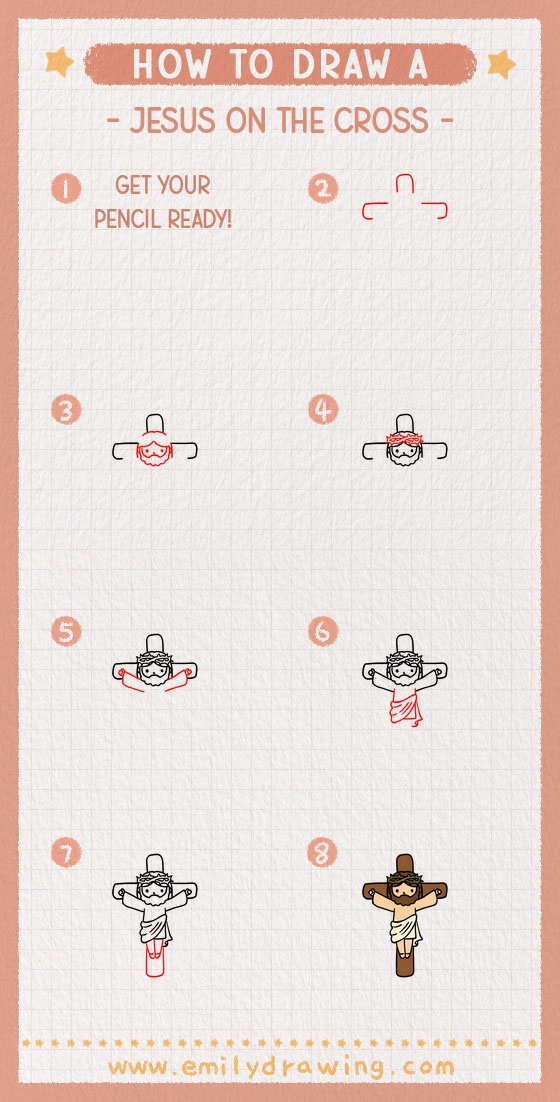
Step 1: Draw the Basic Lines for the Cross and Head
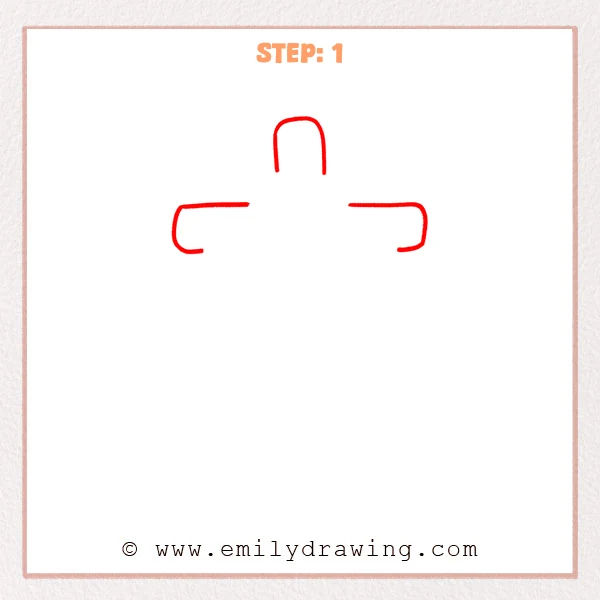
Start with a rounded upside-down U shape near the top for Jesus’s head placement. Then draw long horizontal lines on both sides, curving the ends slightly downward to begin the crossbar shape.
Pro Tip: Keep the left and right lines at the same height so the cross looks balanced.
[Alt Text: A beginner sketch of Jesus on the cross begins with a rounded head guide and simple curved crossbar lines.]
Step 2: Add the Hair, Face, and Beard
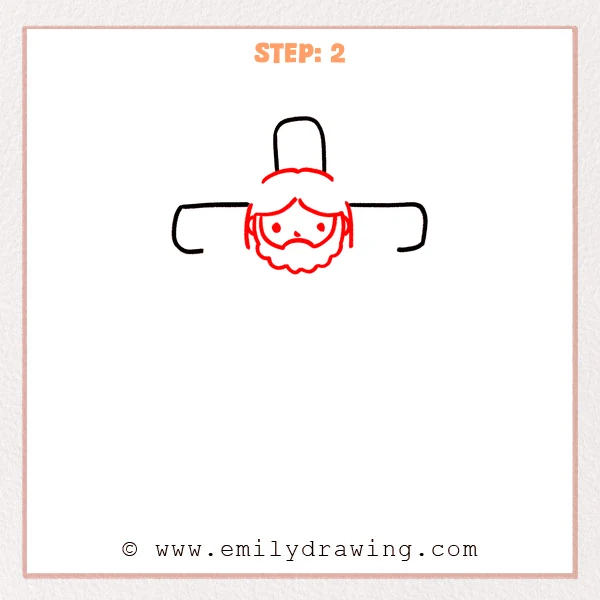
Draw wavy hair below the head, leaving a small part in the center. Add dot eyes, a curved mouth, side ears, and a fluffy beard underneath to make Jesus’s face clear.
Pro Tip: Keep the beard bumps similar in size so the face looks neat and balanced.
[Alt Text: The sketch of Jesus on the cross is refined with wavy hair, simple facial features, ears, and a fluffy beard.]
Step 3: Draw the Crown of Thorns
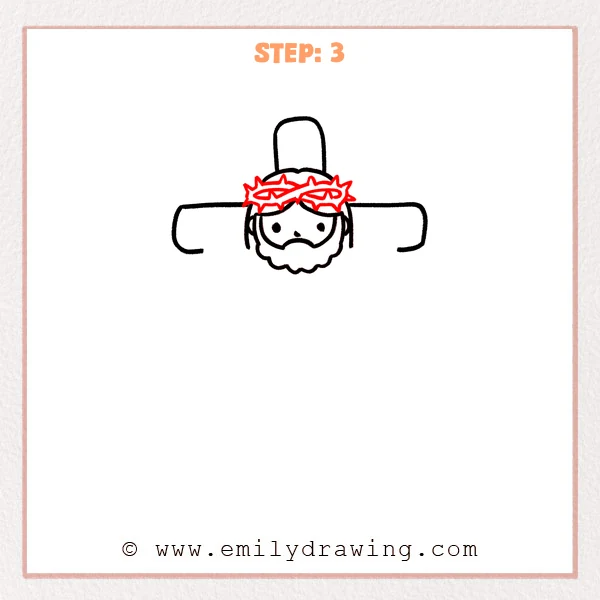
Add a spiky crown of thorns above the hair, stretching across the forehead. Use short points and curved lines to show twisted branches, making the head details more complete.
Pro Tip: The thorn points can vary in size, but keep them following the curve of the forehead.
[Alt Text: The drawing of Jesus on the cross is refined with a spiky crown of thorns across the forehead.]
Step 4: Draw the Outstretched Arms and Sleeves
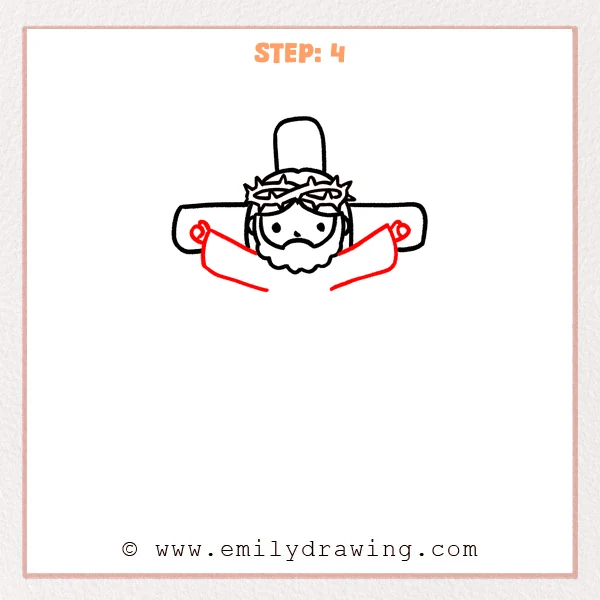
Add wide sleeves extending outward from both sides of the head, placing them in front of the crossbar. Then draw small round hands near the sleeve openings so Jesus’s arms look spread across the cross.
Pro Tip: Keep the sleeve angles mostly symmetrical so the pose feels steady.
[Alt Text: The drawing of Jesus on the cross is refined with outstretched sleeves and small hands in front of the crossbar.]
Step 5: Draw the Body and Flowing Robe
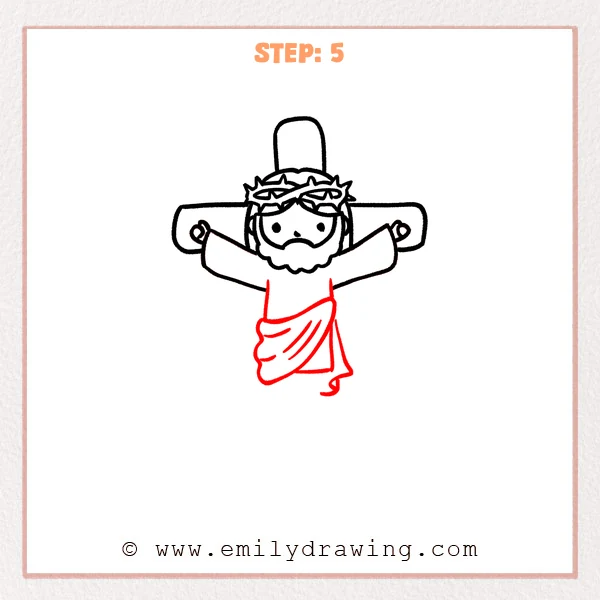
Draw the body below the head, letting the robe hang downward naturally. Add a diagonal wrapped cloth and a few curved fold lines to give the clothing more layers.
Pro Tip: Draw the robe folds in the same direction as the fabric so they look natural.
[Alt Text: The drawing of Jesus on the cross is refined with a simple body, flowing robe, and curved fabric folds.]
Step 6: Add the Legs and Vertical Cross Beam
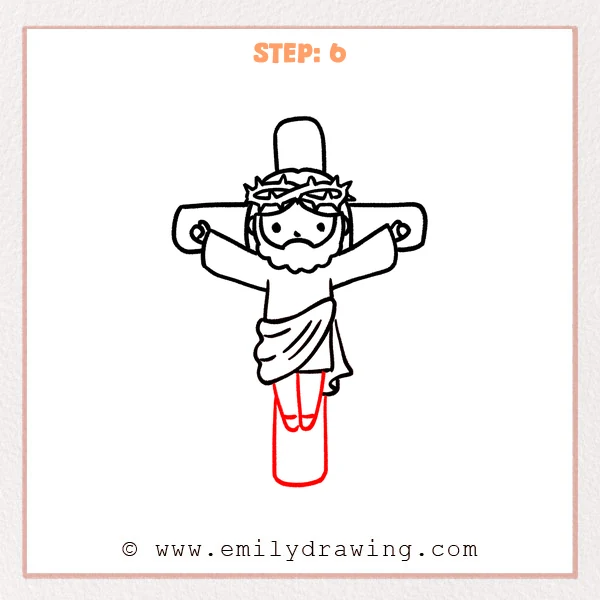
Draw two close legs below the robe, using small curved lines for the feet. Then extend long vertical lines down beside the legs to create the main upright beam of the cross.
Pro Tip: Keep the vertical beam straight and centered under the body so the cross feels steady.
[Alt Text: The drawing of Jesus on the cross is refined with close legs, small feet, and the long vertical beam of the cross.]
Step 7: Color in your drawing!
Fun Facts
- The cross is one of the most recognized Christian symbols in the world.
- Artists often use simple shapes first, then add details slowly.
- Robe folds can make a drawing feel more complete without making it too difficult.
Pin it now, Draw later!
Now you have learned how to draw Jesus on the cross using a calm step by step drawing process. You can trace your final lines, erase extra sketch marks, and add gentle colors to the robe, hair, cross, and crown of thorns.
Try drawing it again on a fresh page to practice the shapes and proportions. Each version will help your hand feel more confident.
Get the FREE Printable Drawing Guide
FREE Download Printable Jesus On The Cross Drawing Tutorial
Frequently Asked Questions
Is this Jesus on the cross drawing good for beginners?
Yes. This easy drawing tutorial uses simple curves, rounded shapes, and clear steps, making it friendly for beginners.
How can I make the cross look more even?
Keep the horizontal crossbar level and place the vertical beam directly under the center of the body. Light pencil guidelines can help before you trace the final lines.
Can I color this drawing after finishing the outline?
Yes. You can use soft colors for the robe, brown for the cross, and gentle tones for the hair and beard.