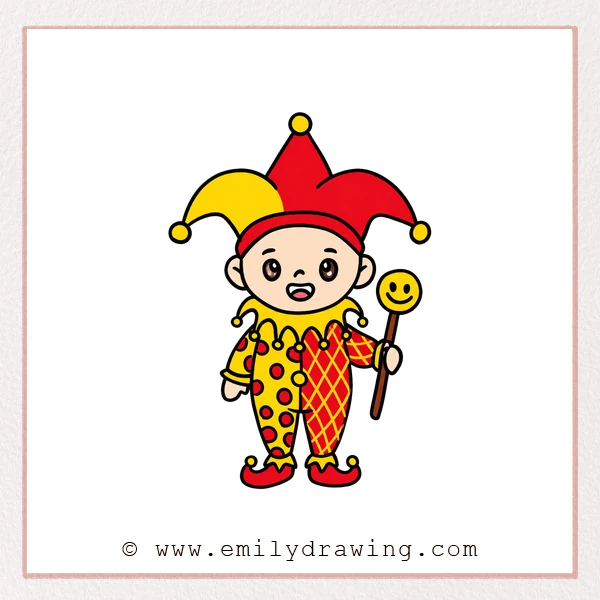
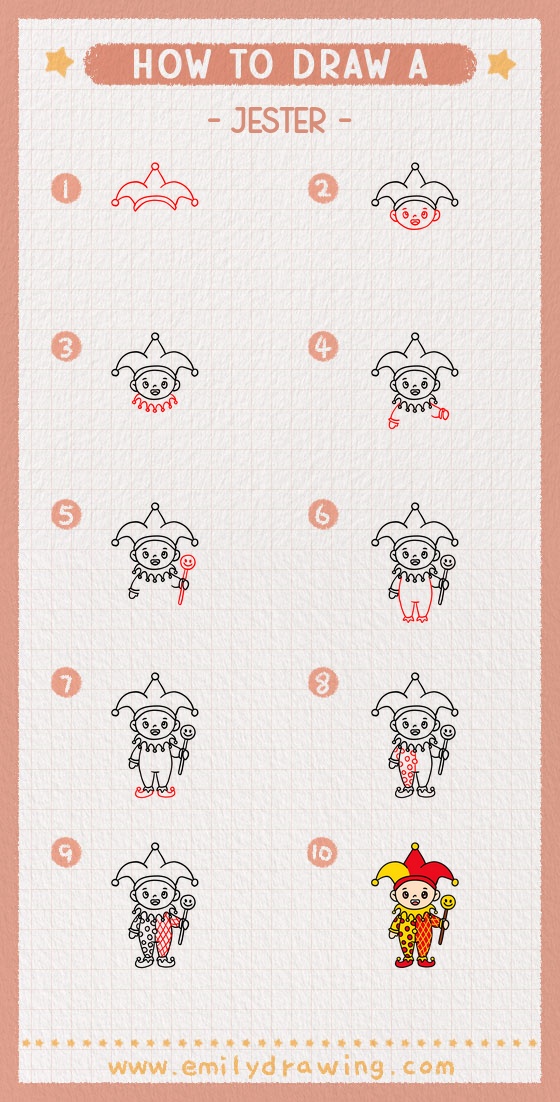
In this easy drawing tutorial, you will learn how to draw a jester step by step.
We will build the character from simple shapes, then add playful costume details.
Take your time and enjoy each small part of the drawing.
What You Will Need
- Pencil
- Eraser
- Black marker or pen
- Coloring tools, such as crayons or markers
- Drawing paper
Here are my RECOMMENDED Art Supplies!
- Crayola Coloring Set (140 Pieces – Mega Value!)
- 24 Colored Crayon Set
- A4 Printer Paper
- Crayola Coloring Pencils
- HP Home Printer with Instant Ink!
Time needed:
17 minutes.
Step-by-Step Drawing Guide
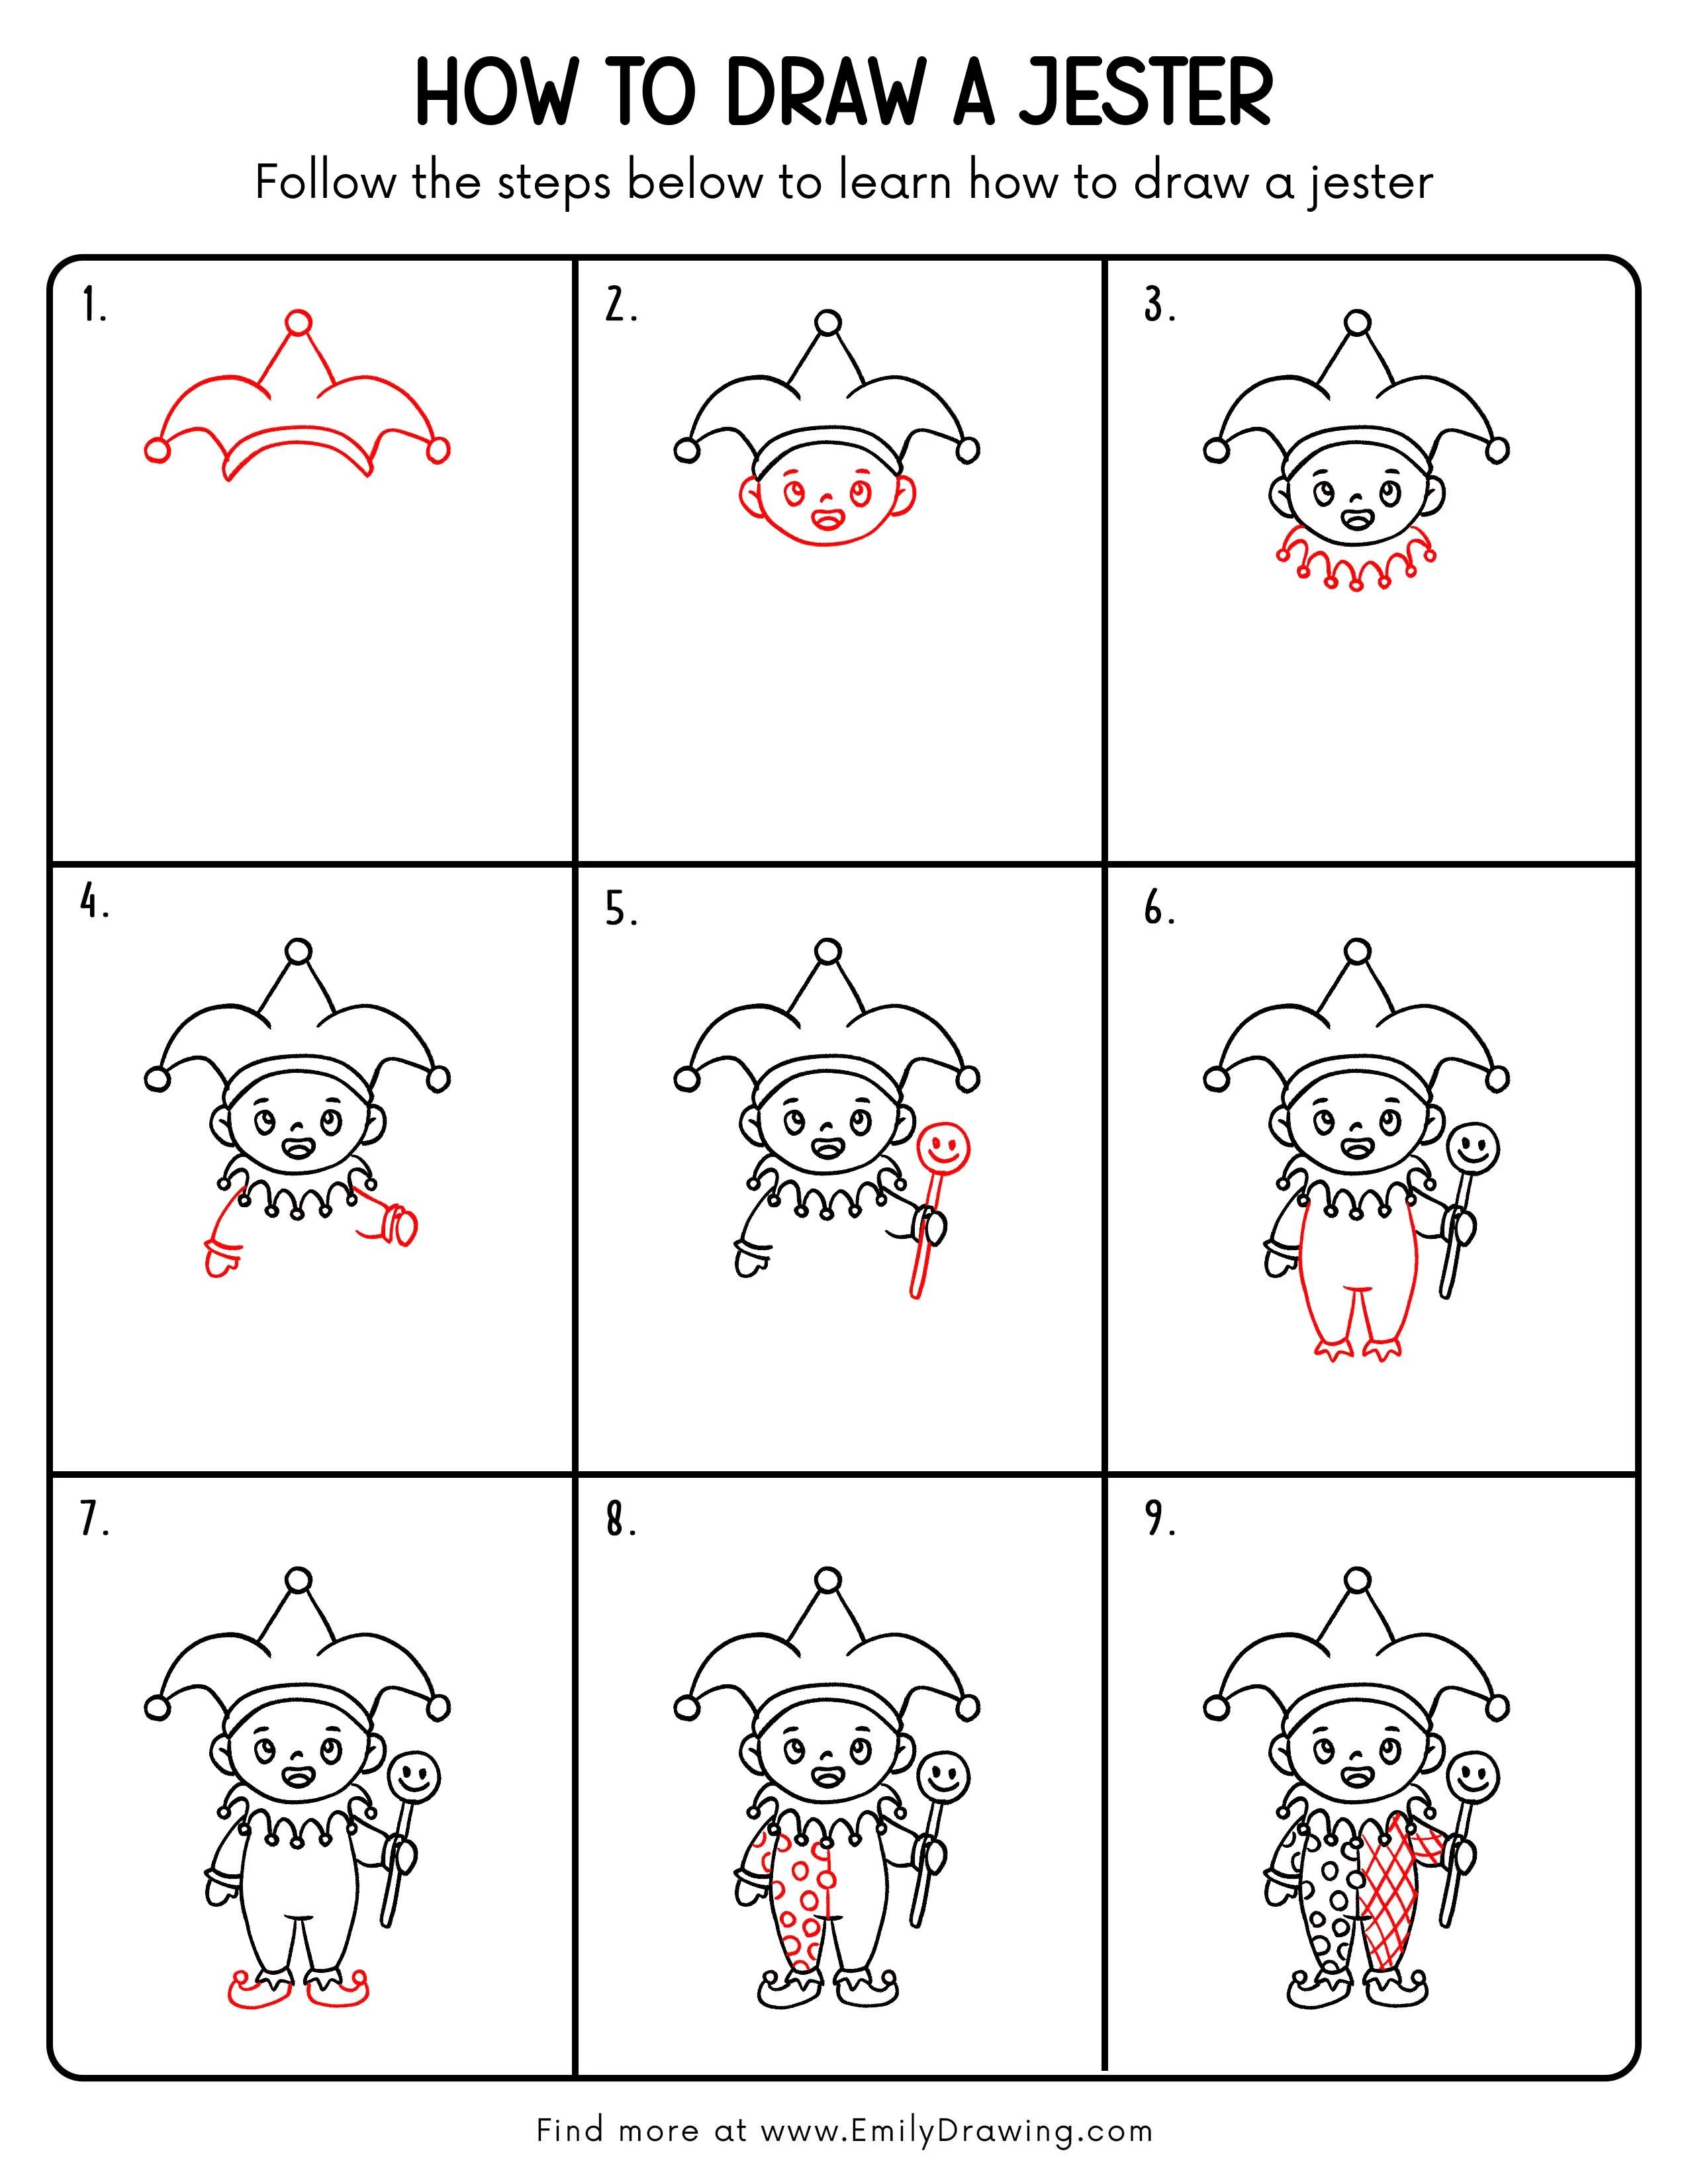
Step 1: Draw the Top Outline of the Jester Hat
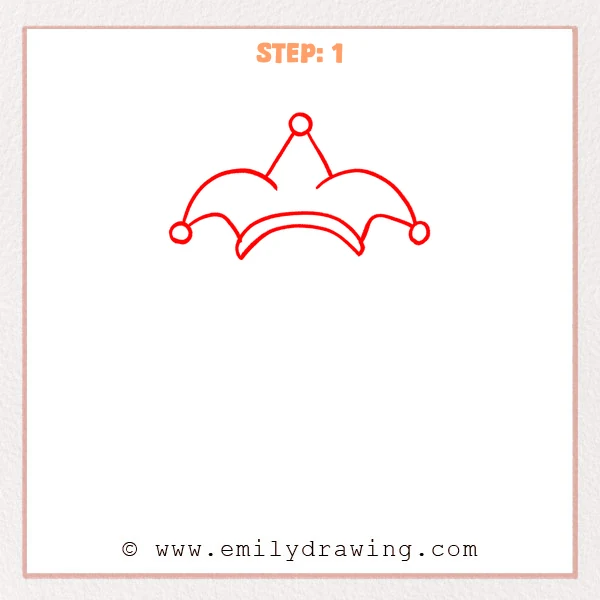
Start with three small round bells, one at the top center and one on each side. Connect them with curved lines to form the soft points and lower arch of the jester hat.
Pro Tip: Keep the left and right curves at a similar height so the hat looks balanced.
[Alt Text: A beginner sketch of a jester hat starting with three bells, curved pointed sections, and a simple lower arch.]
Step 2: Add the Face and Expression
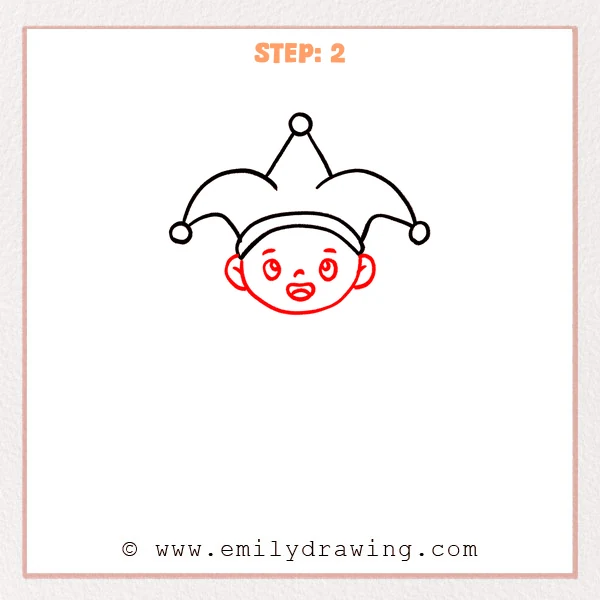
Draw a round face beneath the hat, then add an ear on each side. Next, add the eyes, eyebrows, nose, and open smiling mouth to make the jester look lively.
Pro Tip: Keep the features slightly above the center of the face, leaving enough room for the chin.
[Alt Text: A jester drawing refined with a round face, ears, eyes, eyebrows, nose, and a cheerful open smile beneath the hat.]
Step 3: Add the Jester Collar
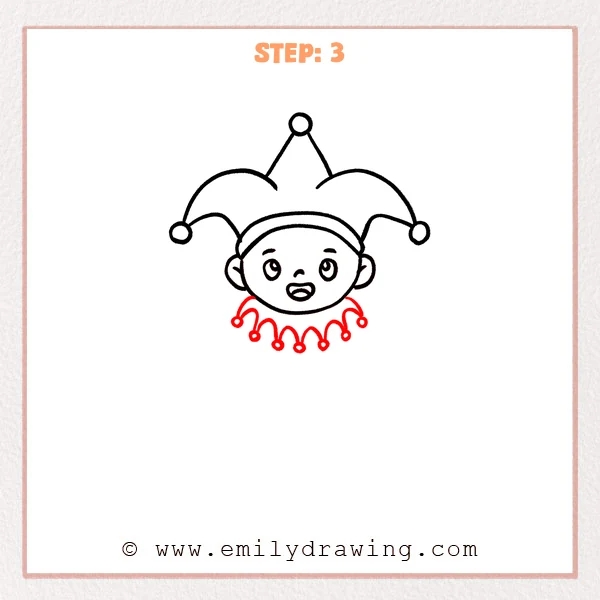
Draw a wavy collar below the face, then add a small round bell at each pointed end. Let the curves connect smoothly from left to right to create a playful decorative edge.
Pro Tip: Keep each wave close in size so the collar looks neat and even.
[Alt Text: A jester drawing refined with a wavy collar and small bells added below the smiling face.]
Step 4: Draw the Arms and Cuffs
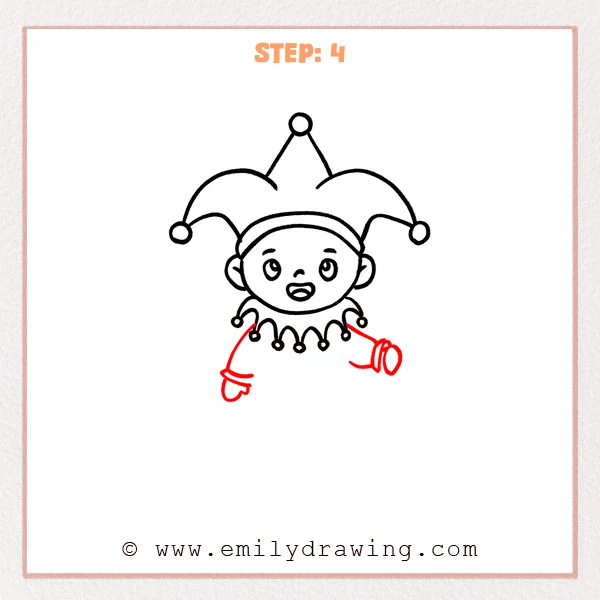
Add two outstretched arms starting from the sides of the collar. On the left, draw a small hand and cuff; on the right, draw a rounded sleeve cuff to make the pose feel more active.
Pro Tip: Let the arm lines spread slightly outward so the character feels more cheerful.
[Alt Text: A jester drawing refined with outstretched arms, a small hand, and rounded sleeve cuffs below the collar.]
Step 5: Add the Smiley Wand
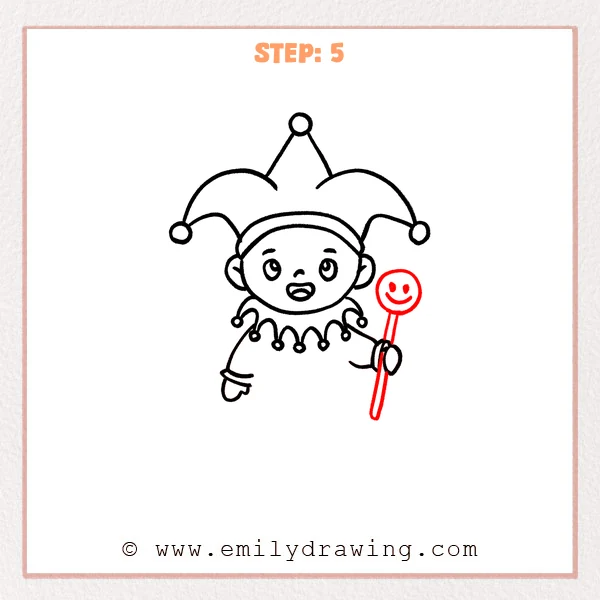
Draw a long wand beside the right hand, then add a round smiling face at the top. Tilt the wand slightly so it looks like the jester is happily holding it up.
Pro Tip: Let the wand pass through the hand area so it looks truly held.
[Alt Text: A jester drawing refined with a long smiley wand held beside the right hand.]
Step 6: Draw the Bodysuit and Short Pant Legs
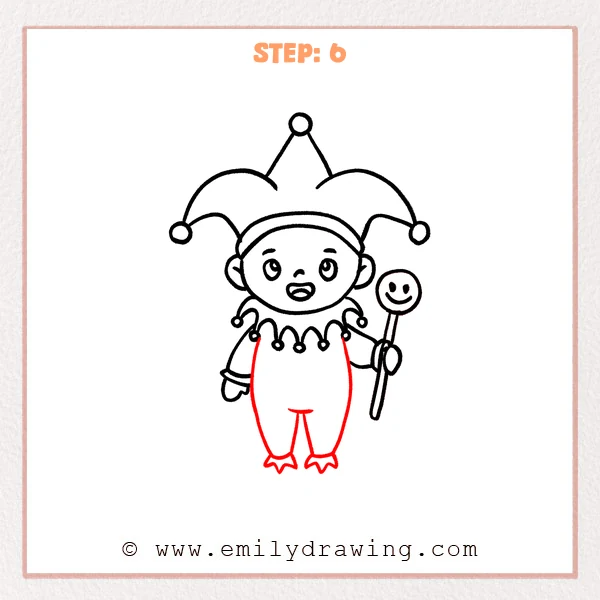
Draw a wide bodysuit shape downward from the collar, letting both sides gently narrow as they go down. Then add separated short pant legs with pointed edges at the bottom, leaving space for the oversized shoes later.
Pro Tip: Keep the pant legs fairly short, so there is enough space to add the shoes later.
[Alt Text: A jester drawing refined with a wide bodysuit, separated short pant legs, and pointed costume edges ready for curled shoes.]
Step 7: Add the Curled Shoes
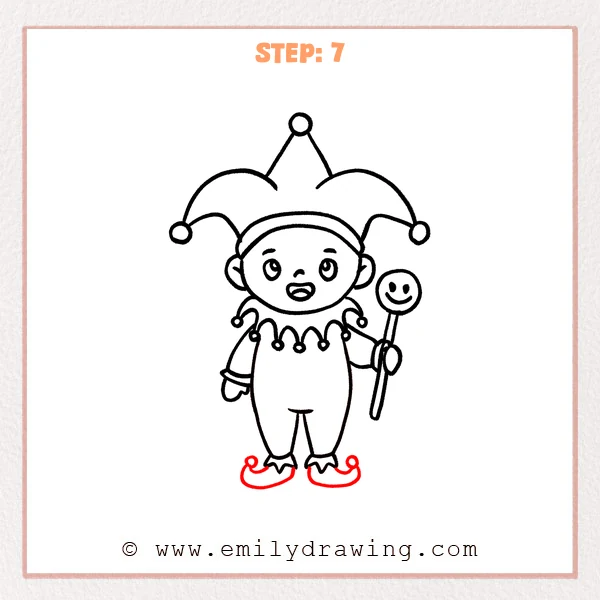
Draw larger curled shoes around the small feet, then add a tiny round ball at each shoe tip. Let the shoes spread outward on both sides to show the jester’s playful costume style.
Pro Tip: Make the soles a little wide so the character looks more stable.
[Alt Text: A jester drawing refined with oversized curled shoes and small round tips added to the feet.]
Step 8: Add the Polka Dot Costume Pattern
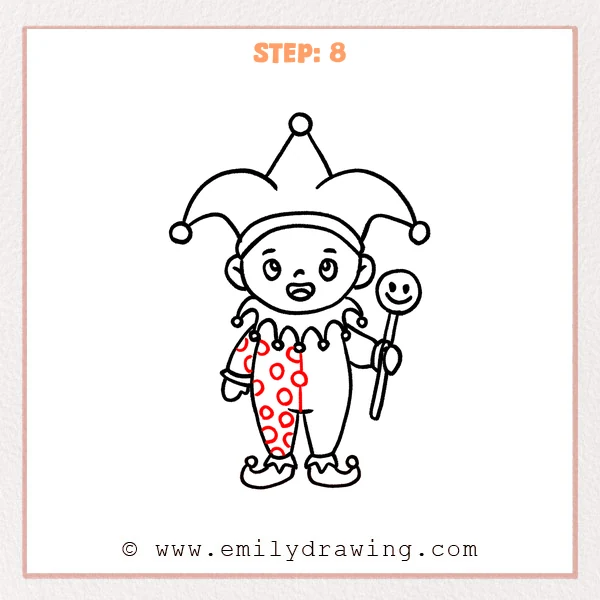
Draw several similar-sized circles on the left half of the body and the left sleeve. Place the dots along the costume shape without making them too perfectly lined up, so the pattern feels natural.
Pro Tip: Let some dots near the edges appear partial, making the pattern look like it continues around the costume.
[Alt Text: A jester drawing refined with polka dot patterns added to the left side of the costume and sleeve.]
Step 9: Add the Diamond Pattern
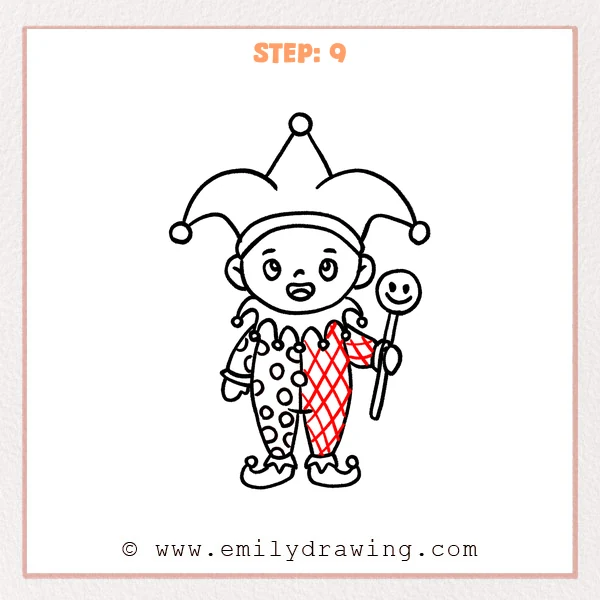
Draw crossing diagonal lines on the right half of the body and the right sleeve to form a diamond pattern. Stop the lines at the costume edges so the pattern stays neat and clear.
Pro Tip: Draw all diagonal lines in one direction first, then add the opposite direction to align the diamonds more easily.
[Alt Text: A jester drawing refined with a diamond pattern added to the right side of the costume and sleeve.]
Step 10: Color in your drawing!
Fun Facts
- Jesters were entertainers who often performed music, jokes, and tricks.
- A jester hat usually has soft points with bells at the ends.
- Diamond and polka dot patterns are common in playful costume designs.
- The curled shoes make the character look more magical and theatrical.
Pin it now, Draw later!
Now your jester drawing has a hat, smiling face, collar, wand, costume, and curled shoes.
Trace the final lines with a black marker, then erase any extra pencil marks.
You can color the outfit with bright reds, yellows, purples, or any cheerful colors you like.
Keep practicing this step by step drawing, and try designing your own jester costume next.
Get the FREE Printable Drawing Guide
FREE Download Printable Jester Drawing Tutorial
Frequently Asked Questions
Is this jester drawing good for beginners?
Yes. This drawing for beginners uses simple circles, curves, and repeating patterns.
What colors should I use for the jester?
Bright colors work best, such as red, yellow, blue, green, or purple. You can also color each side of the costume differently.
How can I make my jester look more fun?
You can add extra bells, stars, stripes, or a bigger smiley wand. Small details make the easy drawing tutorial feel more personal.