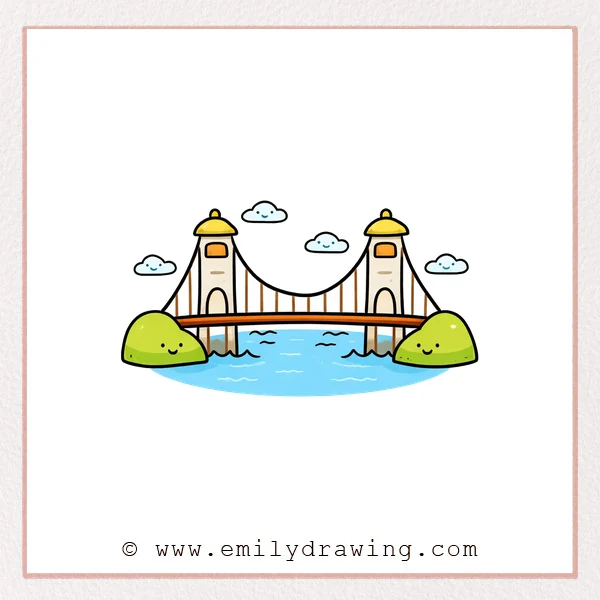
The Golden Gate Bridge is famous for its tall towers and sweeping main cable.
This easy drawing tutorial breaks the bridge into simple, friendly shapes.
Take your time, and keep your lines light until you like the placement.
What You Will Need
- Pencil or drawing pen
- Eraser
- Paper
- Optional: red marker or colored pencil for accents
Here are my RECOMMENDED Art Supplies!
- Crayola Coloring Set (140 Pieces – Mega Value!)
- 24 Colored Crayon Set
- A4 Printer Paper
- Crayola Coloring Pencils
- HP Home Printer with Instant Ink!
Time needed:
23 minutes.
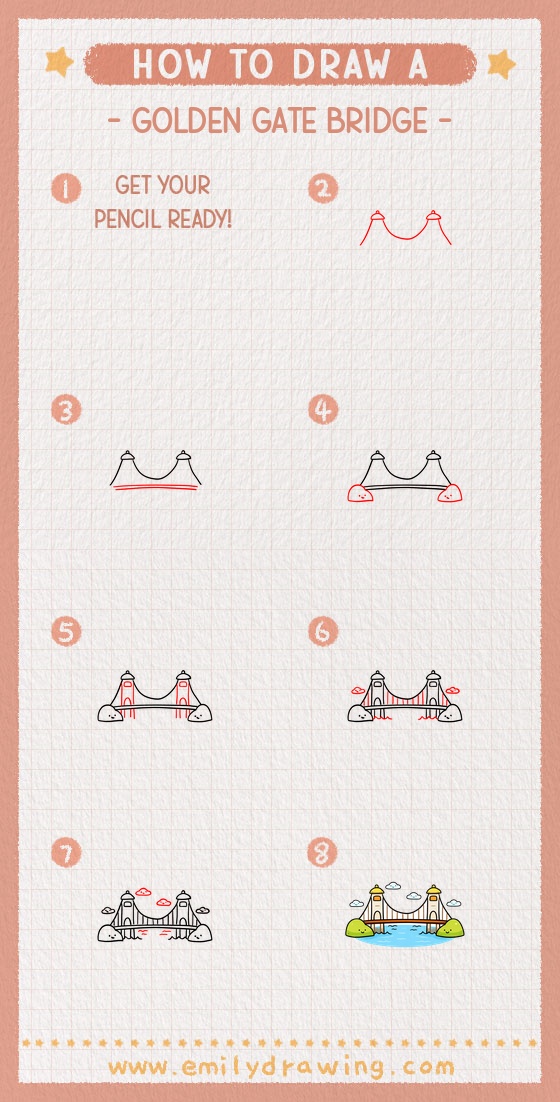
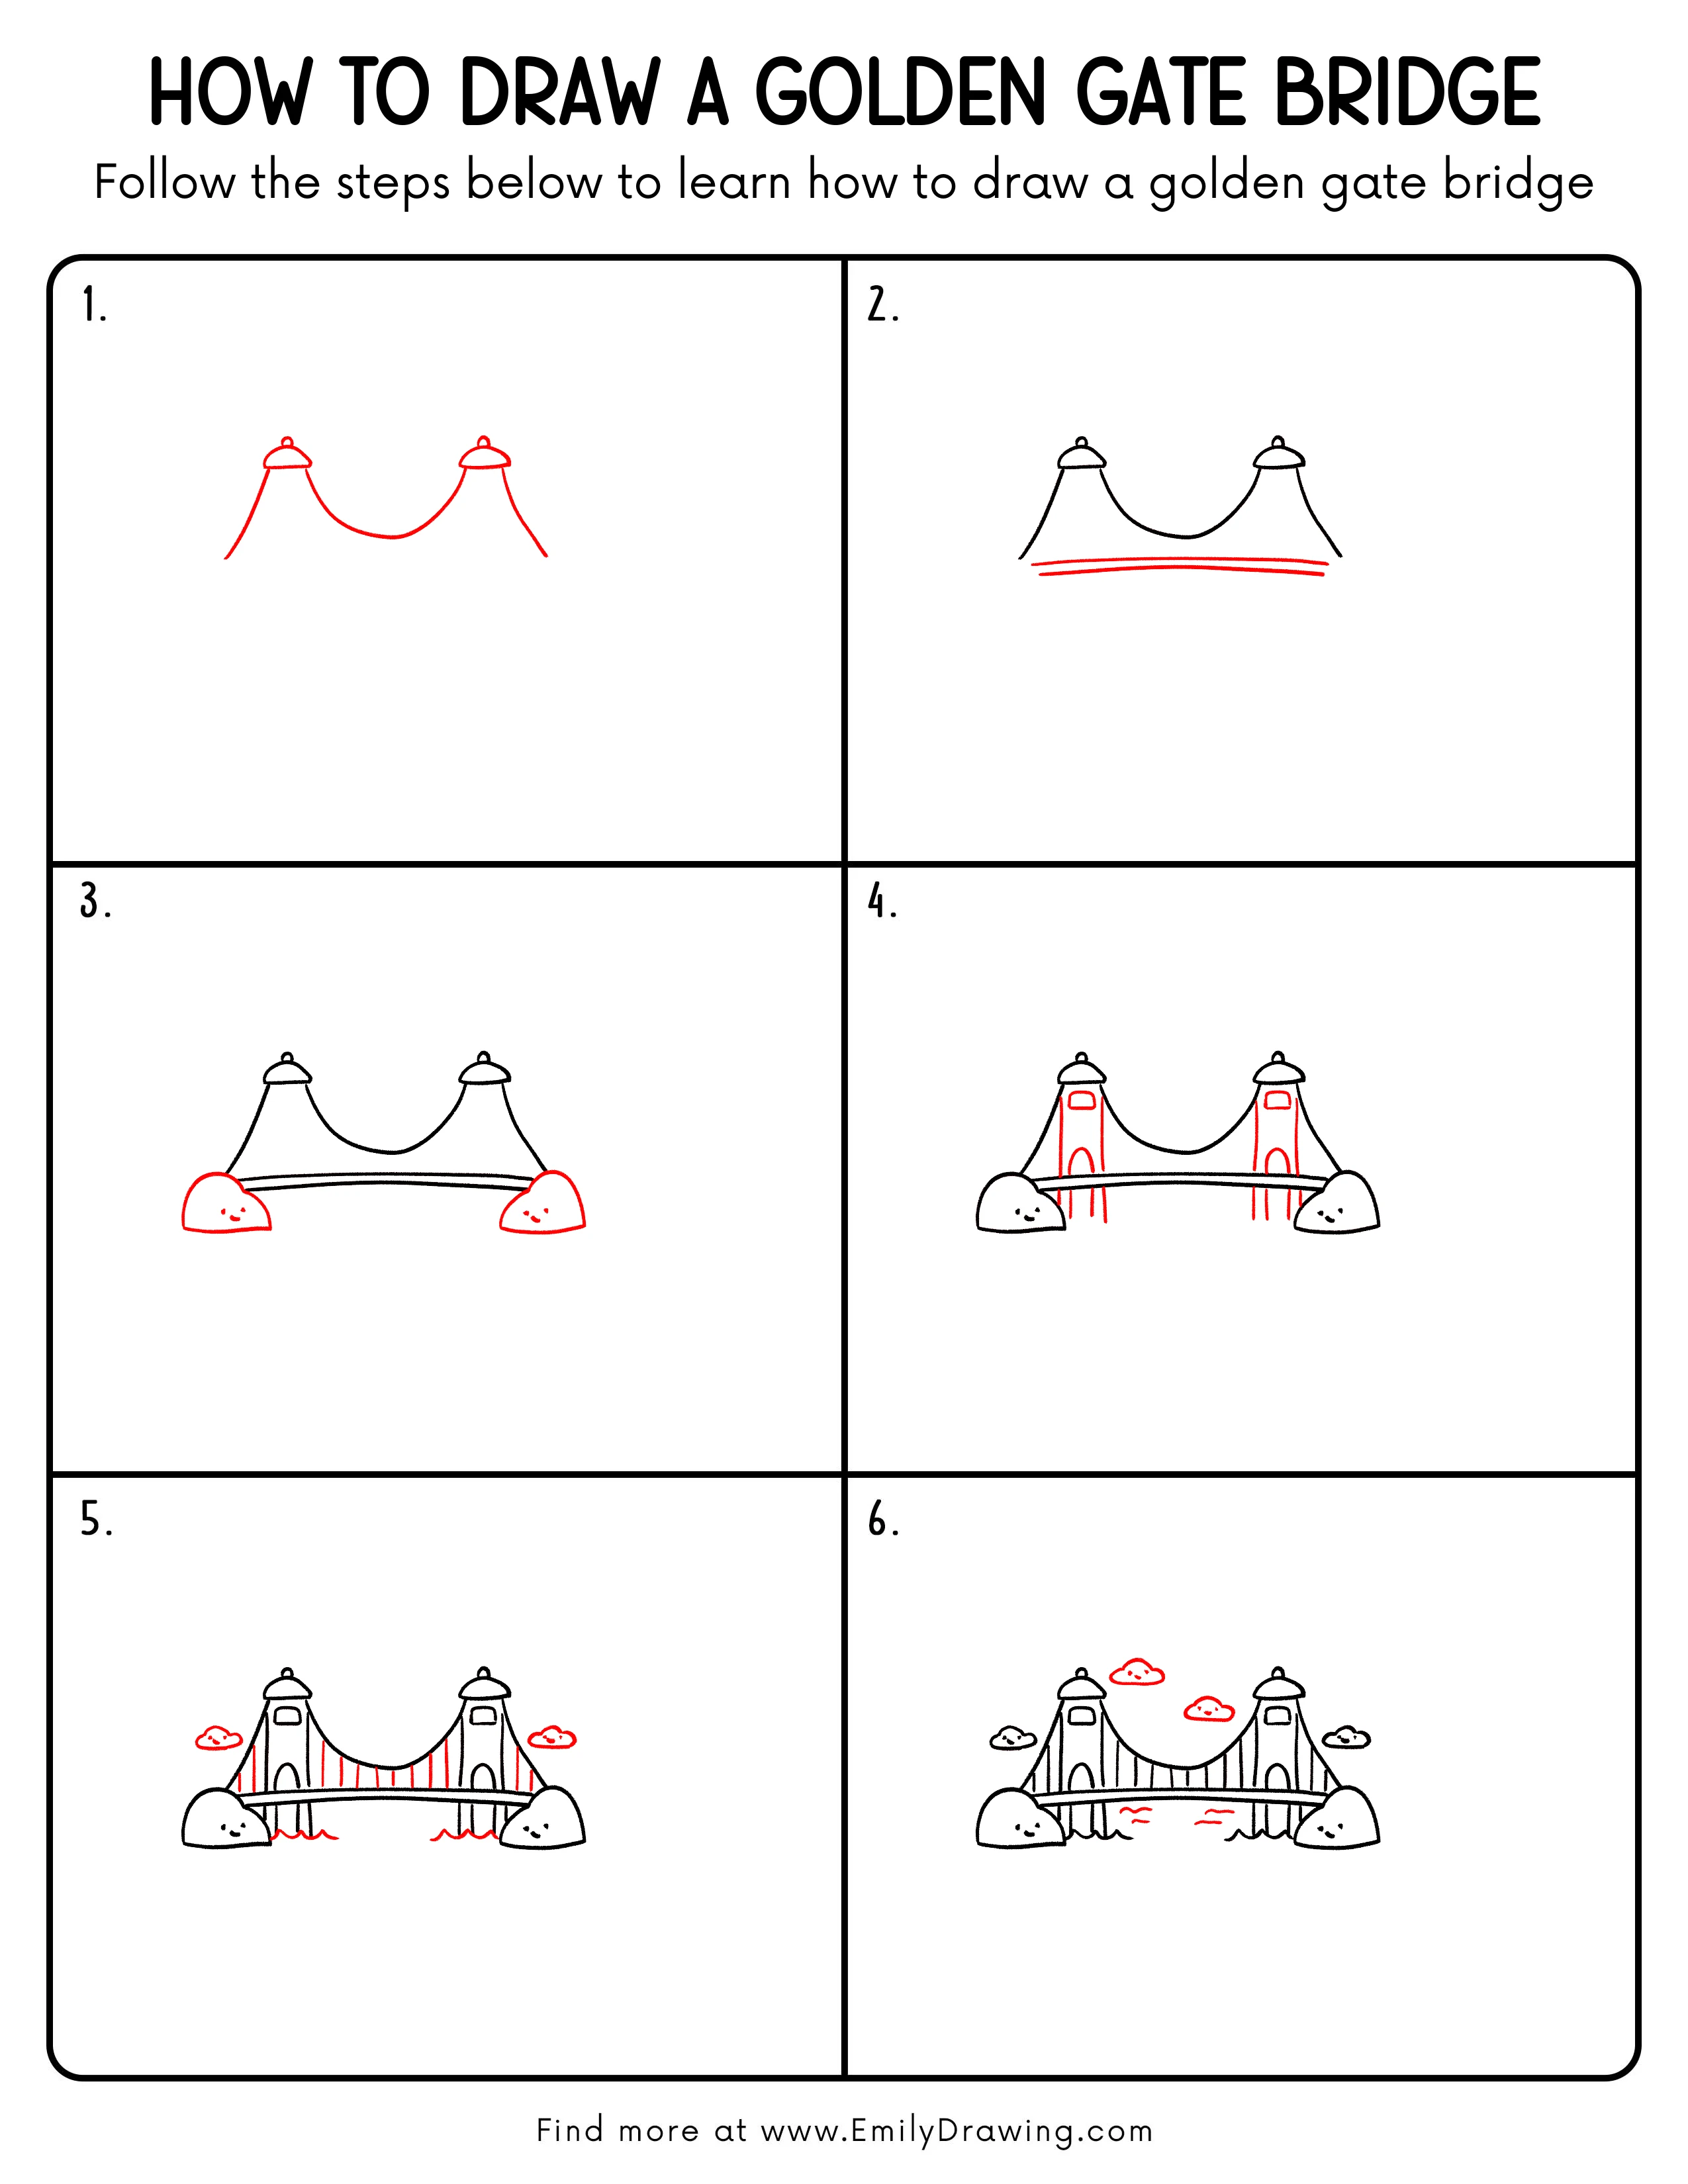
Step-by-Step Drawing Guide
Step 1: Sketch the Two Towers and Main Cable
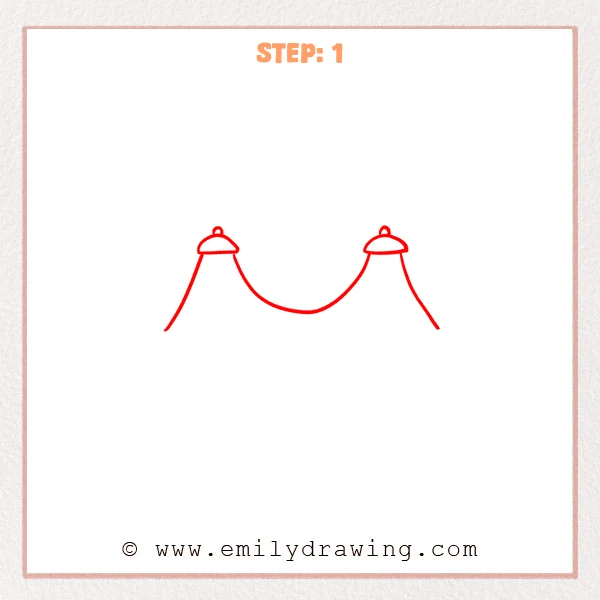
Draw two tall, slightly slanted curves on the left and right to form the outer edges of the towers.
Add a small dome-like cap on each tower, then connect them with one long curved line that dips in the middle.
Pro Tip: Keep both towers the same height, and place the cable’s lowest point near the center.
Step 2: Add Three Parallel Lines for the Bridge Deck
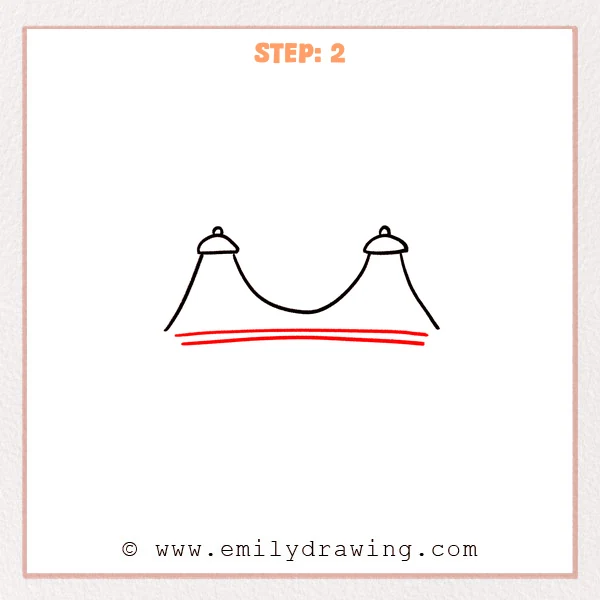
Under the towers, draw three long, slightly curved parallel lines to form the bridge deck layers.
Keep the middle line a bit longer and centered, with even spacing to the other two.
Pro Tip: The more even the spacing, the cleaner and sturdier the deck will look.
Step 3: Add Rounded Land Bases and Simple Faces
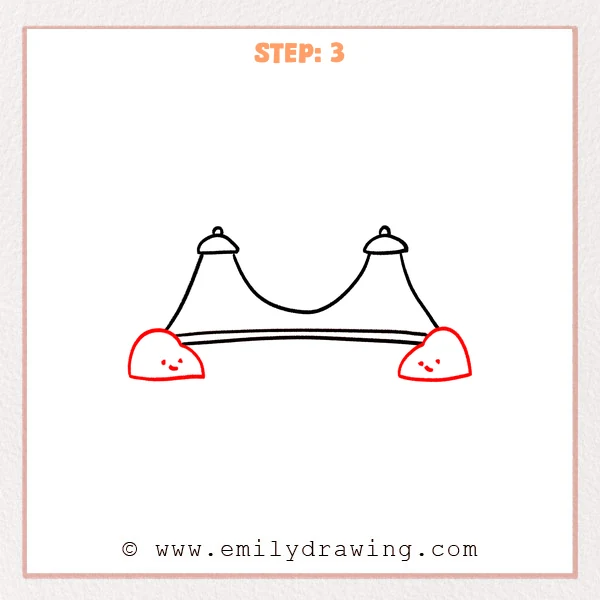
Draw a rounded half-oval shape at each end of the bridge deck, like small hills supporting the entrances.
Add two tiny eyes and a curved smile inside each shape for a cute touch.
Pro Tip: Keep both bases similar in size and aligned with the deck ends.
Step 4: Add the Tower Frames, Windows, and Arch Openings
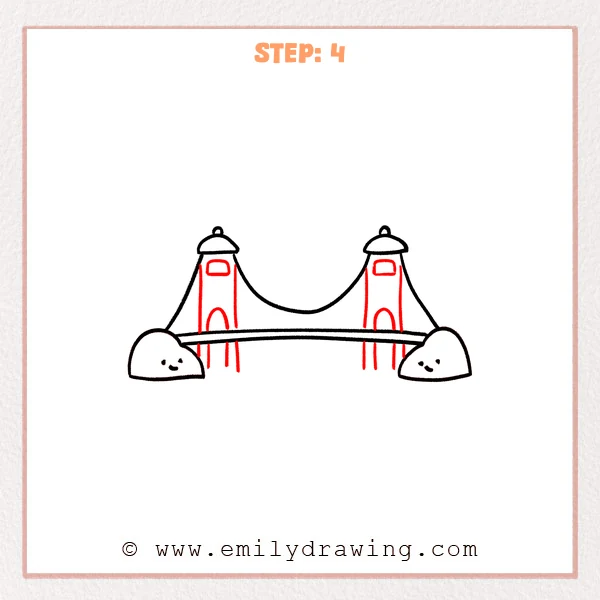
Inside each tower, draw a tall inner rectangle to show the tower structure.
Add a small rectangle window near the top, draw an arched opening below it, and extend a few vertical lines downward past the deck for the tower legs.
Pro Tip: Keep the windows and arches at the same height on both towers for symmetry.
Step 5: Add Hanger Cables, Waves, and Little Clouds
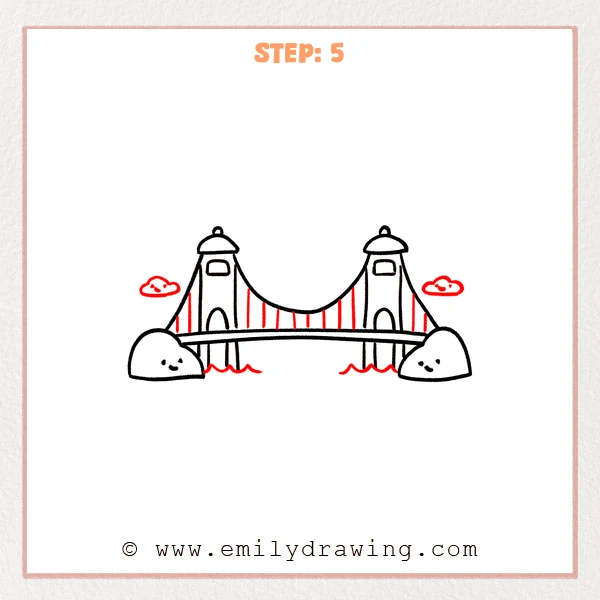
Draw a row of short vertical lines between the main cable and the deck to create the hanger cables, making them a bit denser near the sides.
Add a few wavy lines under the deck near both ends for water, then draw one small cloud on each side and give them tiny faces.
Pro Tip: Keep the hanger cables vertical and change their lengths gradually for a realistic look.
Step 6: Add Extra Details to the Sky and Water
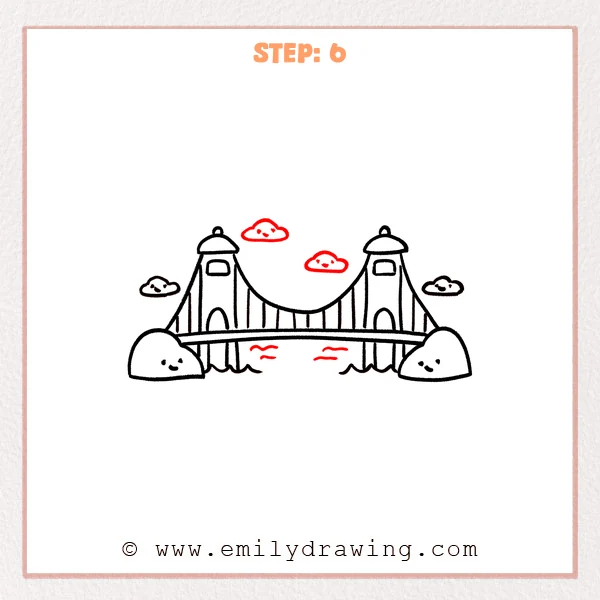
Add two more small clouds above the towers to fill the sky, placing one near the upper middle.
Draw a few short ripple lines in the water under the bridge to match the waves at the sides.
Pro Tip: Place the clouds at different heights to create depth.
Step 7: Color in your drawing!
Fun Facts
- The Golden Gate Bridge is in San Francisco, California, and spans the Golden Gate strait.
- It is a suspension bridge, which means the roadway hangs from strong cables.
- On foggy days, the bridge can look like it disappears into the clouds.
Pin it now, Draw later!
Go over your favorite lines to make them a little bolder and cleaner.
If you like, color the bridge in a bright red-orange to make it stand out.
You now have a step by step drawing of the Golden Gate Bridge—try drawing it again with different clouds or waves!
Get the FREE Printable Drawing Guide
FREE Download Printable Golden Gate Bridge Drawing Tutorial
Frequently Asked Questions
How do I make the bridge look more realistic?
Add more hanger cables with even spacing, and keep the deck lines smooth and parallel.
What if my main cable curve looks uneven?
Lightly erase and redraw the curve, checking that the lowest point is near the center.
Can I draw the bridge at a different angle?
Yes, start with a tilted deck line and keep both towers aligned to the new direction.