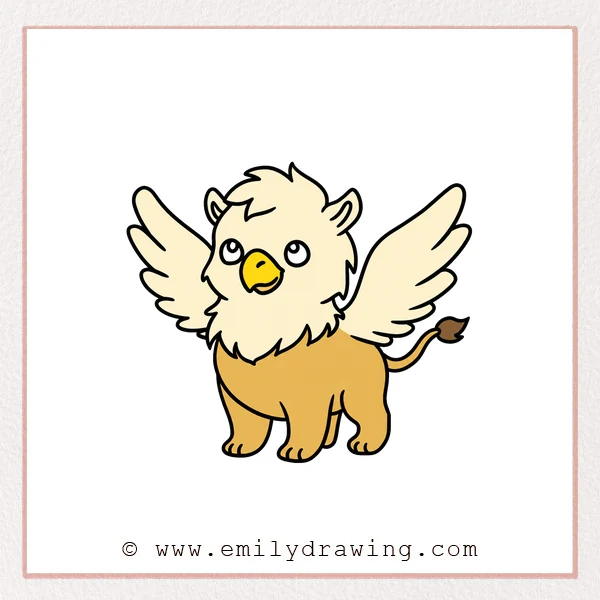
Learn how to draw a griffin with raised wings and a friendly beak. This easy drawing tutorial combines feathered outlines, rounded paws, and a long tufted tail.
What You Will Need
- Drawing paper
- A pencil
- An eraser
Here are my RECOMMENDED Art Supplies!
- Crayola Coloring Set (140 Pieces – Mega Value!)
- 24 Colored Crayon Set
- A4 Printer Paper
- Crayola Coloring Pencils
- HP Home Printer with Instant Ink!
Time needed:
17 minutes.
Step-by-Step Drawing Guide
Step 1: Outline the Feathered Head
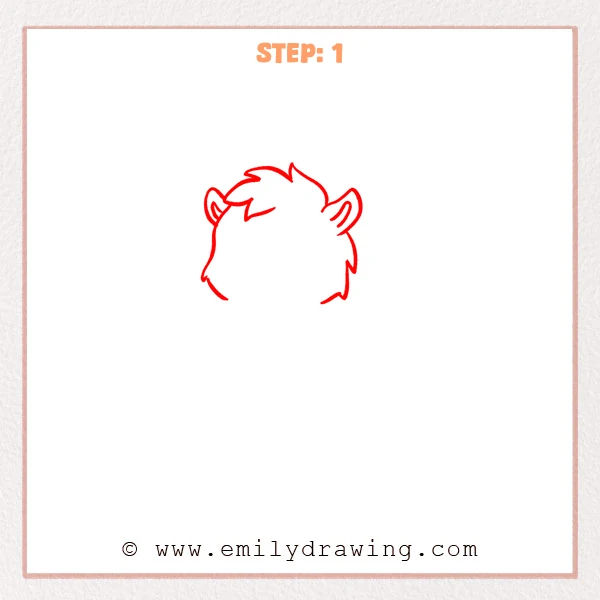
Draw a rounded head with pointed cheek tufts and a swept forehead crest. Add two pointed ears with curved inner details, leaving the neck open.
Pro Tip: Keep the forehead tuft above the space reserved for the face.
Step 2: Add the Eyes and Beak
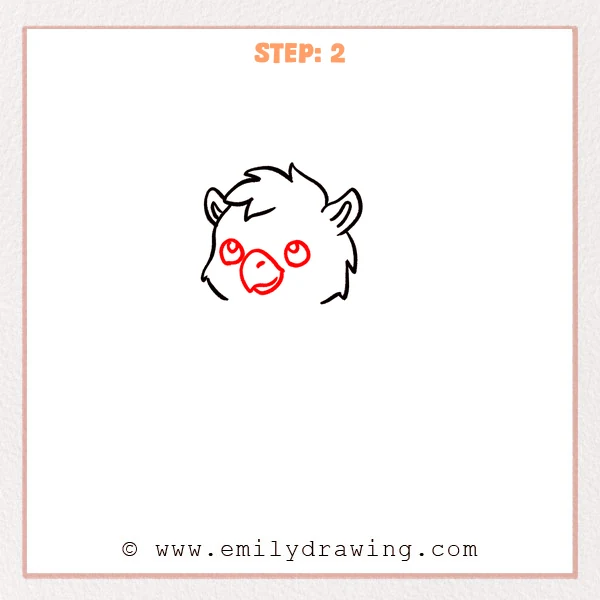
Draw two rounded eyes with a small highlight inside each. Add a large curved beak with a nostril and a smiling lower edge.
Pro Tip: Place the beak between the eyes, extending farther downward.
Step 3: Raise the Left Wing
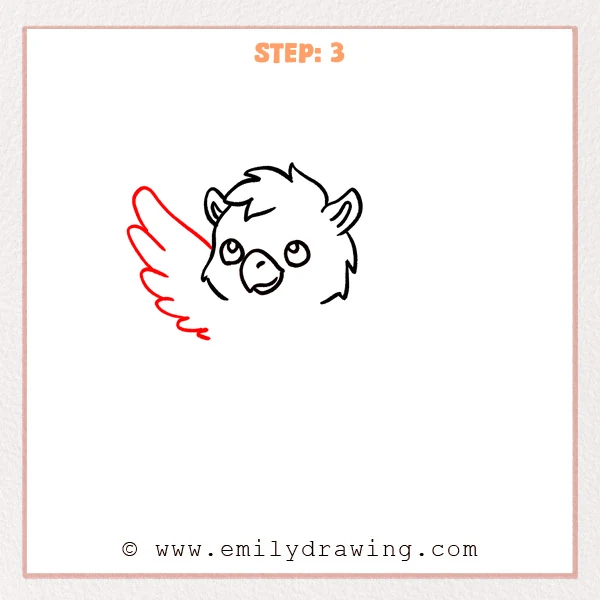
Extend a long curved wing upward from behind the left cheek. Form its outer edge with rounded feathers that shorten toward the base.
Pro Tip: Start with the longest feather and gradually reduce the others.
Step 4: Raise the Right Wing
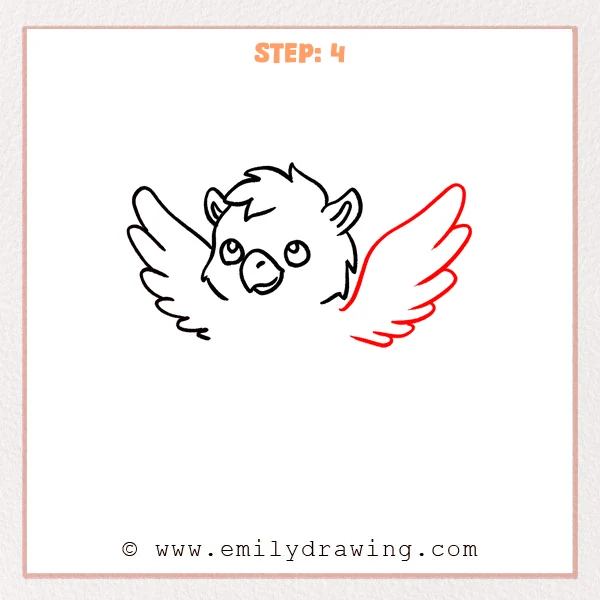
Draw an upward sweep behind the right side of the head. Add long upper feathers and shorter rounded feathers along the lower edge.
Pro Tip: Compare the wingspans before drawing the smallest lower feathers.
Step 5: Add the Ruff and First Leg
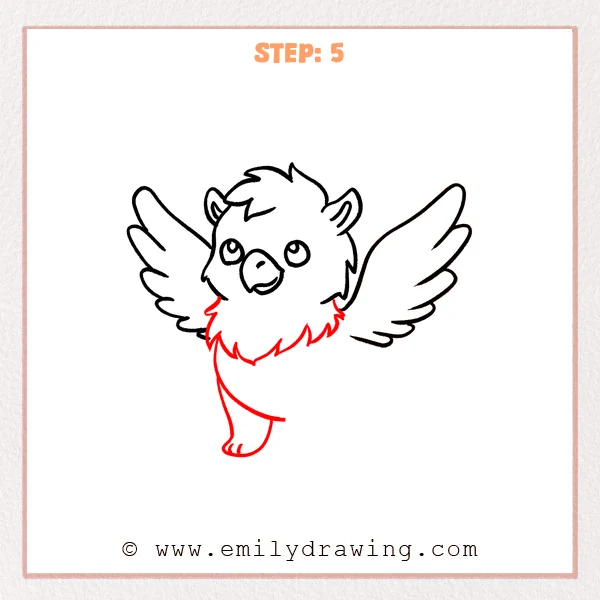
Draw a pointed feather ruff beneath the head between the wings. Add the chest curve, one long front leg, and a paw with toe marks.
Pro Tip: Let the ruff overlap the top of the leg.
Step 6: Complete the Body and Tail
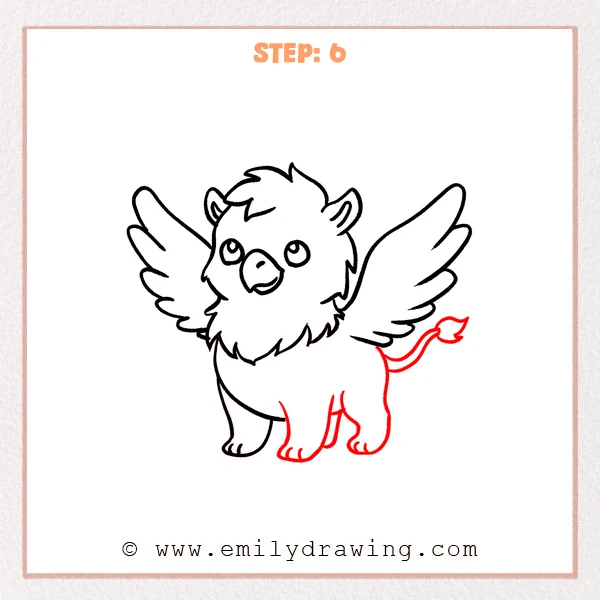
Outline the rounded hindquarters, remaining front leg, and two rear paws with toe marks. Extend a narrow tail upward behind the body and finish with a pointed tuft.
Pro Tip: Stop the far rear leg where the nearer legs overlap it.
Step 7: Color in your drawing!
Fun Facts
- The griffin’s feathered wings contrast with its rounded paws in this drawing.
- Repeated pointed tufts connect the griffin’s crest, neck ruff, and tail visually.
Pin it now, Draw later!
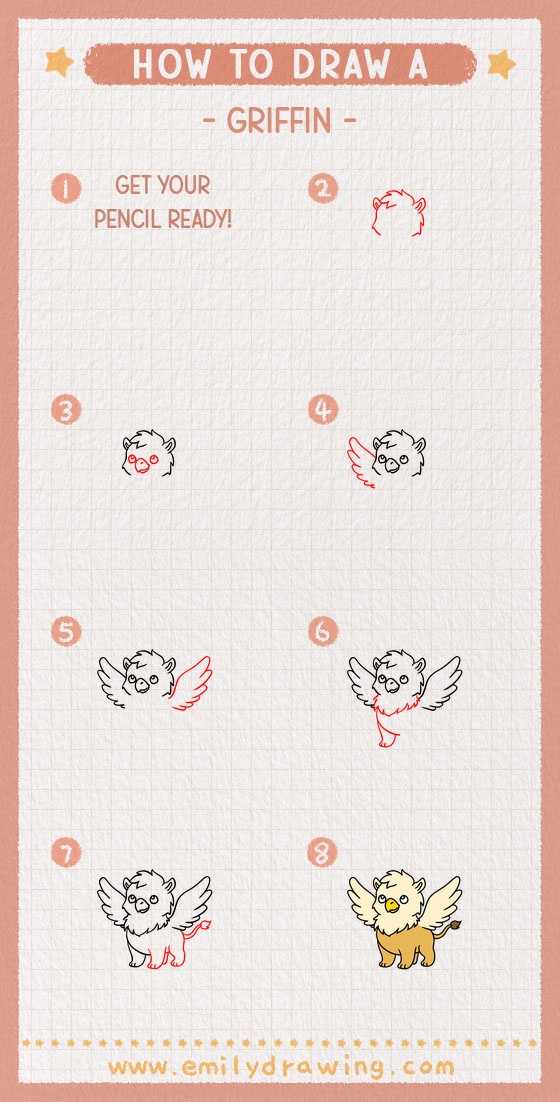
Your griffin now has a feathered head, broad wings, four paws, and a tufted tail. This step by step drawing practices repeated shapes and overlapping outlines. Try drawing another griffin with a slightly different wing angle.
Get the FREE Printable Drawing Guide
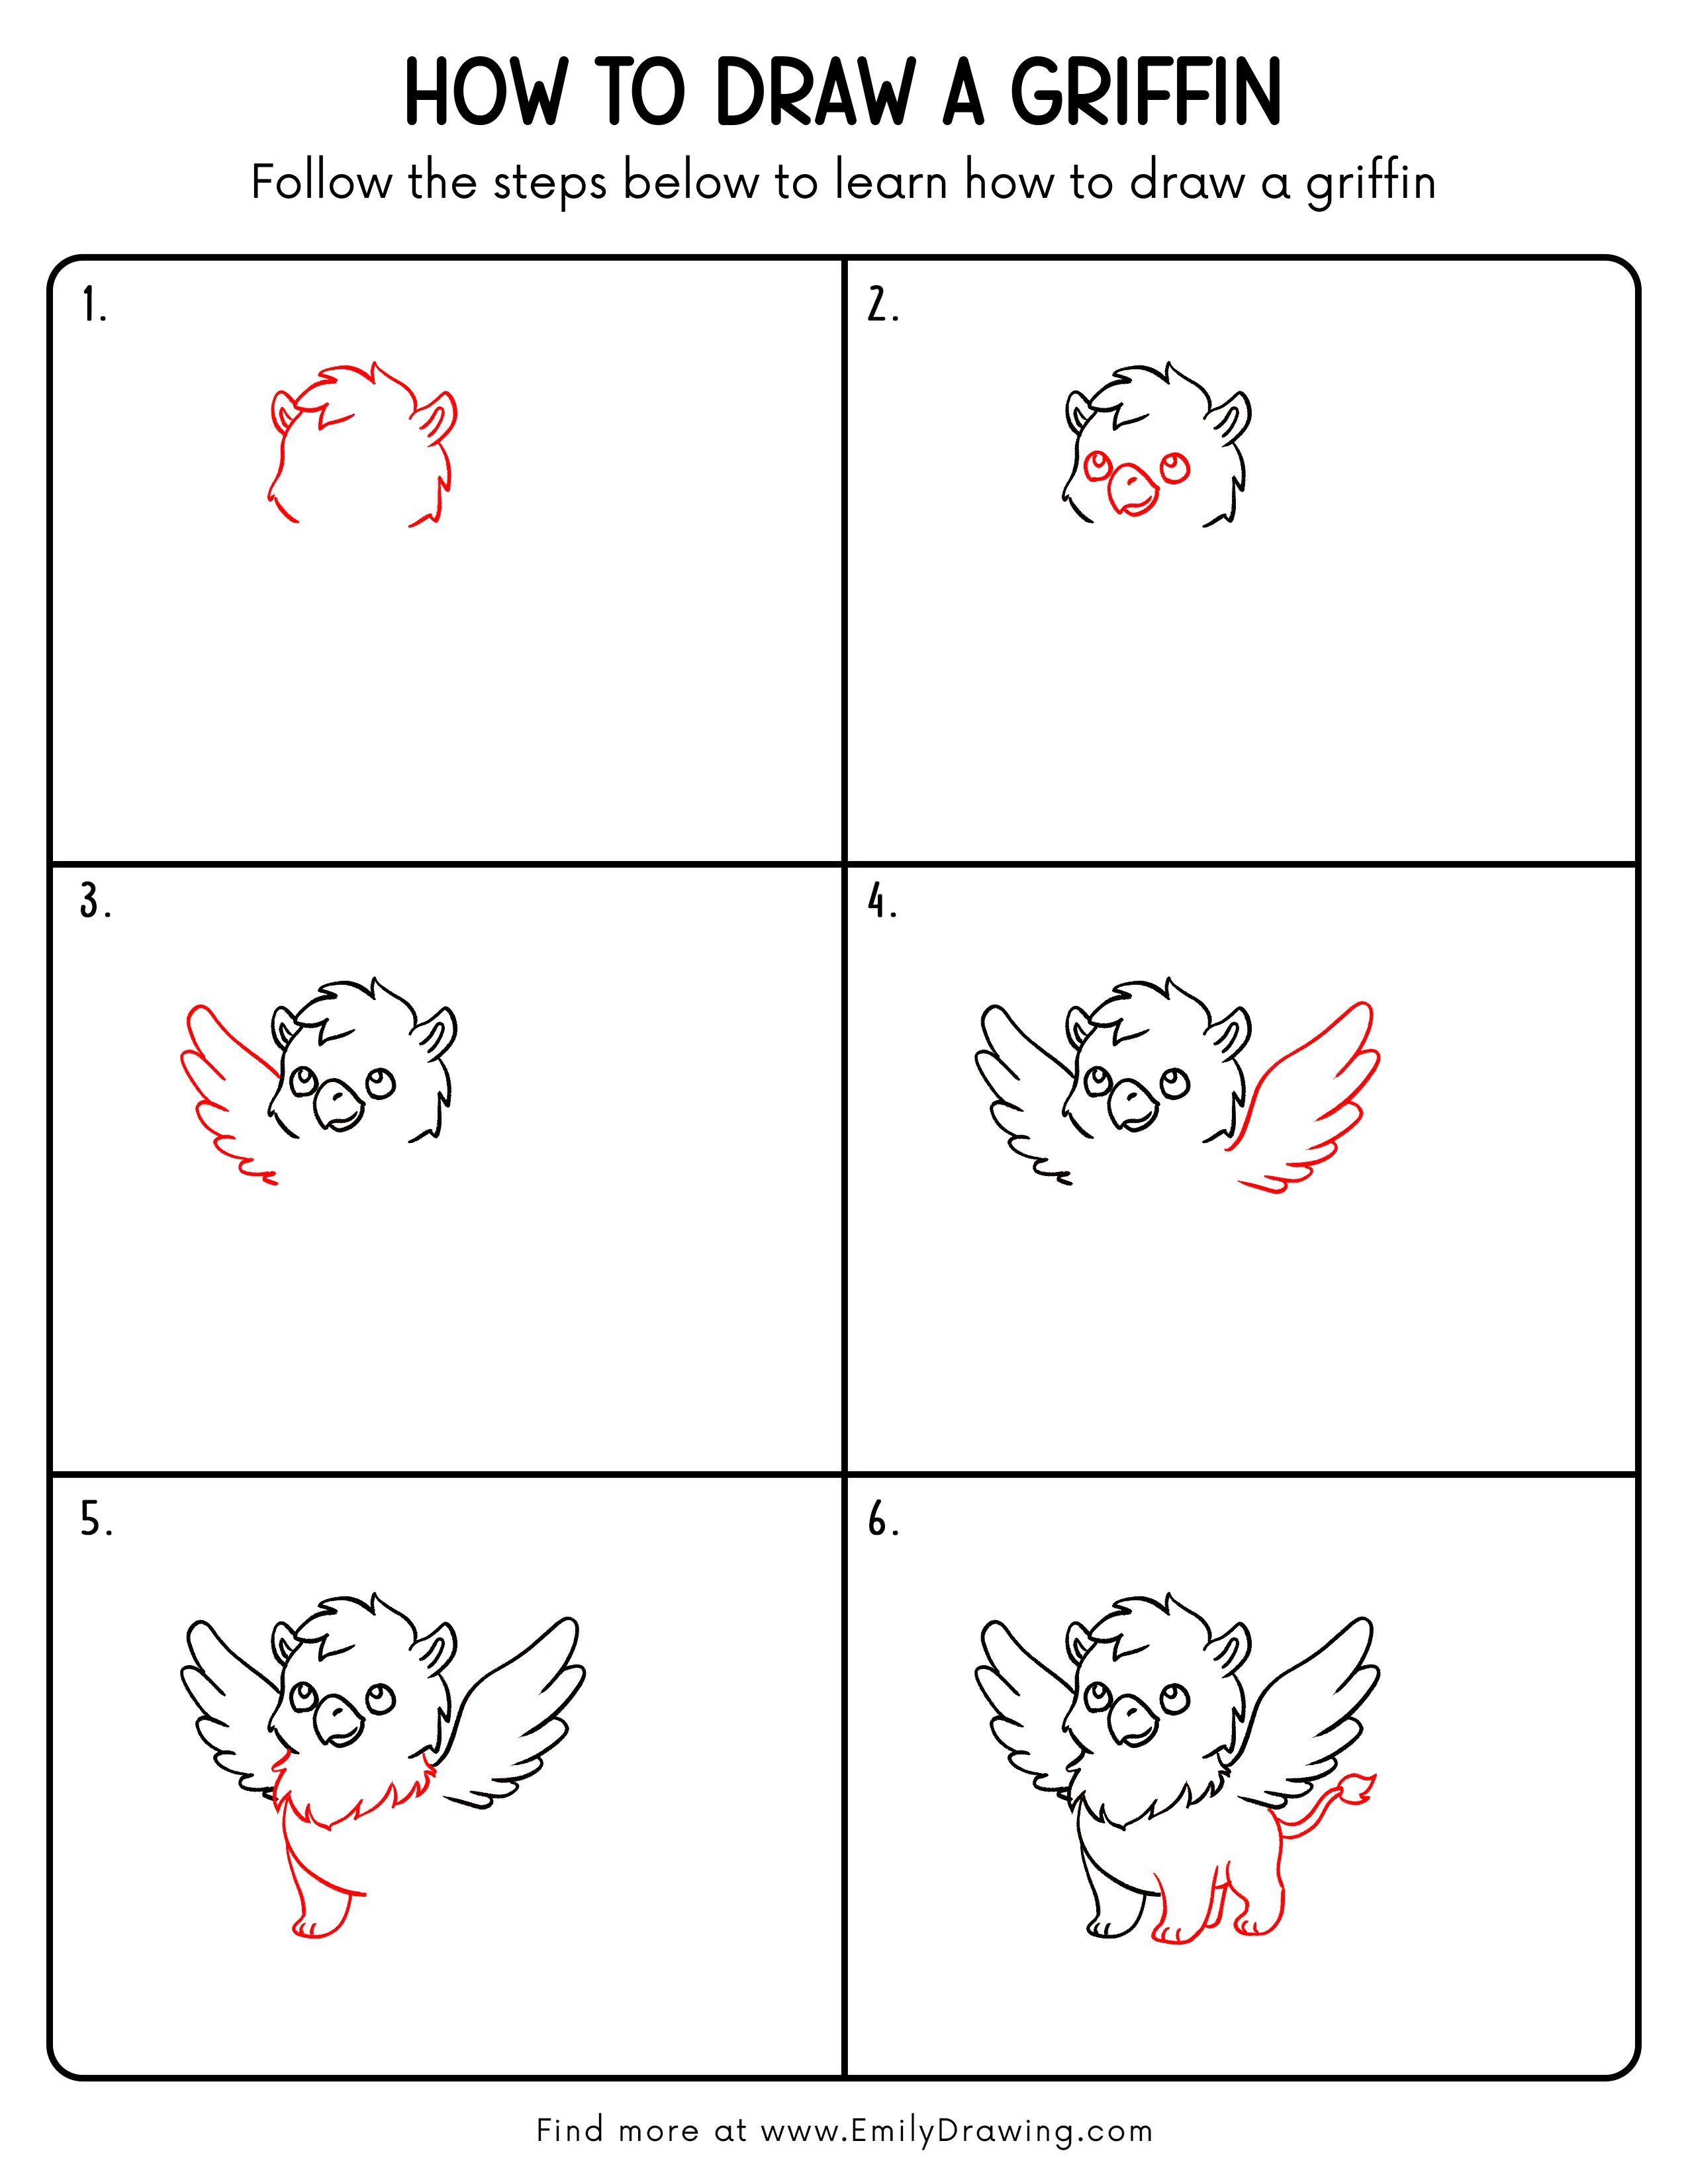
FREE Download Printable Griffin Drawing Tutorial
Frequently Asked Questions
How can I simplify the griffin’s feathers?
Use a few large rounded feather shapes, keeping the upper feathers longer than the lower ones.
What helps with griffin proportions when drawing for beginners?
Keep the head large and leave enough width on both sides for the raised wings.