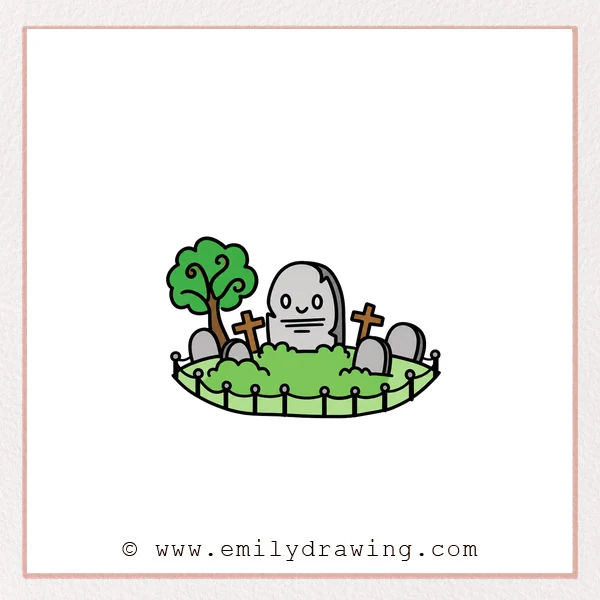
Learn how to draw a graveyard with rounded headstones and a friendly cartoon mood. This step by step drawing practices overlapping shapes, curved scenery, and a surrounding fence.
What You Will Need
- Drawing paper
- A pencil
- An eraser
Here are my RECOMMENDED Art Supplies!
- Crayola Coloring Set (140 Pieces – Mega Value!)
- 24 Colored Crayon Set
- A4 Printer Paper
- Crayola Coloring Pencils
- HP Home Printer with Instant Ink!
Time needed:
15 minutes.
Step-by-Step Drawing Guide
Step 1: Draw the Curly Tree
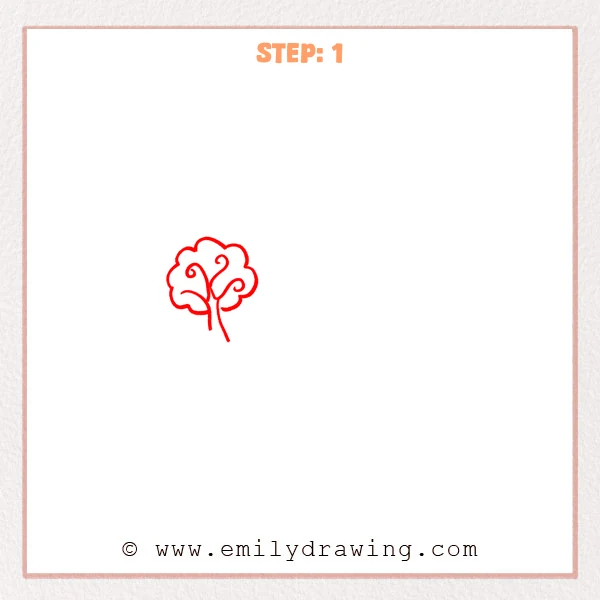
Outline a small tree crown using connected rounded bumps. Add a narrow trunk with branching lines and three curled branch tips.
Pro Tip: Place the tree left of center to leave room for the headstones.
Step 2: Add the Main Headstone
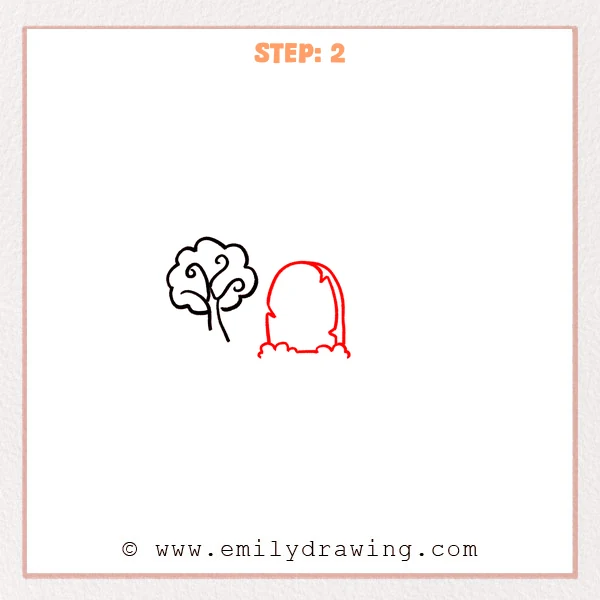
Draw a tall arched headstone to the right of the tree. Add chipped edges, a narrow side border, and low bushes around its base.
Pro Tip: Keep the headstone taller than the bushes but below the tree crown.
Step 3: Fill the Left Side
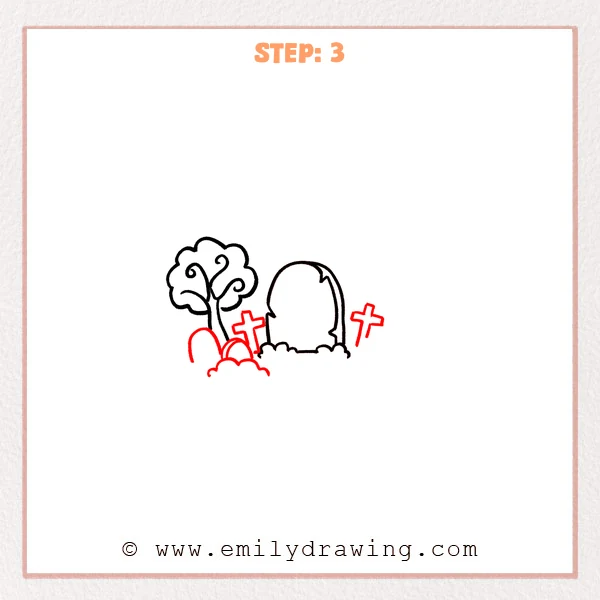
Add two small rounded headstones near the tree’s base. Draw two cross-shaped markers beside the main stone and bushes across the left foreground.
Pro Tip: Allow the foreground bushes to hide the bottoms of nearby stones.
Step 4: Build the Right Side and Ground
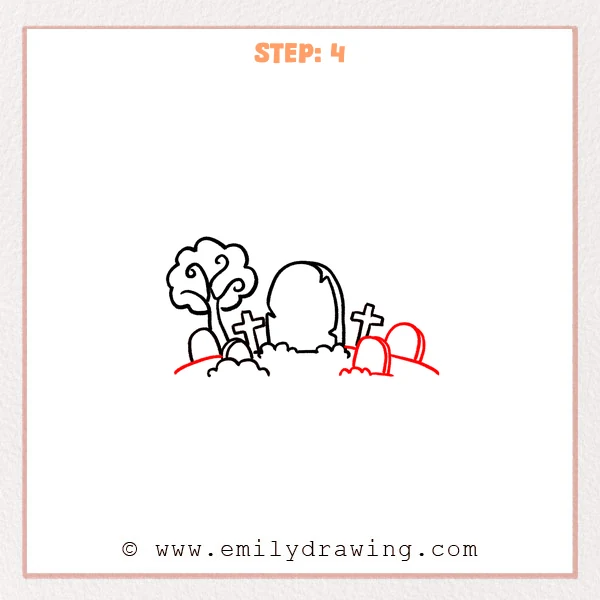
Draw two more rounded headstones on the right with narrow side edges. Add low bushes and a curved ground line behind the foreground stones.
Pro Tip: Break the ground line wherever a headstone stands in front.
Step 5: Surround the Scene with a Fence
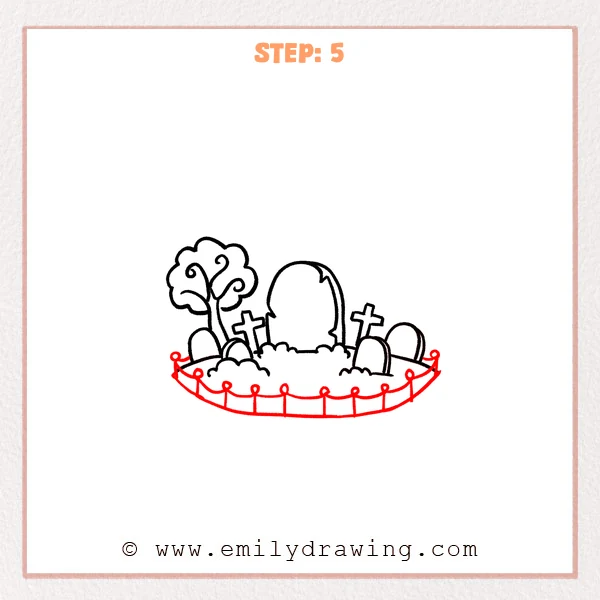
Draw a broad curved boundary along the bottom of the graveyard. Add upright posts with circular tops, linking neighboring posts with sagging curves.
Pro Tip: Space the front posts evenly before drawing the connecting curves.
Step 6: Detail the Central Stone
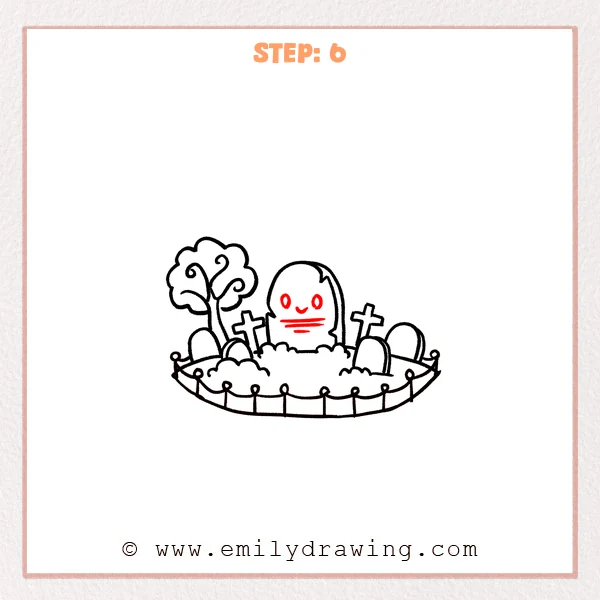
Add two small oval eyes and a curved smile to the main headstone. Draw three short horizontal inscription marks below the face.
Pro Tip: Keep the lowest inscription mark shorter than the two above it.
Step 7: Color in your drawing!
Fun Facts
- Overlapping headstones and bushes give this graveyard drawing a sense of depth.
- The curved fence visually gathers the graveyard’s separate shapes into one scene.
Pin it now, Draw later!
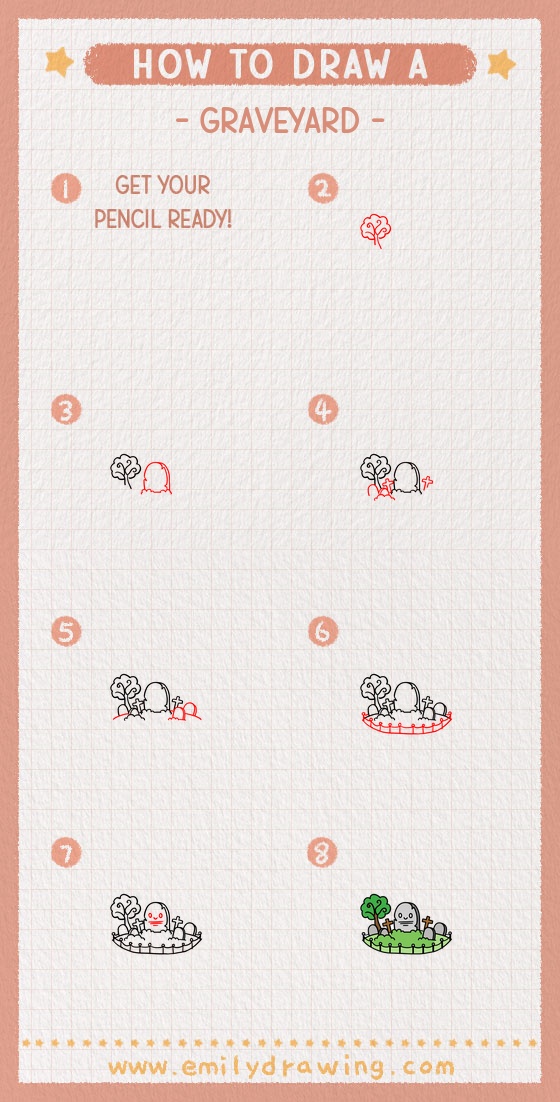
Your graveyard now includes a curly tree, varied markers, bushes, and a surrounding fence. This easy drawing tutorial turns several simple shapes into a complete scene. Try another graveyard drawing with wider spacing between the stones.
Get the FREE Printable Drawing Guide
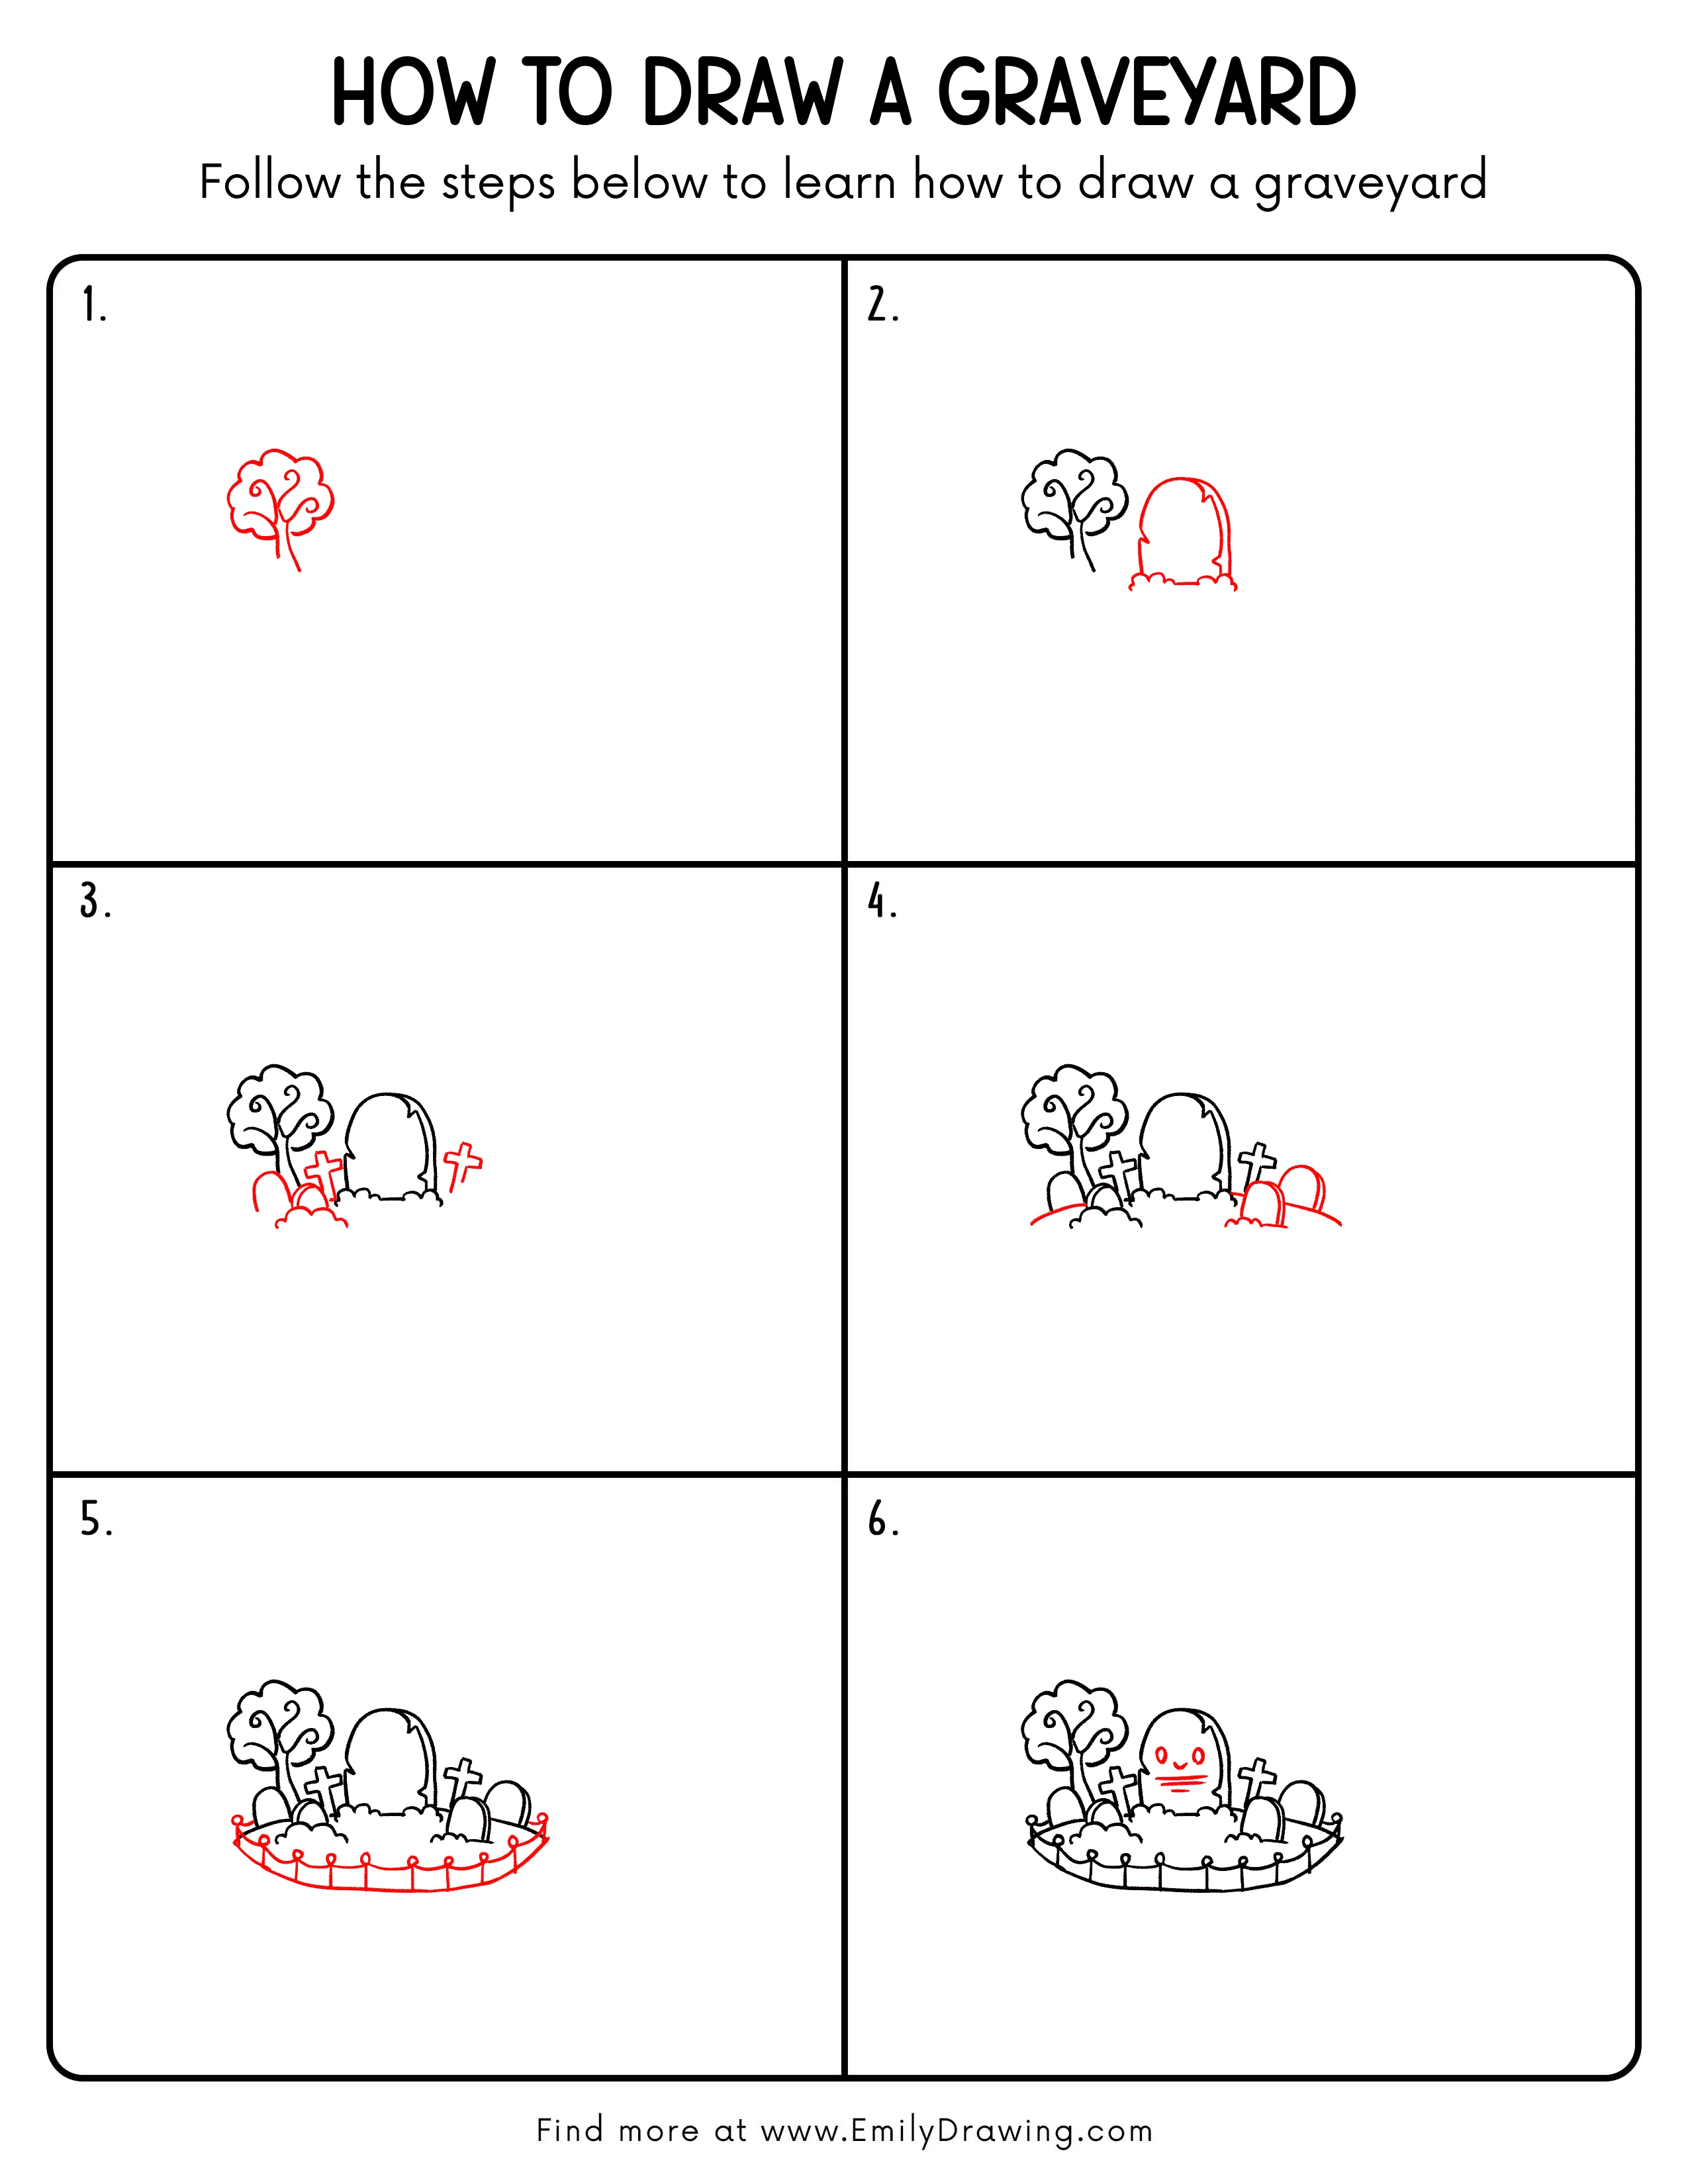
FREE Download Printable Graveyard Drawing Tutorial
Frequently Asked Questions
How can I simplify the graveyard fence?
Use fewer evenly spaced posts, keeping the same curved boundary and hanging links.
What helps place graveyard objects when drawing for beginners?
Begin with the tree and main headstone, then fit smaller shapes around them.