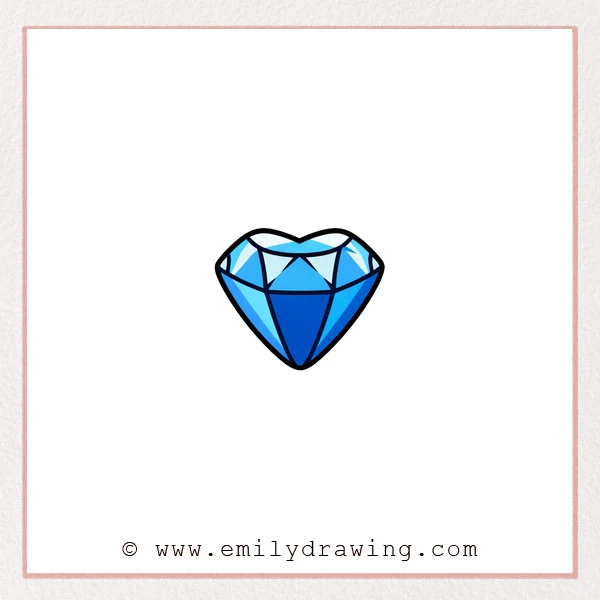
This easy drawing tutorial shows how to draw a gemstone with clean facets.
You will build it step by step, starting with a simple top curve.
Take your time, and keep each line smooth and lightly sketched at first.
What You Will Need
- Pencil
- Eraser
- Black pen or marker (optional for final lines)
- Paper
Here are my RECOMMENDED Art Supplies!
- Crayola Coloring Set (140 Pieces – Mega Value!)
- 24 Colored Crayon Set
- A4 Printer Paper
- Crayola Coloring Pencils
- HP Home Printer with Instant Ink!
Time needed:
17 minutes.
Step-by-Step Drawing Guide
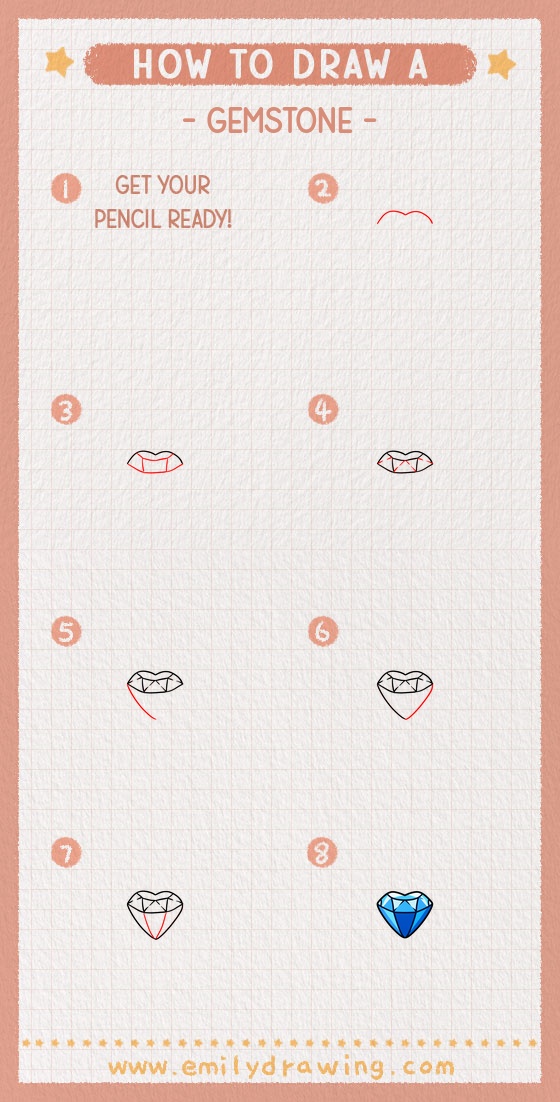
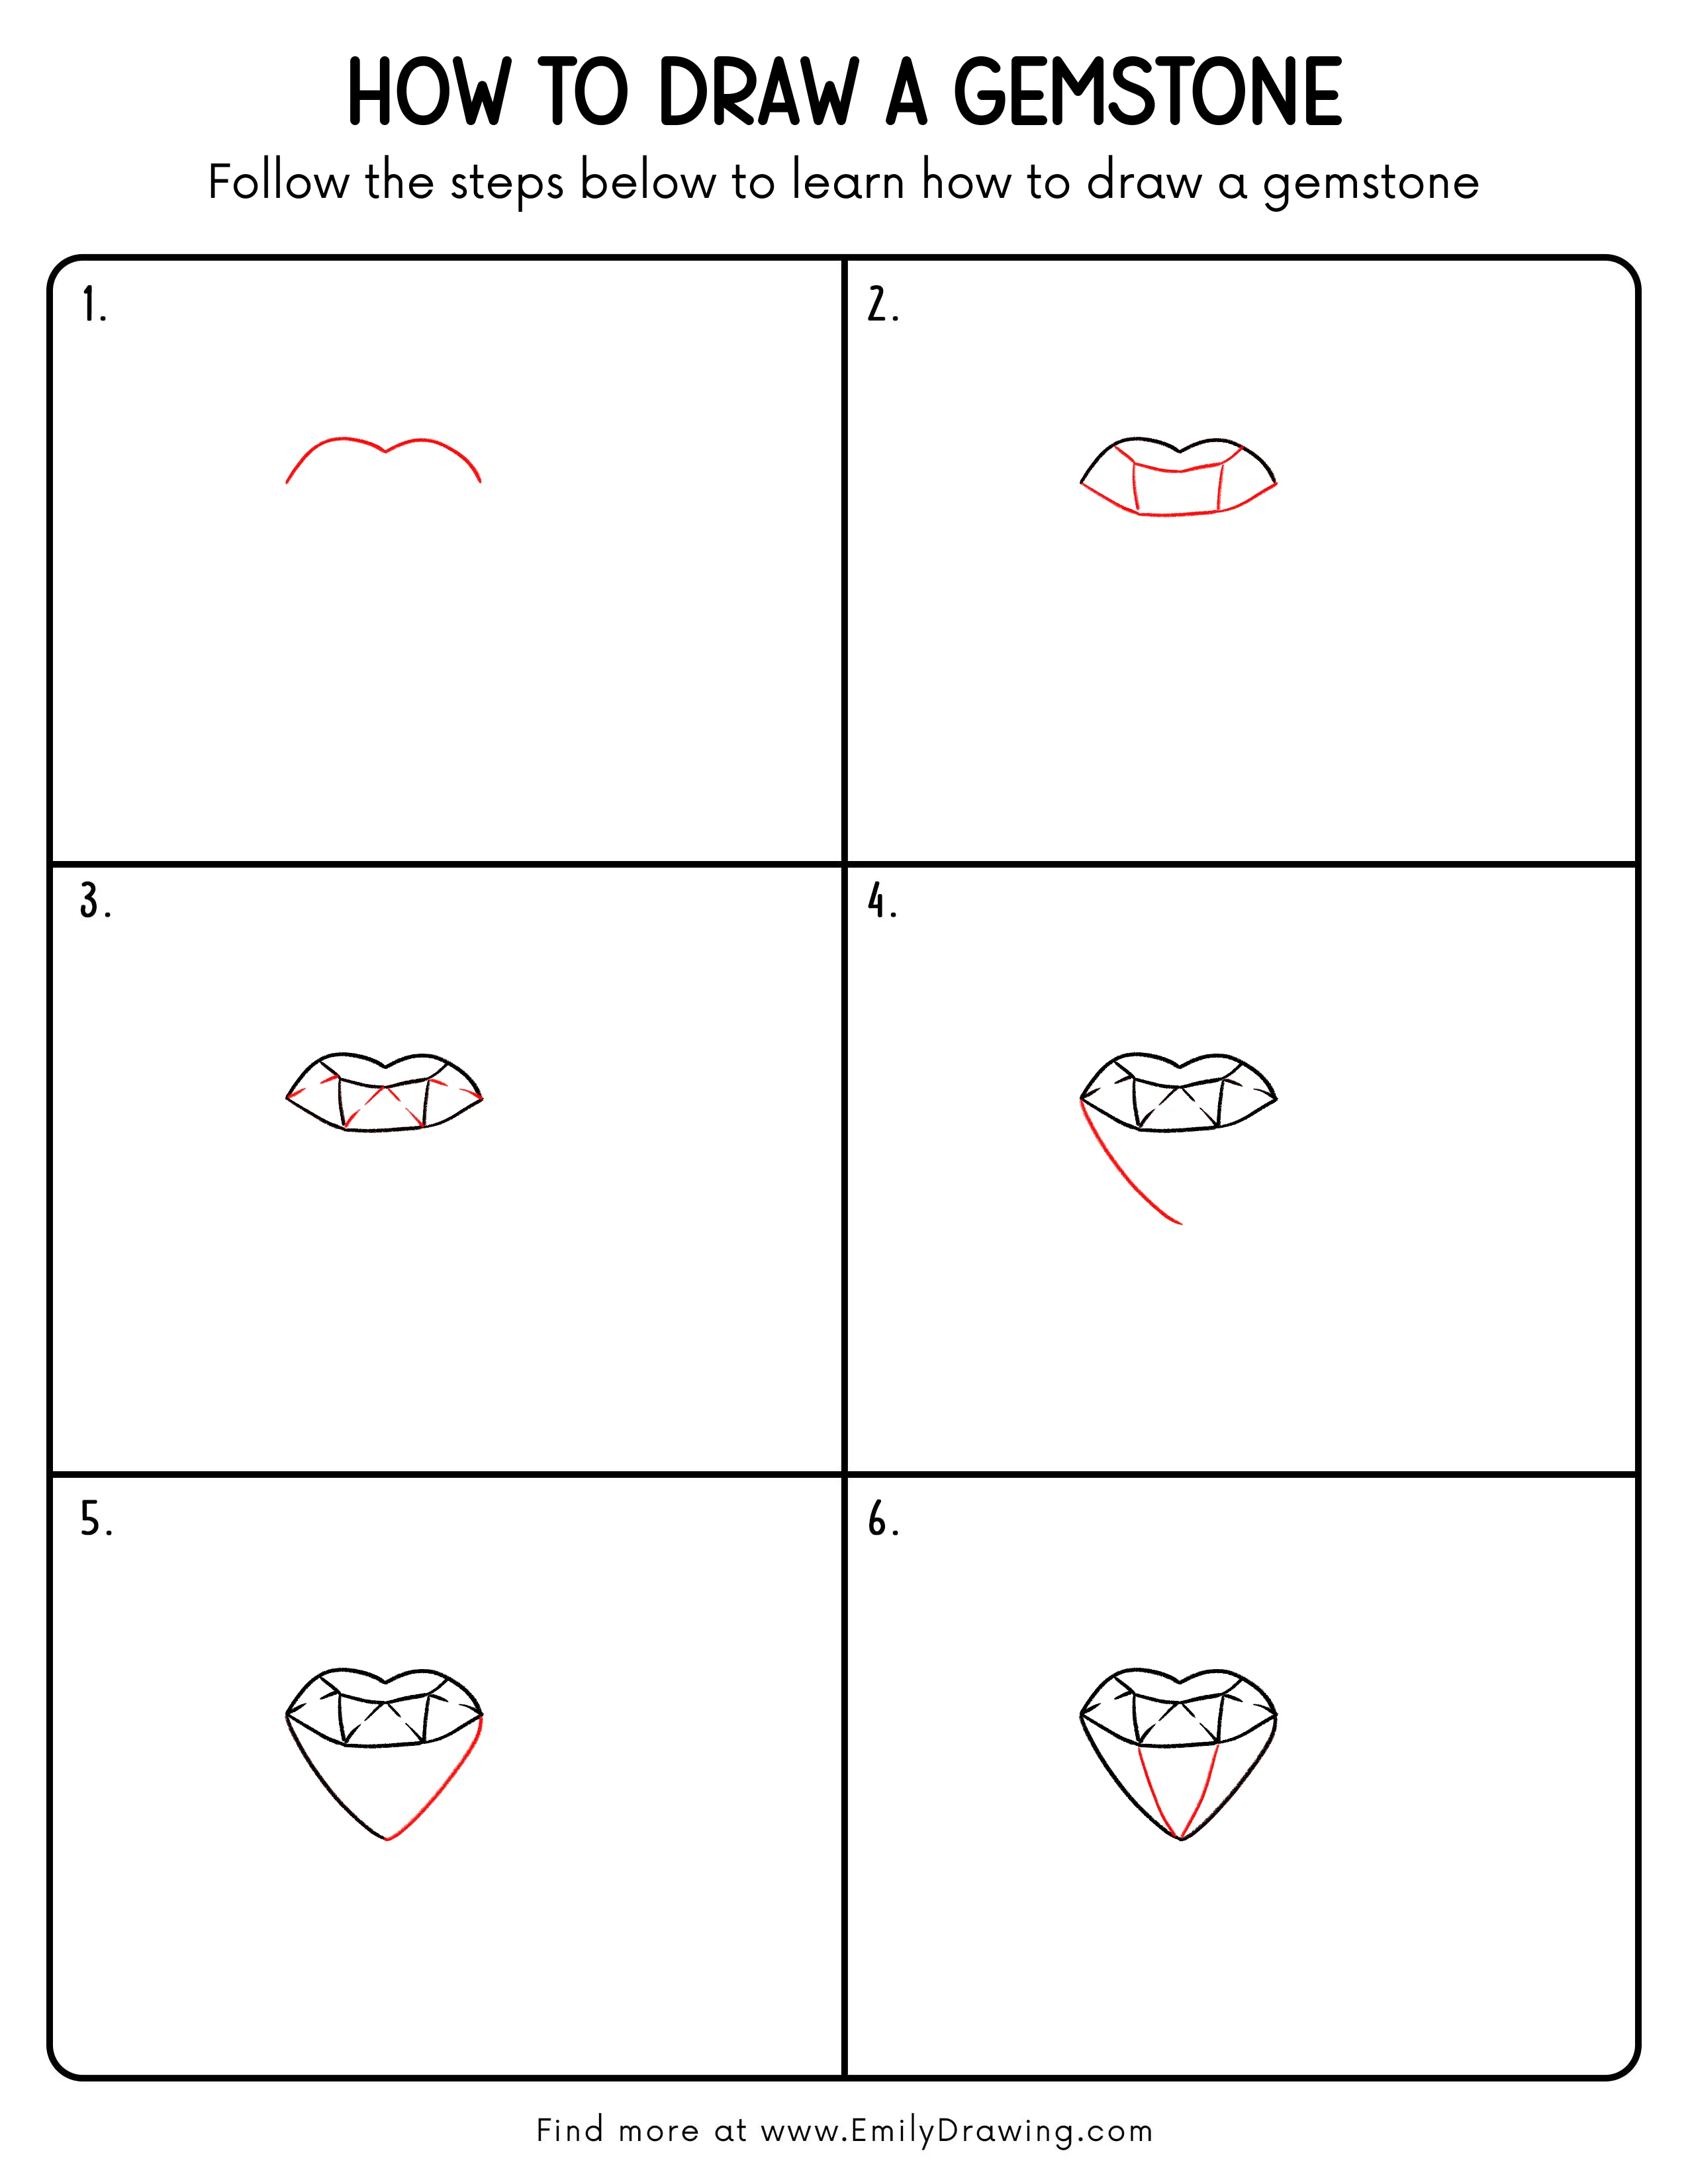
Step 1: Draw the Top Rim Curve

In the center of your page, draw a wide, gentle arch, like a soft upside-down “U.”
Add a small dip in the middle so it feels like two connected curves.
Pro Tip: Keep the curve symmetrical, and make the middle dip very shallow.
Step 2: Add the Bottom Edge and Facets
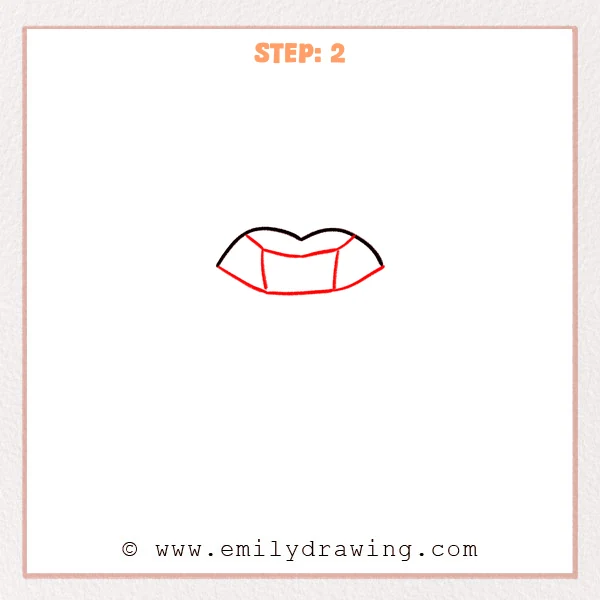
From both ends of the top curve, draw short slanted edges downward to form the outer sides.
Add a long bottom edge, then draw an inner curved line near the top and two inner vertical lines to block in the center facet.
Pro Tip: Keep the two inner vertical lines symmetrical, and make the bottom edge straight.
Step 3: Add Inner Facet Diagonals
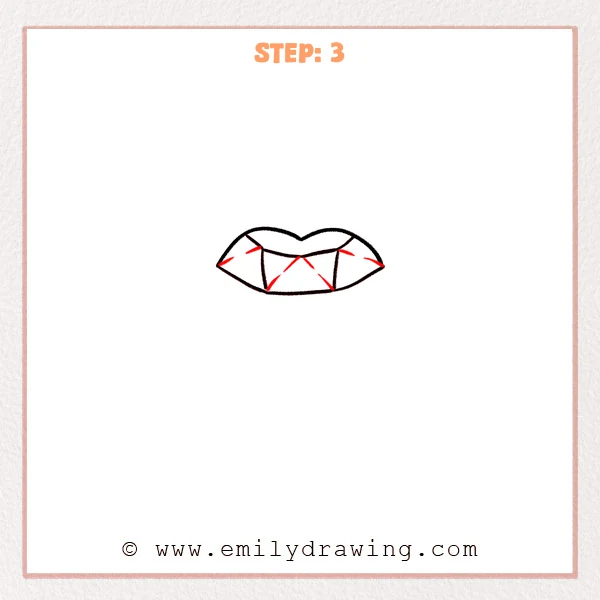
Inside the center facet, draw diagonal lines that meet and cross to form an “X”-like facet pattern.
On the left and right side facets, add a few short diagonal marks to suggest smaller cuts.
Pro Tip: Aim for the diagonals to meet near the center, and keep side marks similar in length.
Step 4: Draw the Lower Outer Outline

From the left outer edge, pull a long curved line downward, narrowing as it goes.
Let the line taper toward a point to set up the gemstone’s bottom tip.
Pro Tip: Keep the lower curve smooth, and aim the tip under the center dip above.
Step 5: Complete the Right Lower Outline
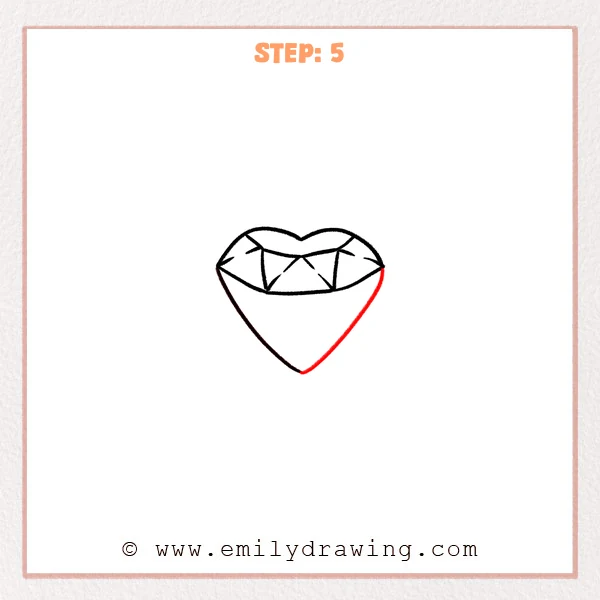
From the right outer edge, draw a long curved line downward, mirroring the left side.
Bring it to meet the left curve at the bottom to form a clean pointed tip.
Pro Tip: Match the curve on both sides, and keep the bottom point centered.
Step 6: Divide the Lower Main Facets
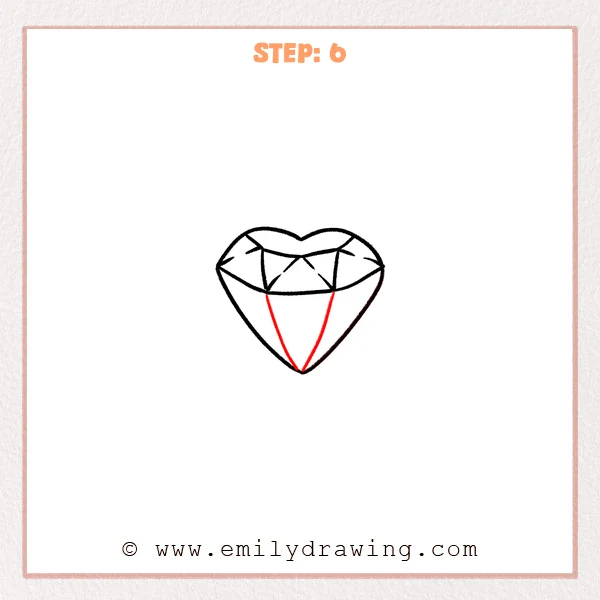
From two points along the upper inner edge, draw straight lines down to meet at the bottom tip.
This creates a large central triangle facet on the lower half, leaving side areas for smaller facets.
Pro Tip: Start both lines at the same height, and meet exactly at the bottom tip.
Step 7: Color in your drawing!
Fun Facts
- Many gemstones sparkle because their flat facets reflect light in many directions.
- The most common “diamond look” is made from repeated triangle and kite shapes.
- Even simple facet lines can make a drawing feel shiny and three-dimensional.
Pin it now, Draw later!
Trace your final lines with a pen once you like the shape and symmetry.
Erase extra sketch marks, then add a few tiny highlight gaps by leaving small areas white.
Now you know how to draw a gemstone with a clear step by step drawing method—try drawing a second one with different facet patterns.
Get the FREE Printable Drawing Guide
FREE Download Printable Gemstone Drawing Tutorial
Frequently Asked Questions
How do I make the gemstone look more sparkly?
Keep a few facet areas lighter, and add small highlight shapes near the top rim.
What if my gemstone looks uneven?
Check that the left and right curves match, and re-center the bottom tip if needed.
Can I color this gemstone?
Yes, fill facets with two or three shades of the same color to keep it clean and bright.