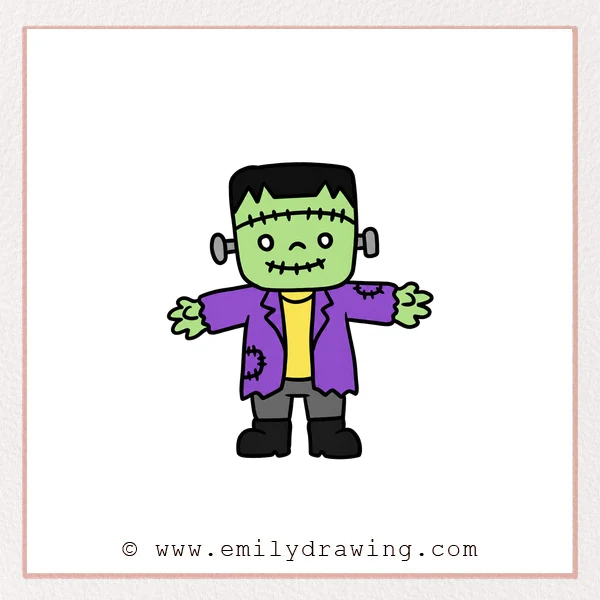
Learn how to draw Frankenstein as a friendly cartoon with a broad head and outstretched arms. You will practice rounded corners, zigzag edges, and tiny stitch marks. This step by step drawing keeps each new part manageable.
What You Will Need
- A pencil
- An eraser
- Drawing paper
- Colored pencils or crayons (optional)
Here are my RECOMMENDED Art Supplies!
- Crayola Coloring Set (140 Pieces – Mega Value!)
- 24 Colored Crayon Set
- A4 Printer Paper
- Crayola Coloring Pencils
- HP Home Printer with Instant Ink!
Time needed:
17 minutes.
Step-by-Step Drawing Guide
Step 1: Shape the Head and Face
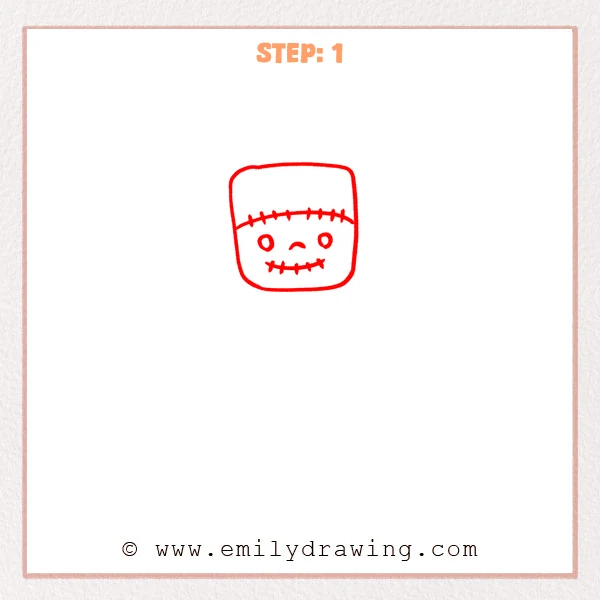
Draw a tall rounded rectangle for the broad Frankenstein head. Add a curved forehead seam crossed by several short stitches. Below it, draw two oval eyes, an arched nose, and a stitched smile.
Pro Tip: Leave a generous space above the forehead seam for the hair.
Step 2: Add Hair and Side Bolts
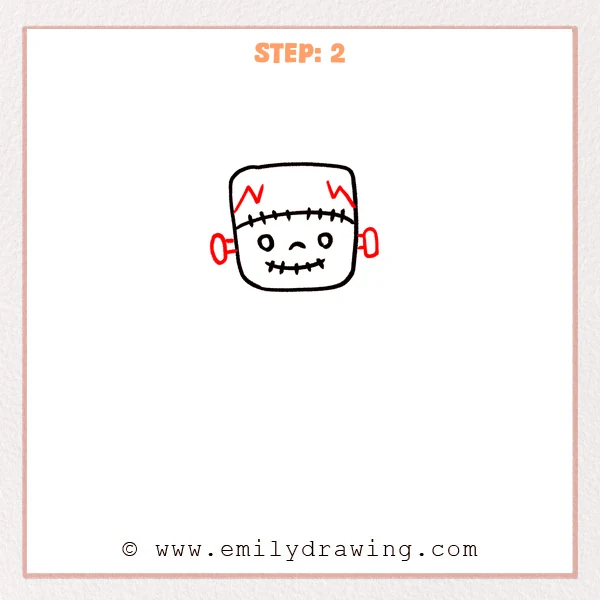
Draw a short zigzag hair edge inside each upper corner. Add two short parallel lines extending from each side of the head. Close each pair with a narrow rounded bolt end.
Pro Tip: Keep the two bolts near the same height as the eyes.
Step 3: Extend the Arms and Hands
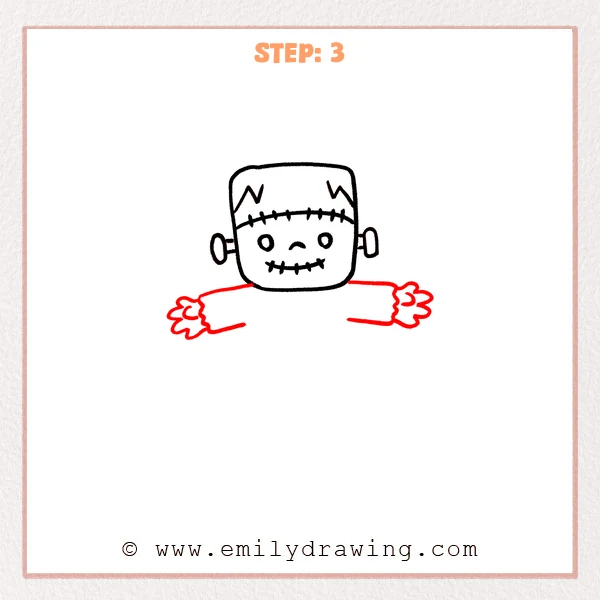
Draw broad sleeves extending sideways from below the head. Finish each sleeve with a wavy cuff and an open rounded hand. Add a small curved line inside each hand to suggest the thumb.
Pro Tip: Give both arms similar lengths while allowing the hands to differ slightly.
Step 4: Draw the Open Jacket
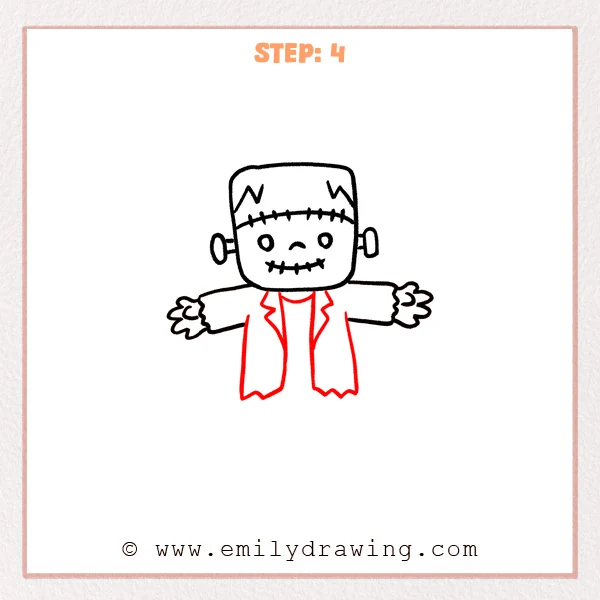
Extend two long jacket sides downward beneath the arms. Draw pointed lapels and inner edges framing a narrow shirt. Add a curved neckline and finish the jacket with uneven zigzag hems.
Pro Tip: Keep the shirt opening centered beneath the head.
Step 5: Add Trousers and Boots
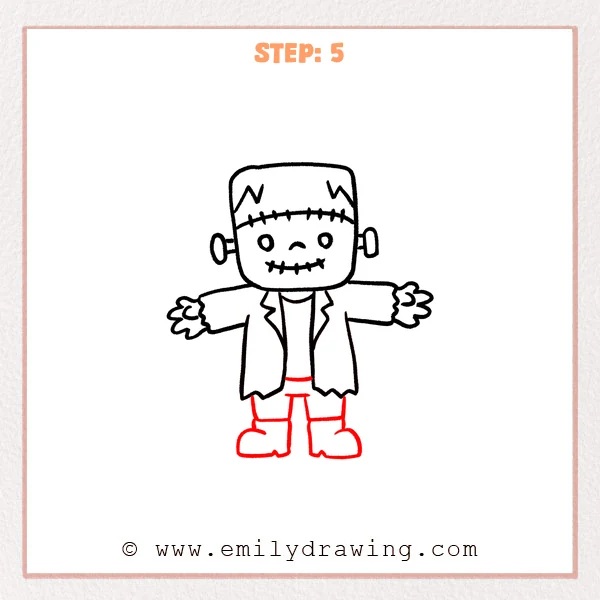
Draw a short shirt hem between the open jacket edges. Add two trouser legs with a small central gap. Finish each leg with a broad rounded boot and a curved toe line.
Pro Tip: Keep the boot soles at approximately the same level.
Step 6: Finish the Clothing Stitches
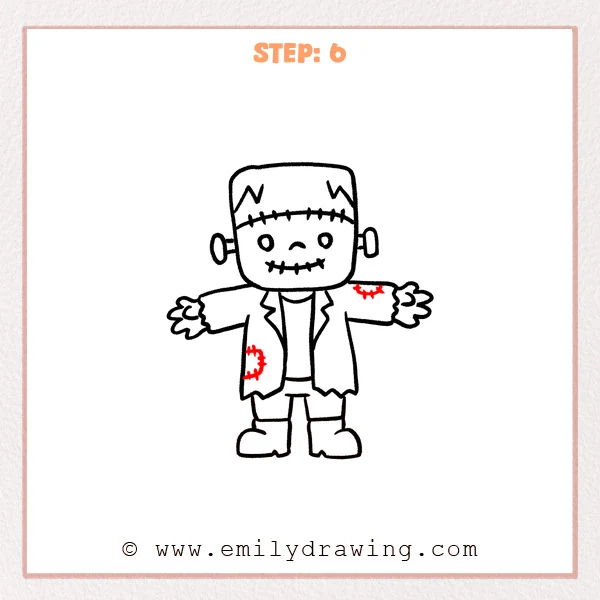
Draw a curved seam near the top of the right sleeve. Add another curved seam along the lower left jacket panel. Cross both seams with short strokes to create stitched repairs.
Pro Tip: Space the stitch marks far enough apart to remain clear.
Step 7: Color in your drawing!
Fun Facts
- The rounded head corners soften the angular shape of this cartoon Frankenstein.
- Tiny crossed lines turn simple curves into visible stitched seams.
- The broad head and short legs give this Frankenstein drawing playful proportions.
Pin it now, Draw later!
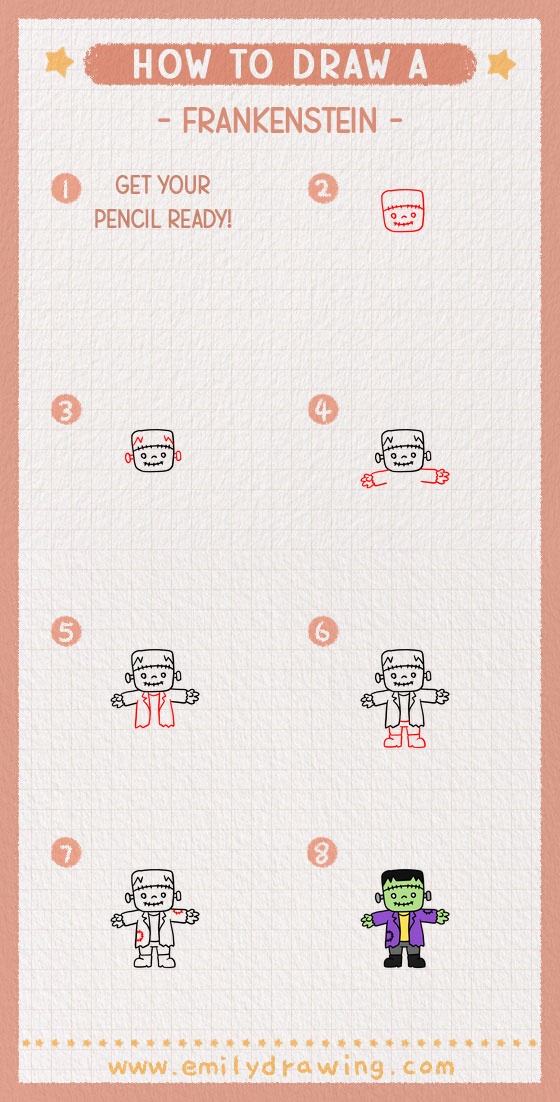
Your Frankenstein drawing now has side bolts, open hands, a ragged jacket, and sturdy boots. Check that the smaller stitches remain easy to see. Try your own gentle color combination when you feel ready.
Get the FREE Printable Drawing Guide
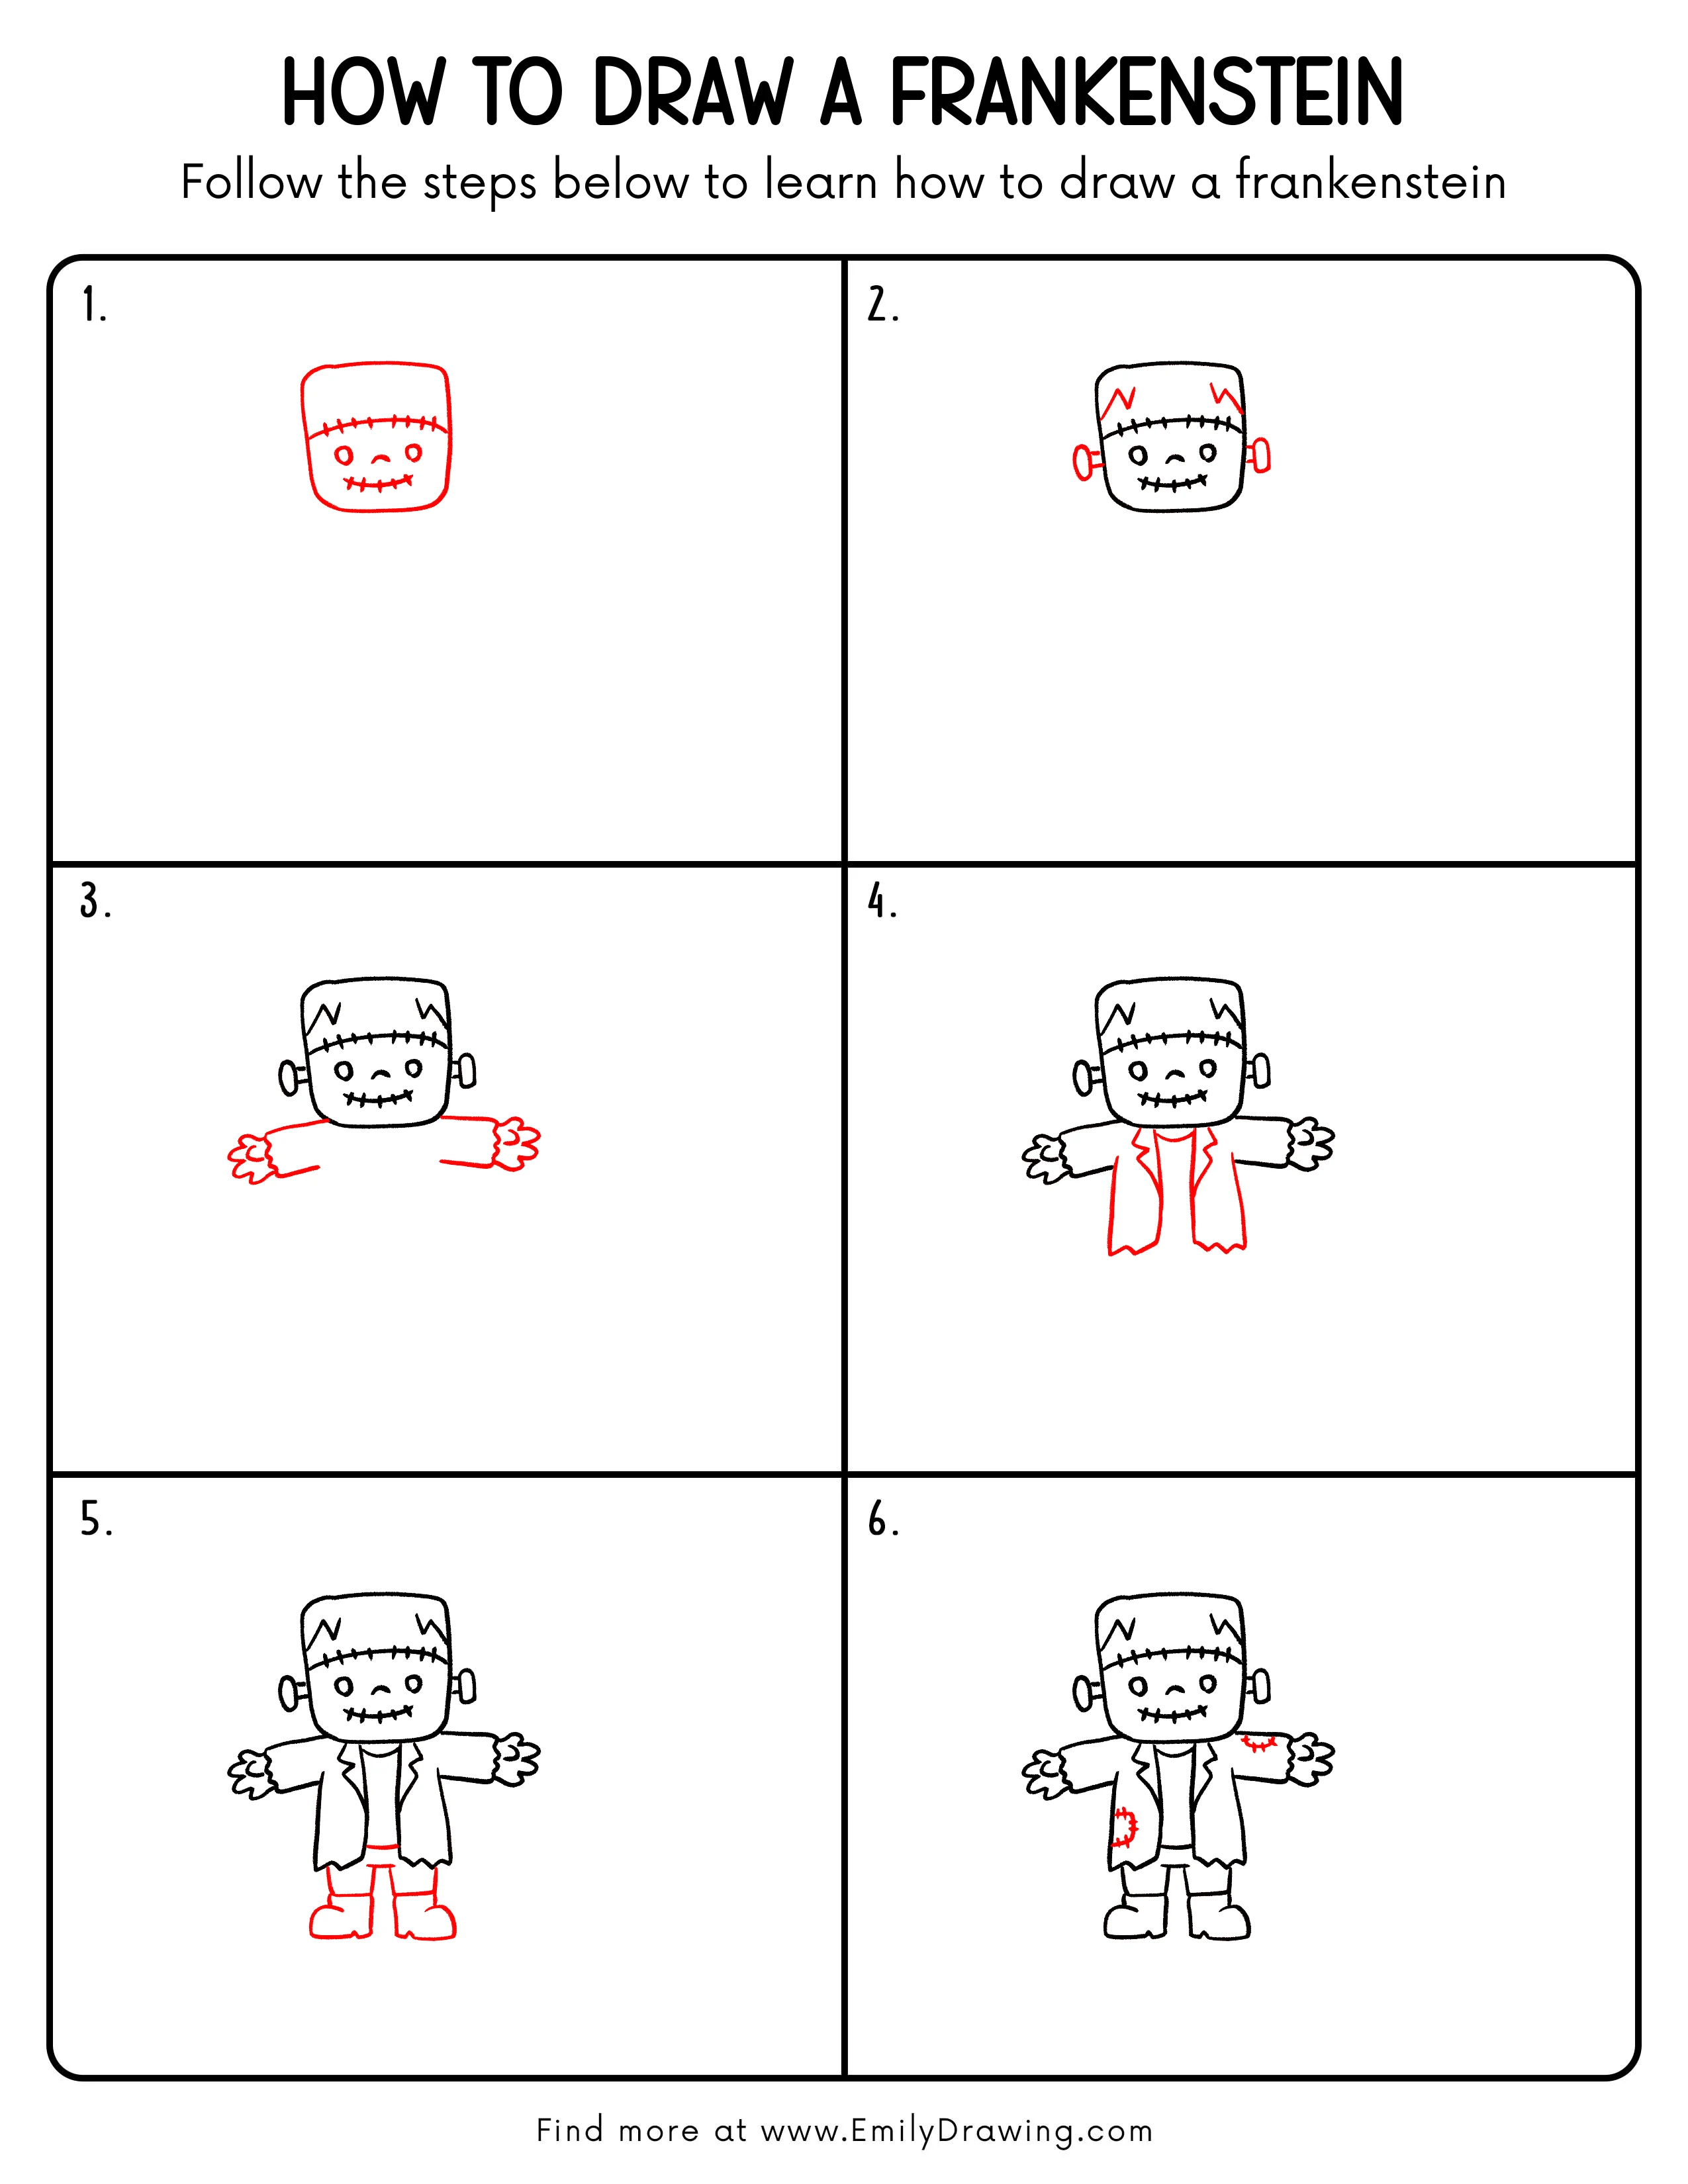
FREE Download Printable Frankenstein Drawing Tutorial
Frequently Asked Questions
How do I make the Frankenstein stitches look tidy?
Draw each long seam first, then add short crossing marks. Leave small gaps between the marks so they do not merge.
Can beginners simplify the Frankenstein hands?
Yes. Use a rounded thumb curve and a few broad finger bumps. Clear silhouettes matter more than tiny finger details in this easy drawing tutorial.