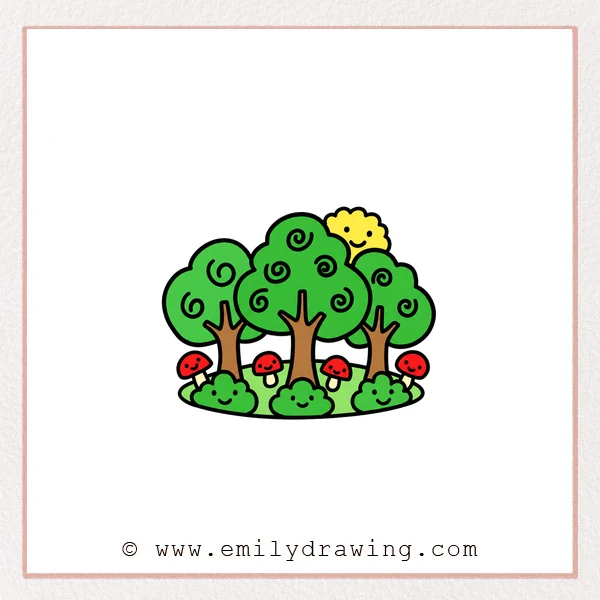
Learn how to draw a forest using rounded treetops and simple branching trunks. This easy drawing tutorial builds a cheerful scene with mushrooms and smiling bushes. The repeated curves offer gentle practice in drawing for beginners.
What You Will Need
- A pencil
- An eraser
- Drawing paper
- Colored pencils or crayons (optional)
Here are my RECOMMENDED Art Supplies!
- Crayola Coloring Set (140 Pieces – Mega Value!)
- 24 Colored Crayon Set
- A4 Printer Paper
- Crayola Coloring Pencils
- HP Home Printer with Instant Ink!
Time needed:
15 minutes.
Step-by-Step Drawing Guide
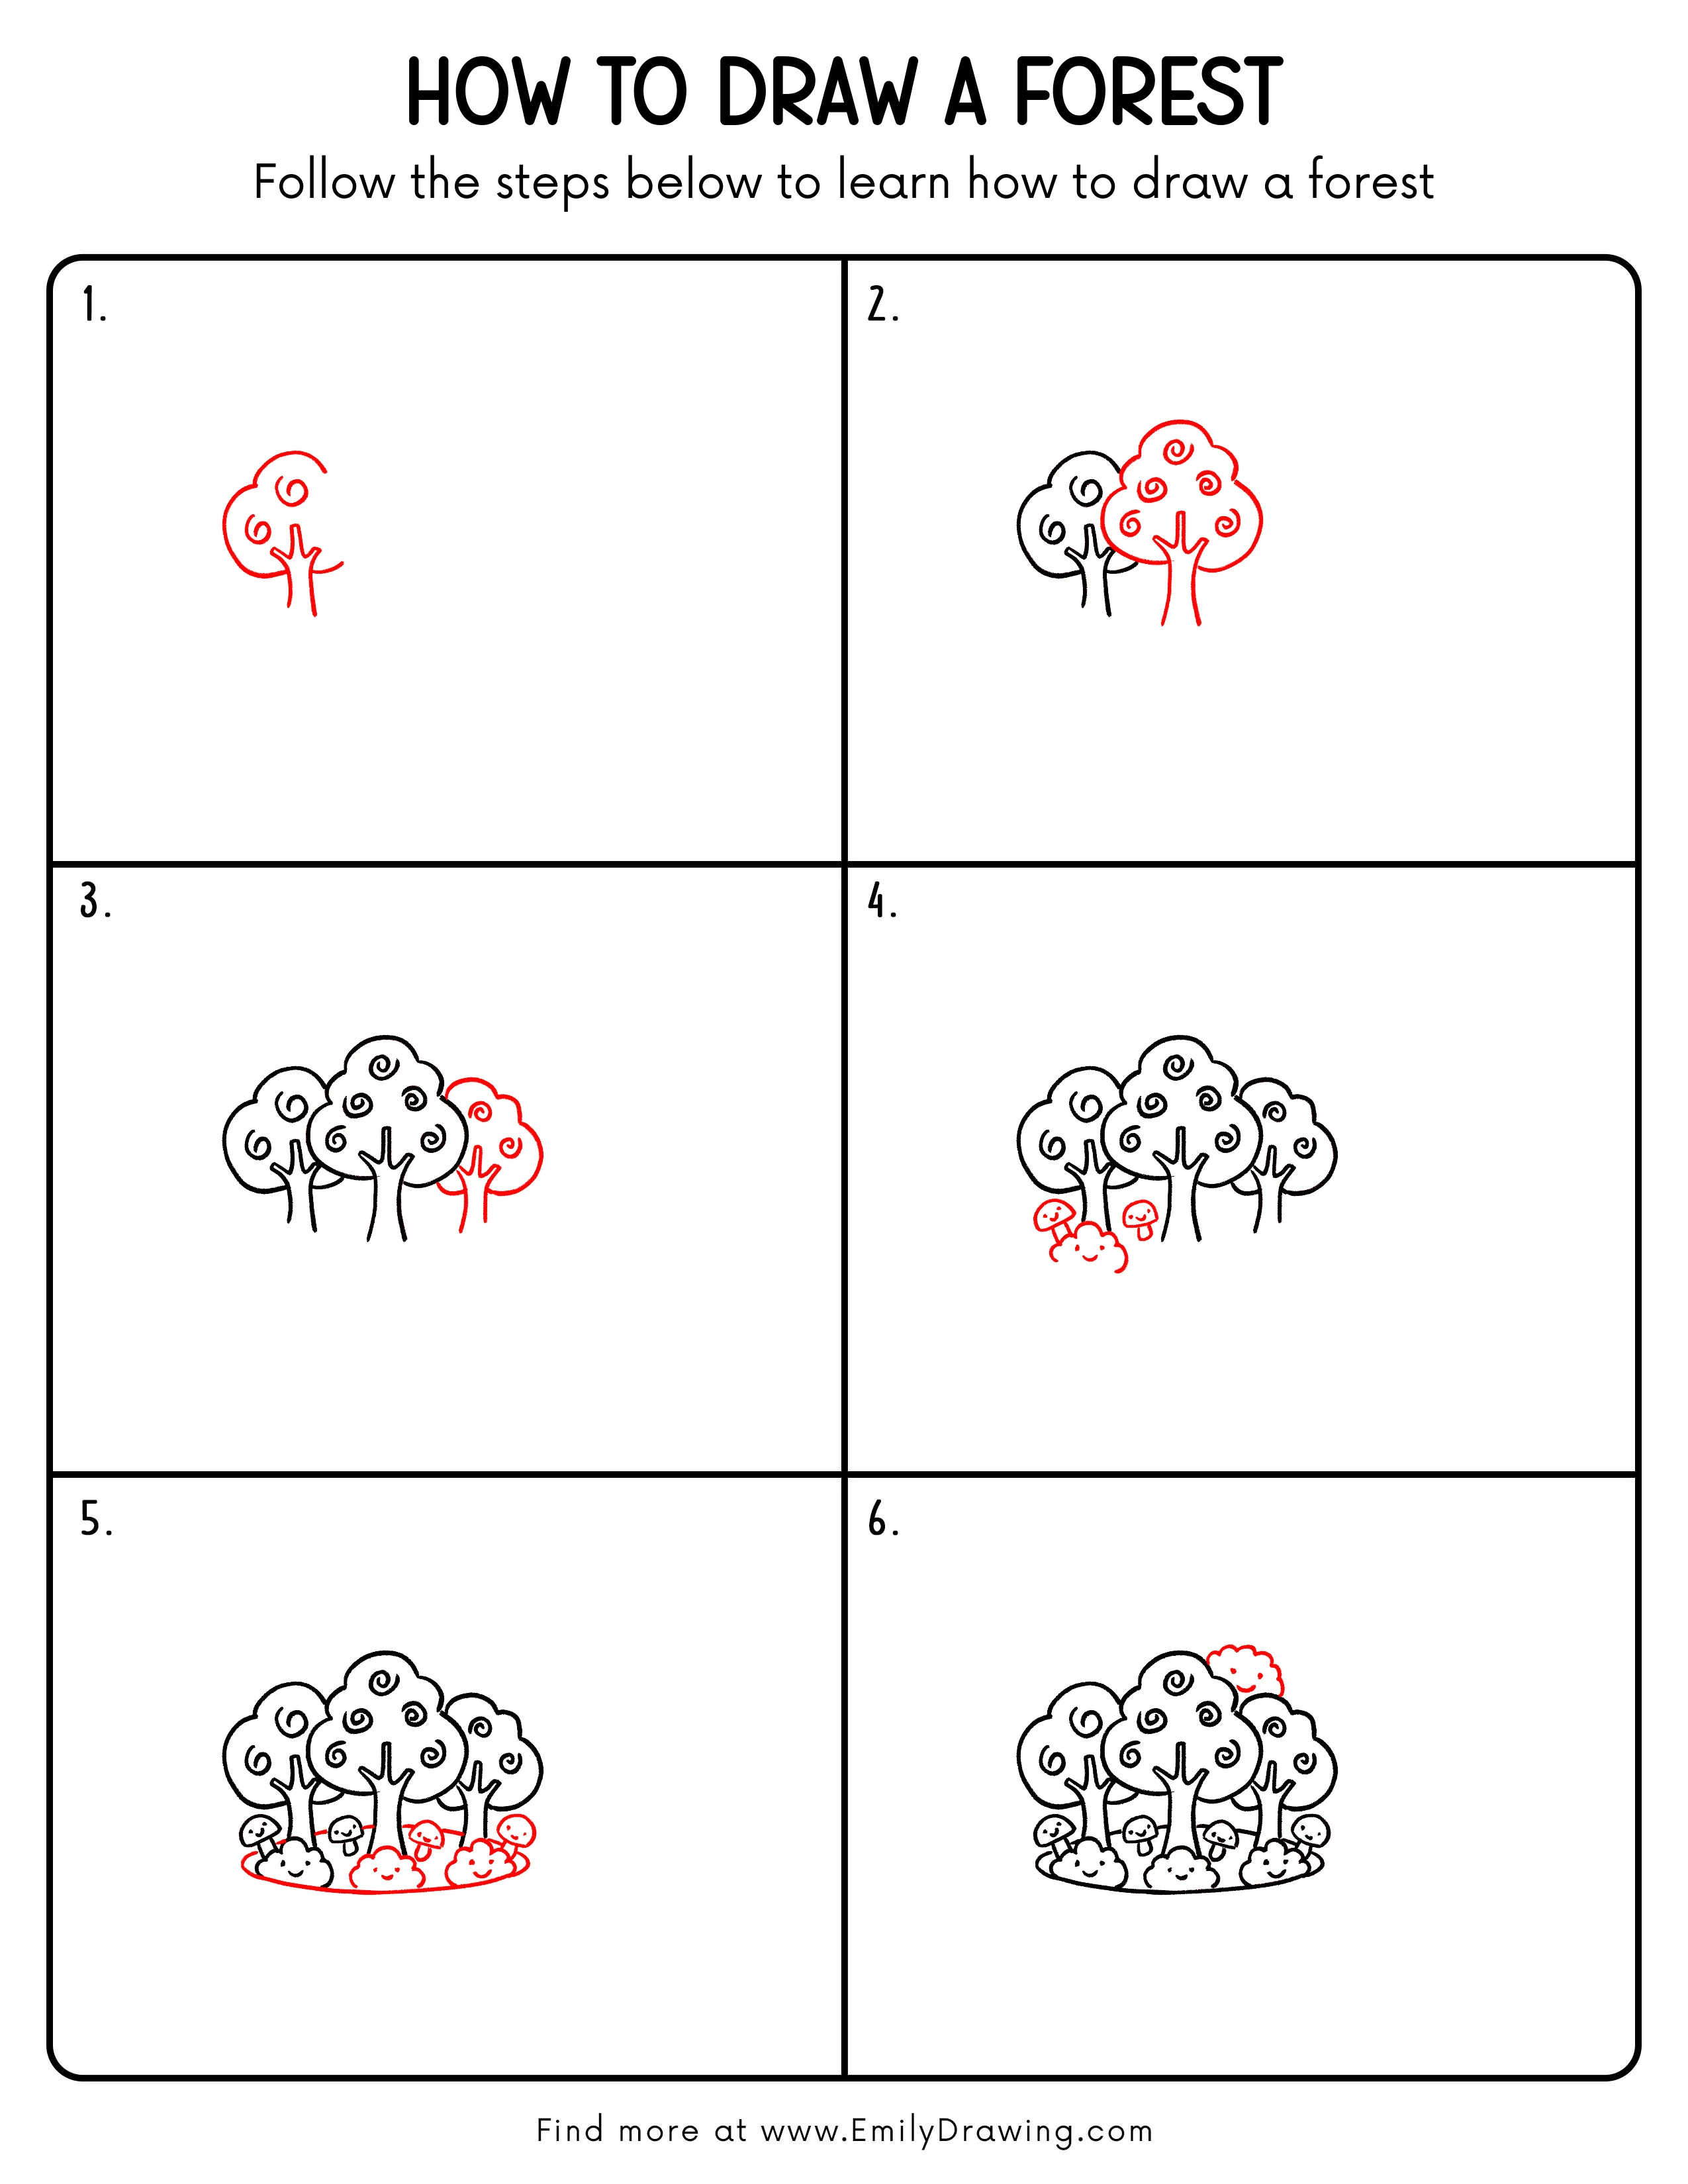
Step 1: Begin the Left Tree
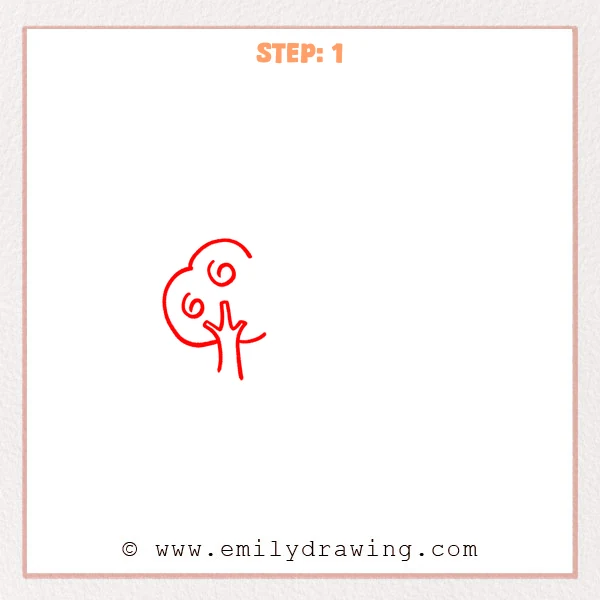
Draw a narrow trunk with three short branches near the lower left. Surround it with rounded canopy curves, leaving the right side open. Add two loose spirals inside the leafy area.
Pro Tip: Leave plenty of space above and beside this first tree.
Step 2: Add the Center Tree
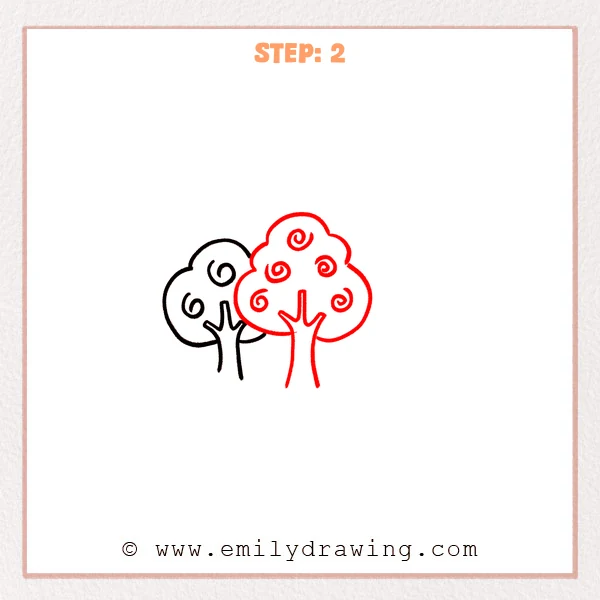
Draw a larger scalloped treetop overlapping the first tree on its right. Extend a three-branched trunk downward from the middle of this new canopy. Place five open spirals across the leafy shape.
Pro Tip: Keep the center canopy slightly higher than the left one.
Step 3: Place the Right Tree

Add a smaller rounded canopy behind the central tree on the right. Draw its narrow trunk with three upward branches below the canopy. Place two spirals inside the visible leafy area.
Pro Tip: Stop the hidden canopy edges where they meet the center tree.
Step 4: Draw the First Forest Floor Details
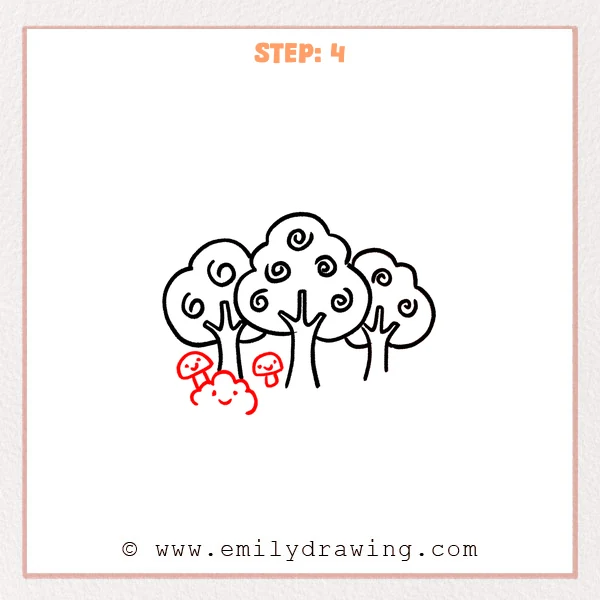
Draw two small mushrooms below the left and central trees. Give each a rounded cap, short stem, and tiny smiling face. Add a scalloped smiling bush in front of the left trunk.
Pro Tip: Keep the left mushroom stem partly hidden behind the bush.
Step 5: Complete the Ground and Bushes
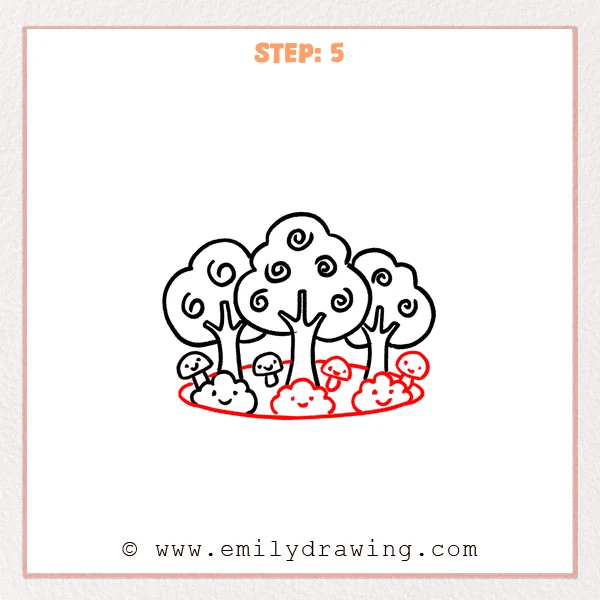
Draw two more smiling mushrooms beneath the trees on the right. Add smiling scalloped bushes below the central and right trunks. Curve an oval ground outline around the plants, stopping at overlapping shapes.
Pro Tip: Let the front edge of the oval run beneath all three bushes.
Step 6: Add a Smiling Background Shape
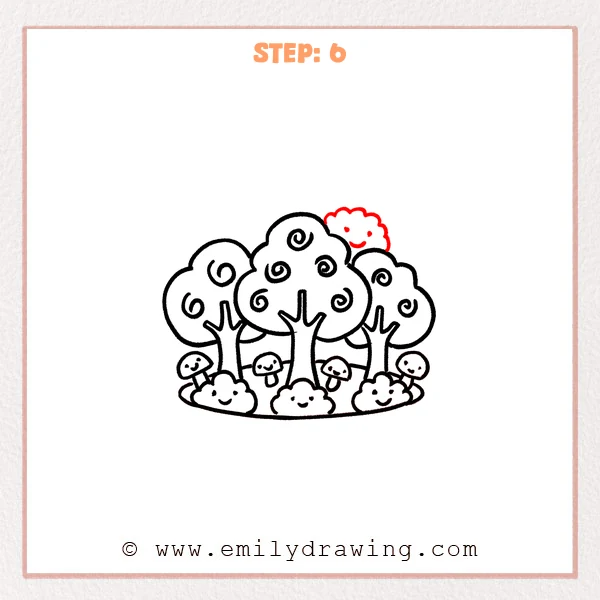
Draw a small scalloped shape peeking above the right tree. Place two dot eyes and a curved smile inside it.
Pro Tip: Keep the lower part hidden behind the existing treetops.
Step 7: Color in your drawing!
Fun Facts
- Overlapping treetops make this forest drawing look deeper without complicated perspective.
- Spirals suggest leafy texture without drawing individual leaves.
- Repeated scalloped curves connect the shapes of the treetops and bushes.
Pin it now, Draw later!

Your step by step drawing now includes three trees, four mushrooms, and three foreground bushes. Check the overlapping edges and gently erase any unwanted pencil marks. Try coloring your forest with a few greens and warm mushroom colors when you are ready.
Get the FREE Printable Drawing Guide
FREE Download Printable Forest Drawing Tutorial
Frequently Asked Questions
How can I keep the forest trees from looking crowded?
Leave open spaces around the trunks and let only the canopies overlap. The taller center tree helps separate the three shapes.
Do all the forest spirals need to match?
No. Slight differences in size and direction make the canopies feel playful while keeping the drawing simple.