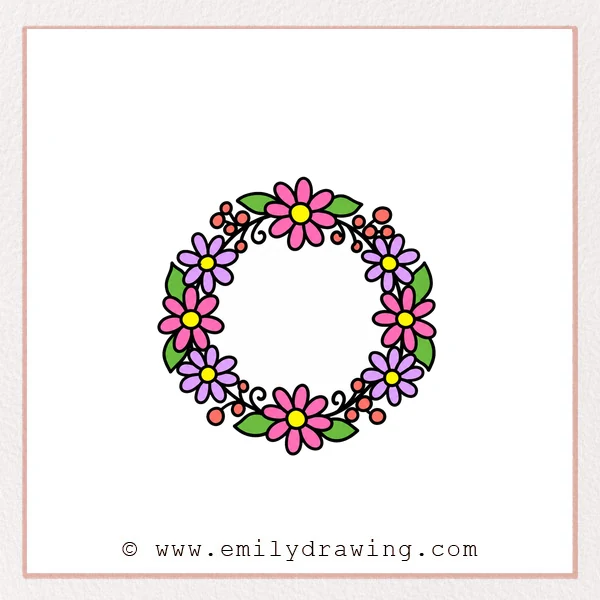
Learn how to draw flower crown decorations around an open oval center. This easy drawing tutorial repeats simple petals, pointed leaves, berries, and curling stems.
What You Will Need
- A pencil
- Plain drawing paper
- An eraser
- Colored pencils or crayons, if desired
Here are my RECOMMENDED Art Supplies!
- Crayola Coloring Set (140 Pieces – Mega Value!)
- 24 Colored Crayon Set
- A4 Printer Paper
- Crayola Coloring Pencils
- HP Home Printer with Instant Ink!
Time needed:
28 minutes.
Step-by-Step Drawing Guide
Step 1: Place the First Three Flowers
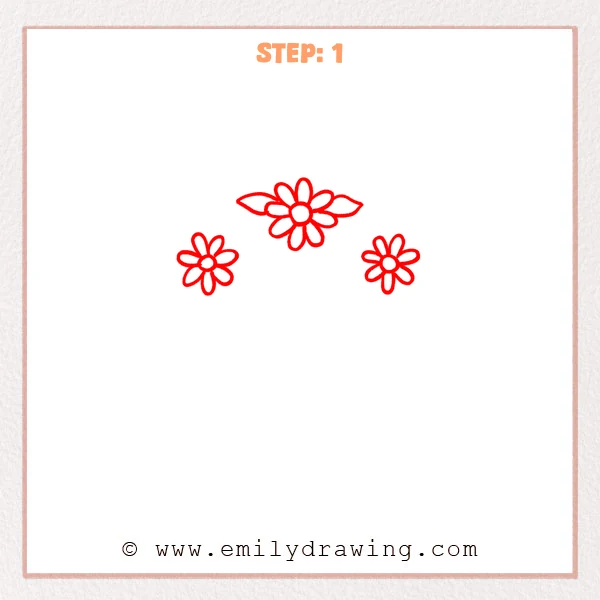
Draw one larger flower above two smaller flowers spaced below either side. Give each a circular center surrounded by long rounded petals. Add a pointed leaf on each side of the larger flower.
Pro Tip: Leave a wide empty space between the two smaller flowers.
Step 2: Connect the Upper Flowers
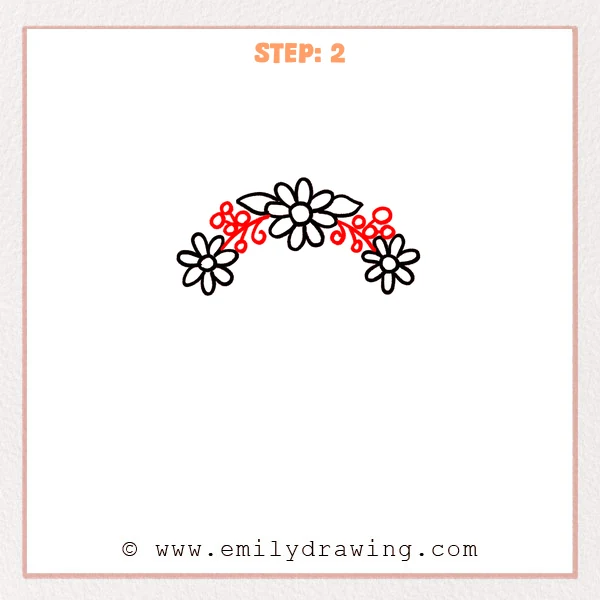
Join the flowers with curved stems sweeping across the upper gaps. Add short branches tipped with round berries on both sides. Draw a small inward curl beside each branch cluster.
Pro Tip: Keep the connecting stems behind the petals at their joins.
Step 3: Extend the Right Side
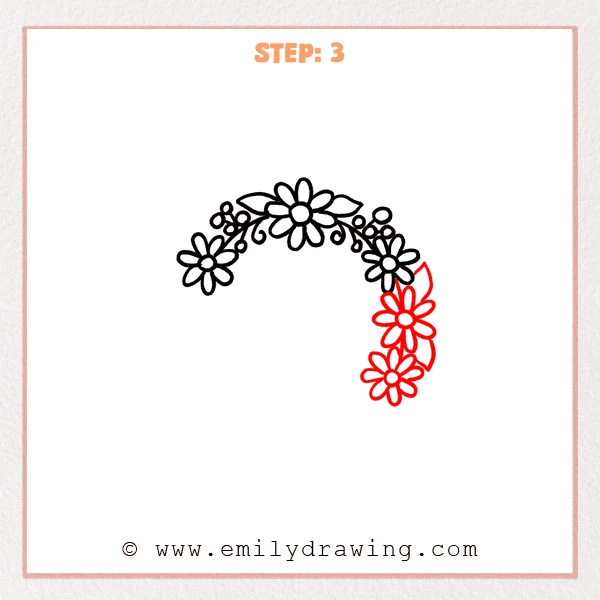
Add two more flowers descending along the right side of the oval. Draw a pointed leaf behind each gap between neighboring flowers.
Pro Tip: Follow a gentle outward curve before turning the row inward.
Step 4: Add the Bottom Flower
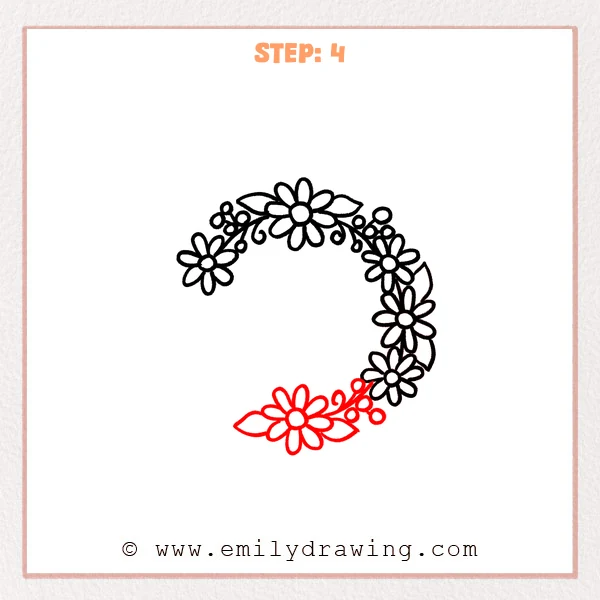
Draw a larger flower at the bottom with a leaf on either side. Connect it to the lower-right flower using a curved stem. Add round berry branches and a small curl along this connection.
Pro Tip: Align the lower flower roughly beneath the upper central flower.
Step 5: Build the Lower Left Curve
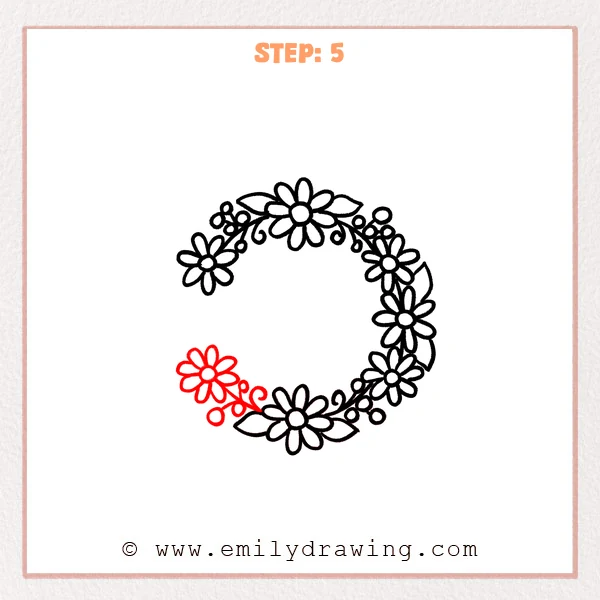
Draw a small flower on the lower-left side of the oval. Connect it to the bottom flower with a curved stem. Add round berries on short branches and an inward curl beside them.
Pro Tip: Keep the lower-left connection similar in length to the lower-right connection.
Step 6: Close the Floral Ring
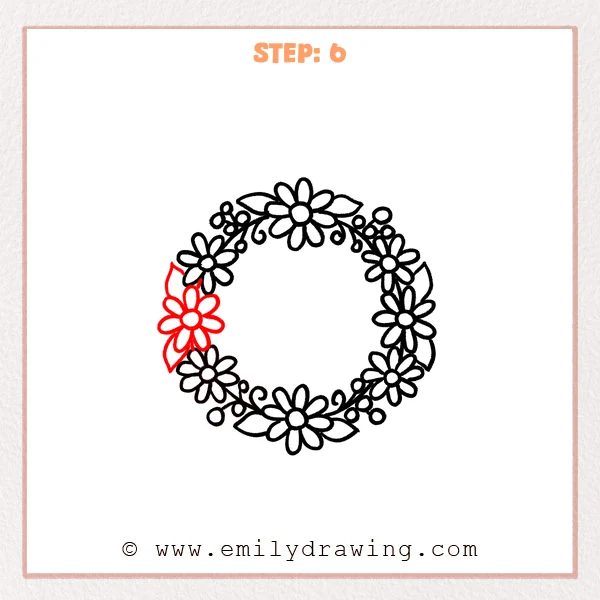
Fill the remaining left-side gap with a rounded-petal flower. Tuck a pointed leaf behind it above and below. Join the new cluster neatly to its neighboring flowers.
Pro Tip: Preserve the open oval center as you close the flower crown.
Step 7: Color in your drawing!
Fun Facts
- The flower crown’s repeated petals create a decorative rhythm around its open center.
- Larger flowers at the top and bottom help balance the smaller side blooms.
Pin it now, Draw later!
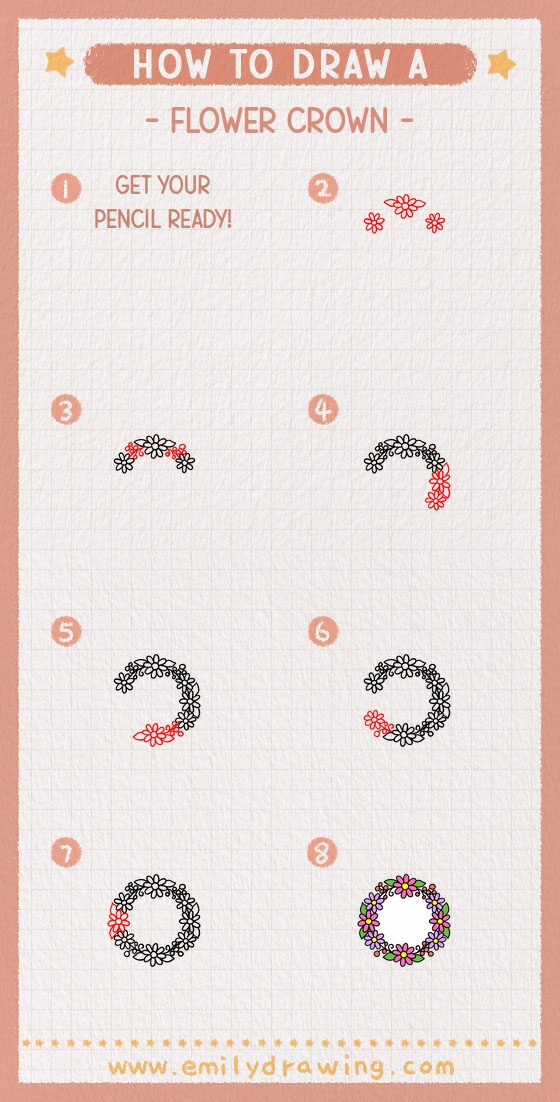
Your flower crown step by step drawing now forms a complete ring of floral decorations. Check the joins and leave the middle open for a light, airy appearance. Enjoy this drawing for beginners, and try a flower crown in your favorite colors.
Get the FREE Printable Drawing Guide
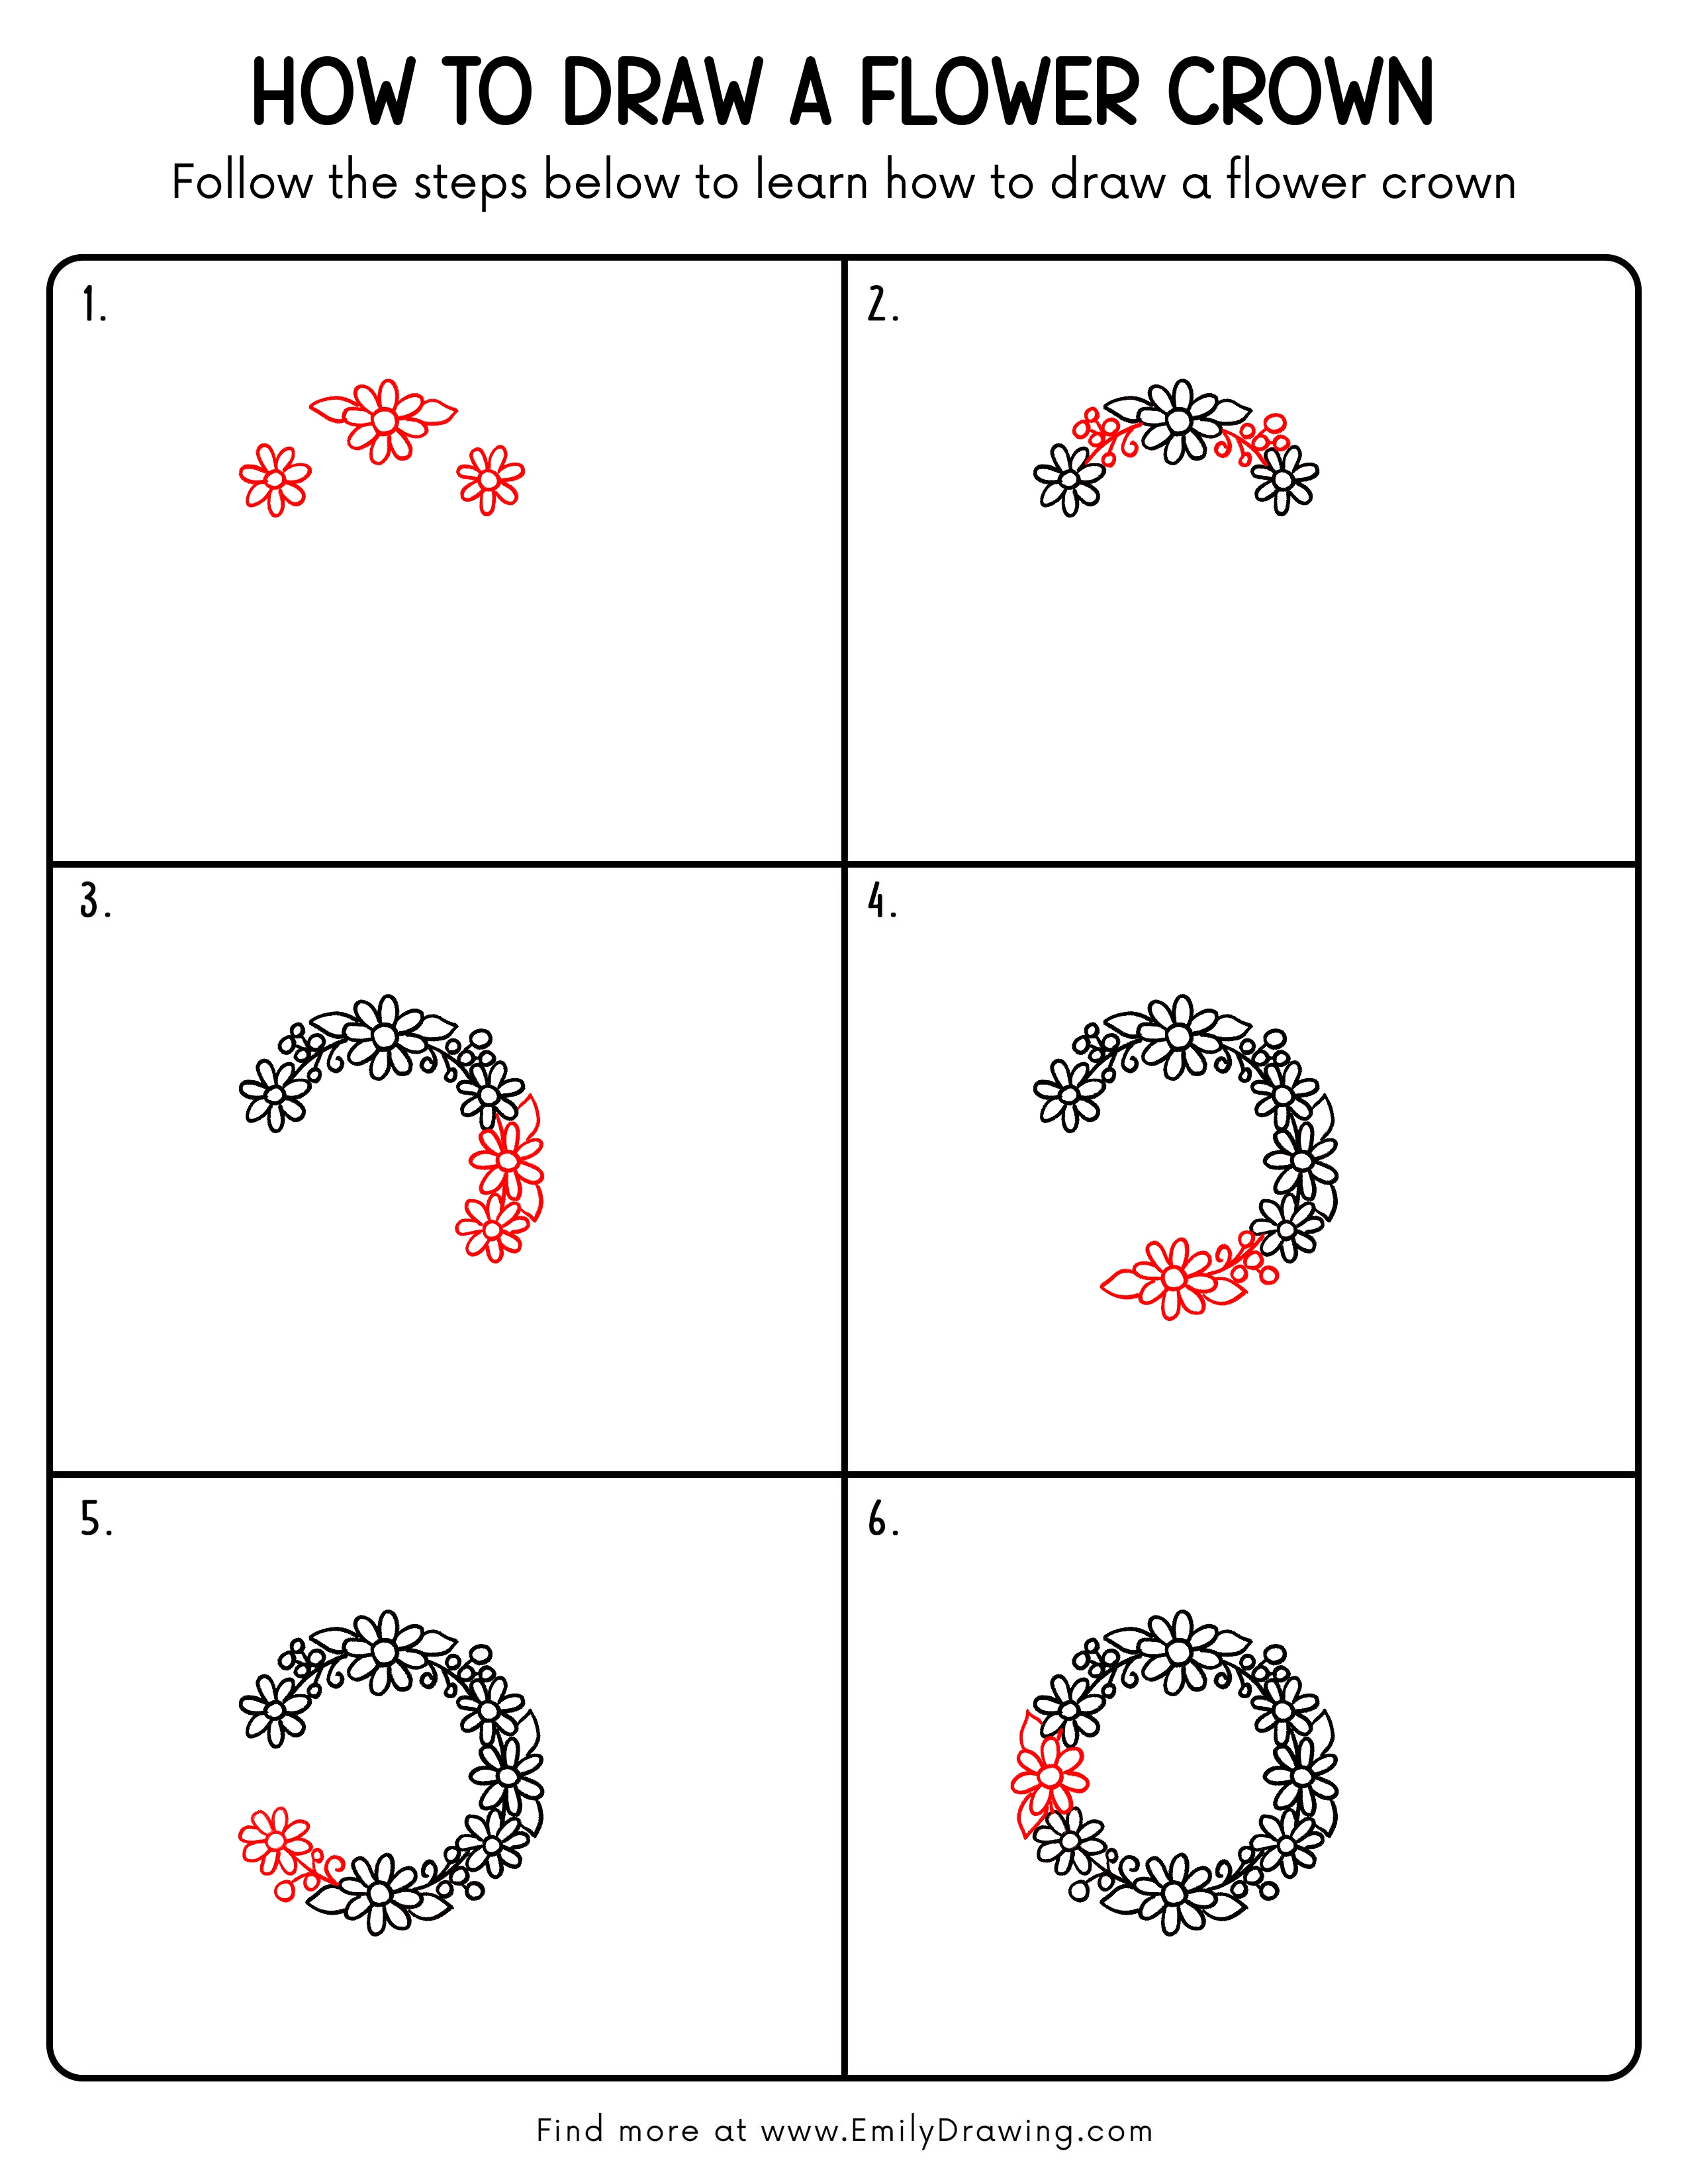
FREE Download Printable Flower Crown Drawing Tutorial
Frequently Asked Questions
How can I keep the flower crown evenly shaped?
Compare the distance from each side flower to the open center as you work.
Must all flower crown petals match exactly?
No. Gentle variations in petal length make the repeated flowers feel less rigid.