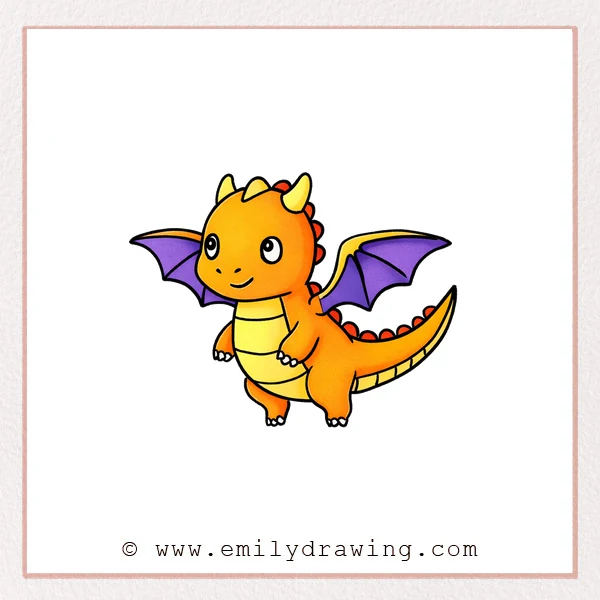
This easy drawing tutorial shows you how to draw a flying dragon in a calm, simple way. It is a lovely step by step drawing guide for beginners, with clear shapes and gentle details. Take your time with each stage, and enjoy watching your flying dragon come together.
What You Will Need
- Drawing paper
- Pencil
- Eraser
- Black pen or marker
- Colored pencils or crayons
Here are my RECOMMENDED Art Supplies!
- Crayola Coloring Set (140 Pieces – Mega Value!)
- 24 Colored Crayon Set
- A4 Printer Paper
- Crayola Coloring Pencils
- HP Home Printer with Instant Ink!
Time needed:
10 minutes.
Step-by-Step Drawing Guide
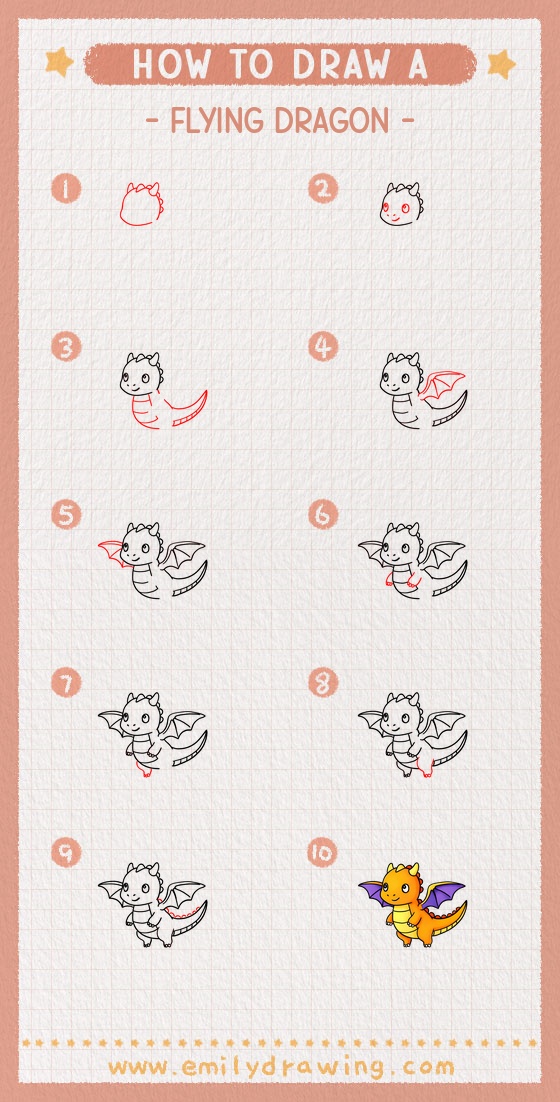
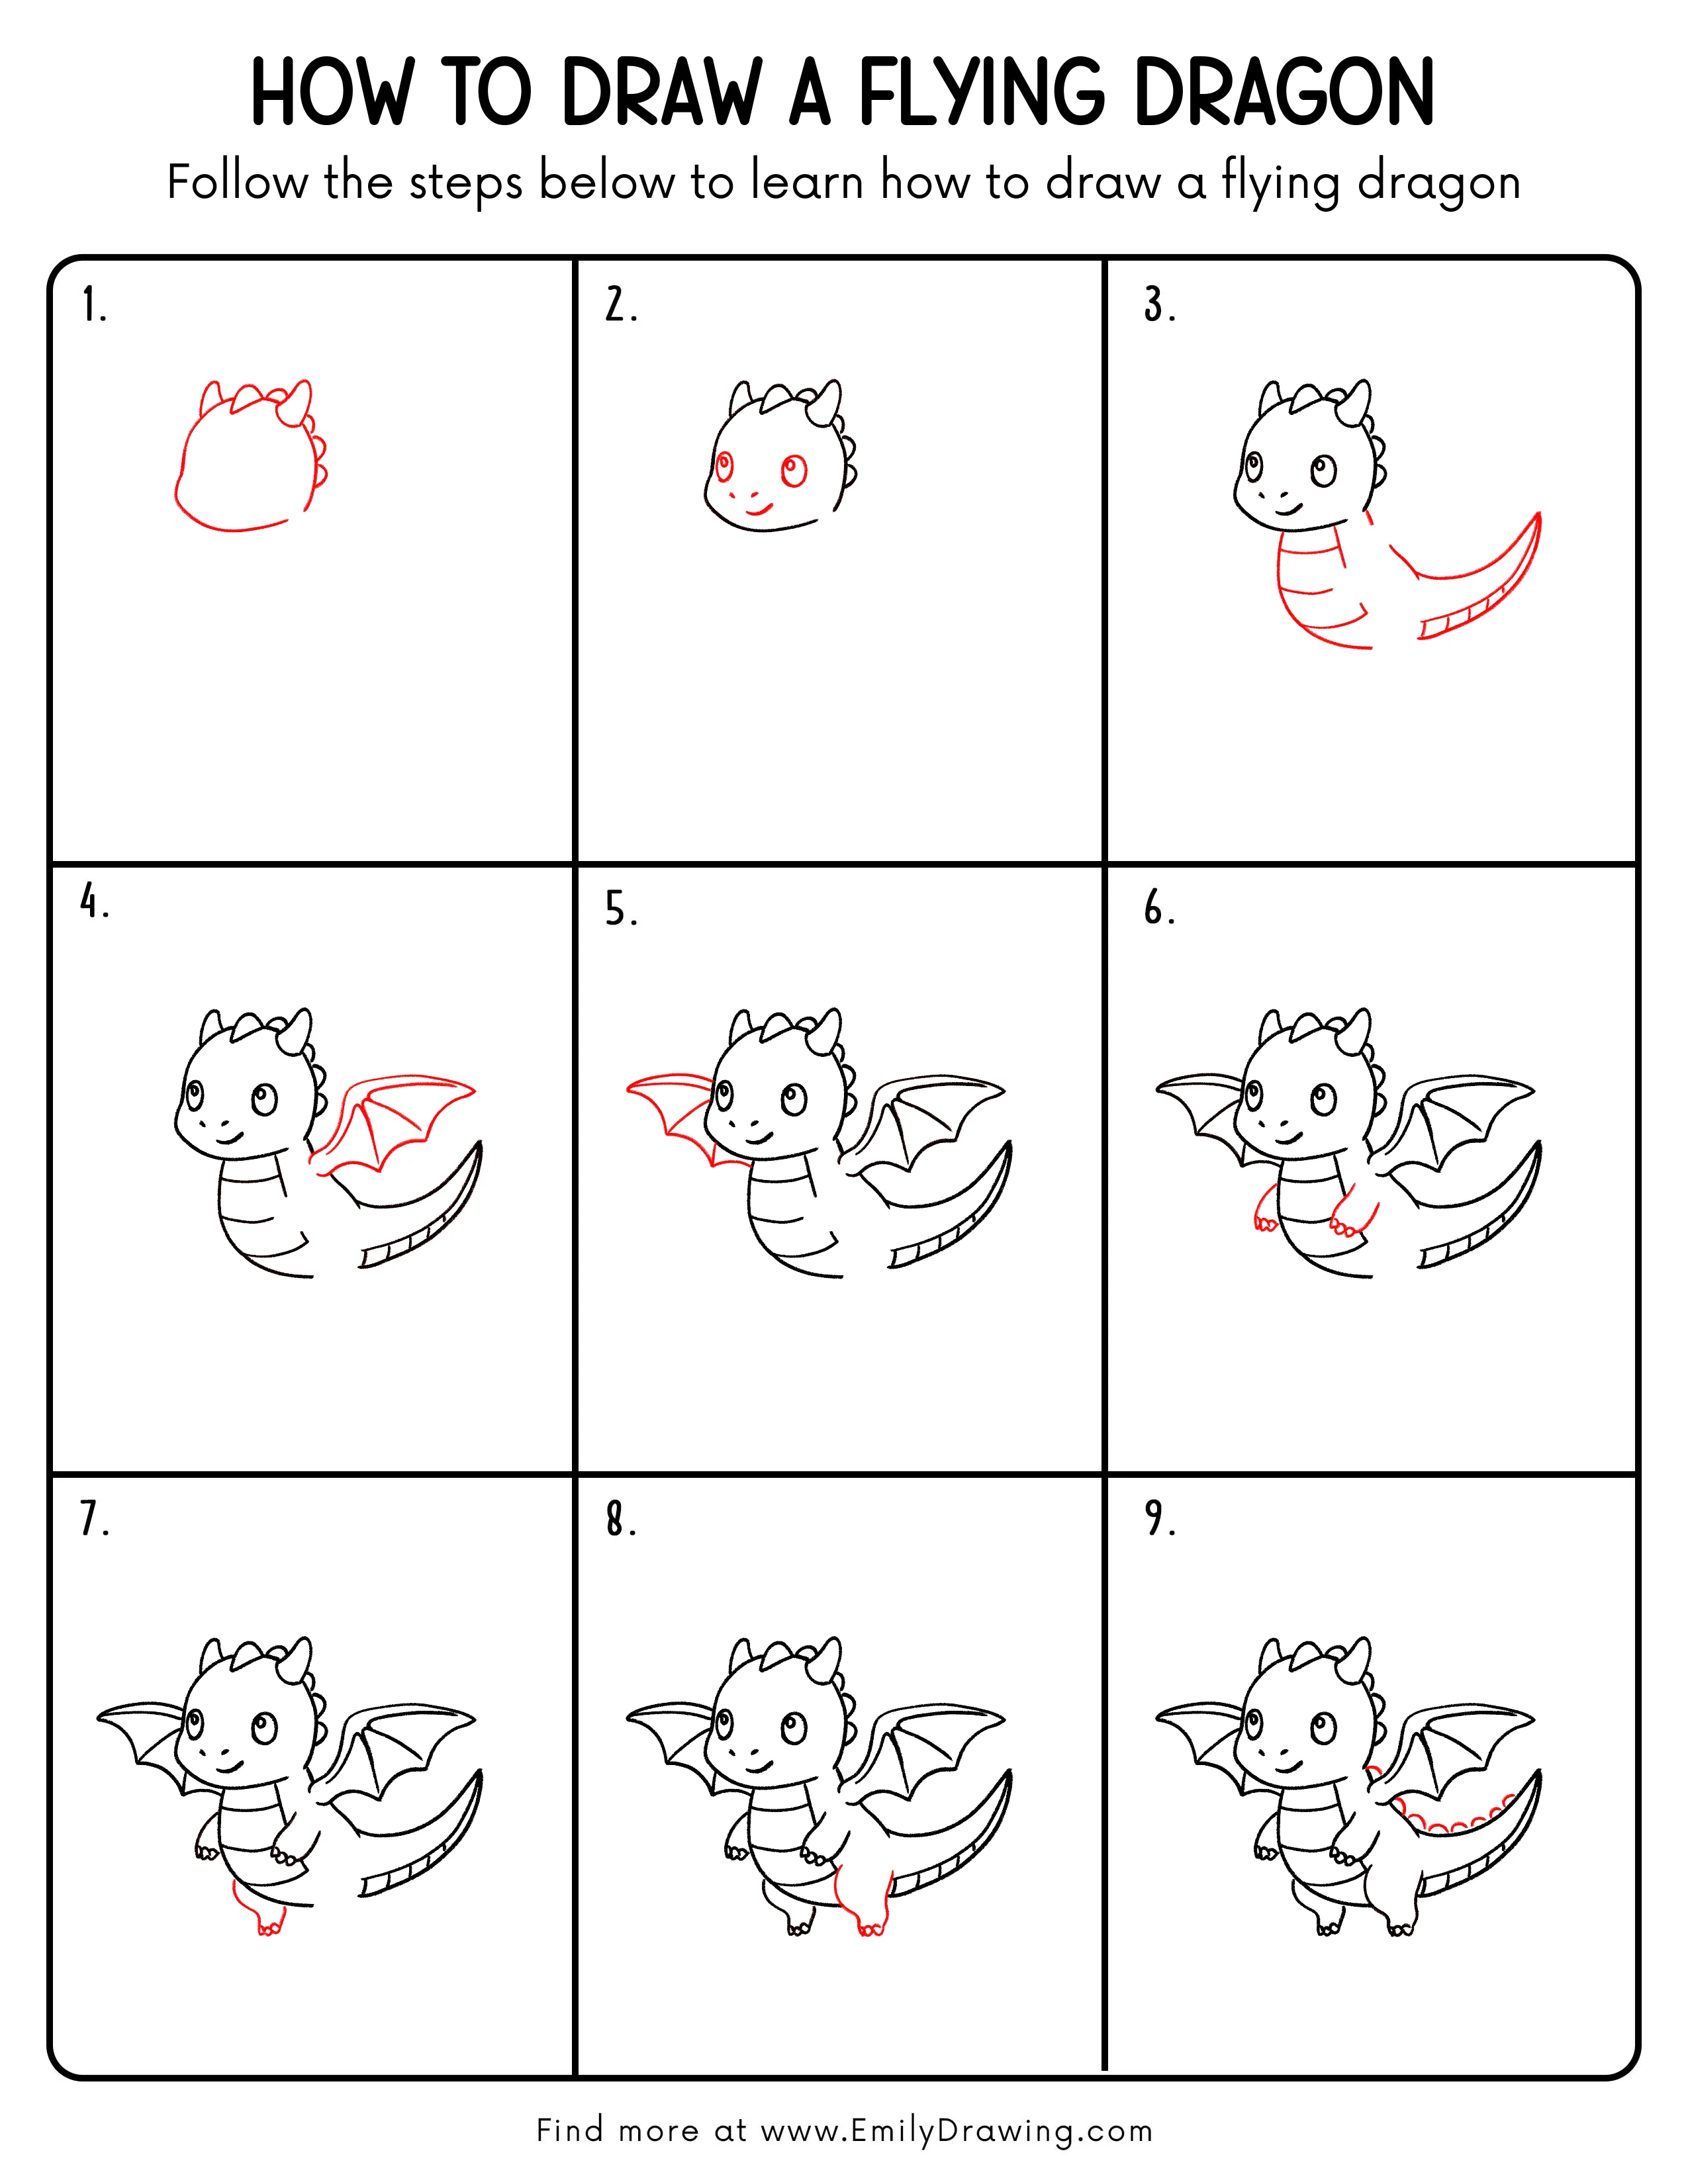
Step 1: Draw the Head and Back Outline
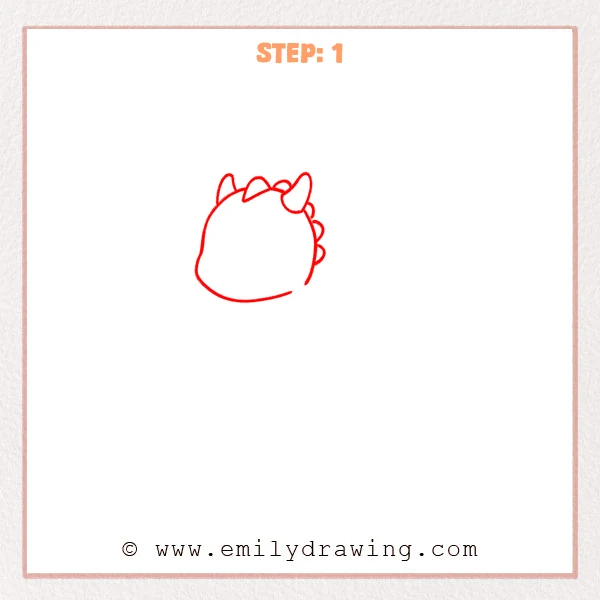
Start with a rounded head shape near the upper middle of the page. Let the lower part feel a little wider, then add two pointed horns on top and a few small back spikes behind the head. This gives your flying dragon a soft and playful outline.
Pro Tip: Keep the first outline light so you can adjust the head size more easily.
Step 2: Add the Facial Features
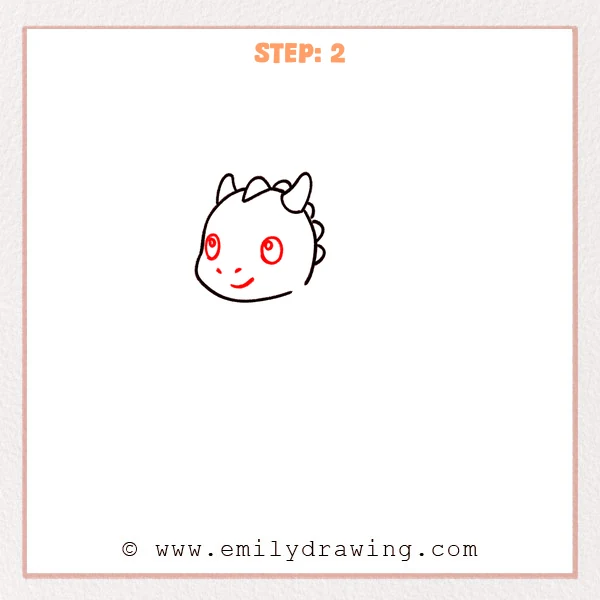
Add two large round eyes in the middle of the face, leaving a little space between them. Sketch two tiny nostrils and a curved smiling mouth to give the dragon a kind expression. These simple features help the character feel friendly right away.
Pro Tip: Try to keep both eyes similar in size for a balanced face.
Step 3: Add the Body and Long Tail
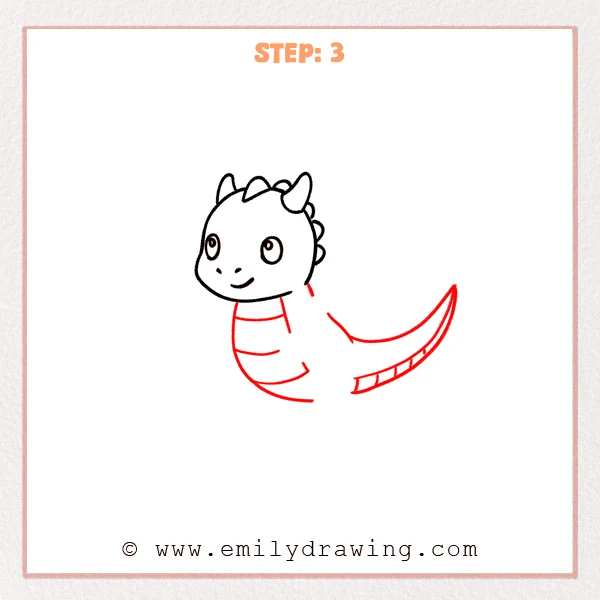
Bring two curved lines down from the head to form the neck and rounded body. Extend the body into a long tail that curves up toward the right side, then add a few tail bands underneath. The dragon now begins to look like it is gliding through the air.
Pro Tip: Let the tail become thinner as it moves outward for a lighter flying look.
Step 4: Add the Open Wing
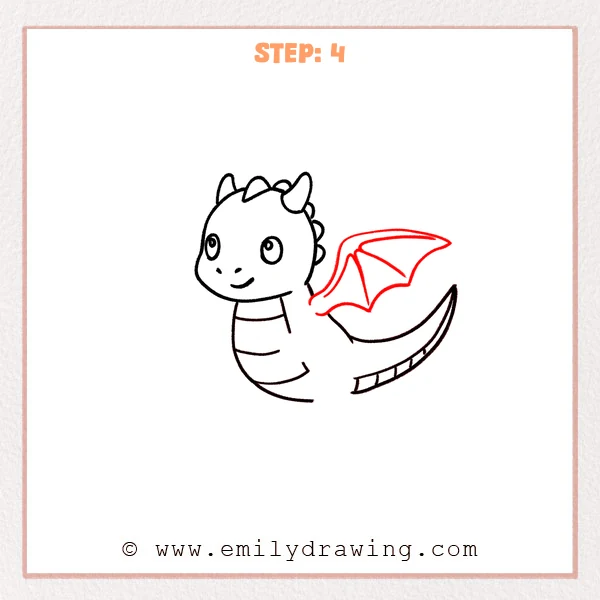
Start from the upper back and draw one large wing stretching out to the right. Add the inner wing supports and the curved membrane between them to build the shape. This wing gives the dragon a clear flying pose.
Pro Tip: Let the wing connect smoothly to the back so the pose feels natural.
Step 5: Add the Second Wing
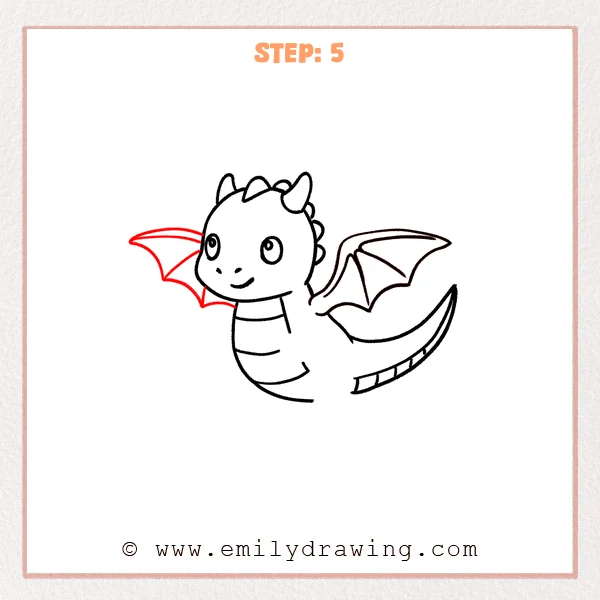
Add another wing behind the head on the left side. Let part of it hide slightly behind the head and body, then draw the inner support lines and curved membrane. This creates a nice sense of depth and balance.
Pro Tip: A slightly hidden wing makes the dragon look more three-dimensional.
Step 6: Add the Small Arms and Claws
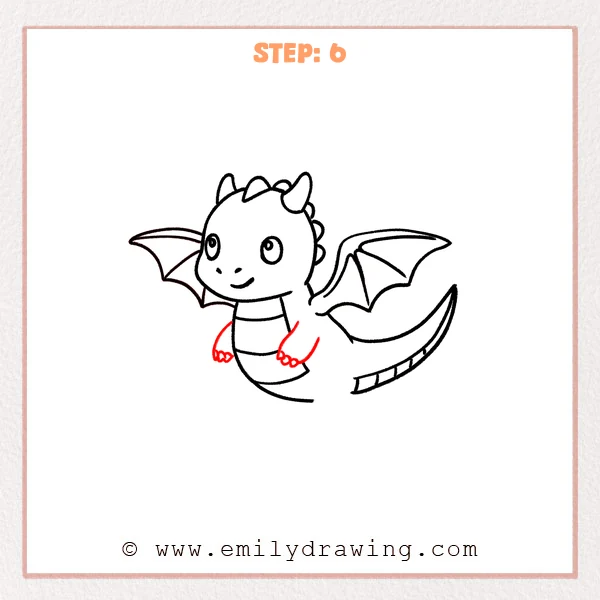
Draw two short front arms along the sides of the body. At the ends, add a few small rounded claws to keep the dragon looking cute rather than fierce. These little arms make the design feel more lively.
Pro Tip: Place the arms at slightly different heights for a more natural pose.
Step 7: Add One Little Leg
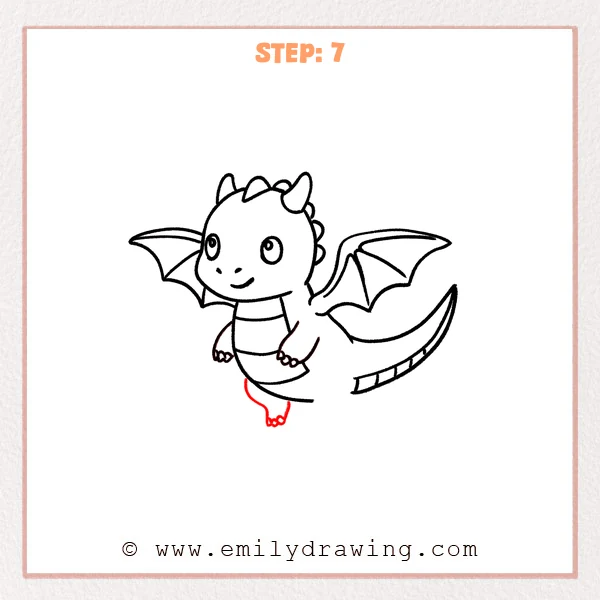
Under the body, add one short back leg with a gentle bend. Finish it with a few small rounded toes at the bottom. This helps the dragon feel more complete without making the shape too heavy.
Pro Tip: Keep the leg fairly short so it matches the small front arms.
Step 8: Add the Other Back Leg
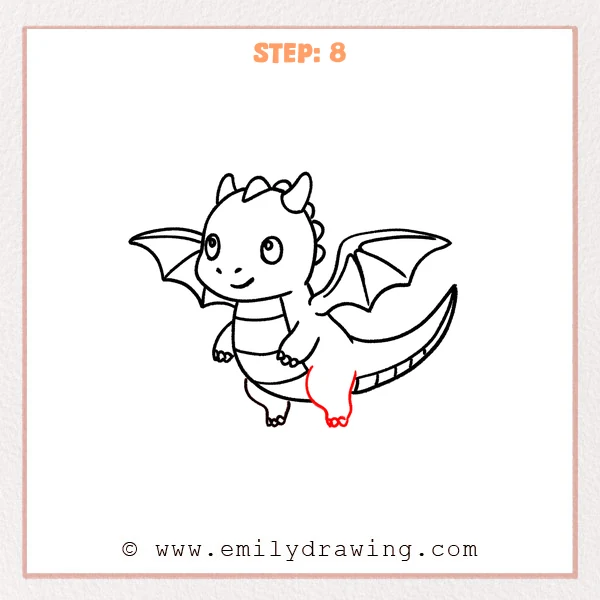
Add the second back leg on the lower right side of the body. Let it hang naturally from the body and give it a rounded foot with small toes. Now the dragon has a full set of limbs.
Pro Tip: Make this leg slightly larger if it sits closer to the viewer.
Step 9: Add the Small Back Scales
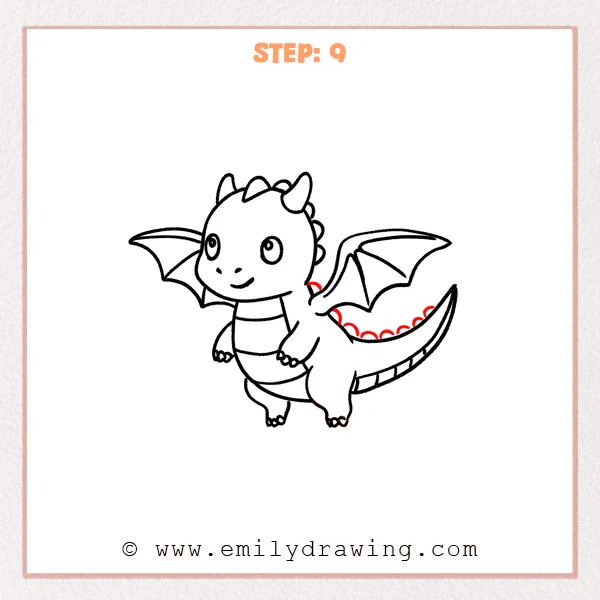
Start behind the neck and draw a row of small rounded scales along the back toward the tail. Let them sit neatly one after another like soft little waves. This final detail gives your flying dragon a polished and charming finish.
Pro Tip: Keep the scales close in size so the back line stays neat and even.
Step 10: Color in your drawing!
Fun Facts
- Dragons often appear in stories as magical creatures that can fly, guard treasure, or protect special places.
- Many dragon drawings use bat-like wings because the shapes are simple and easy to recognize.
- Cute dragon designs often use large eyes, rounded shapes, and short claws to look friendly.
Pin it now, Draw later!
You started with a simple head, then added the face, body, tail, wings, arms, legs, and back scales. That steady process turned a few easy shapes into a complete flying dragon drawing for beginners. You can color your dragon green, blue, red, or any color you like, and you can add soft shading under the wings and belly to give it more form. One common beginner mistake is making the wings or legs too large for the body, so keep checking the overall balance as you draw. Keep practicing this easy drawing tutorial, and try drawing your flying dragon in different flying poses next time.
Get the FREE Printable Drawing Guide
FREE Download Printable Flying Dragon Drawing Tutorial
Frequently Asked Questions
Is this flying dragon drawing good for beginners?
Yes. The steps use simple shapes and gentle details, so it works well for new artists.
How can I make my dragon look more like it is flying?
Curve the body and tail softly, and spread the wings wide to suggest movement in the air.
What colors should I use for a dragon?
You can use any colors you like. Green, red, blue, purple, and gold all work beautifully for dragons.