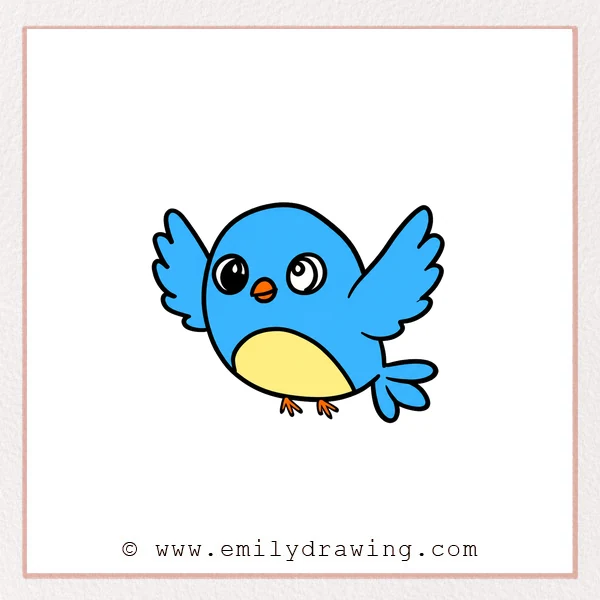
Learn how to draw flying bird shapes with lifted wings and a round body. This easy drawing tutorial uses soft curves to create a cheerful cartoon character.
What You Will Need
- A pencil
- Plain drawing paper
- An eraser
- Colored pencils or crayons, if desired
Here are my RECOMMENDED Art Supplies!
- Crayola Coloring Set (140 Pieces – Mega Value!)
- 24 Colored Crayon Set
- A4 Printer Paper
- Crayola Coloring Pencils
- HP Home Printer with Instant Ink!
Time needed:
24 minutes.
Step-by-Step Drawing Guide
Step 1: Outline the Rounded Body
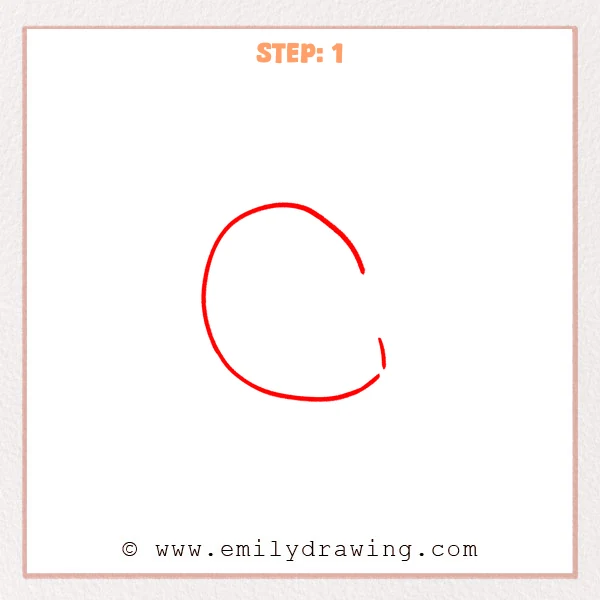
Draw a large, rounded body with a gently domed head. Leave a wide gap on the right for a wing. Add a short side curve below it, leaving a smaller tail gap.
Pro Tip: Keep the bottom broad so the bird looks softly rounded.
Step 2: Draw the Eyes and Beak
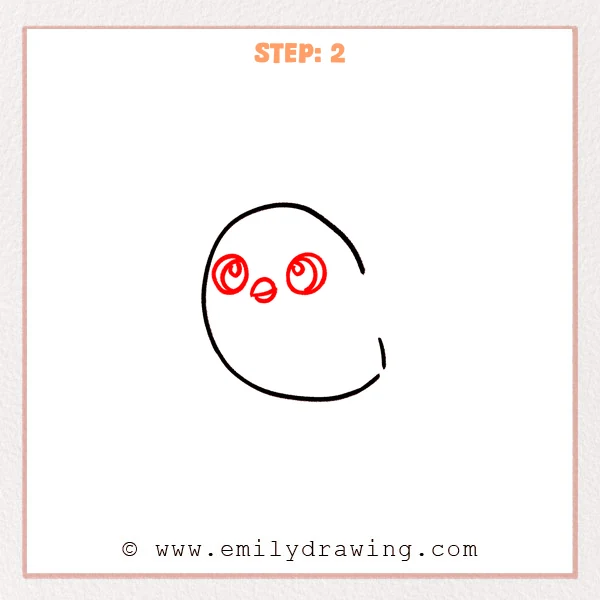
Add two large oval eyes with curved inner shapes and small highlights. Between them, draw a small rounded beak with a slanted dividing line.
Pro Tip: Keep the beak smaller than either eye.
Step 3: Add the Left Wing
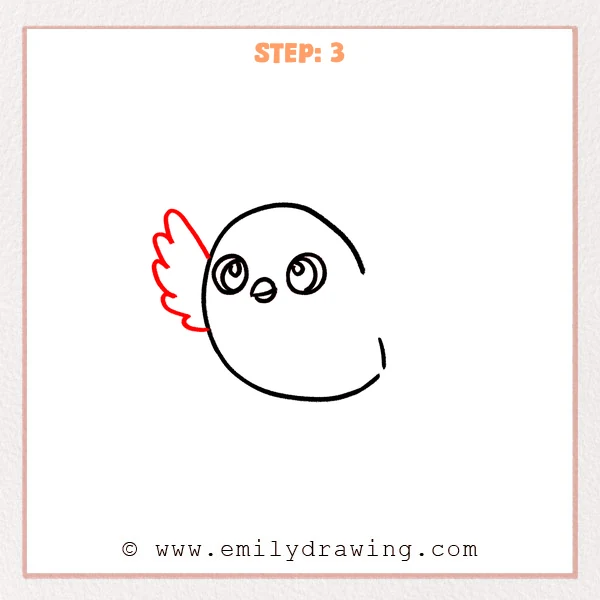
Draw a raised wing extending upward from the body’s left side. Shape its outer edge with rounded feather tips returning to the body.
Pro Tip: Make the uppermost feather longer than the lower feather bumps.
Step 4: Draw the Right Wing
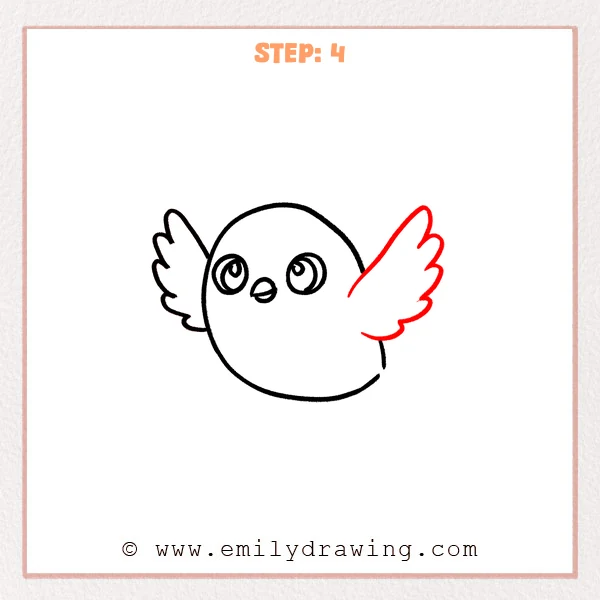
From the right-side gap, sweep a long line upward and outward. Return with rounded feather tips to form a broad raised wing.
Pro Tip: Make this nearer wing slightly larger than the left wing.
Step 5: Mark the Belly and Feet
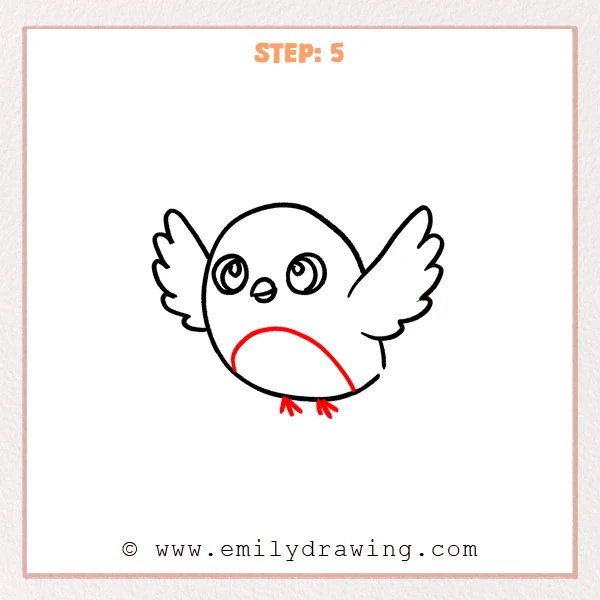
Draw a broad curved belly patch across the body’s lower half. Add two tiny feet underneath, each formed from three short toe strokes.
Pro Tip: Keep the feet small so the lifted wings remain the main feature.
Step 6: Add the Tail Feathers
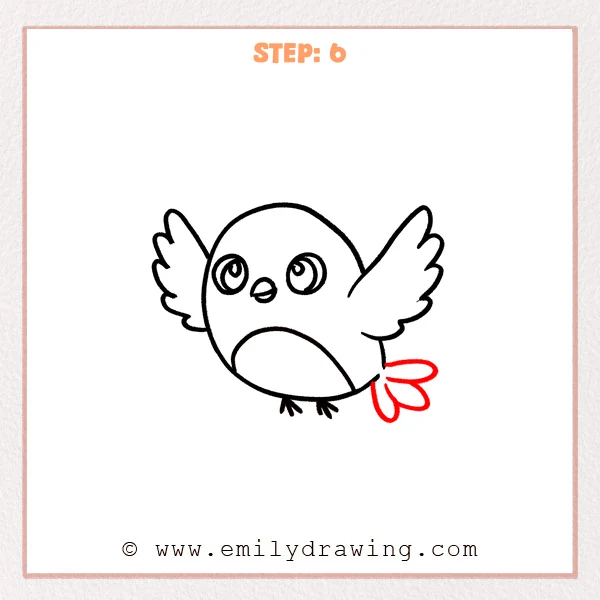
Draw three long, rounded tail feathers extending from the lower-right gap. Fan them outward, with the lowest feather curving downward.
Pro Tip: Join the feathers at a narrow base beside the body.
Step 7: Color in your drawing!
Fun Facts
- The flying bird’s raised wings and fanned tail make its pose easy to read.
- The curved belly patch follows the round body and creates a separate coloring area.
Pin it now, Draw later!
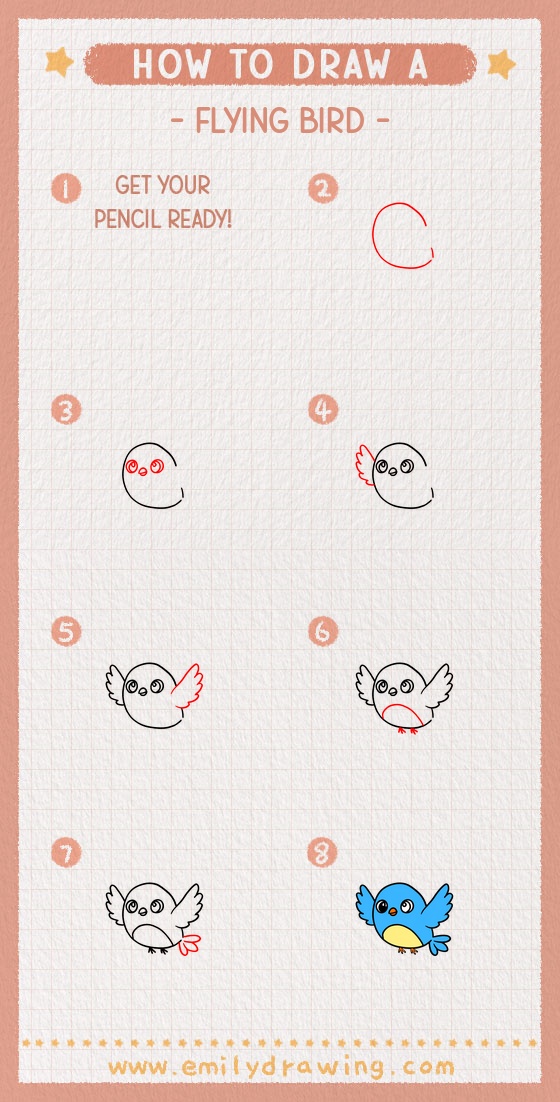
Your flying bird step by step drawing now has raised wings, tiny feet, and tail feathers. Check the feather curves and tidy the wing joins. Enjoy this drawing for beginners, and try coloring your flying bird with a bright belly patch.
Get the FREE Printable Drawing Guide
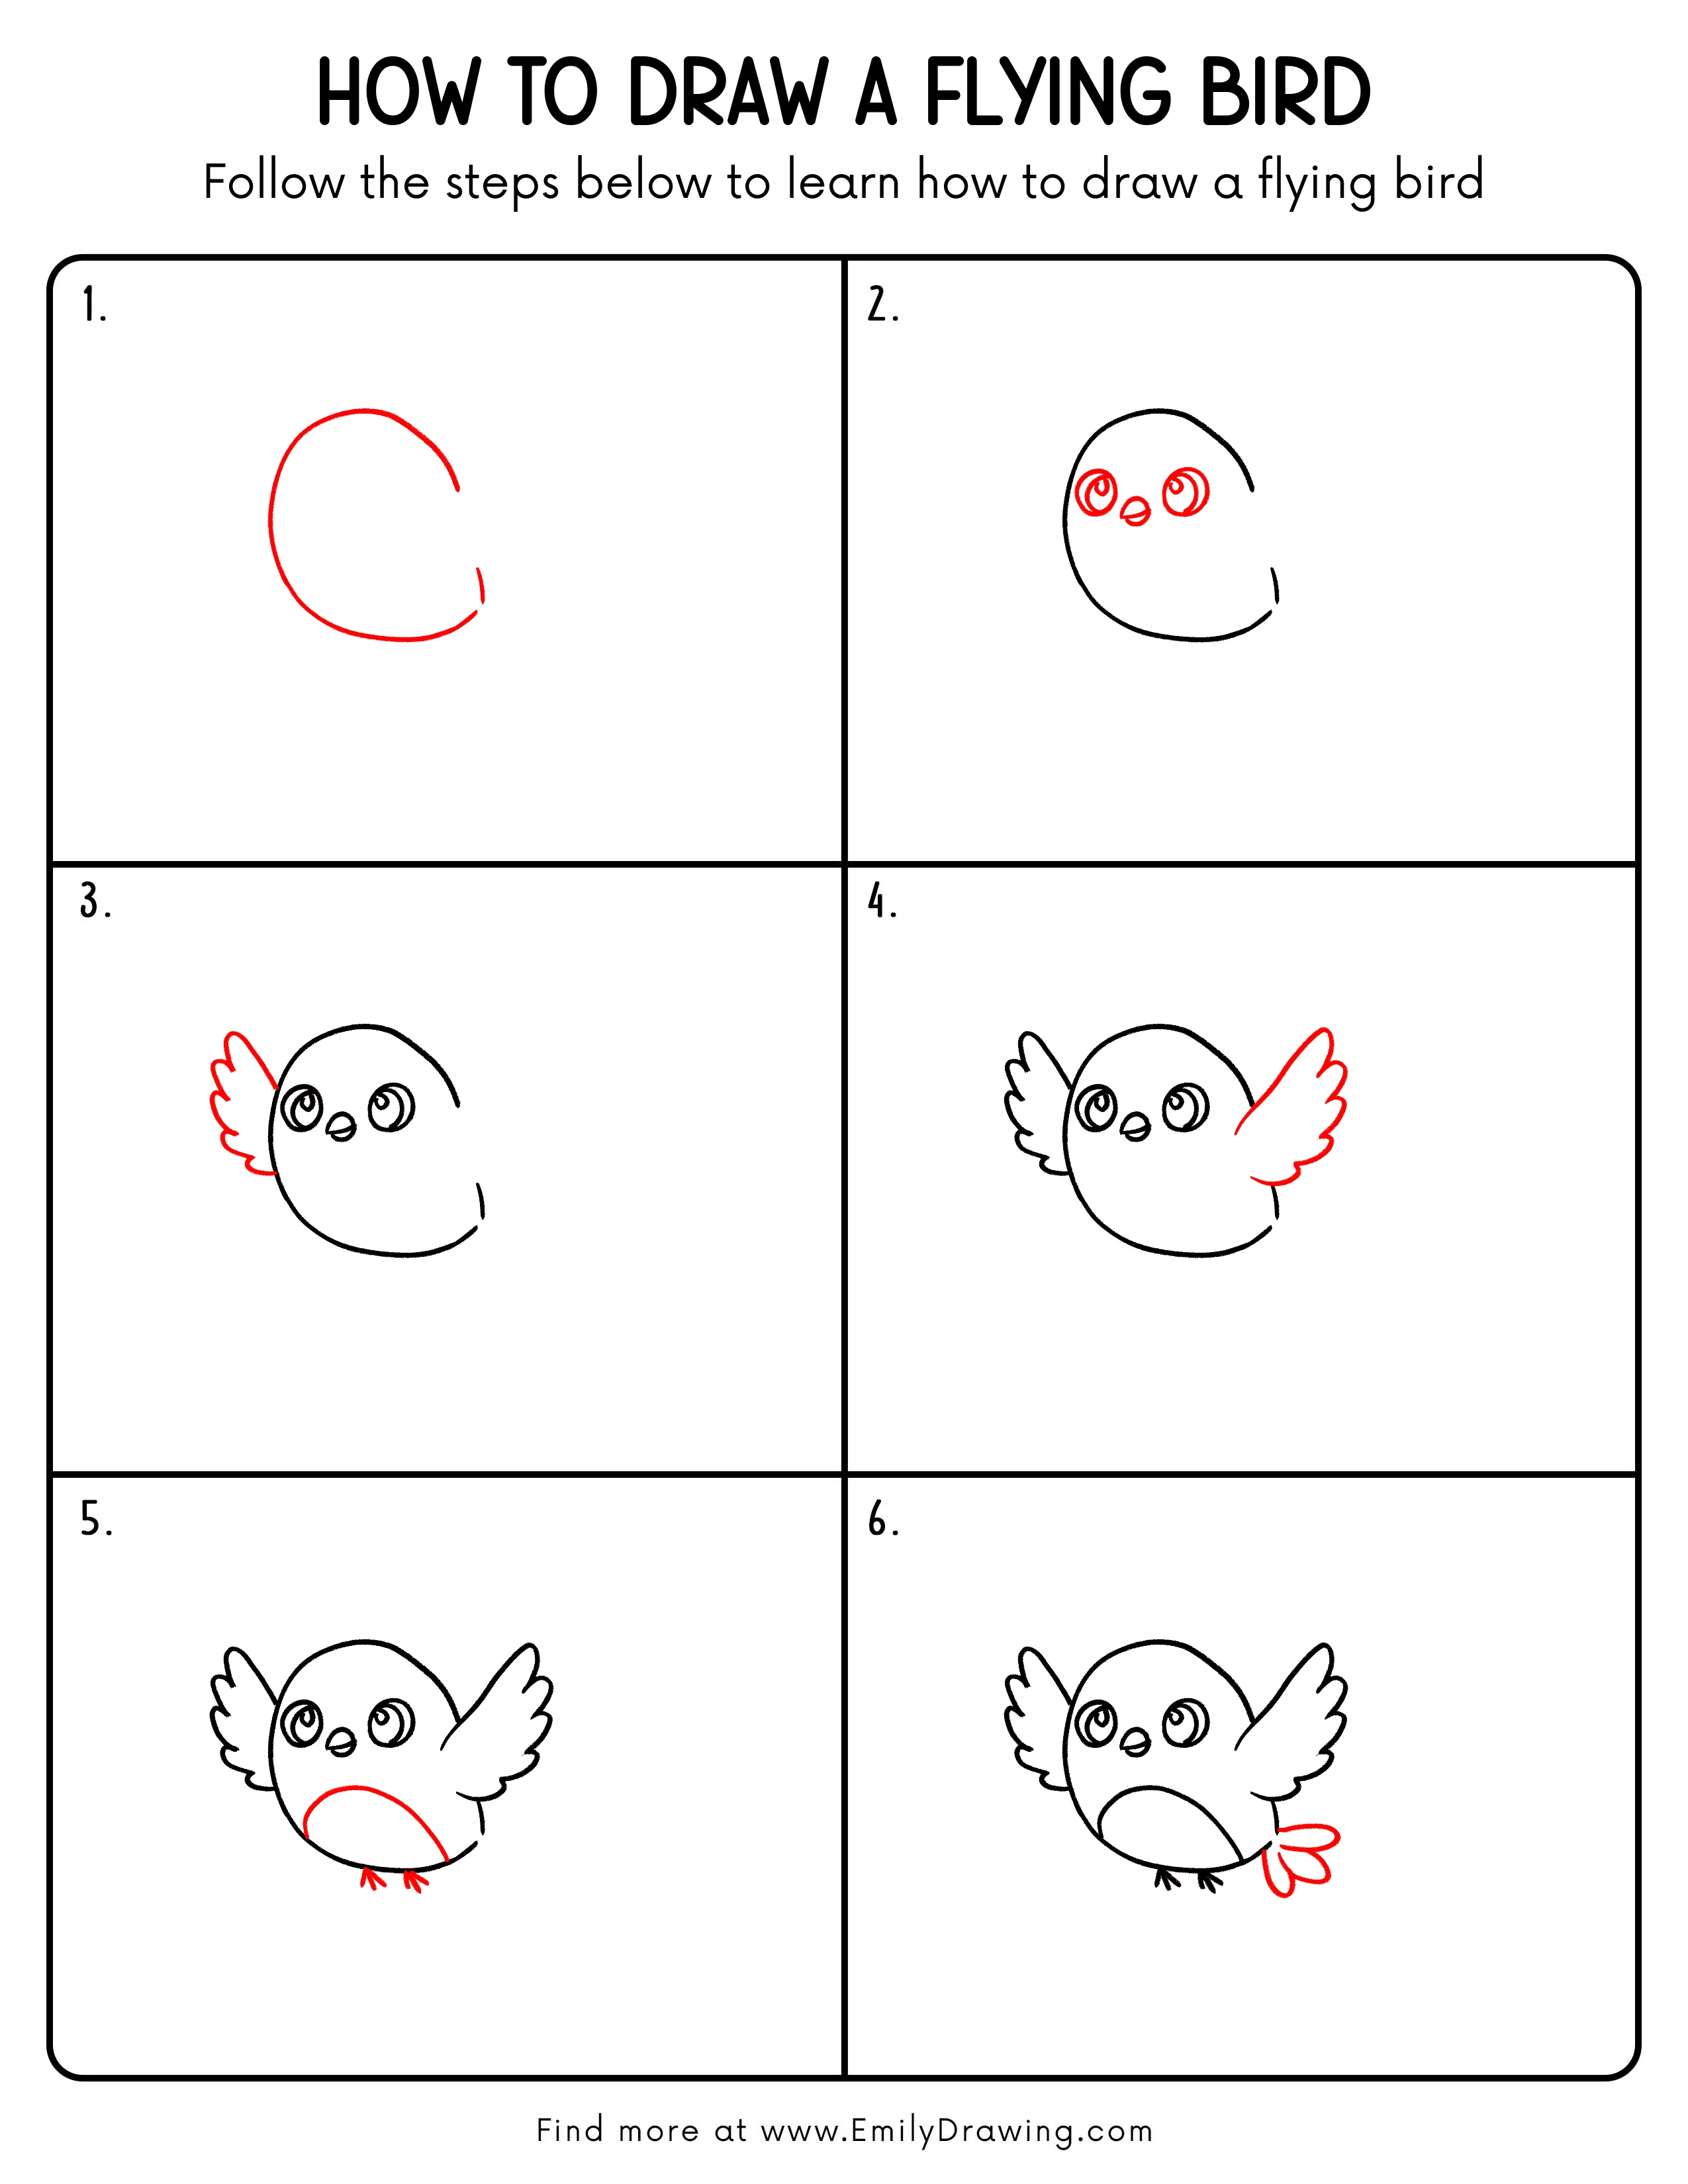
FREE Download Printable Flying Bird Drawing Tutorial
Frequently Asked Questions
Should both flying bird wings be the same size?
The right wing can be larger because it appears nearer in this cartoon pose.
How can I make the flying bird feathers softer?
Round each feather tip and use shallow inward curves between neighboring feathers.