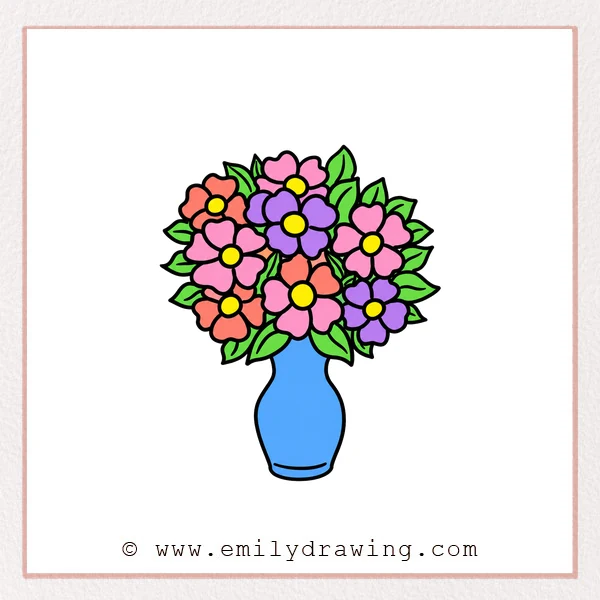
Learn how to draw flower bouquet shapes by grouping simple, overlapping blooms. This easy drawing tutorial adds pointed leaves and a narrow holder beneath the flowers.
What You Will Need
- A pencil
- Plain drawing paper
- An eraser
- Colored pencils or crayons, if desired
Here are my RECOMMENDED Art Supplies!
- Crayola Coloring Set (140 Pieces – Mega Value!)
- 24 Colored Crayon Set
- A4 Printer Paper
- Crayola Coloring Pencils
- HP Home Printer with Instant Ink!
Time needed:
30 minutes.
Step-by-Step Drawing Guide
Step 1: Draw the First Three Flowers
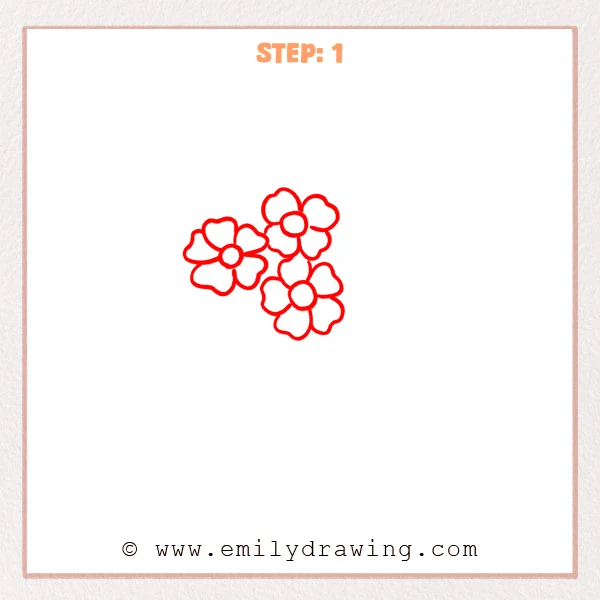
Arrange three small circular centers in a loose triangular group. Surround each with rounded, gently notched petals, stopping edges where neighboring flowers overlap.
Pro Tip: Leave small spaces between the blooms for later leaves.
Step 2: Expand the Right Side
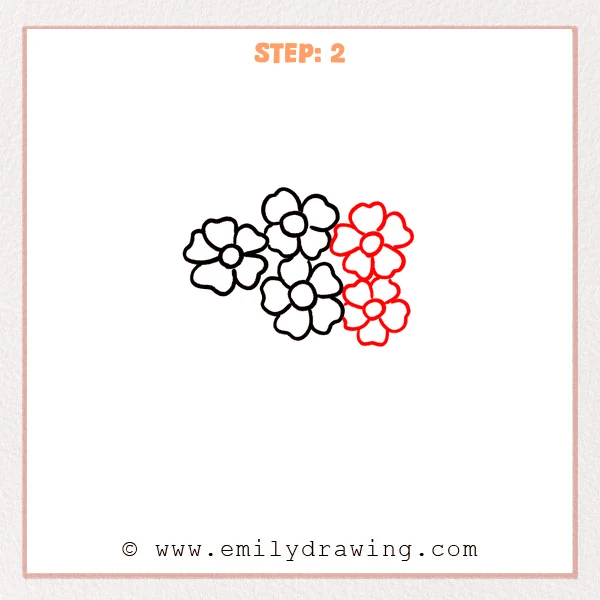
Add two more circular flower centers on the cluster’s right side. Draw soft, notched petals around them, keeping the lower flower beneath the upper one.
Pro Tip: Make the new blooms similar in size to the first flowers.
Step 3: Add Two Upper Blooms
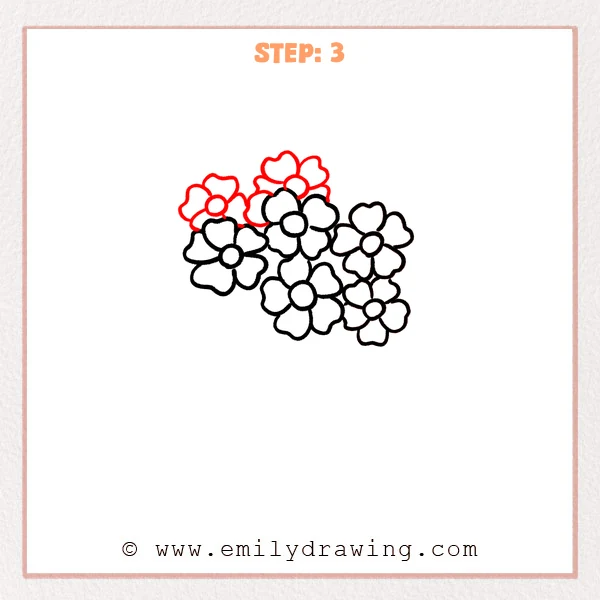
Draw two smaller flowers behind the cluster’s upper left and middle. Add their round centers and only the petal edges visible between existing blooms.
Pro Tip: Stop new outlines at the foreground petals to show overlap.
Step 4: Fill the Left and Lower Gaps
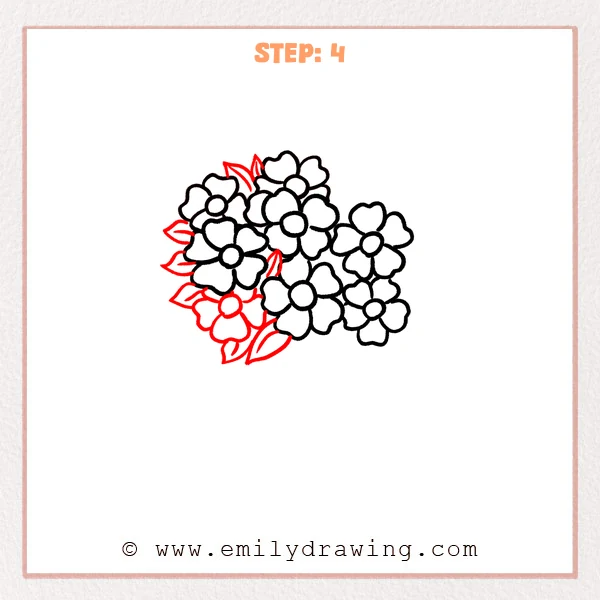
Add a smaller flower below the left side of the cluster. Tuck pointed leaves around the upper left, left edge, and lower gaps. Draw a short central vein inside each new leaf.
Pro Tip: Let the leaf tips extend beyond the rounded petal outline.
Step 5: Complete the Leafy Border
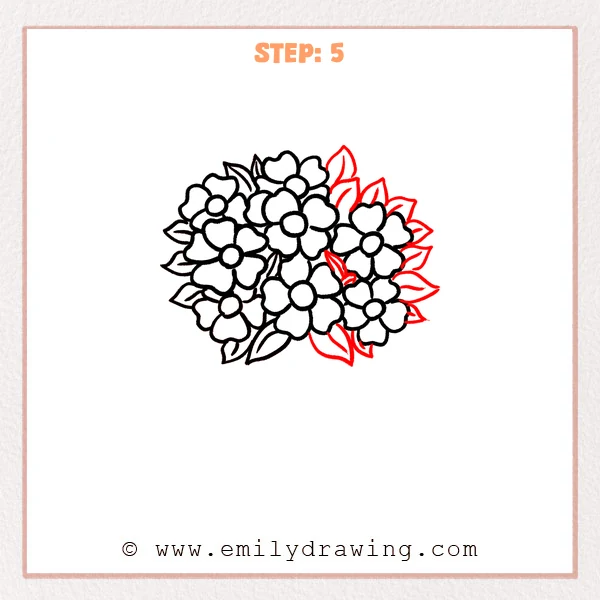
Add pointed leaves above the upper flowers and around the right edge. Fill a few gaps between the blooms and beneath the lower flowers. Give the new leaves simple curved veins following their tips.
Pro Tip: Vary the leaf angles to avoid a stiff, evenly spaced border.
Step 6: Draw the Narrow Holder
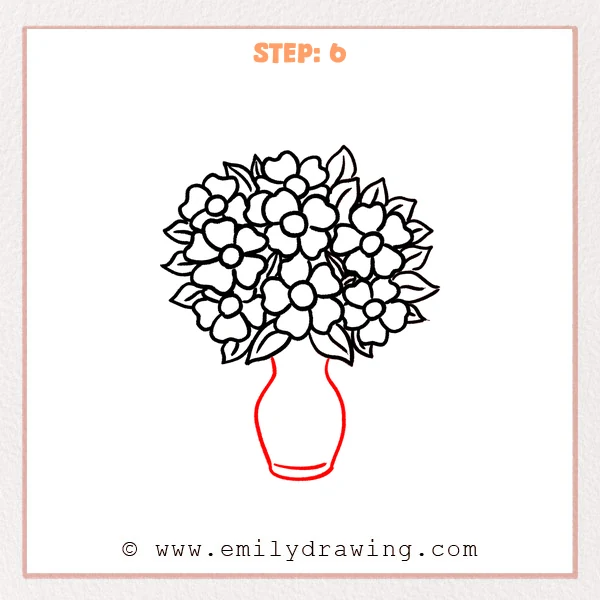
Extend two wavy sides downward from beneath the flower bouquet. Join them with a rounded bottom and add a shallow inner curve near the base.
Pro Tip: Keep the holder narrower than the flower cluster above it.
Step 7: Color in your drawing!
Fun Facts
- Overlapping petals make the flower bouquet look layered even without shading.
- Pointed leaves create a contrasting border around the bouquet’s soft flower shapes.
Pin it now, Draw later!
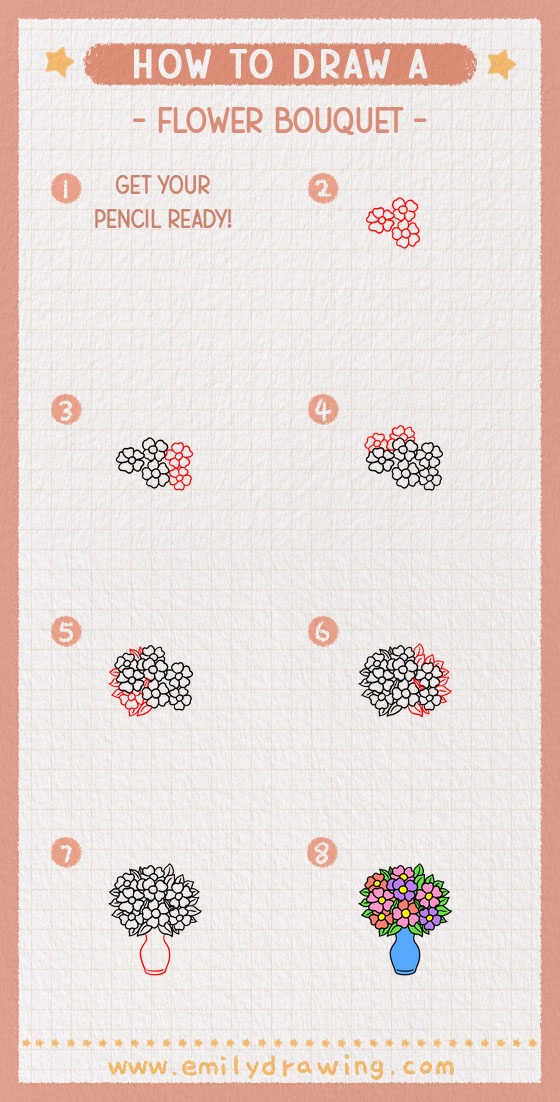
Your flower bouquet step by step drawing now combines clustered blooms, leaves, and a holder. Check that overlapping outlines stop neatly and choose a gentle color palette. Enjoy this drawing for beginners, and try another flower bouquet with different petal colors.
Get the FREE Printable Drawing Guide
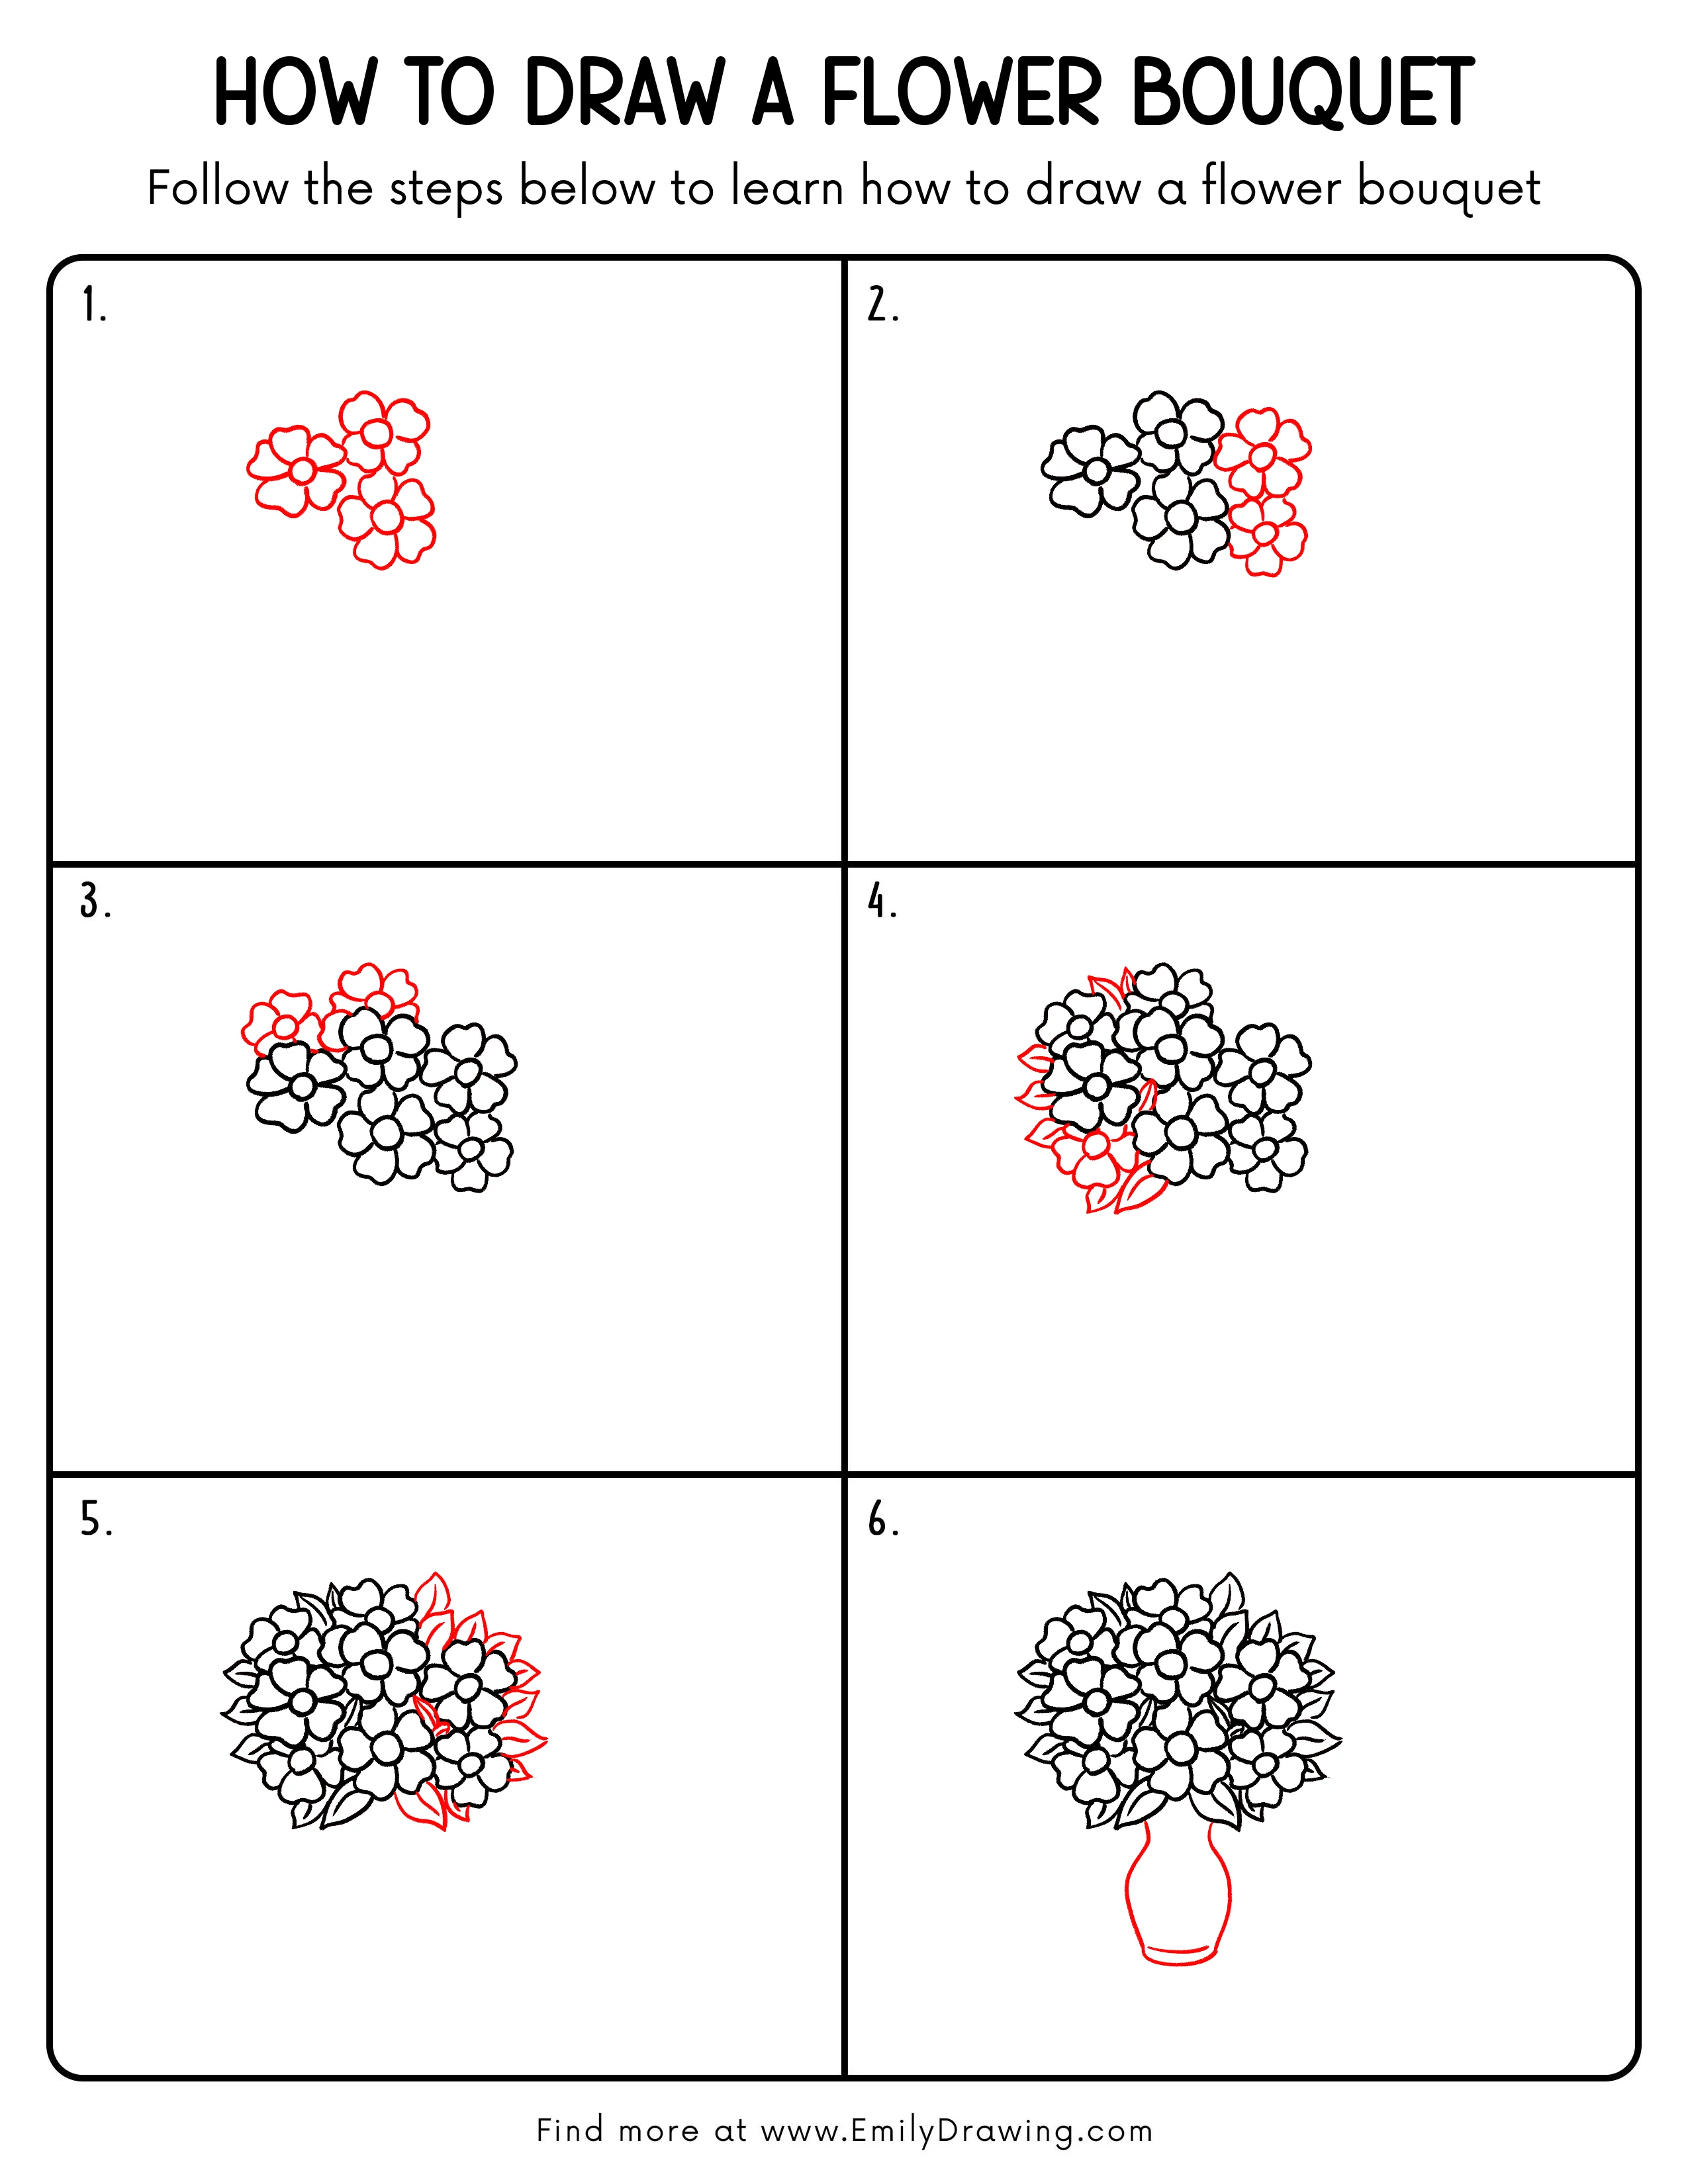
FREE Download Printable Flower Bouquet Drawing Tutorial
Frequently Asked Questions
How can I keep the flower bouquet from looking crowded?
Leave small gaps between the main blooms and use only a few visible leaf tips there.
Should I draw complete flowers behind the front blooms?
Draw only the visible portions so hidden lines do not cross the front petals.