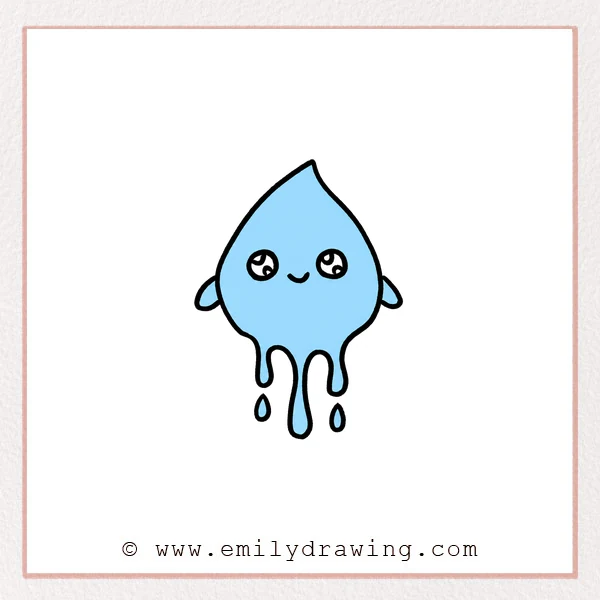
Learn how to draw drips as a cheerful liquid character. This drawing for beginners combines a pointed droplet, flowing lower curves, tiny arms, and a friendly face.
What You Will Need
- Drawing paper
- Pencil and eraser
- Black pen or marker
Here are my RECOMMENDED Art Supplies!
- Crayola Coloring Set (140 Pieces – Mega Value!)
- 24 Colored Crayon Set
- A4 Printer Paper
- Crayola Coloring Pencils
- HP Home Printer with Instant Ink!
Time needed:
12 minutes.
Step-by-Step Drawing Guide
Step 1: Shape the Main Drop
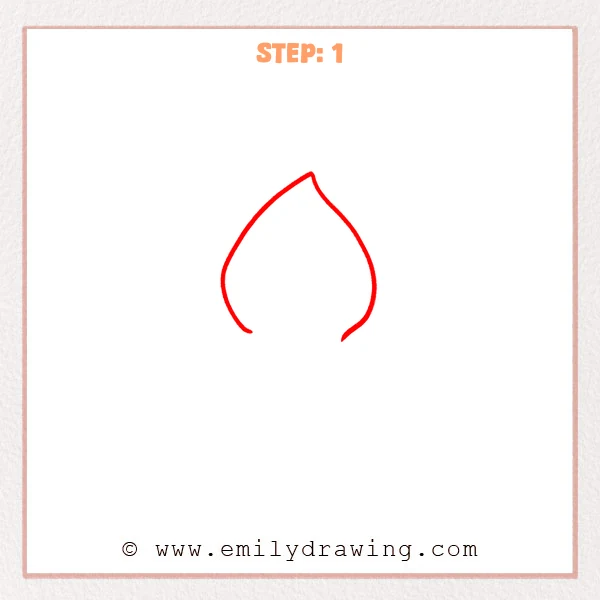
Draw two broad curves rising from an open base to one pointed top. Keep the middle wide and taper both sides gradually upward.
Pro Tip: Place the top point above the center of the open base.
Step 2: Add the Flowing Bottom
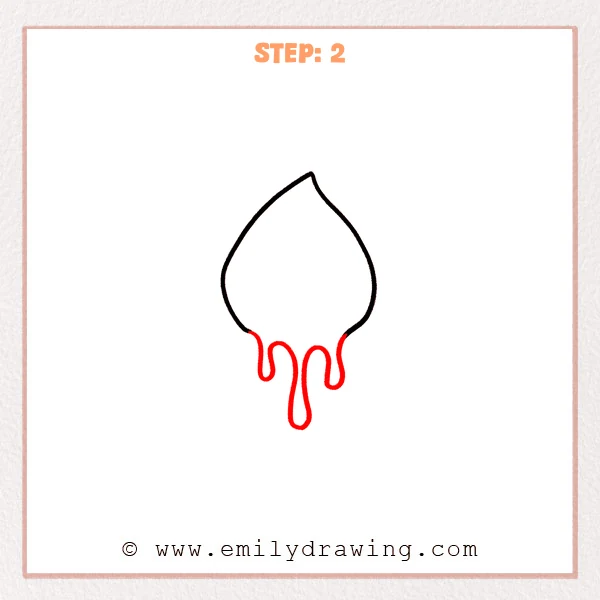
Connect the open base with three long rounded drips. Make the center drip lowest and the outer two shorter.
Pro Tip: Round every hanging end so the liquid looks smooth.
Step 3: Draw Two Falling Drops
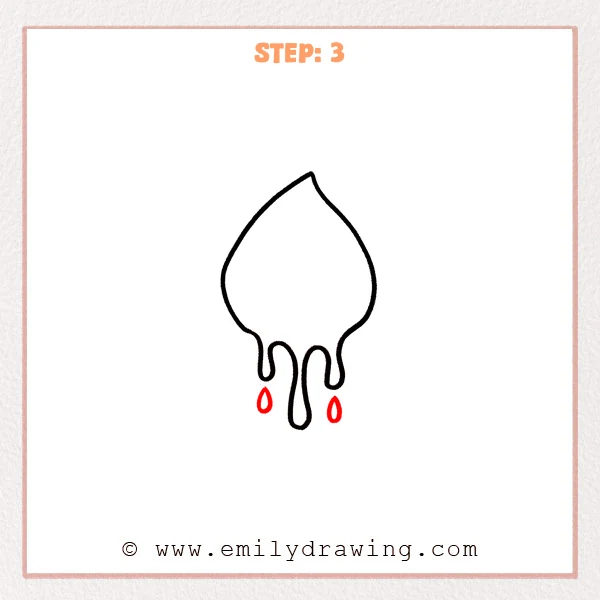
Add one small teardrop beneath each short outer drip. Point their tops upward and round their lower ends.
Pro Tip: Leave clear white space between the falling drops and main shape.
Step 4: Add Small Arms
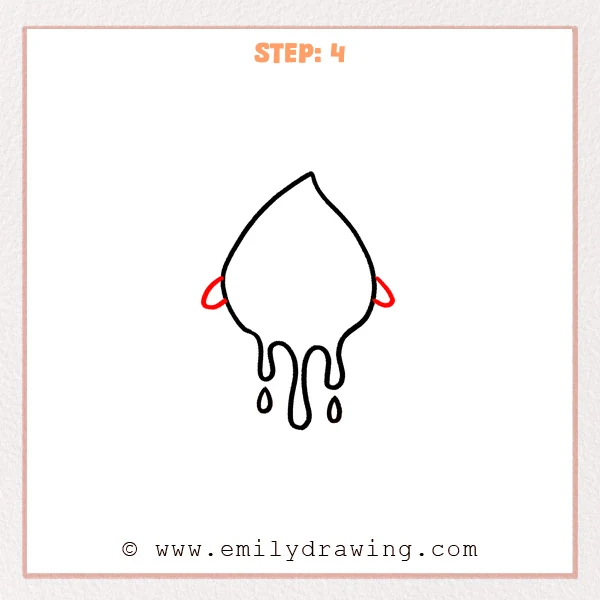
Draw a short loop extending from each side of the body. Taper both loops where they reconnect to the main outline.
Pro Tip: Keep both arms near the same height.
Step 5: Draw the First Eye
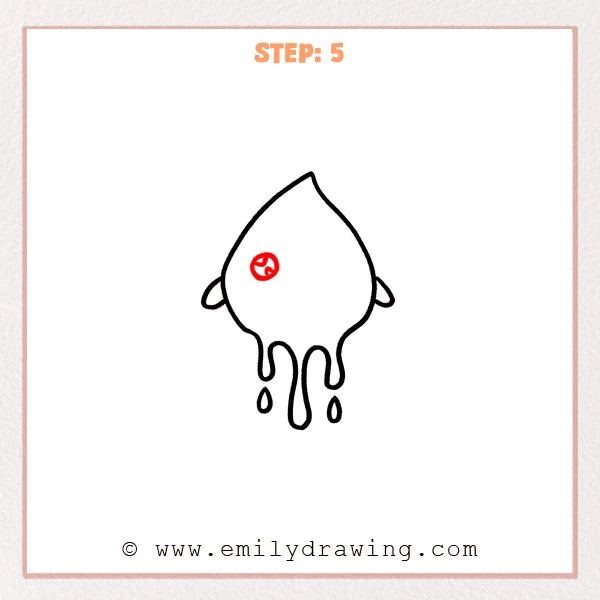
Place one round eye high on the left side. Divide it with flowing curved sections and add a small spiral detail.
Pro Tip: Keep the eye compact so there is room for its matching partner.
Step 6: Complete the Face
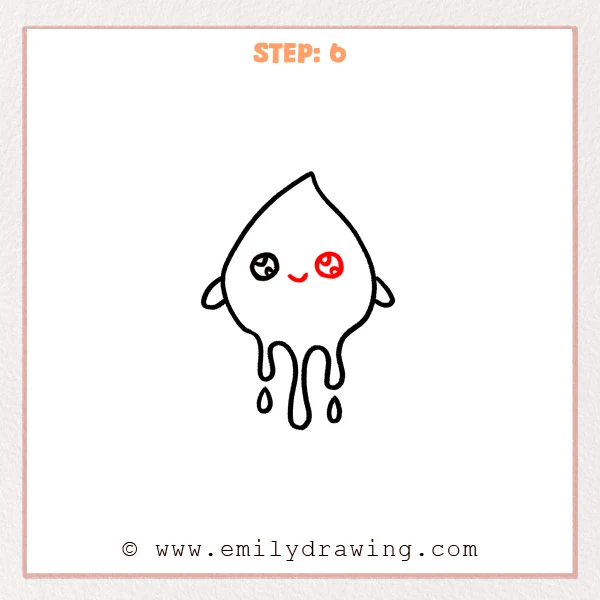
Draw a matching segmented eye on the right side. Add a tiny upward-curving smile between and below the eyes.
Pro Tip: Align the round eye outlines before adding their inner patterns.
Step 7: Color in your drawing!
Fun Facts
- Surface tension helps small liquid drops hold rounded shapes.
- Gravity pulls flowing liquid downward and can create long narrow drips.
- Different drip lengths make an abstract silhouette feel lively and natural.
Pin it now, Draw later!
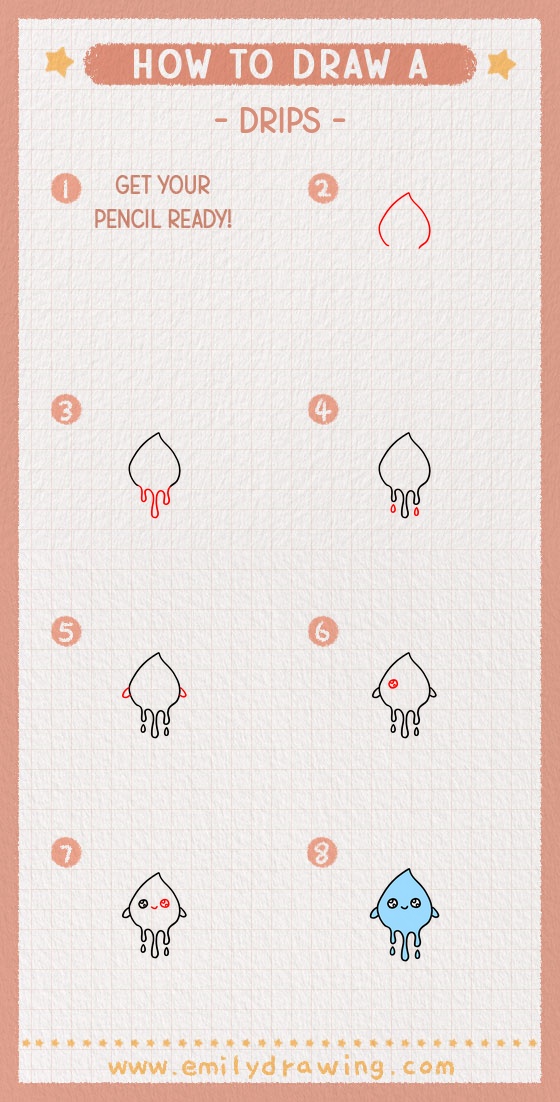
Clean the sketch and strengthen the pointed body, hanging drips, arms, and face. Your easy drips drawing is finished, so fill it with glossy color and leave highlights uncolored.
Get the FREE Printable Drawing Guide
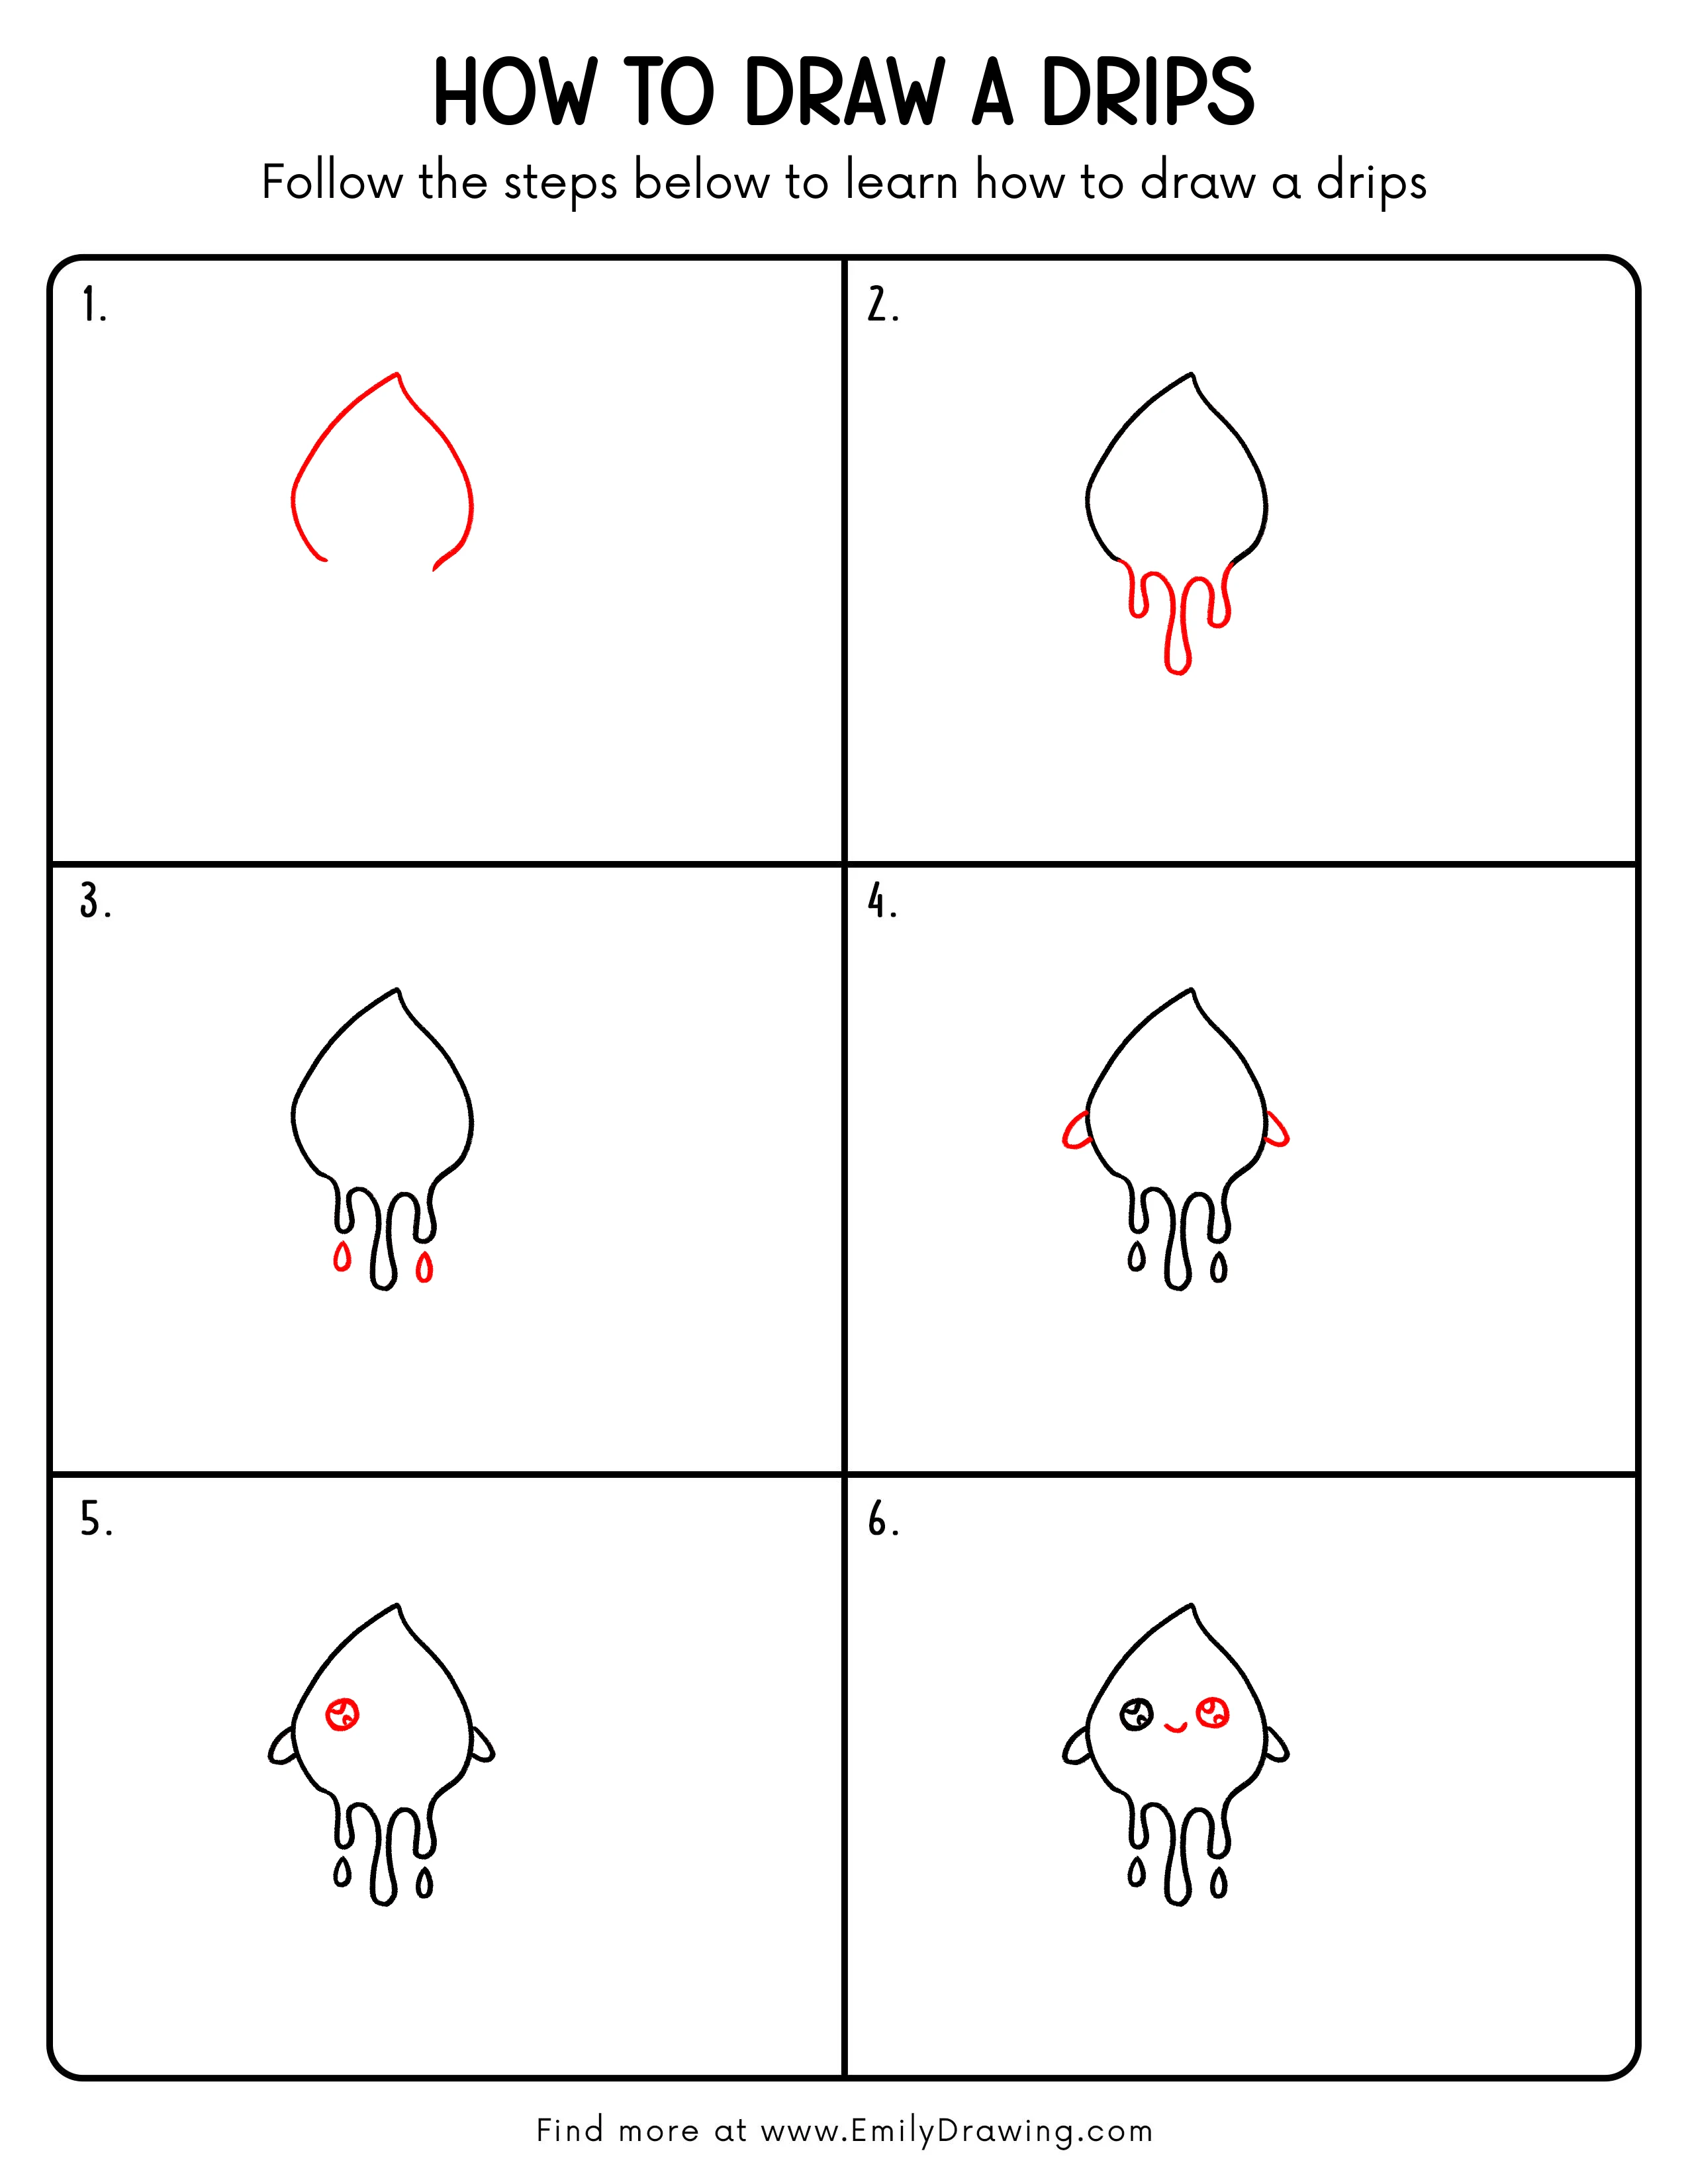
FREE Download Printable Drips Drawing Tutorial
Frequently Asked Questions
How can I make the drips look fluid?
Use smooth curves and avoid sharp corners at their rounded ends.
Can the hanging drips have different lengths?
Yes, varied lengths make the design more energetic and believable.
What colors suit this character?
Try blue for water, bright paint colors, or any imaginative liquid shade.