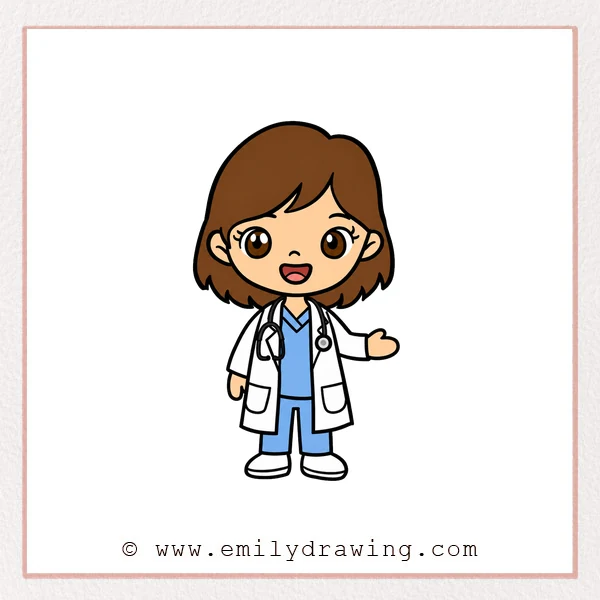
Learn how to draw a doctor with a friendly face and recognizable medical details. This drawing for beginners practices rounded shapes, simple clothing, and expressive cartoon features.
What You Will Need
- Drawing paper
- Pencil and eraser
- Black pen or marker
Here are my RECOMMENDED Art Supplies!
- Crayola Coloring Set (140 Pieces – Mega Value!)
- 24 Colored Crayon Set
- A4 Printer Paper
- Crayola Coloring Pencils
- HP Home Printer with Instant Ink!
Time needed:
24 minutes.
Step-by-Step Drawing Guide
Step 1: Shape the Doctor’s Hair
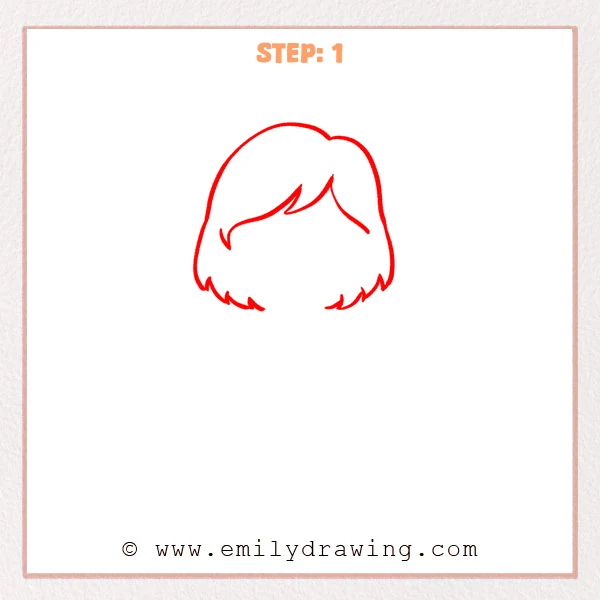
Draw a large rounded hairstyle with a small bump near the top. Add a sweeping fringe and several pointed locks along the lower edge.
Pro Tip: Leave a broad opening beneath the fringe for the face.
Step 2: Draw the Friendly Face
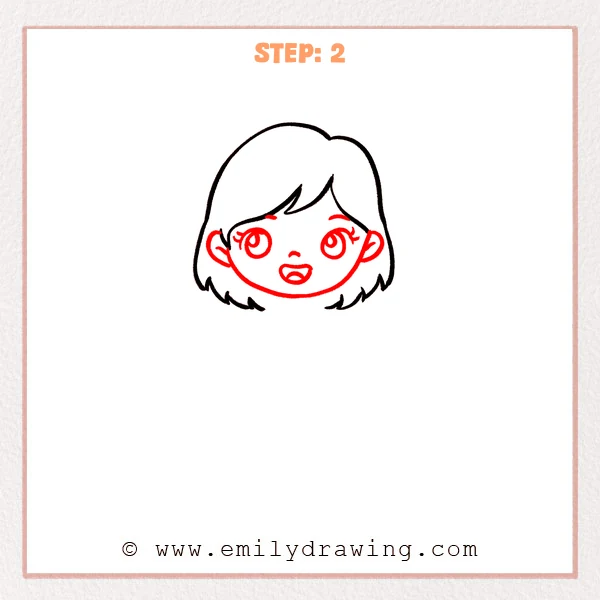
Add two ears and connect them with a softly rounded jaw. Draw large shining eyes, eyebrows, a tiny nose, and an open smile.
Pro Tip: Place the eyes at the same height for a balanced expression.
Step 3: Outline the Lab Coat
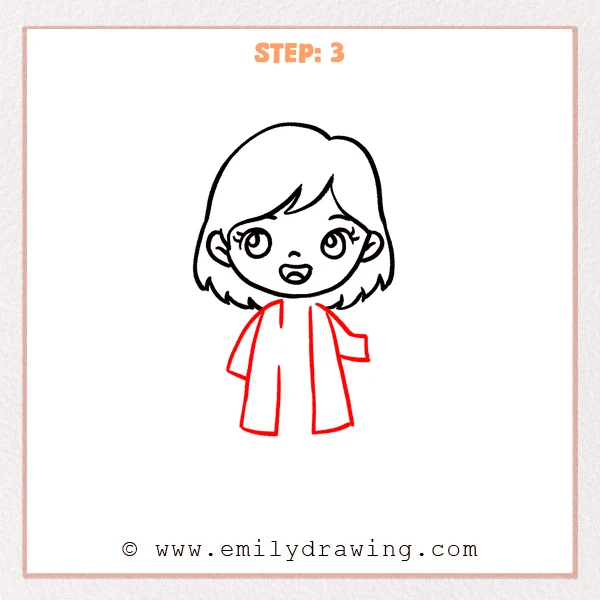
Sketch the long open lab coat beneath the head with two front panels. Add narrow sleeves and the raised bent arm on the right.
Pro Tip: Make both coat panels similar in length and width.
Step 4: Add the Shirt and Stethoscope
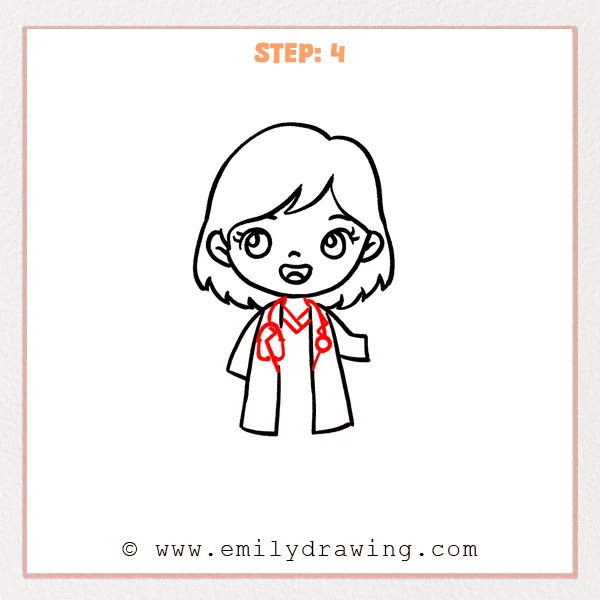
Draw a V-shaped shirt neckline between the coat panels. Loop a stethoscope around the neck, adding its earpieces, tubing, and round chest piece.
Pro Tip: Keep the stethoscope tubing clear of the coat’s inner edges.
Step 5: Draw the Legs and Shoes
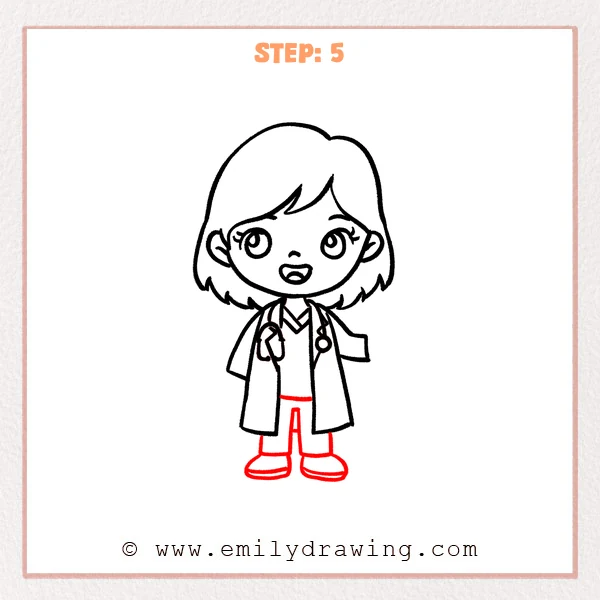
Extend two straight trouser legs below the coat with a narrow gap. Finish each leg with a wide, rounded shoe and a curved sole.
Pro Tip: Align the shoes along one baseline so the doctor stands evenly.
Step 6: Finish the Hands and Pockets
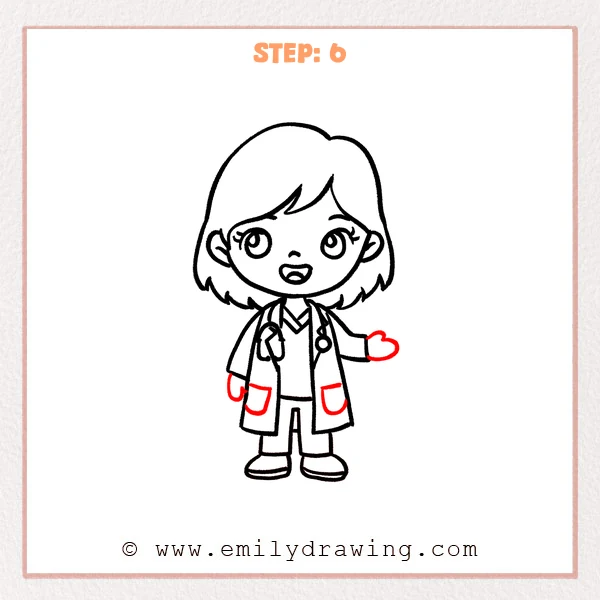
Close both sleeves with simple mitten-shaped hands, including the raised waving hand. Add one rounded pocket to each side of the lab coat.
Pro Tip: Keep the pockets level and safely inside the coat outline.
Step 7: Color in your drawing!
Fun Facts
- Doctors use stethoscopes to listen to sounds made by the heart and lungs.
- A white coat is a widely recognized symbol of medical work.
- Rounded features and large eyes help this doctor look friendly and approachable.
Pin it now, Draw later!
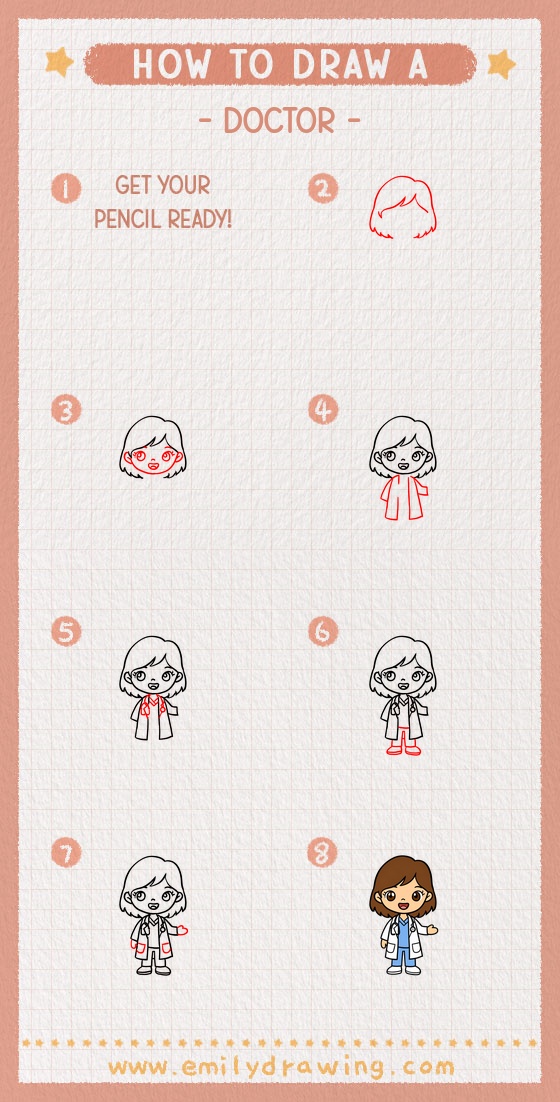
Erase overlapping guide lines and strengthen the hair, clothing, and medical details. Your easy doctor drawing is complete, so add bright colors and a name badge if you like.
Get the FREE Printable Drawing Guide
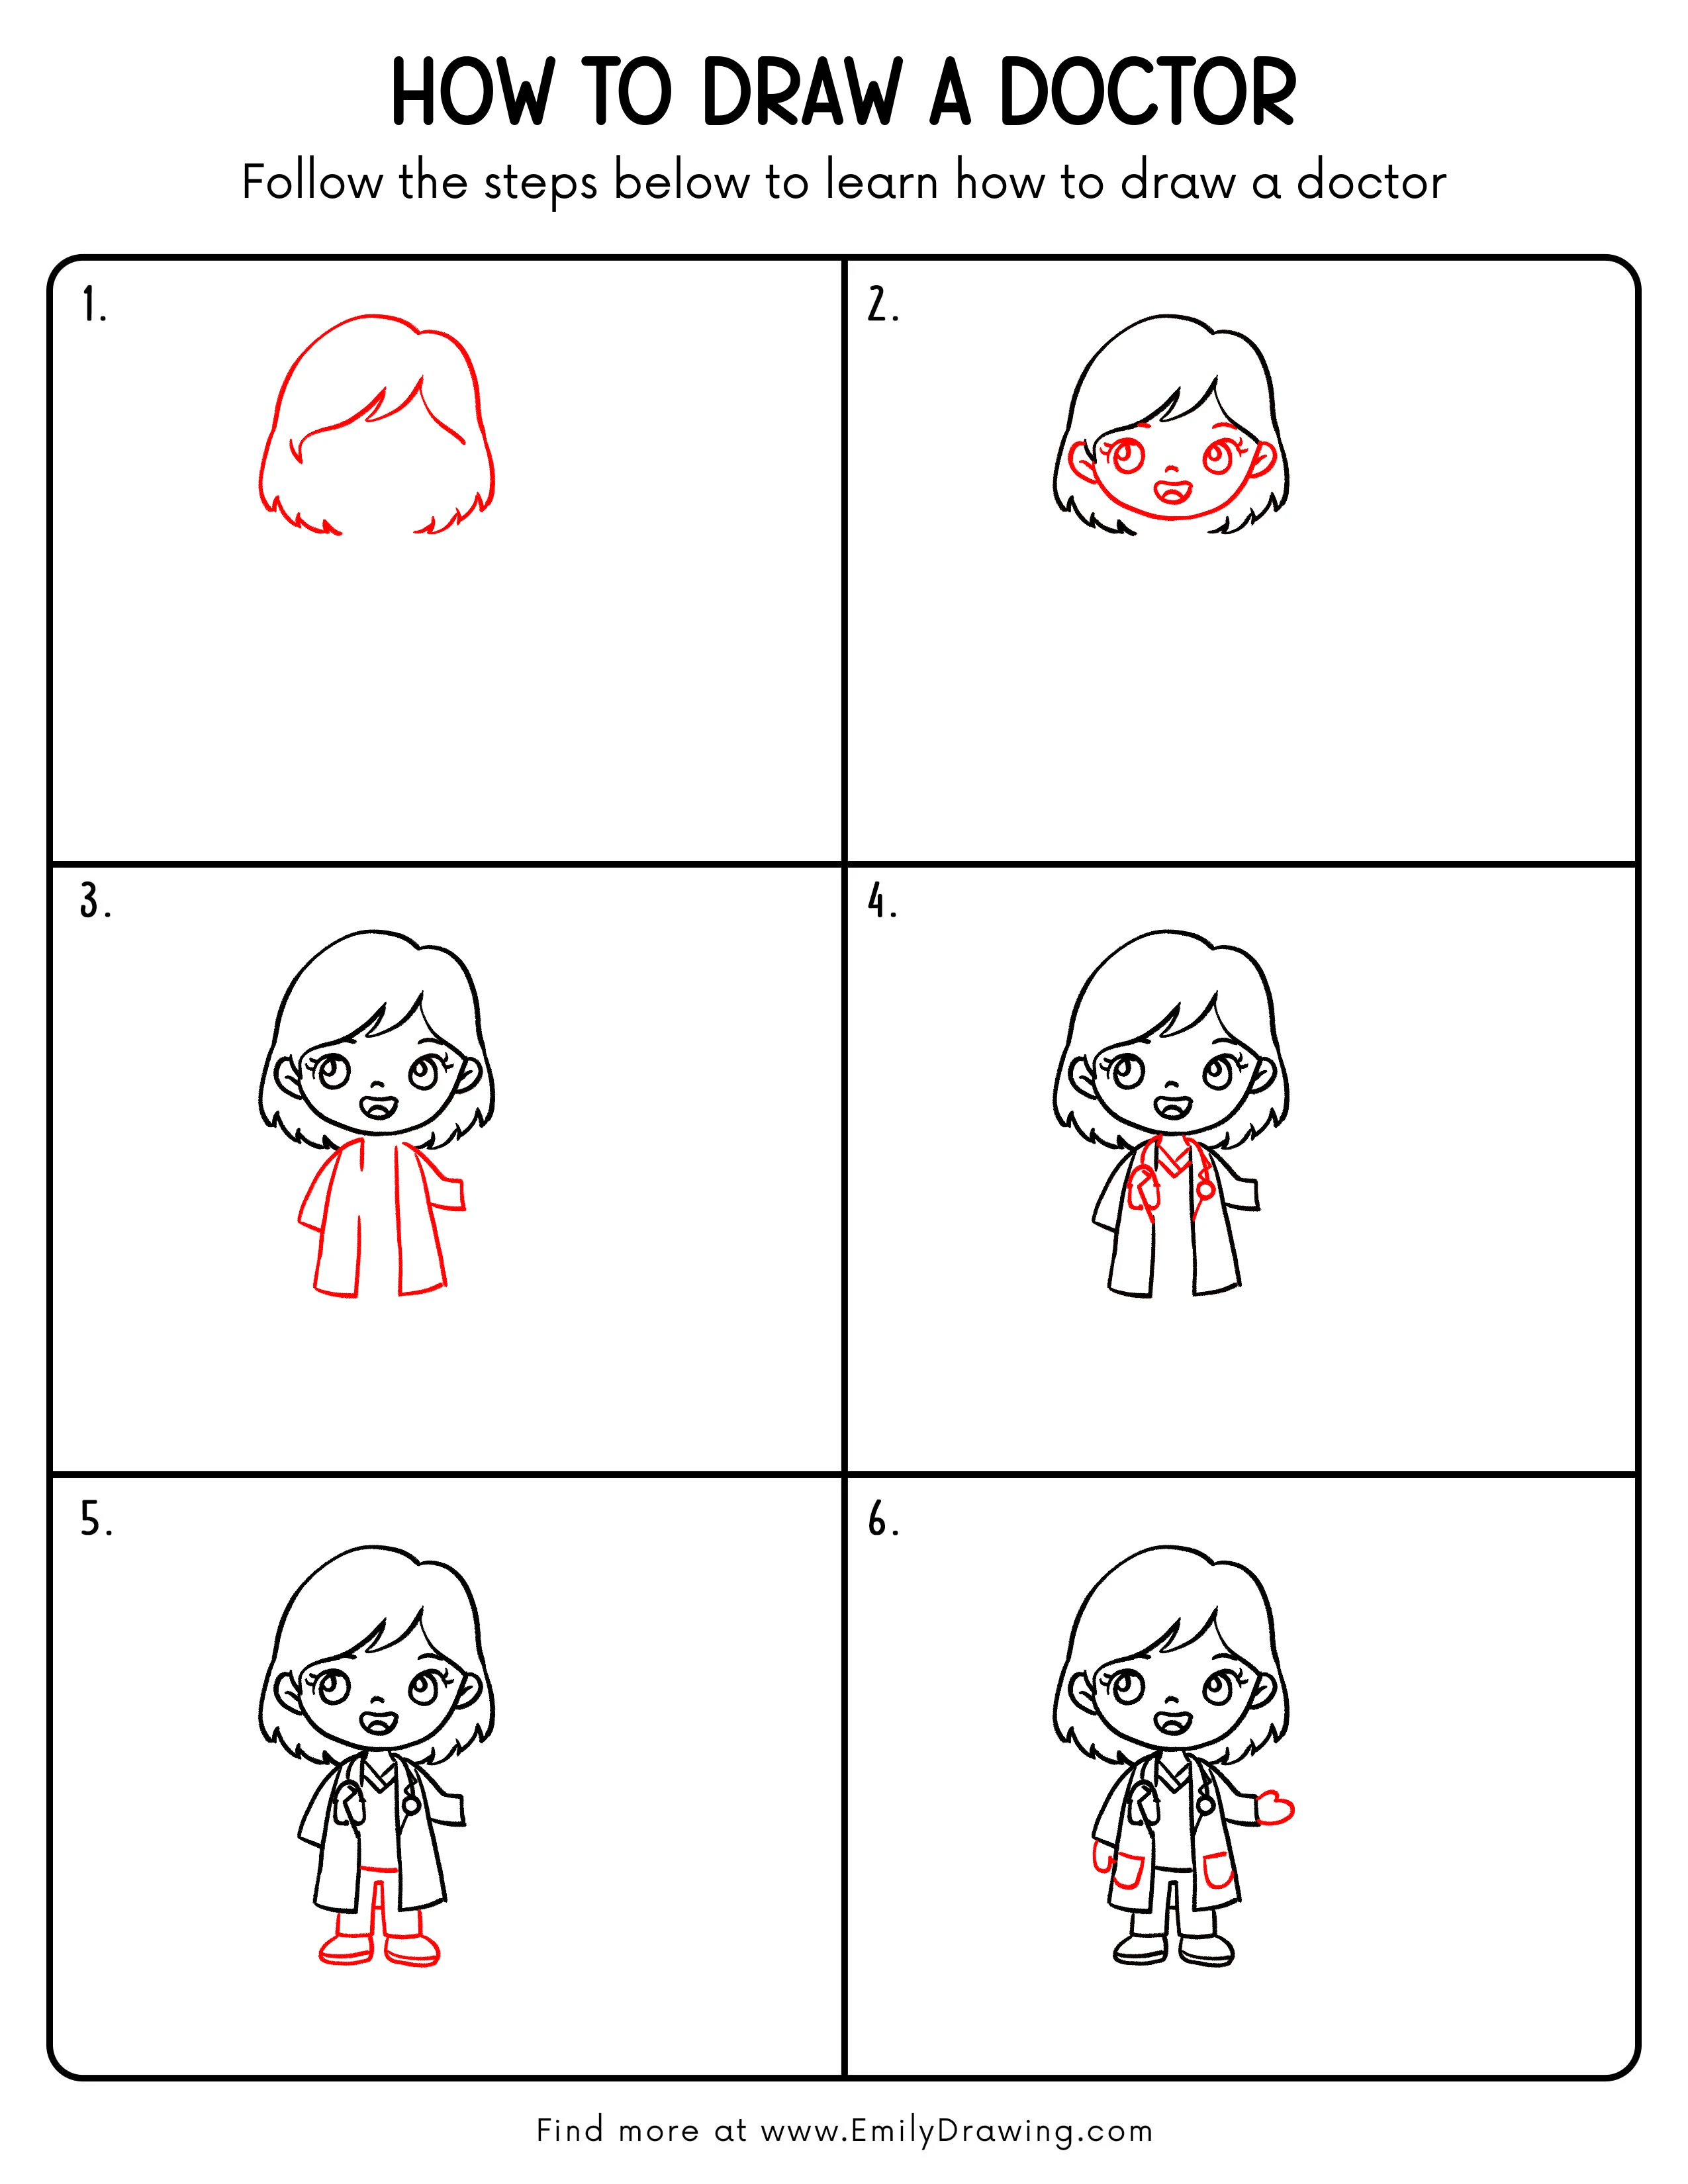
FREE Download Printable Doctor Drawing Tutorial
Frequently Asked Questions
How can I keep the doctor symmetrical?
Lightly mark a vertical centerline before placing the face, coat, and legs.
What colors work well for the uniform?
Try a white coat with colorful scrubs, shoes, and stethoscope details.
Can I change the doctor’s hairstyle?
Yes, adjust the fringe and outer silhouette while keeping the face placement unchanged.