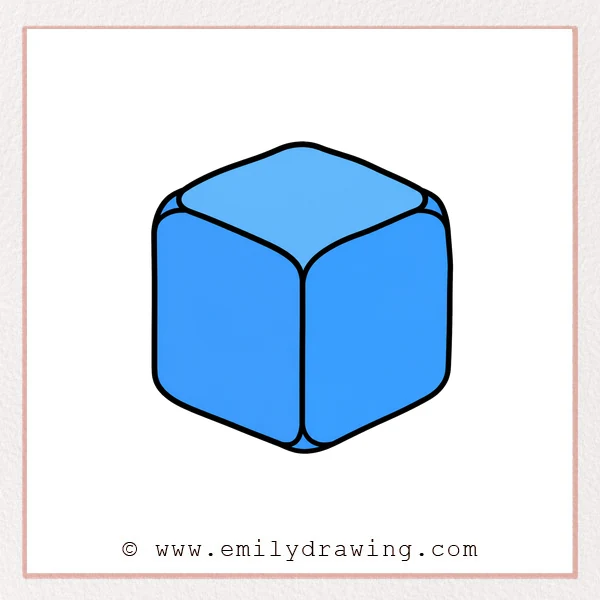
Learn how to draw cube form with clear edges and gently rounded corners. This step by step drawing introduces the top and side faces one section at a time.
What You Will Need
- Drawing paper
- Pencil and eraser
- Ruler and black marker
Here are my RECOMMENDED Art Supplies!
- Crayola Coloring Set (140 Pieces – Mega Value!)
- 24 Colored Crayon Set
- A4 Printer Paper
- Crayola Coloring Pencils
- HP Home Printer with Instant Ink!
Time needed:
24 minutes.
Step-by-Step Drawing Guide
Step 1: Draw the Upper Edges
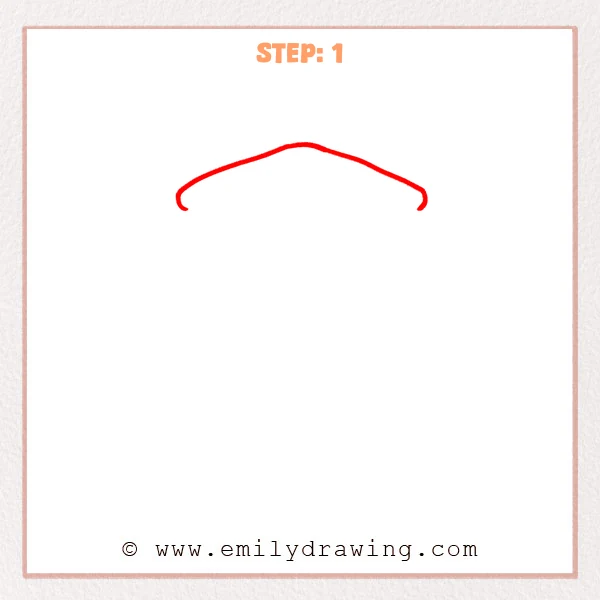
Draw two sloping lines that meet near the top center. Bend each outer end downward with a small rounded corner.
Pro Tip: Keep both sloping sides similar in length for a balanced top.
Step 2: Complete the Top Face
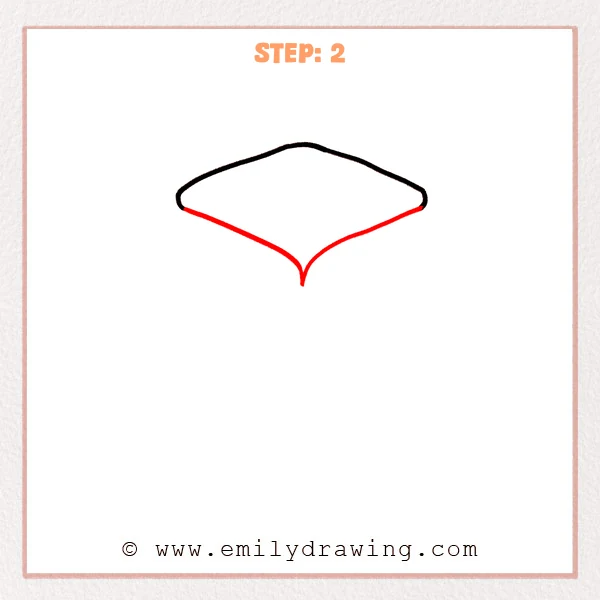
From both outer corners, draw inward curves meeting at a lower point. This closes a broad diamond-shaped top face with softened edges.
Pro Tip: Place the lower point directly beneath the upper meeting point.
Step 3: Begin the Left Face
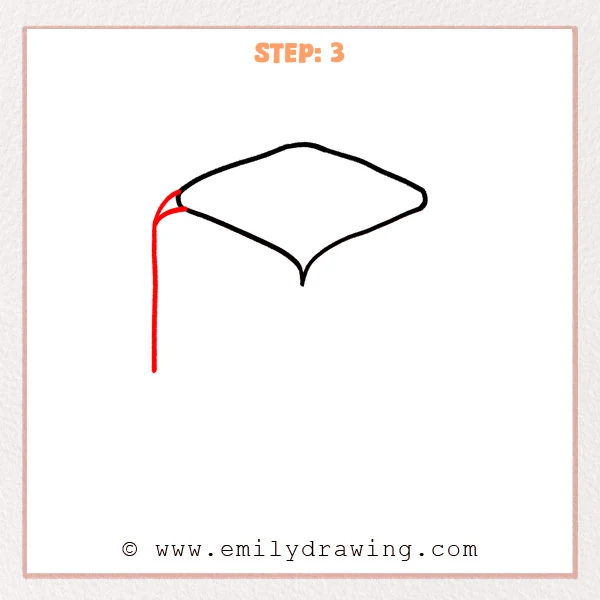
Add a small curved connector at the top-left corner. Extend a long vertical edge downward from that connector.
Pro Tip: Keep the vertical edge straight to make the cube feel solid.
Step 4: Finish the Front-Left Face
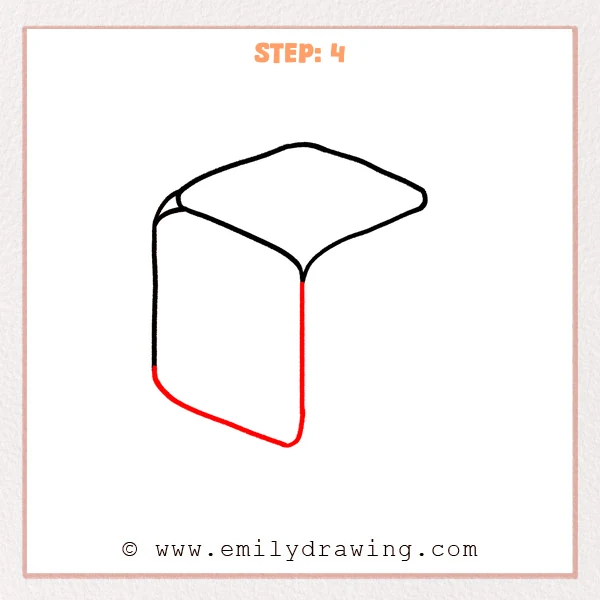
Extend the center point downward to form the front vertical edge. Round the lower-left corner and join it diagonally to the front edge.
Pro Tip: Make the two vertical edges end at matching heights.
Step 5: Add the Right Edge
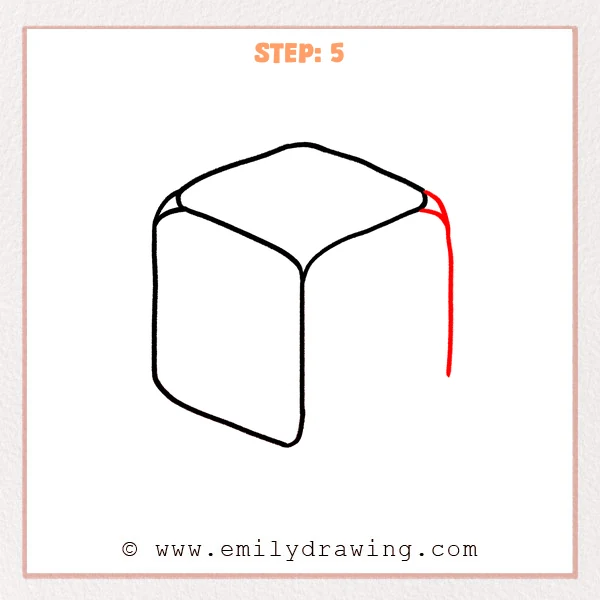
Draw a short connector at the top-right corner. Continue it into a long vertical edge matching the height of the left side.
Pro Tip: Compare all three vertical edges before darkening this new line.
Step 6: Close the Right Face
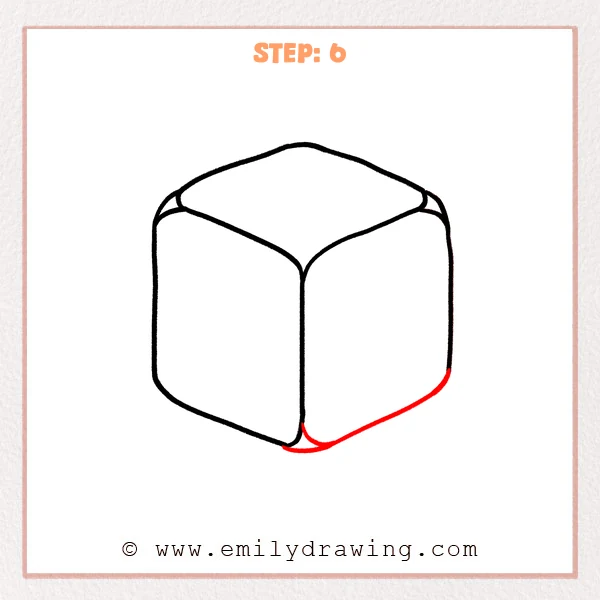
Join the right edge to the bottom center with a rising diagonal. Add a small curved connector beneath the front corner to finish the form.
Pro Tip: Echo the left bottom angle when drawing the final diagonal.
Step 7: Color in your drawing!
Fun Facts
- A cube has six square faces, twelve edges, and eight corners.
- Three faces can be suggested on paper by using angled parallel edges.
- Rounded corners soften the form without changing its basic cube structure.
Pin it now, Draw later!
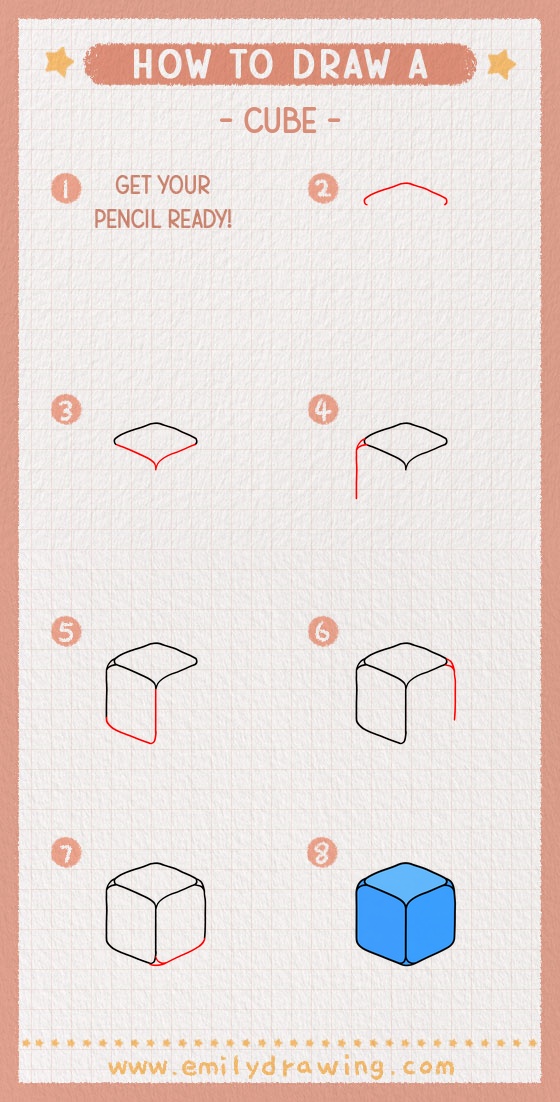
Clean the corners, strengthen the visible edges, and shade each face differently. Your drawing for beginners is complete, so practice another cube at a new angle.
Get the FREE Printable Drawing Guide
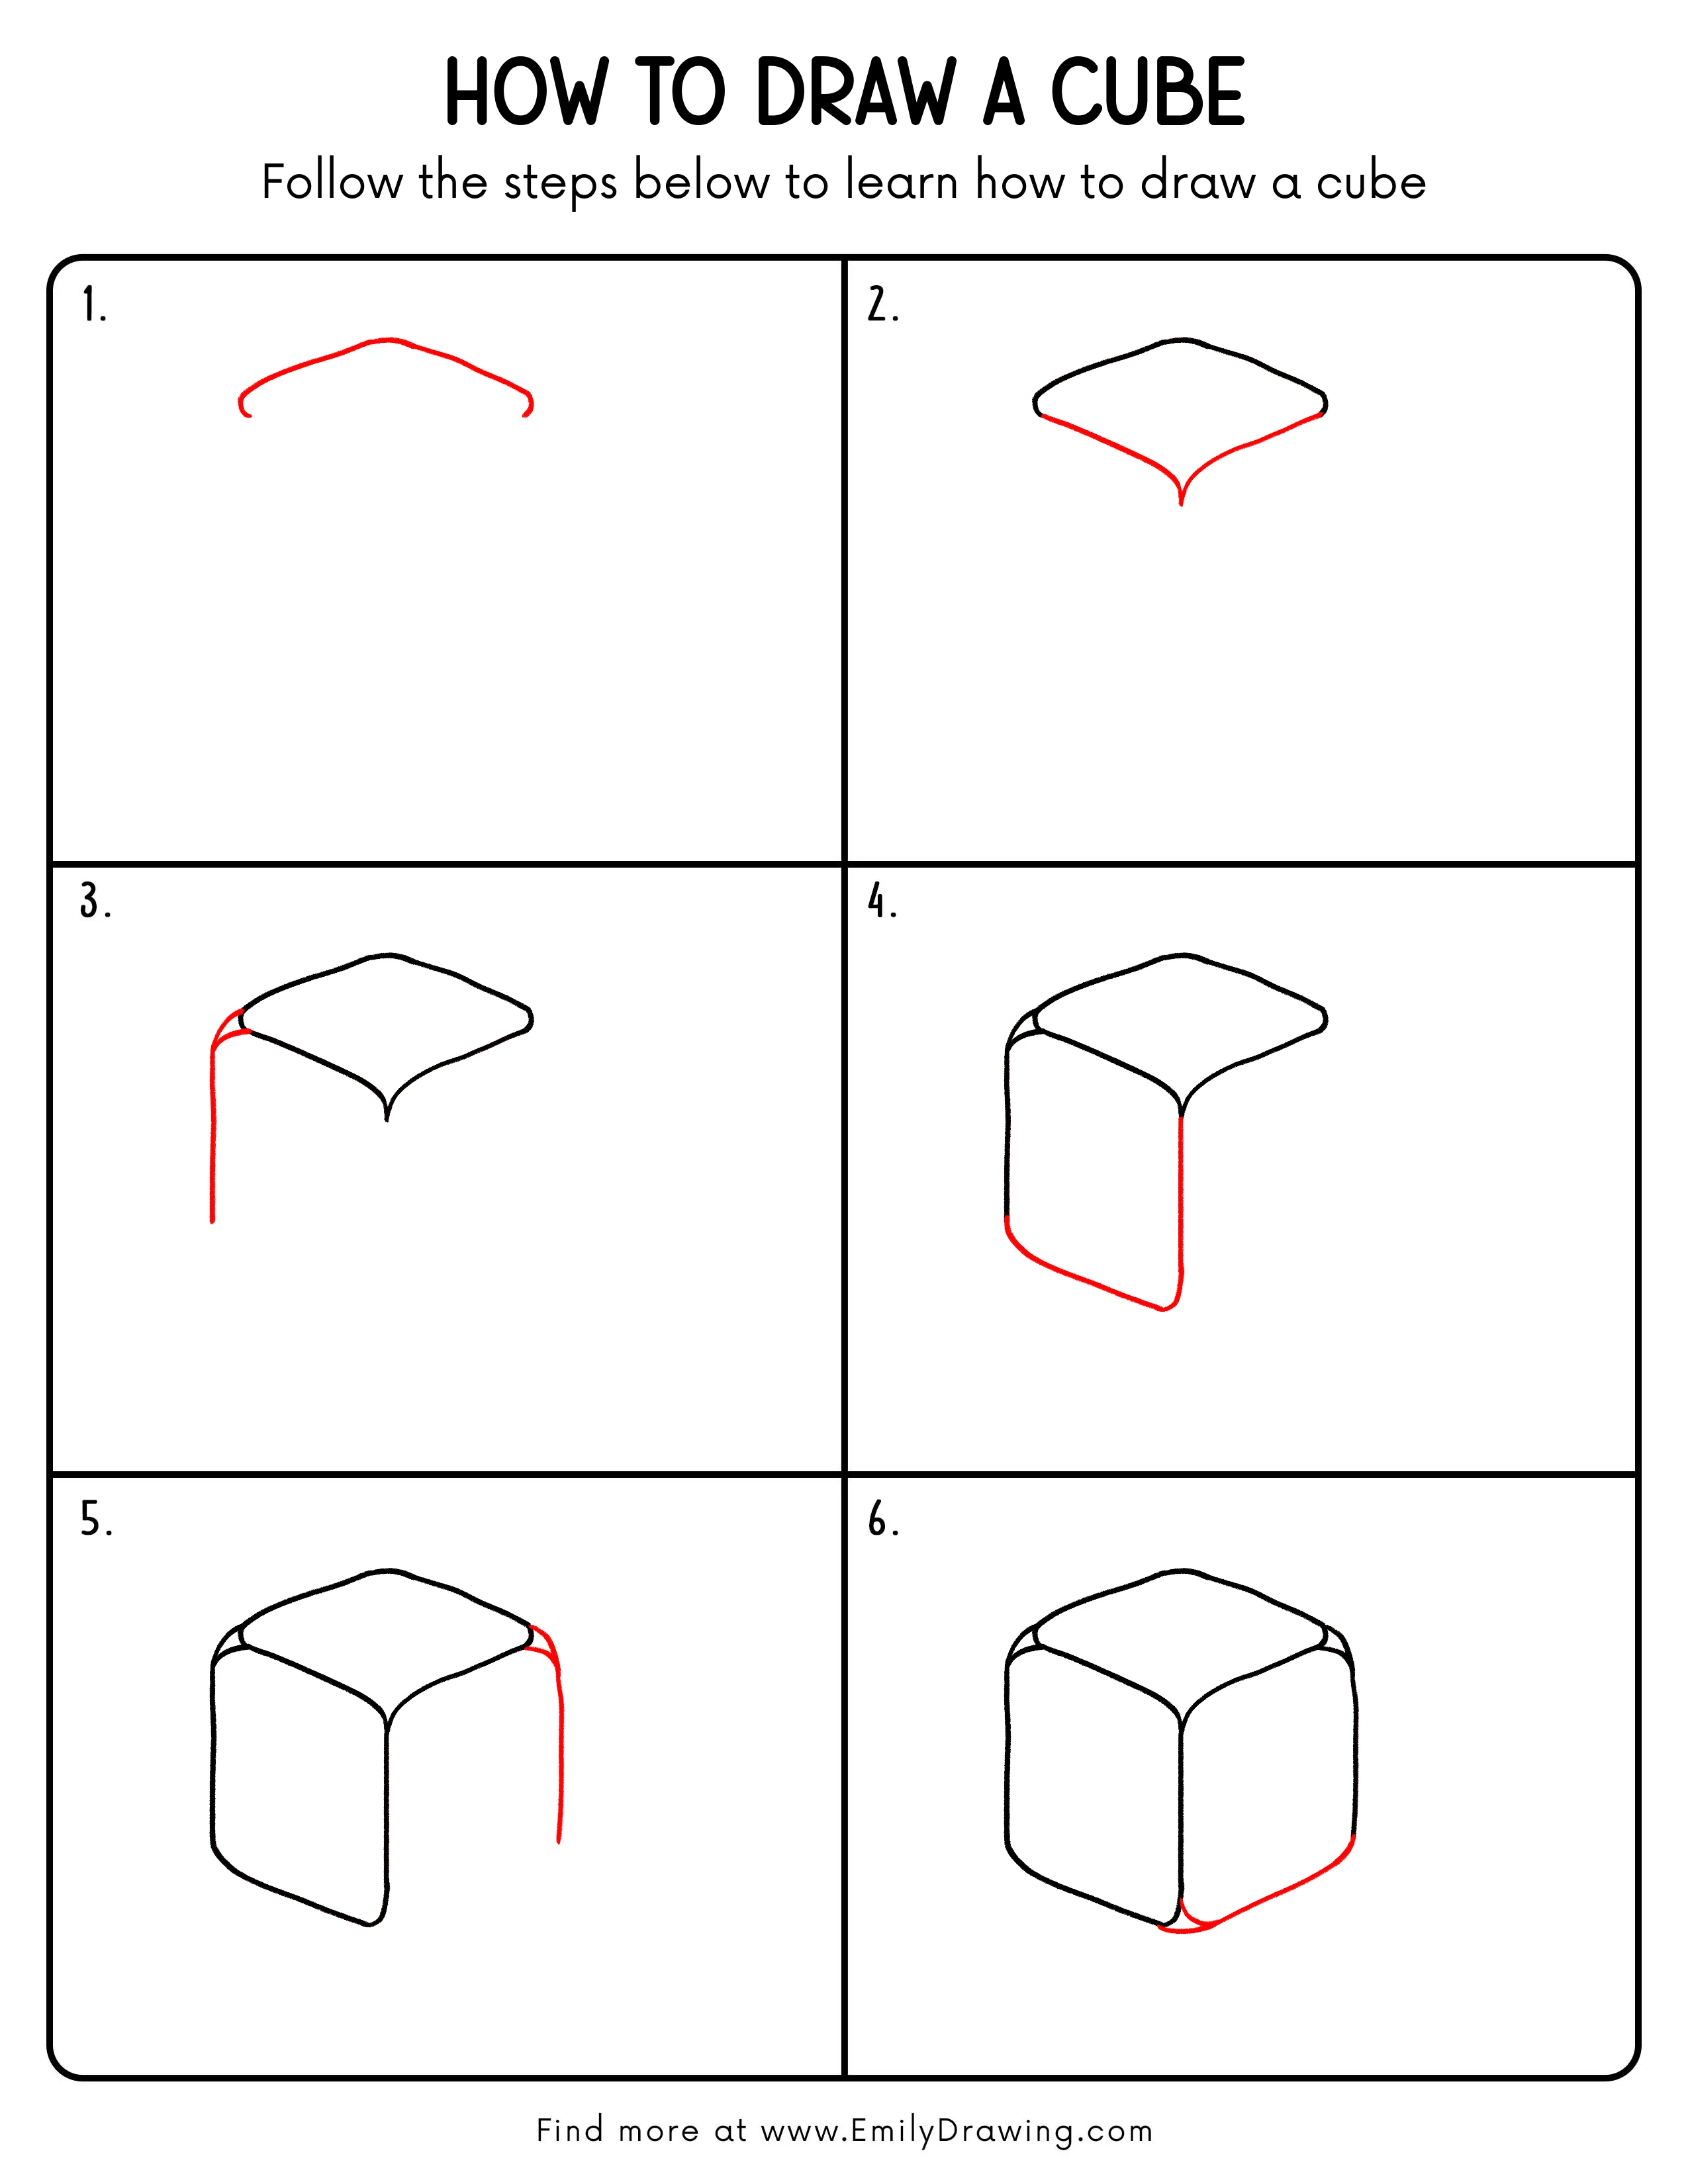
FREE Download Printable Cube Drawing Tutorial
Frequently Asked Questions
Why does my cube look uneven?
Check that corresponding slanted and vertical edges follow consistent directions.
Do I need a ruler for this easy drawing tutorial?
No, but a ruler can help beginners keep the main edges steady.
How should I shade the cube?
Keep the top light, make one side medium, and darken the opposite side.