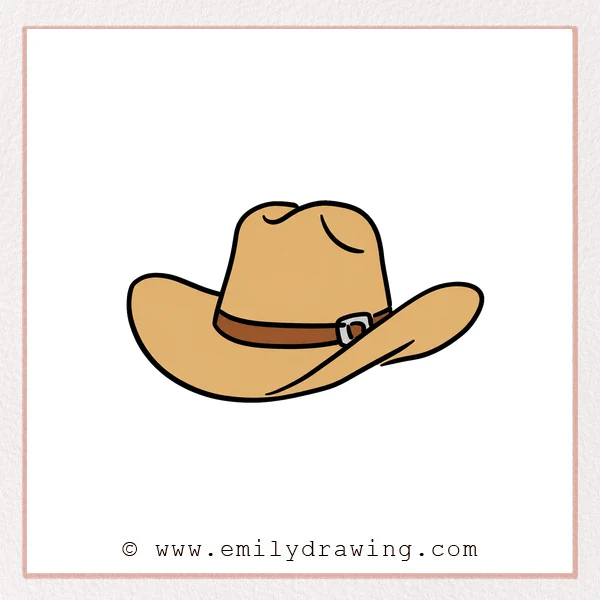
Learn how to draw cowboy hat shapes with sweeping curves and bold proportions. This step by step drawing breaks the classic hat into six beginner-friendly additions.
What You Will Need
- Drawing paper
- Pencil and eraser
- Black marker or colored pencils
Here are my RECOMMENDED Art Supplies!
- Crayola Coloring Set (140 Pieces – Mega Value!)
- 24 Colored Crayon Set
- A4 Printer Paper
- Crayola Coloring Pencils
- HP Home Printer with Instant Ink!
Time needed:
13 minutes.
Step-by-Step Drawing Guide
Step 1: Shape the Crown
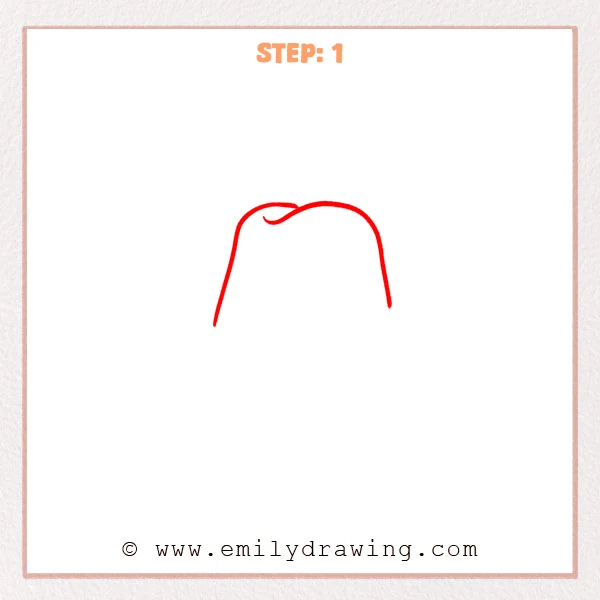
Draw two long sides that lean slightly outward toward the bottom. Join their tops with two rounded humps and a shallow center dip.
Pro Tip: Keep the crown wider at its base than at its top.
Step 2: Add the Hatband
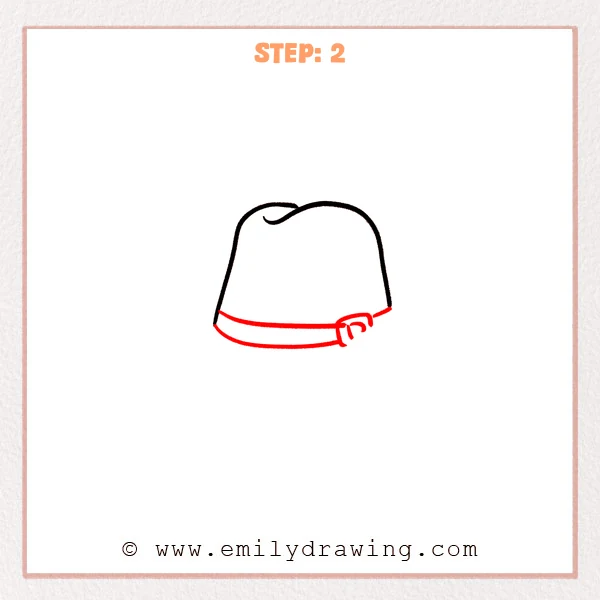
Draw two shallow curved lines across the crown’s lower edge. Add a small overlapping buckle near the right end of the band.
Pro Tip: Follow the crown’s lower curve when placing both band lines.
Step 3: Begin the Left Brim
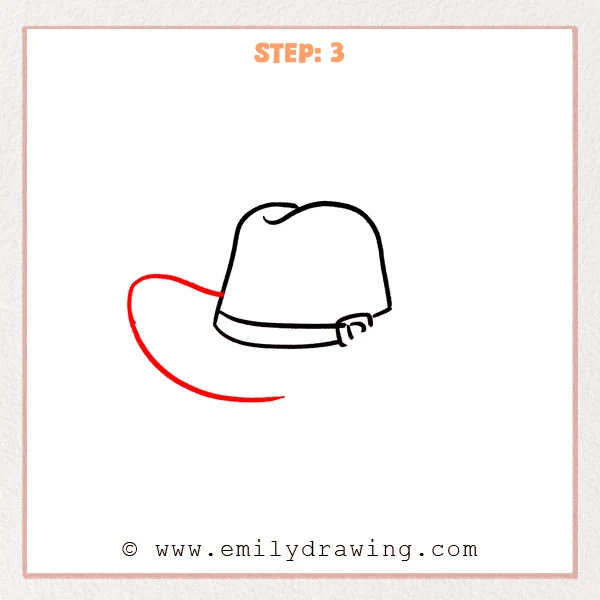
From the crown’s lower-left side, sweep a broad curve outward and downward. Continue it beneath the crown, stopping near the lower center.
Pro Tip: Use one loose arm movement to make the brim flow smoothly.
Step 4: Extend the Lower Brim
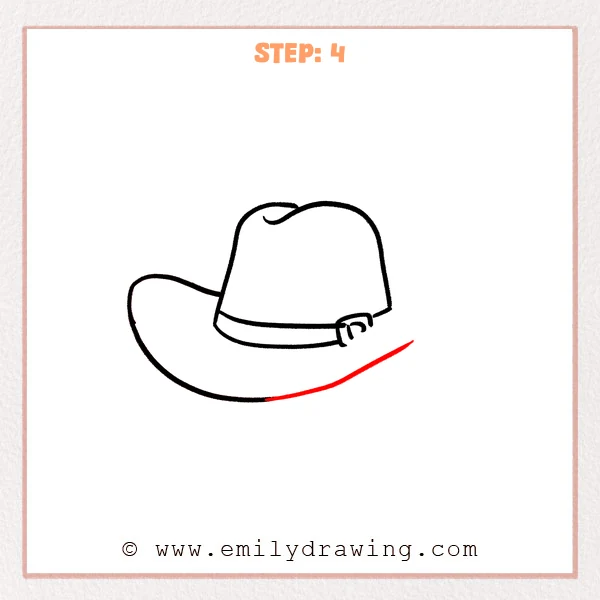
Continue the lower brim from the center toward the right. Lift the line gradually so it points upward beyond the buckle.
Pro Tip: Keep this extension shallower than the rounded left side.
Step 5: Complete the Raised Brim
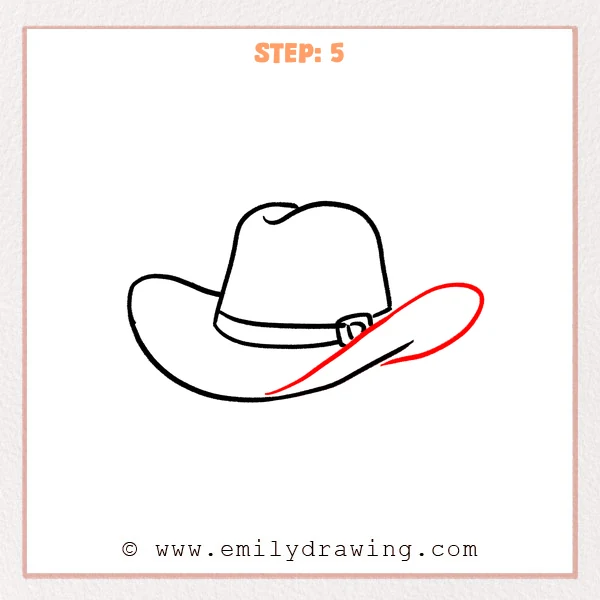
Draw a long loop from the crown to form the raised right edge. Curve it around and reconnect near the lower brim line.
Pro Tip: Leave a narrow pointed fold where the two right curves meet.
Step 6: Add Crease Details
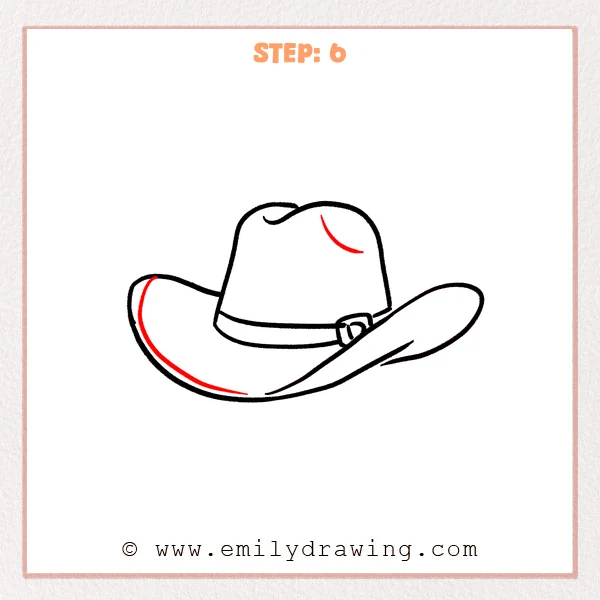
Add a curved accent inside the left brim. Draw another soft crease high on the crown to suggest its bend.
Pro Tip: Keep both detail lines short so the silhouette remains dominant.
Step 7: Color in your drawing!
Fun Facts
- Wide hat brims help shade a wearer’s face and neck from sunlight.
- Many cowboy hat crowns are shaped with distinctive dents or creases.
- Sweeping brim lines provide useful practice for confident, continuous curves.
Pin it now, Draw later!
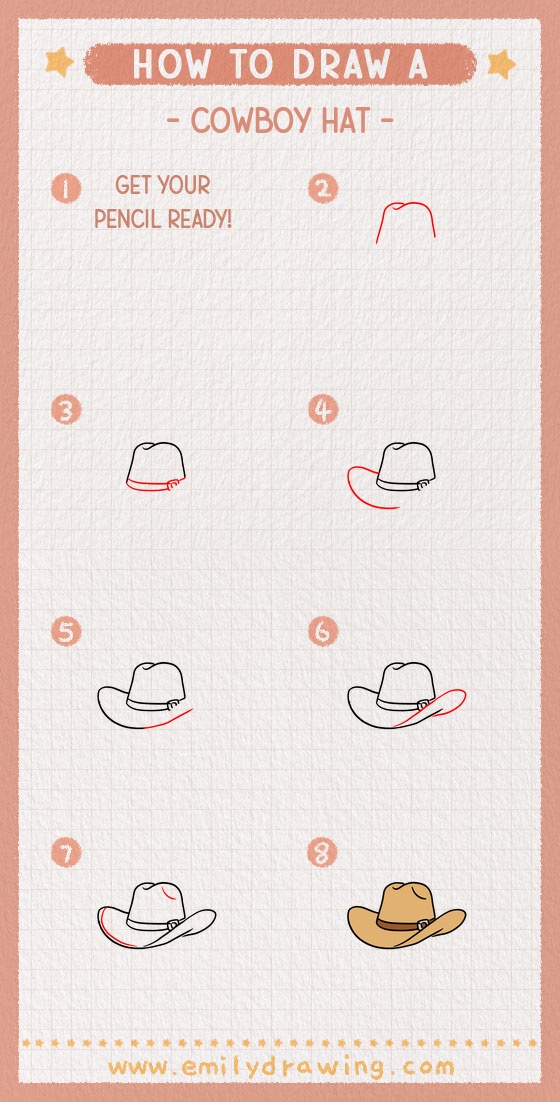
Clean the sketch, strengthen the outline, and color the band separately. Your easy drawing tutorial is complete, so personalize the buckle or add texture.
Get the FREE Printable Drawing Guide
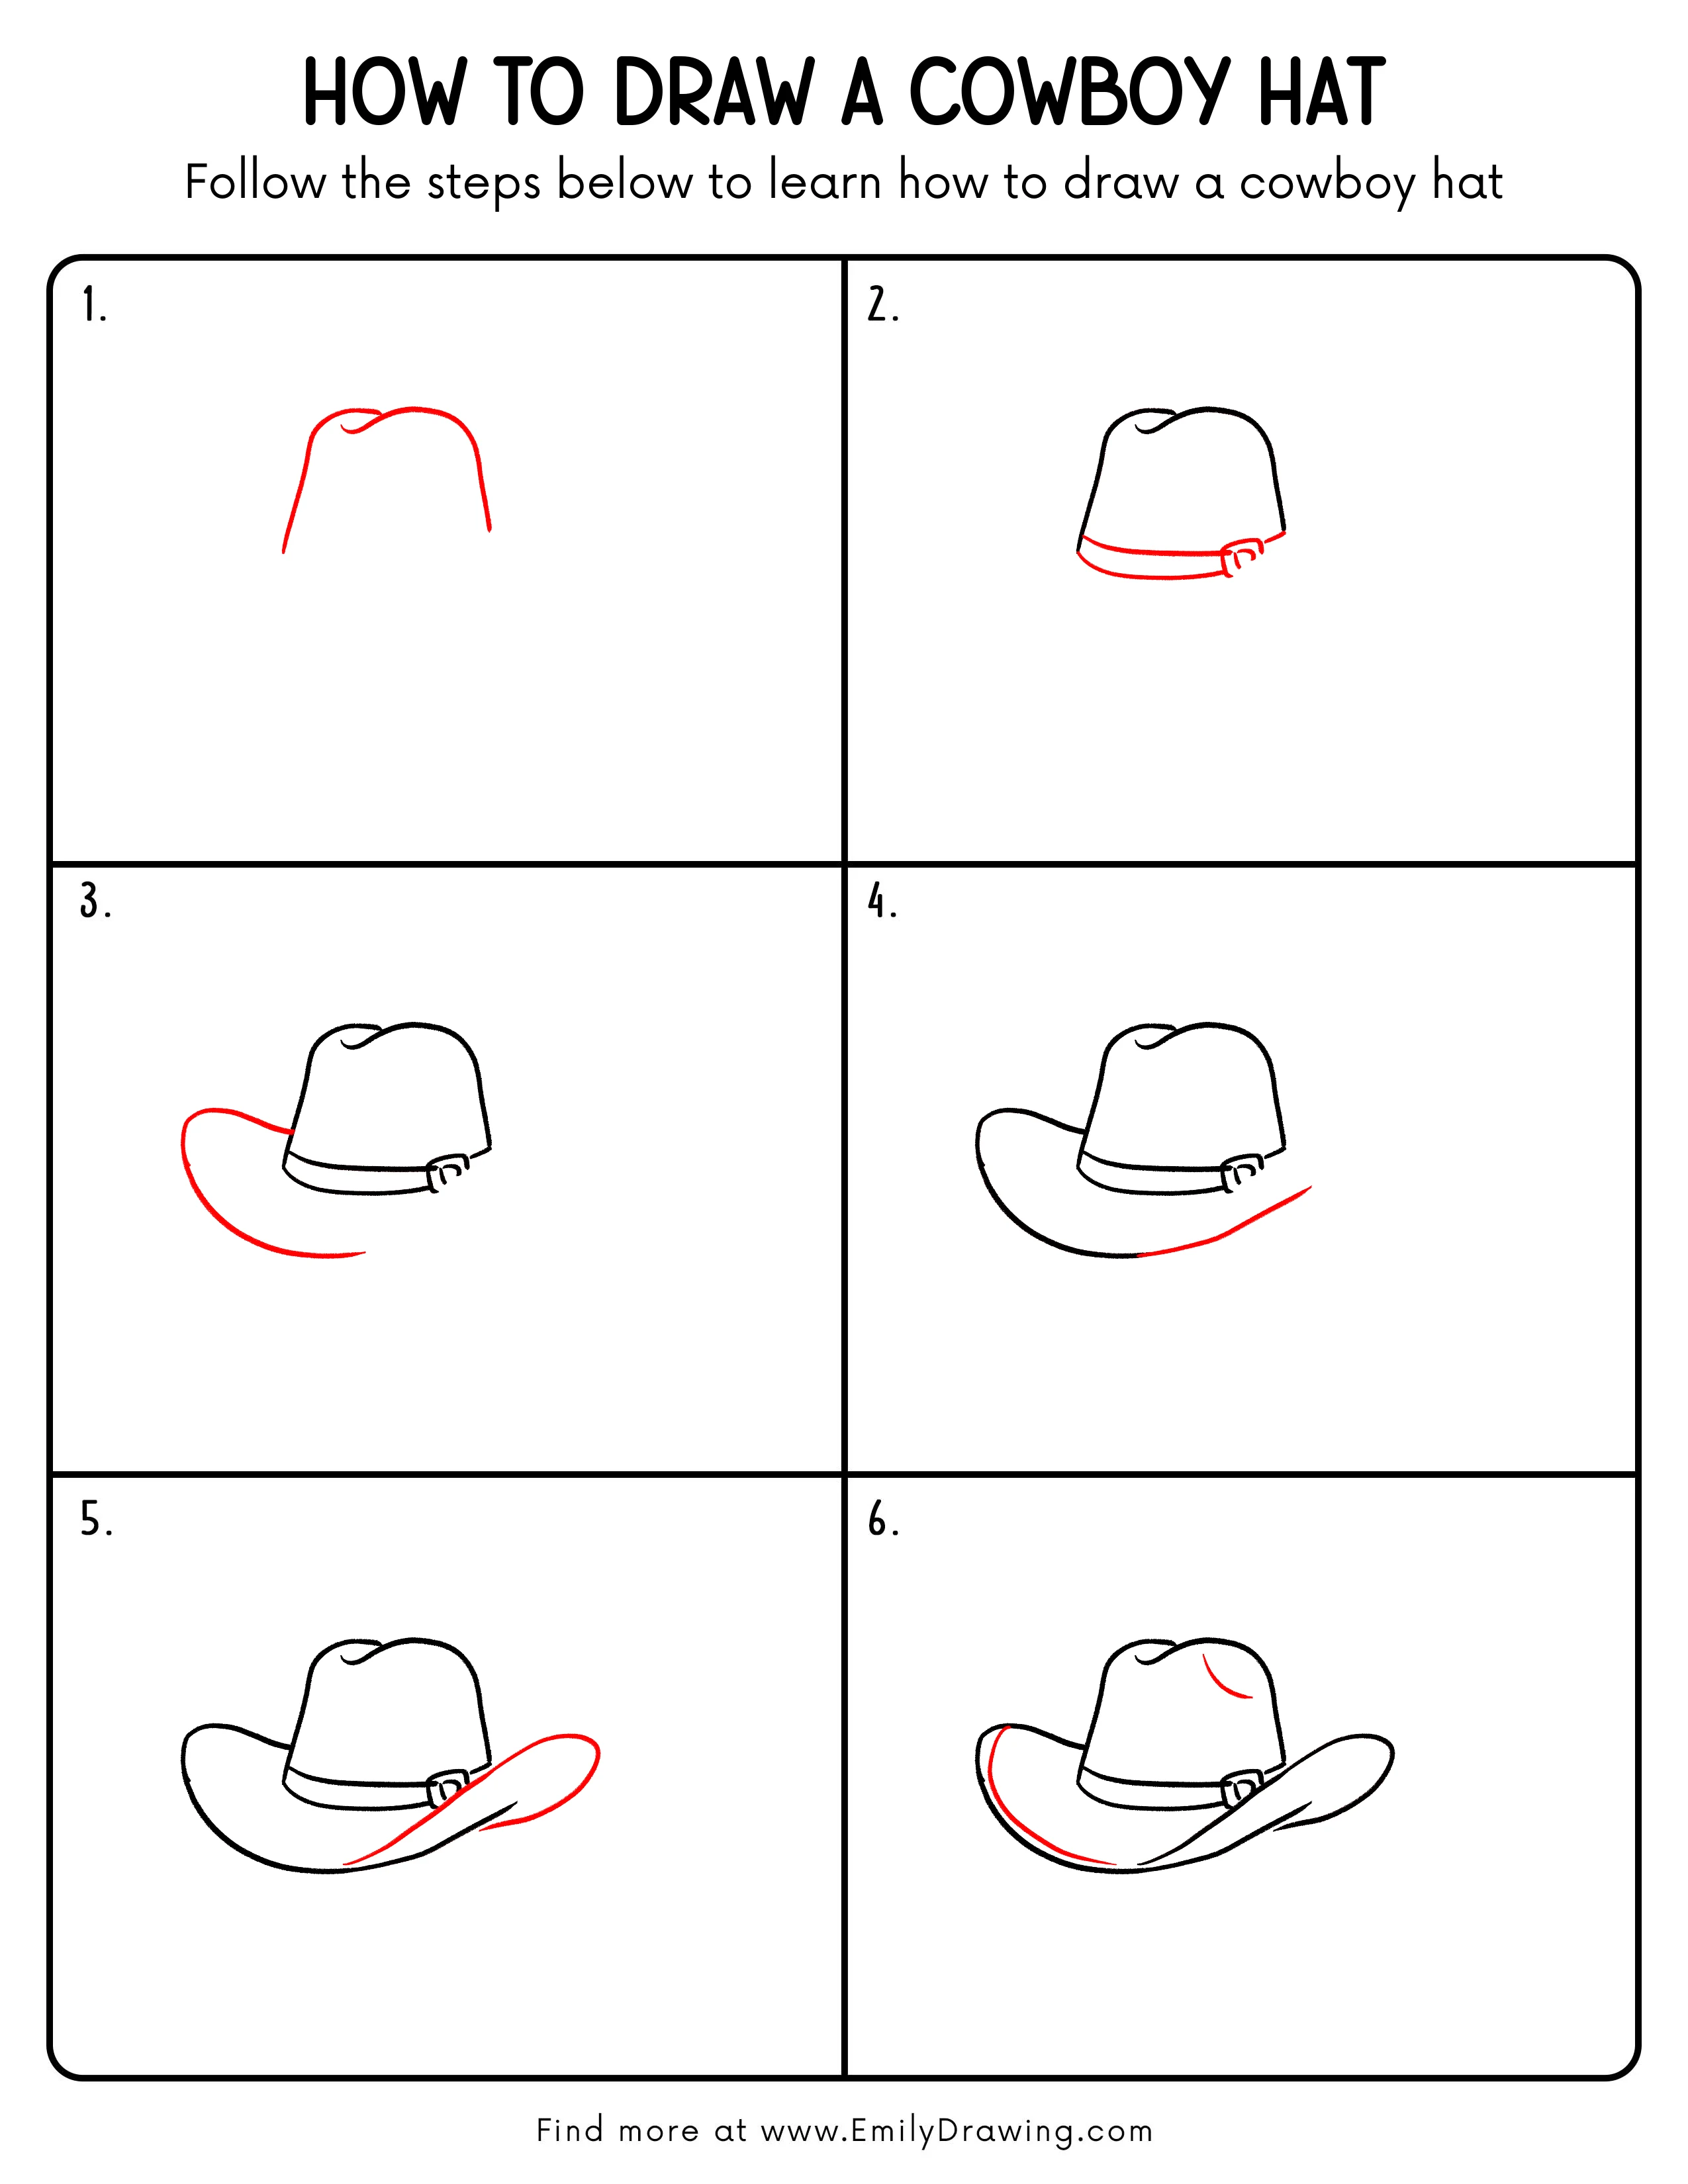
FREE Download Printable Cowboy Hat Drawing Tutorial
Frequently Asked Questions
How can I make the brim look wider?
Extend both sides farther from the crown while keeping their curves smooth.
Why does my crown look uneven?
Lightly compare the side heights before darkening the two top humps.
Can I decorate this drawing for beginners?
Yes, add stitching, a star buckle, or a patterned hatband.