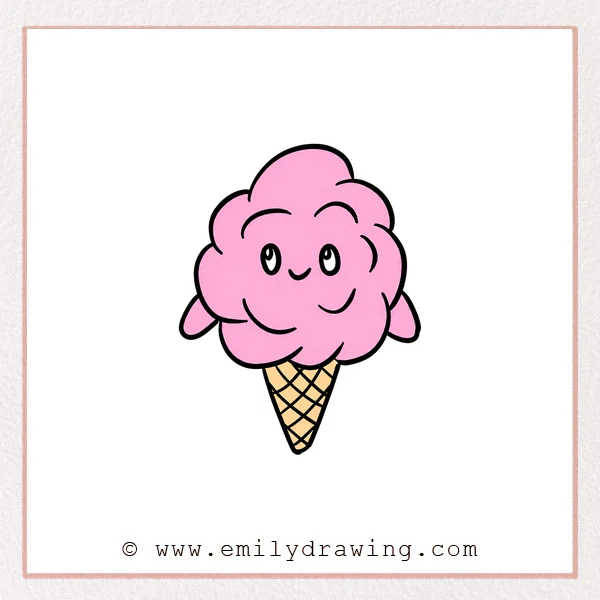
Learn how to draw cotton candy using soft bumps and playful curves. This easy drawing tutorial turns simple lines into a sweet character for beginners.
What You Will Need
- Drawing paper
- Pencil and eraser
- Black marker or colored pencils
Here are my RECOMMENDED Art Supplies!
- Crayola Coloring Set (140 Pieces – Mega Value!)
- 24 Colored Crayon Set
- A4 Printer Paper
- Crayola Coloring Pencils
- HP Home Printer with Instant Ink!
Time needed:
28 minutes.
Step-by-Step Drawing Guide
Step 1: Start the Fluffy Outline
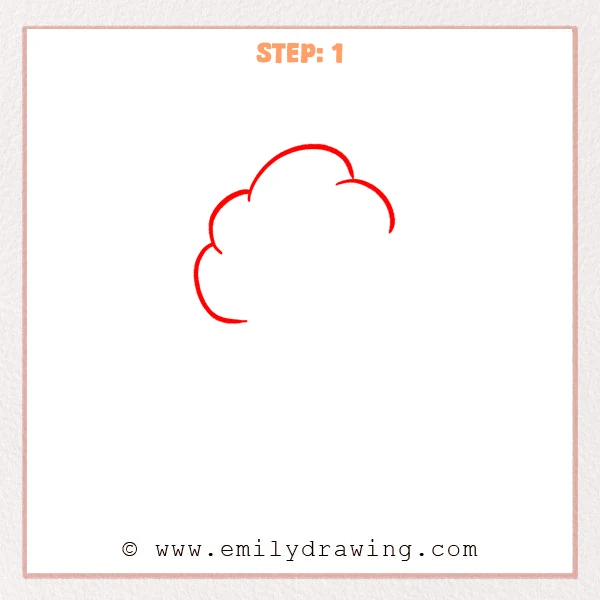
Draw several large connected curves across the top and left side. Leave clear openings along the right and lower edges.
Pro Tip: Change each curve’s size slightly for a naturally fluffy shape.
Step 2: Add Inner Fluff Lines
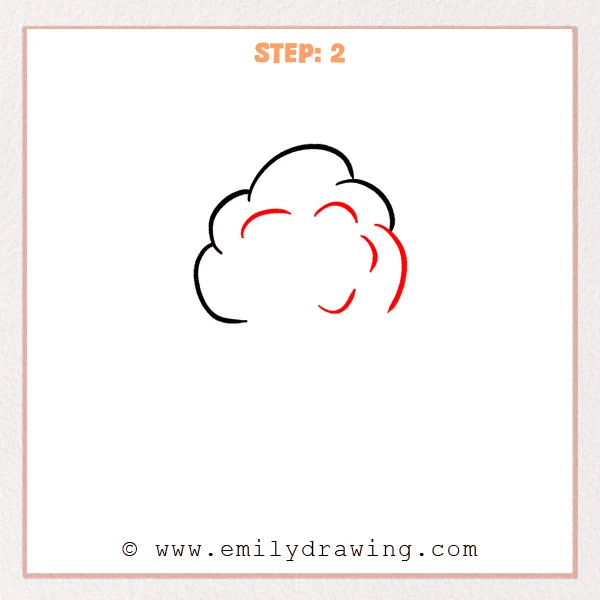
Continue the outer curve farther down the right side. Add four short curved marks inside to suggest overlapping puffs.
Pro Tip: Point each inner curve toward the center of the cotton candy.
Step 3: Close the Lower Edge
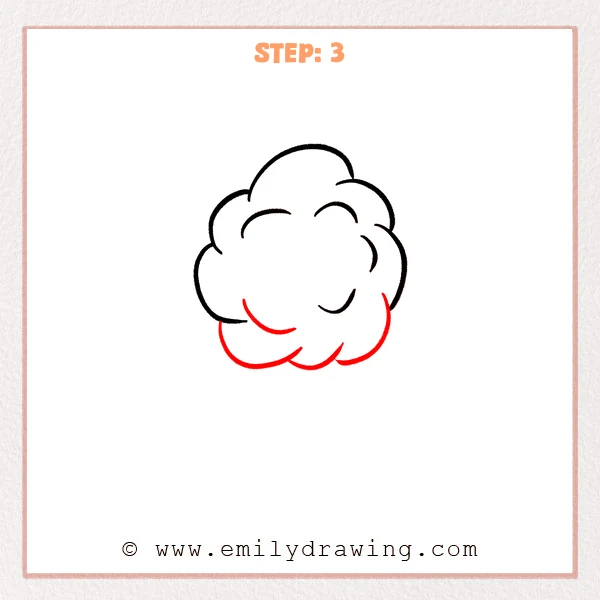
Complete the bottom with three broad, connected scallops. Add another curved crease near the lower-left portion of the fluff.
Pro Tip: Keep the bottom bumps rounded rather than perfectly even.
Step 4: Draw Side Puffs
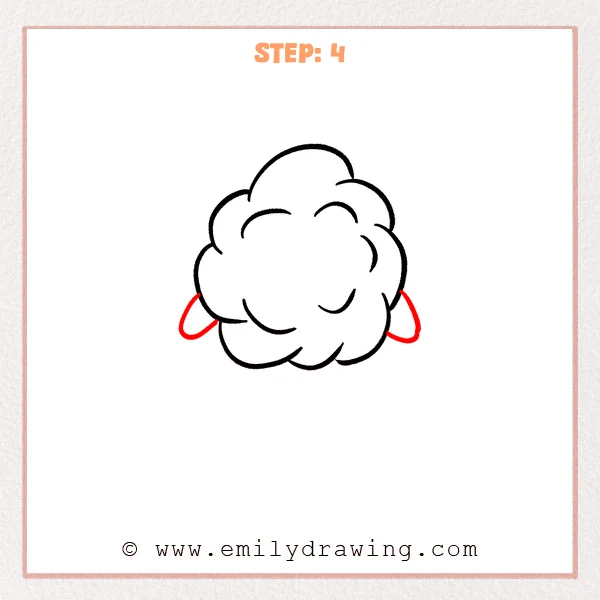
Add a small teardrop-shaped puff on each lower side. Tuck both shapes partly behind the main cotton candy outline.
Pro Tip: Make the side puffs similar in size for a balanced silhouette.
Step 5: Add the Waffle Cone
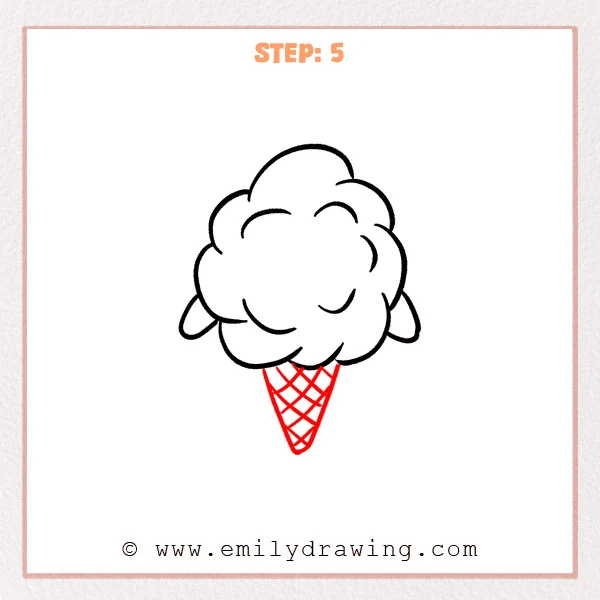
Draw a narrow cone tapering beneath the center of the fluff. Fill it with crossing diagonal lines to form a diamond pattern.
Pro Tip: Narrow the cone gradually so its point sits below the center.
Step 6: Create a Friendly Face
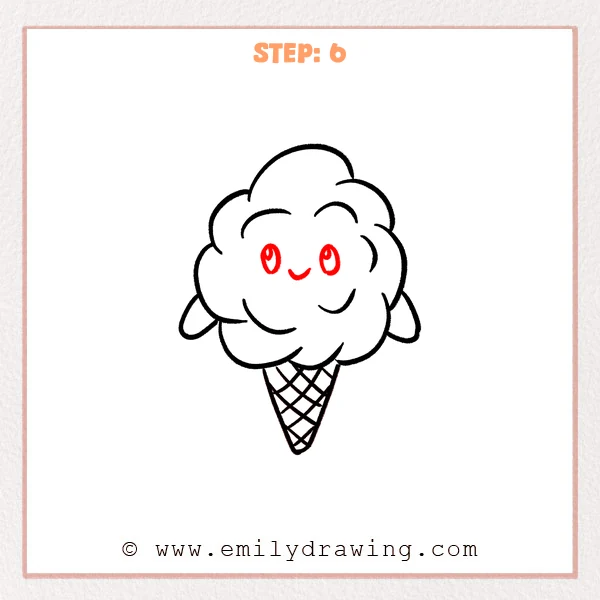
Draw two tall oval eyes with small highlight shapes. Place a short upward-curving smile between and slightly below them.
Pro Tip: Keep both eye highlights on the same side for consistent lighting.
Step 7: Color in your drawing!
Fun Facts
- Cotton candy is made when spun sugar forms many very thin strands.
- Its cloudlike silhouette is excellent practice for drawing connected curves.
- A repeating diamond pattern quickly makes a plain cone look textured.
Pin it now, Draw later!
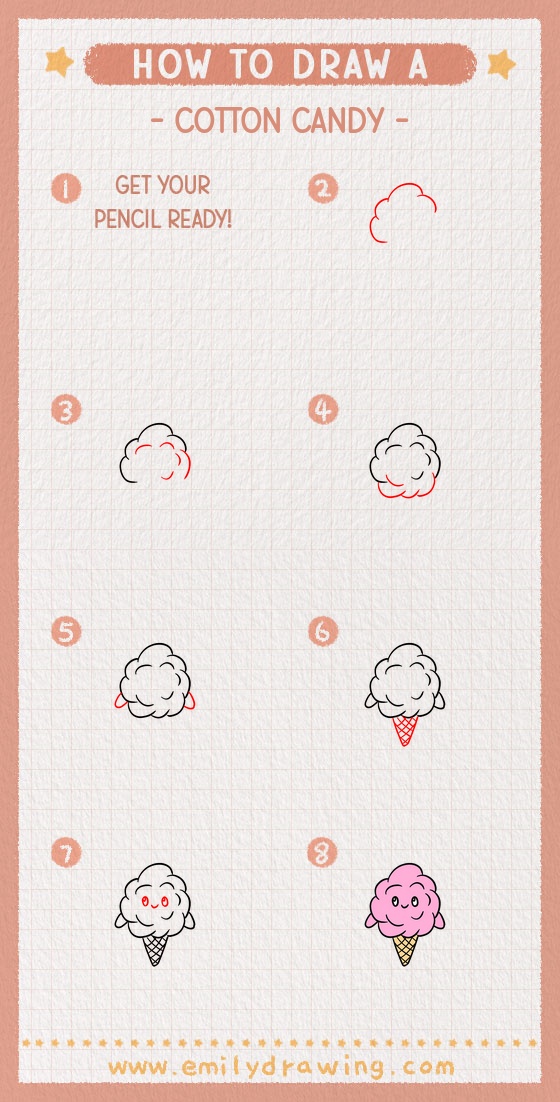
Darken the final lines, erase extra marks, and choose your favorite candy colors. Your step by step drawing is finished, so add a cheerful background.
Get the FREE Printable Drawing Guide
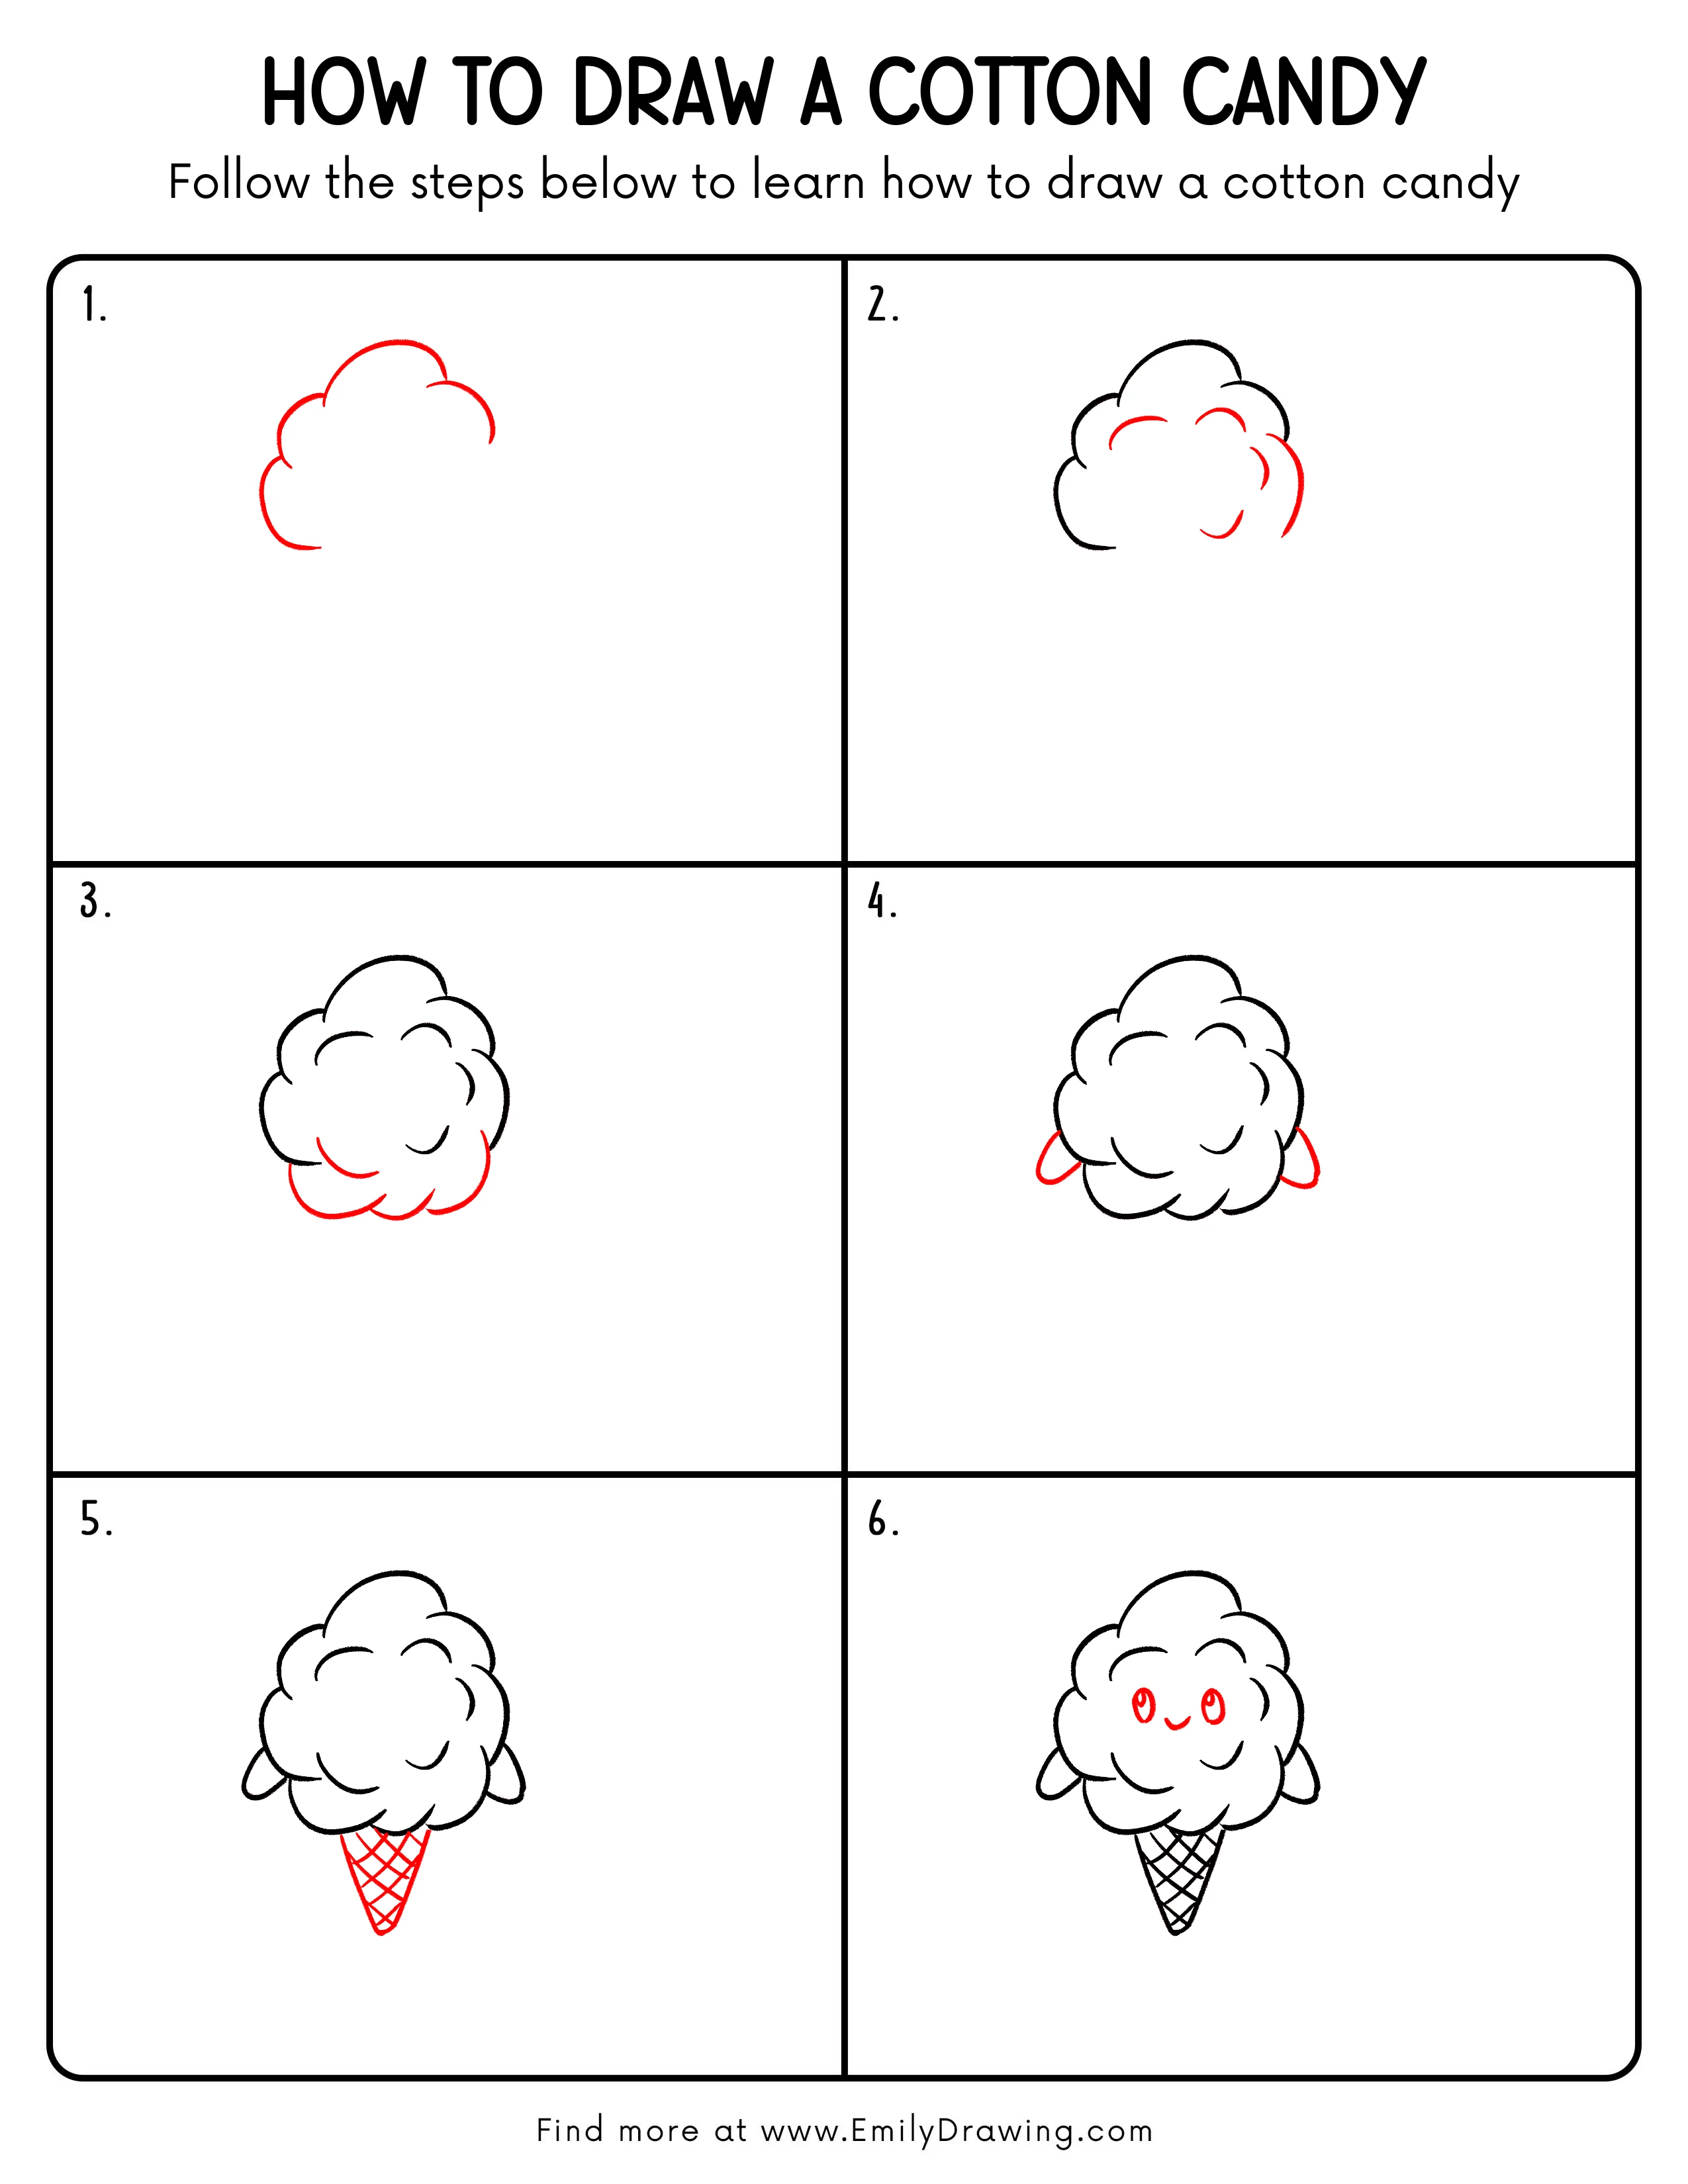
FREE Download Printable Cotton Candy Drawing Tutorial
Frequently Asked Questions
How do I keep the cotton candy looking fluffy?
Use rounded curves of different sizes and avoid sharp corners in the outline.
Can I draw it without a face?
Yes, simply skip the final facial features for a classic cotton candy drawing.
Which colors suit this drawing for beginners?
Pastel pink, blue, or lavender work well with a golden-brown cone.