Learn how to draw cottage scenery with friendly curves and simple rounded shapes. This drawing for beginners builds a cozy little home in six manageable steps.
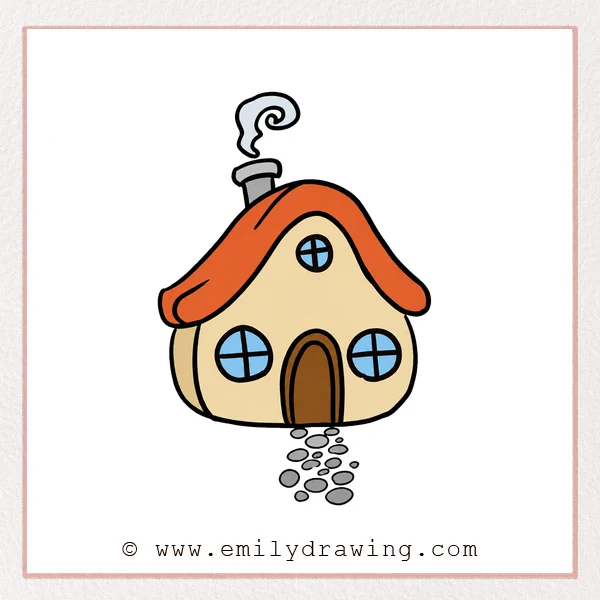
What You Will Need
- Drawing paper
- Pencil and eraser
- Black marker or colored pencils
Here are my RECOMMENDED Art Supplies!
- Crayola Coloring Set (140 Pieces – Mega Value!)
- 24 Colored Crayon Set
- A4 Printer Paper
- Crayola Coloring Pencils
- HP Home Printer with Instant Ink!
Time needed:
27 minutes.
Step-by-Step Drawing Guide
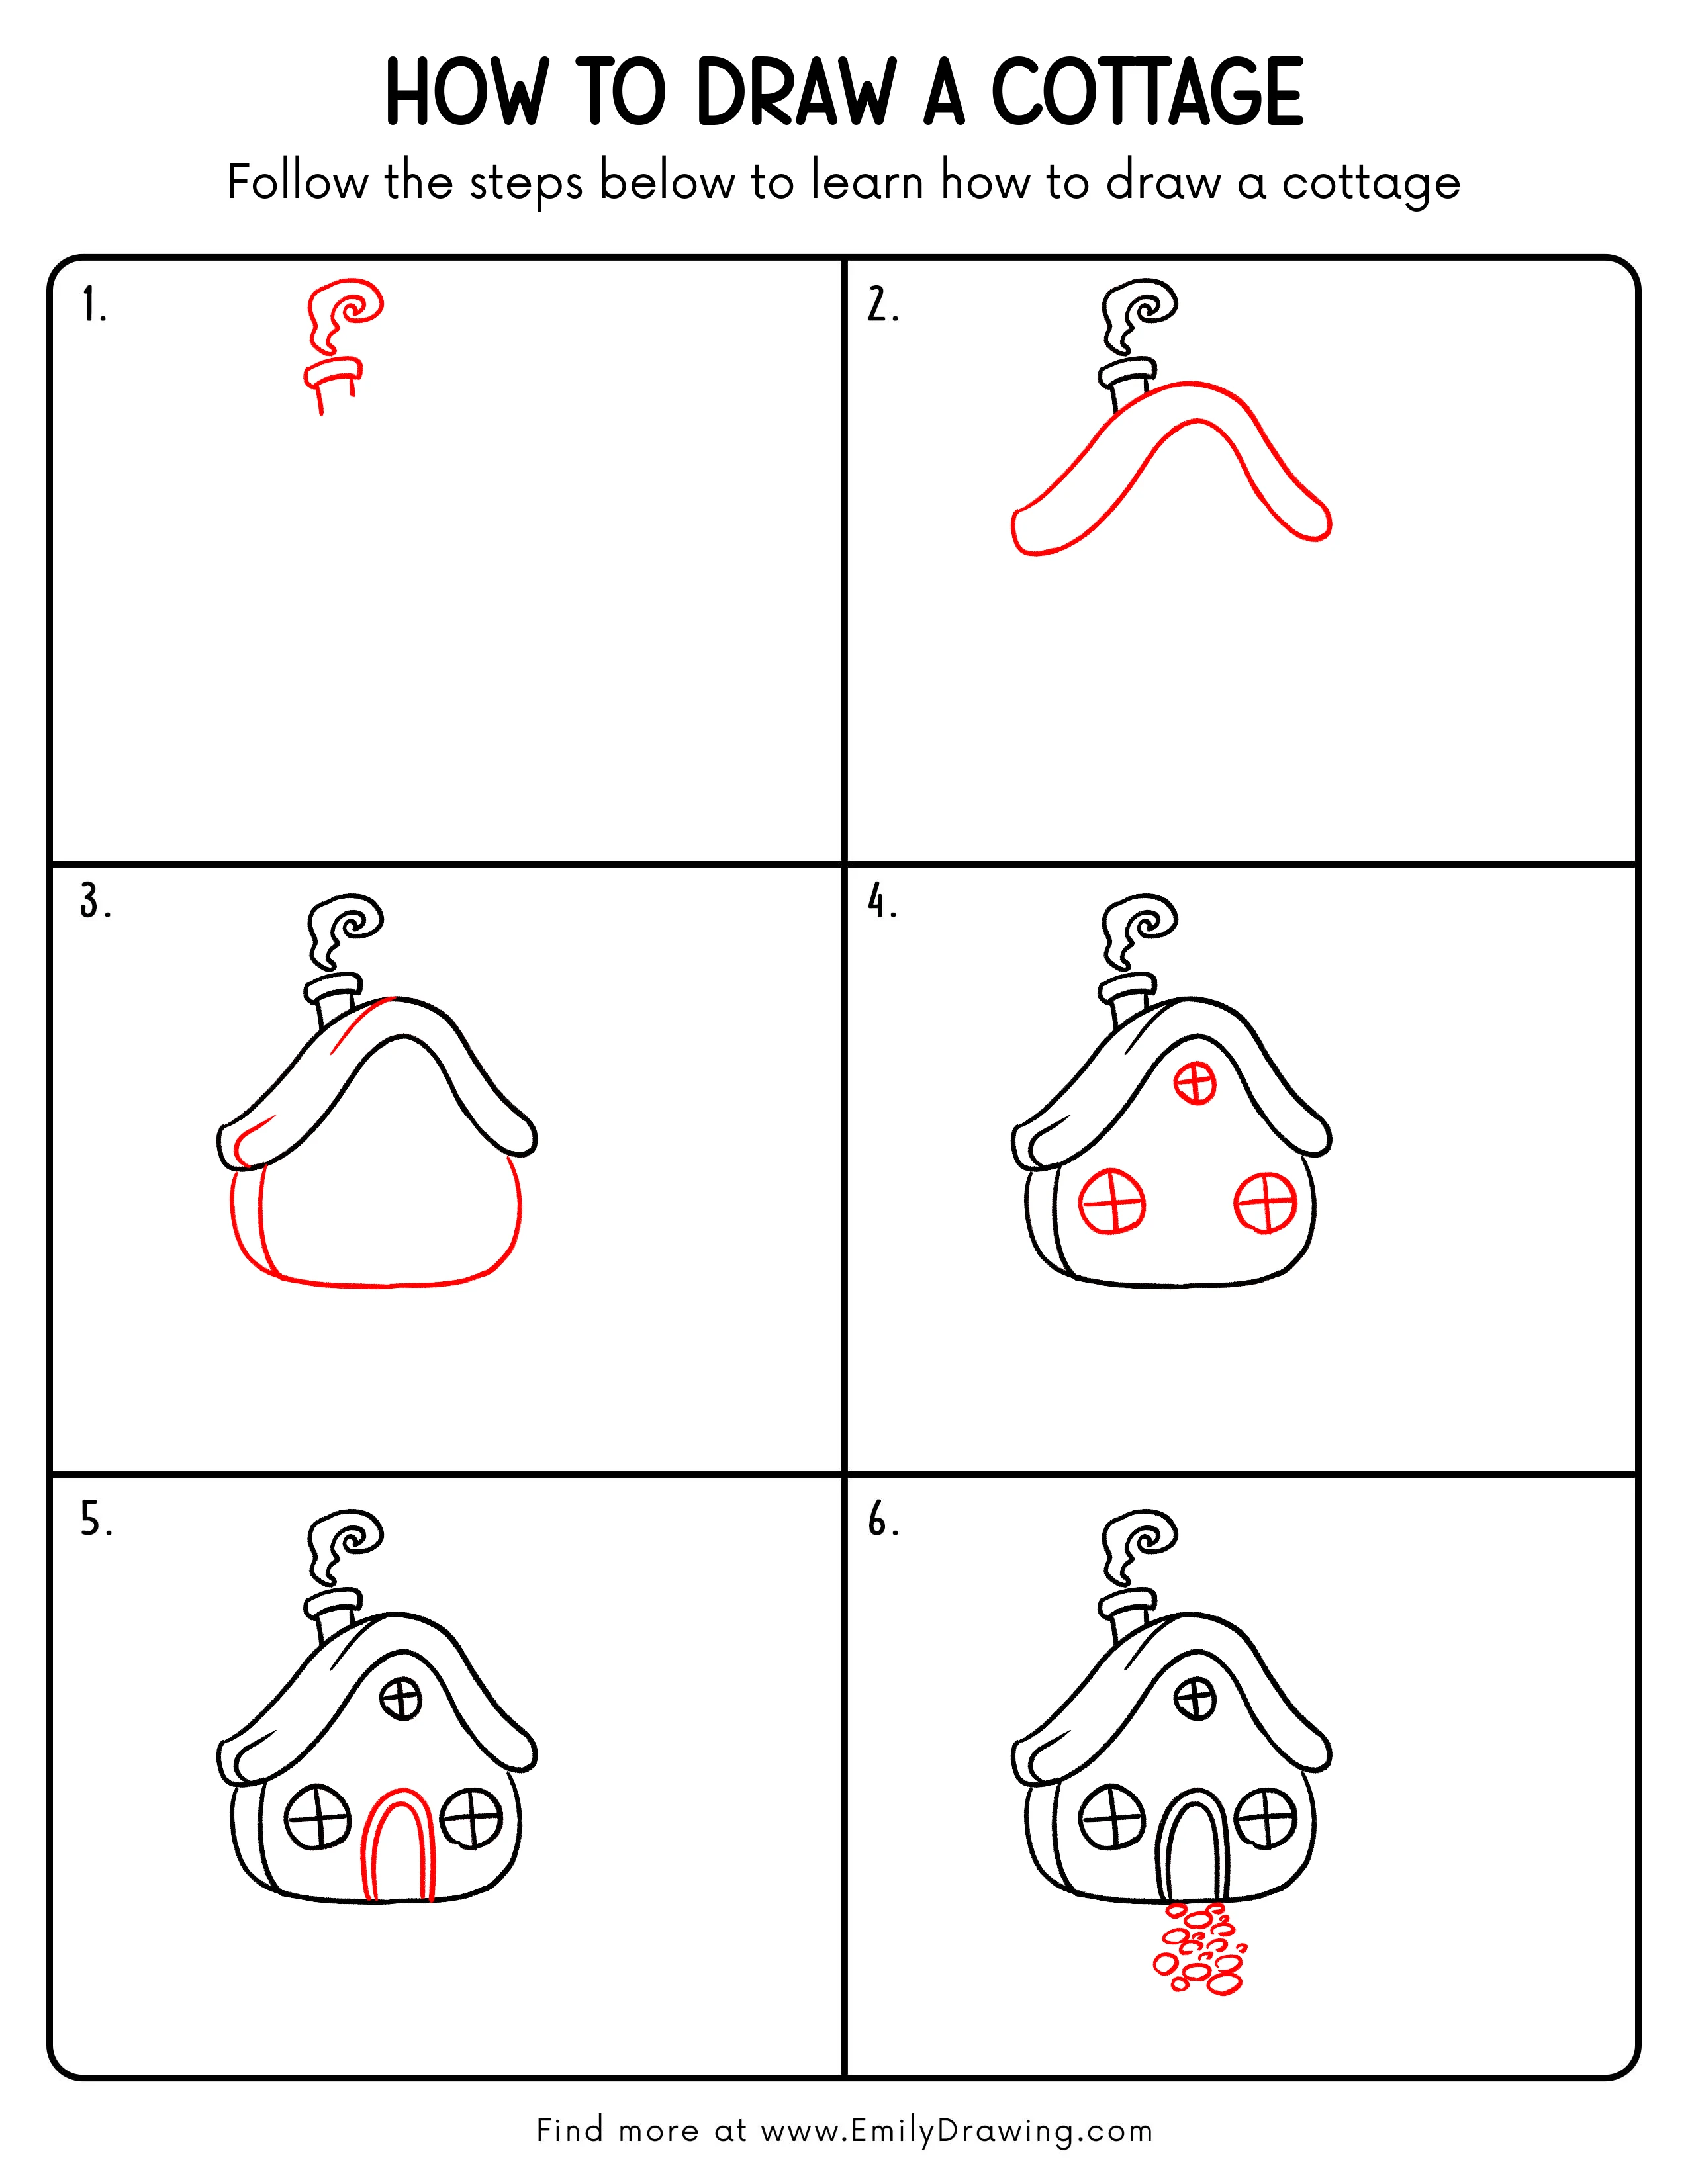
Step 1: Draw the Chimney and Smoke
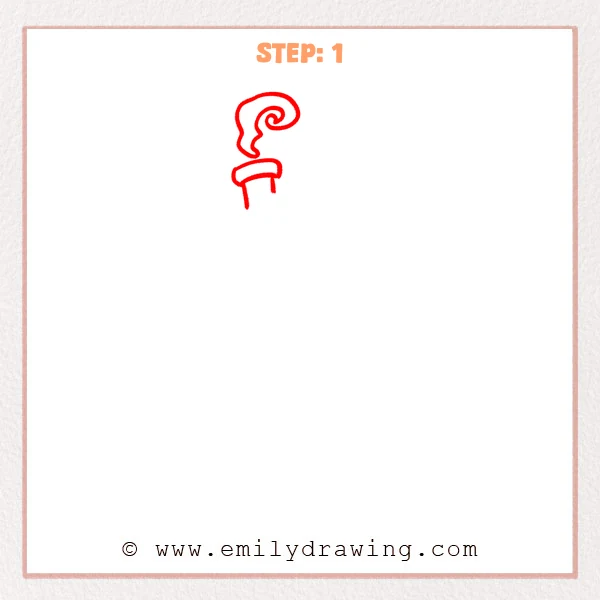
Draw a short chimney with a soft, rounded cap. Add a large curling smoke shape above it, including a smaller inner curl.
Pro Tip: Leave open space beneath the chimney for the cottage roof.
Step 2: Shape the Curved Roof
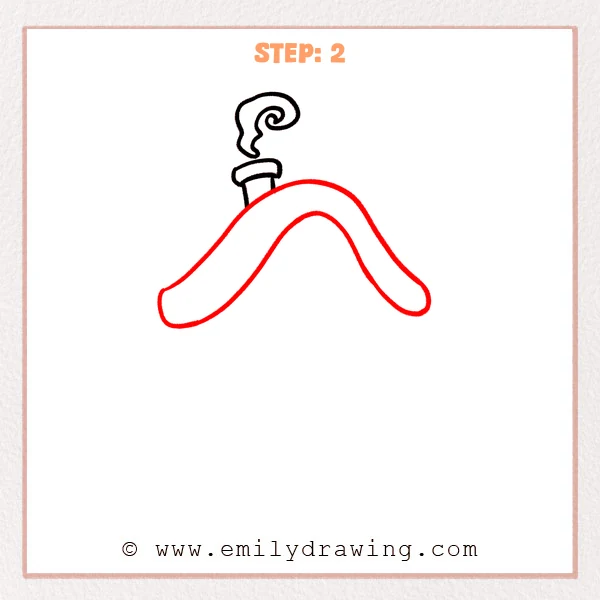
Draw a wide arching roof that rises beneath the chimney. Curve both ends downward and round them into thick, soft eaves.
Pro Tip: Make the roof wider than the future cottage walls.
Step 3: Add the Cottage Walls
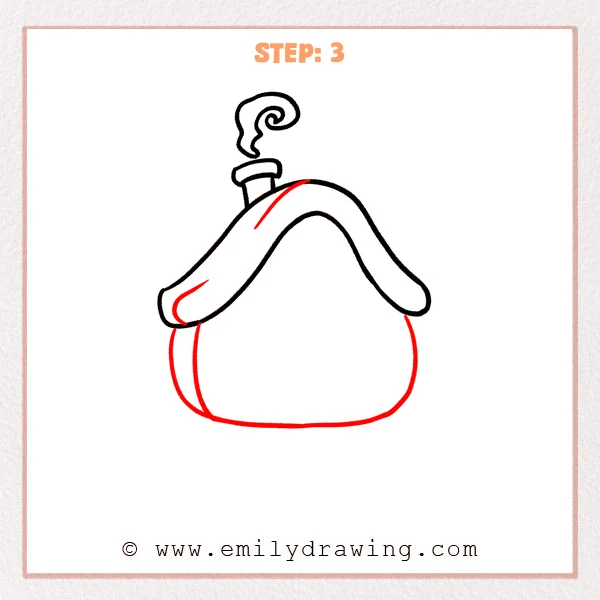
Extend curved walls downward from both roof edges. Join them with a long, gently rounded baseline, then add two short roof accents.
Pro Tip: Keep the base nearly level so the cottage feels steady.
Step 4: Draw Three Windows
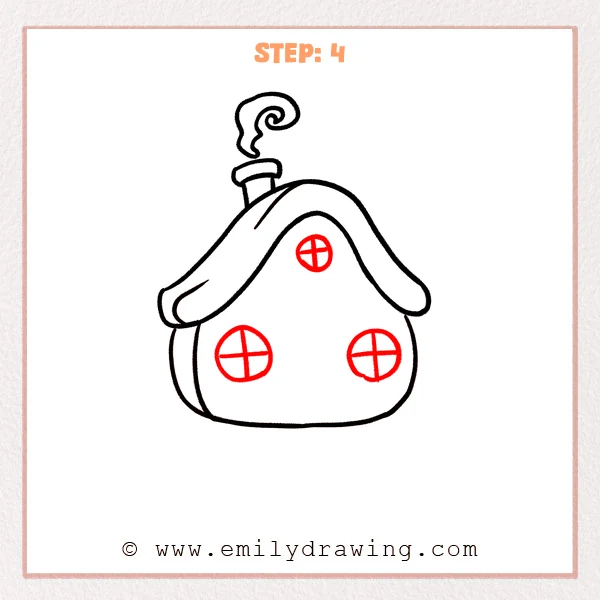
Place one small round window high beneath the roof peak. Add two larger round windows below, then divide each with a cross.
Pro Tip: Align the two lower windows at roughly the same height.
Step 5: Add the Front Door
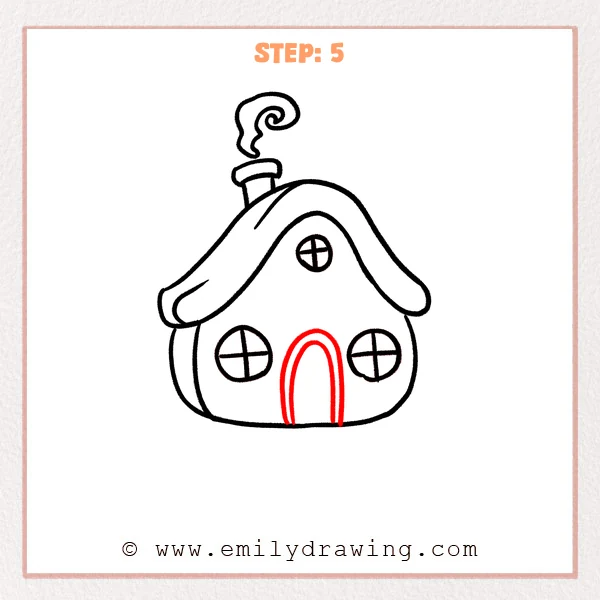
Draw a tall rounded doorway between the lower windows. Add a parallel inner arch to create a simple door frame.
Pro Tip: Center the doorway under the small upper window.
Step 6: Finish with a Stone Path
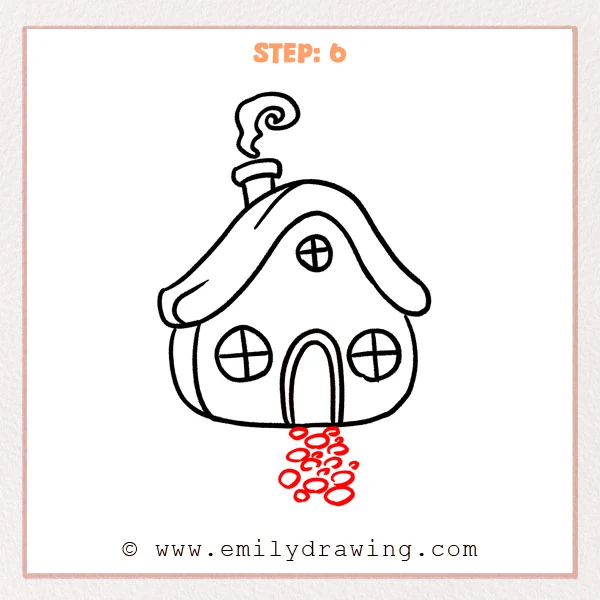
Draw several uneven oval stones beginning below the doorway. Let the path spread slightly wider as it moves toward the foreground.
Pro Tip: Vary the stone sizes to keep the path relaxed and natural.
Step 7: Color in your drawing!
Fun Facts
- Cottage roofs often use steep curves or slopes to help shed rain and snow.
- Round windows add a storybook feeling while providing useful symmetry practice.
- Repeating oval stones creates depth when the nearer shapes appear larger.
Pin it now, Draw later!
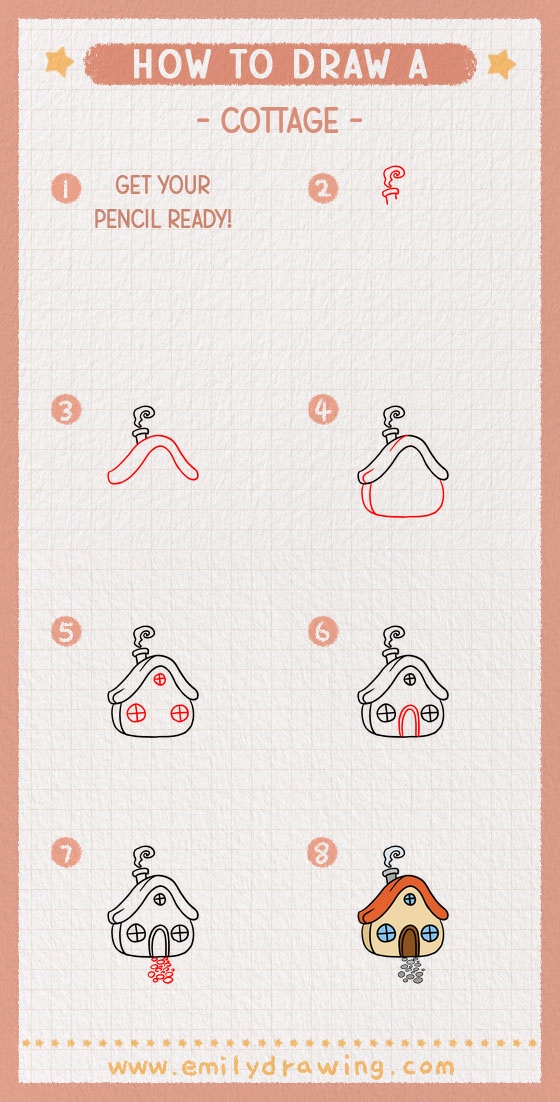
Trace your favorite lines, erase stray pencil marks, and add welcoming colors. Your step by step drawing is complete, so enjoy giving your cottage a cheerful setting.
Get the FREE Printable Drawing Guide
FREE Download Printable Cottage Drawing Tutorial
Frequently Asked Questions
How can I make the roof look balanced?
Mark the center lightly, then curve each roof side toward equally low endpoints.
What colors work well for a cottage?
Try warm walls, a contrasting roof, and bright window or door accents.
How can I personalize this easy drawing tutorial?
Add flowers, trees, curtains, or extra stones around your finished cottage.