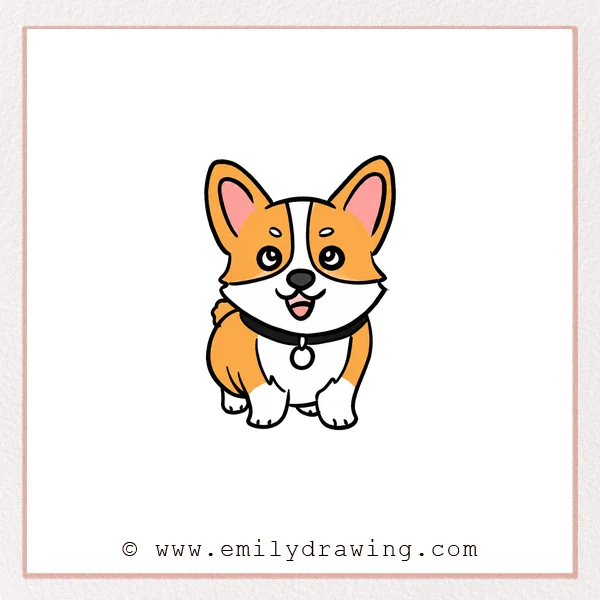
Learn how to draw a cheerful cartoon corgi with large upright ears, short legs, and a bright collar. This beginner-friendly tutorial helps you practice symmetry, expressive facial features, fluffy contours, and a compact dog pose.
What You Will Need
- Drawing paper
- Pencil and eraser
- Black marker or colored pencils
Here are my RECOMMENDED Art Supplies!
- Crayola Coloring Set (140 Pieces – Mega Value!)
- 24 Colored Crayon Set
- A4 Printer Paper
- Crayola Coloring Pencils
- HP Home Printer with Instant Ink!
Time needed:
15 minutes.
Step-by-Step Drawing Guide
Step 1: Draw the Ears and Head Top
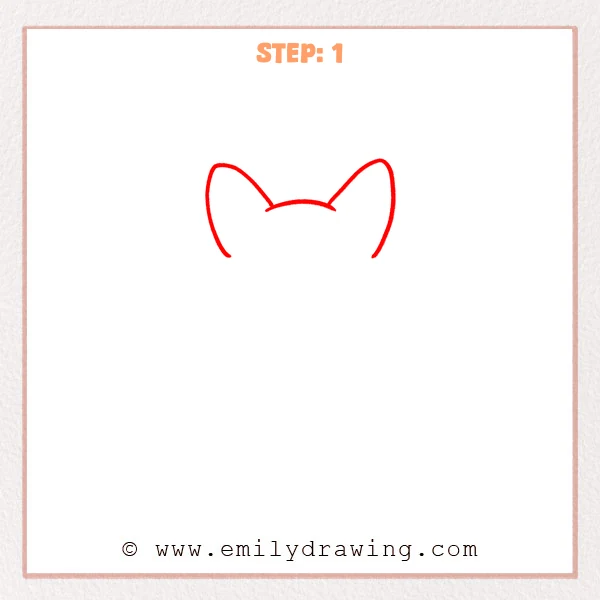
Draw two large upright ears with rounded points, one on each side. Connect their inner bases with a shallow curved line to form the top of the corgi’s head.
Pro Tip: Keep the ears similar in height and place an equal amount of space on both sides of the head curve.
Step 2: Complete the Face
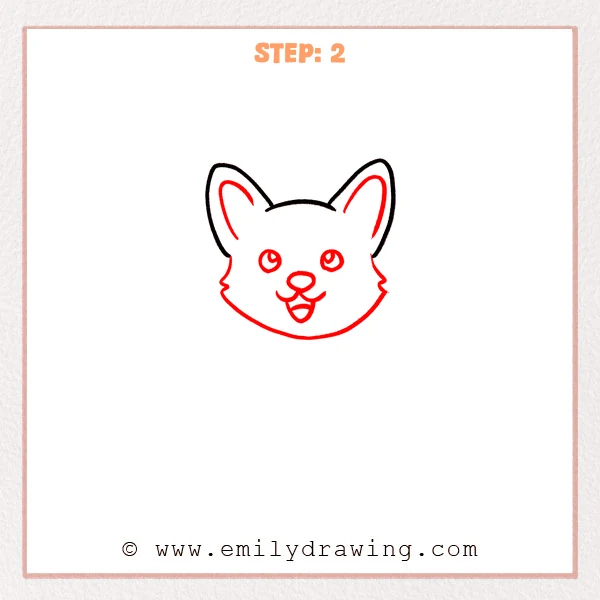
Add a curved inner line to each ear, then extend the head into pointed cheek tufts and a rounded chin. Draw two shiny round eyes, an oval nose, a curved smiling muzzle, and an open mouth with a small tongue.
Pro Tip: Place the nose on the center line between the eyes to keep the expression balanced.
Step 3: Mark the Face Pattern
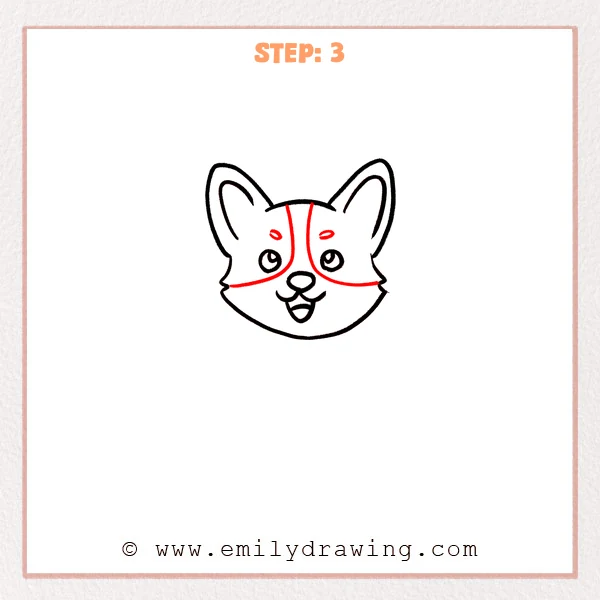
Draw two long curves from the forehead down around the eyes and out toward the cheek tufts. Add one small oval marking above each eye.
Pro Tip: Mirror the two long curves loosely so the pale center stripe stays an even width.
Step 4: Start the Body and Left Legs
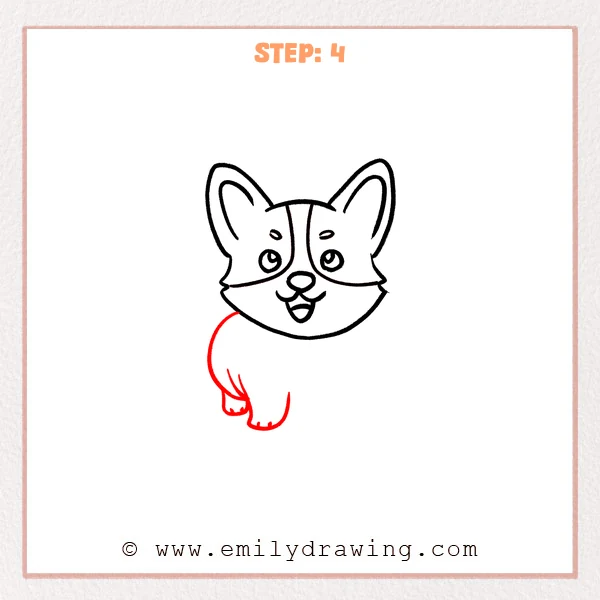
From beneath the left side of the head, draw a rounded body edge that curves down toward a small rear paw. Add a larger front leg near the center and finish both paws with short toe marks.
Pro Tip: Keep the legs short compared with the head to capture the corgi’s compact proportions.
Step 5: Complete the Body and Legs
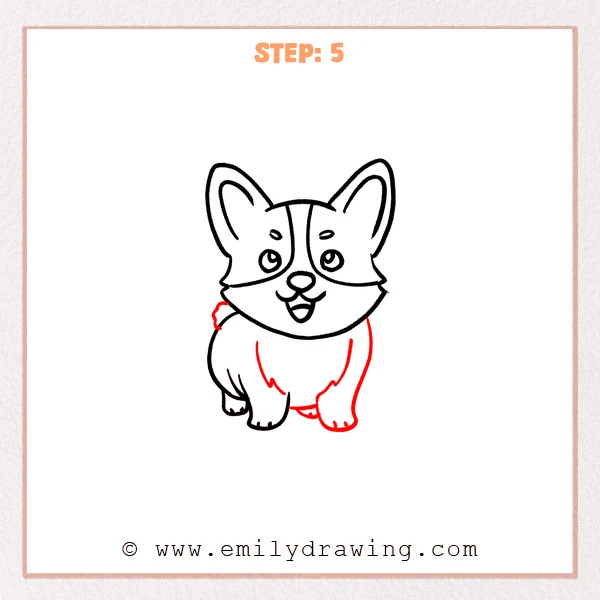
Draw the right side of the body and add the second front leg with a rounded paw and tiny toes. Finish the chest with two inward tufts, then add the partly visible rear paw and a small curved tail on the left.
Pro Tip: Align the bottoms of the two front paws so the corgi stands level.
Step 6: Add the Collar and Tag
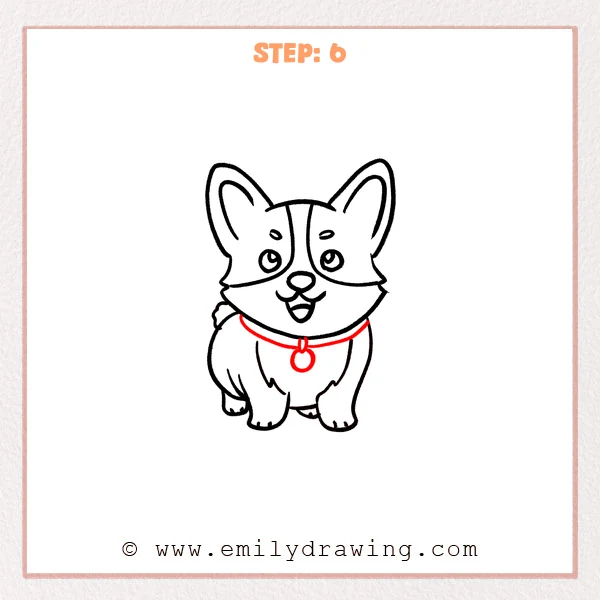
Draw a curved collar band across the neck beneath the head. Add a small loop at the center and hang a round identification tag from it.
Pro Tip: Follow the curve of the chin when drawing the collar so it wraps naturally around the neck.
Step 7: Color in your drawing!
Fun Facts
- Corgis are known for their short legs, long bodies, and large upright ears.
- The Pembroke Welsh Corgi and Cardigan Welsh Corgi are two distinct breeds.
- Corgis were developed as herding dogs and could move close to the ground around cattle.
Pin it now, Draw later!
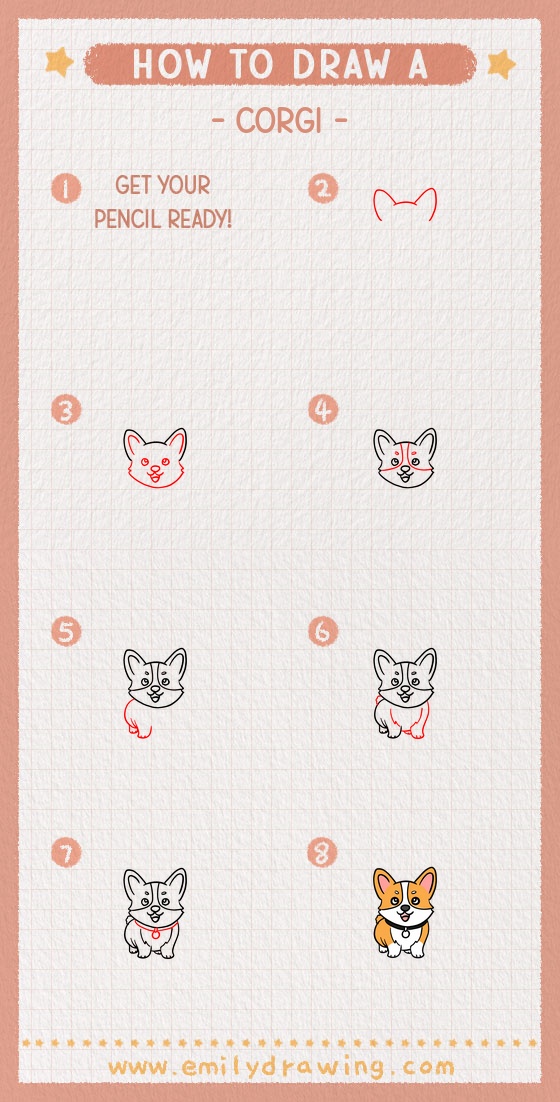
Erase stray guidelines, darken the finished outline, and color the coat with warm tan, white, and darker accent areas. Your corgi drawing is complete, so try adding a grassy ground line, a favorite toy, or a custom symbol on the tag.
Get the FREE Printable Drawing Guide
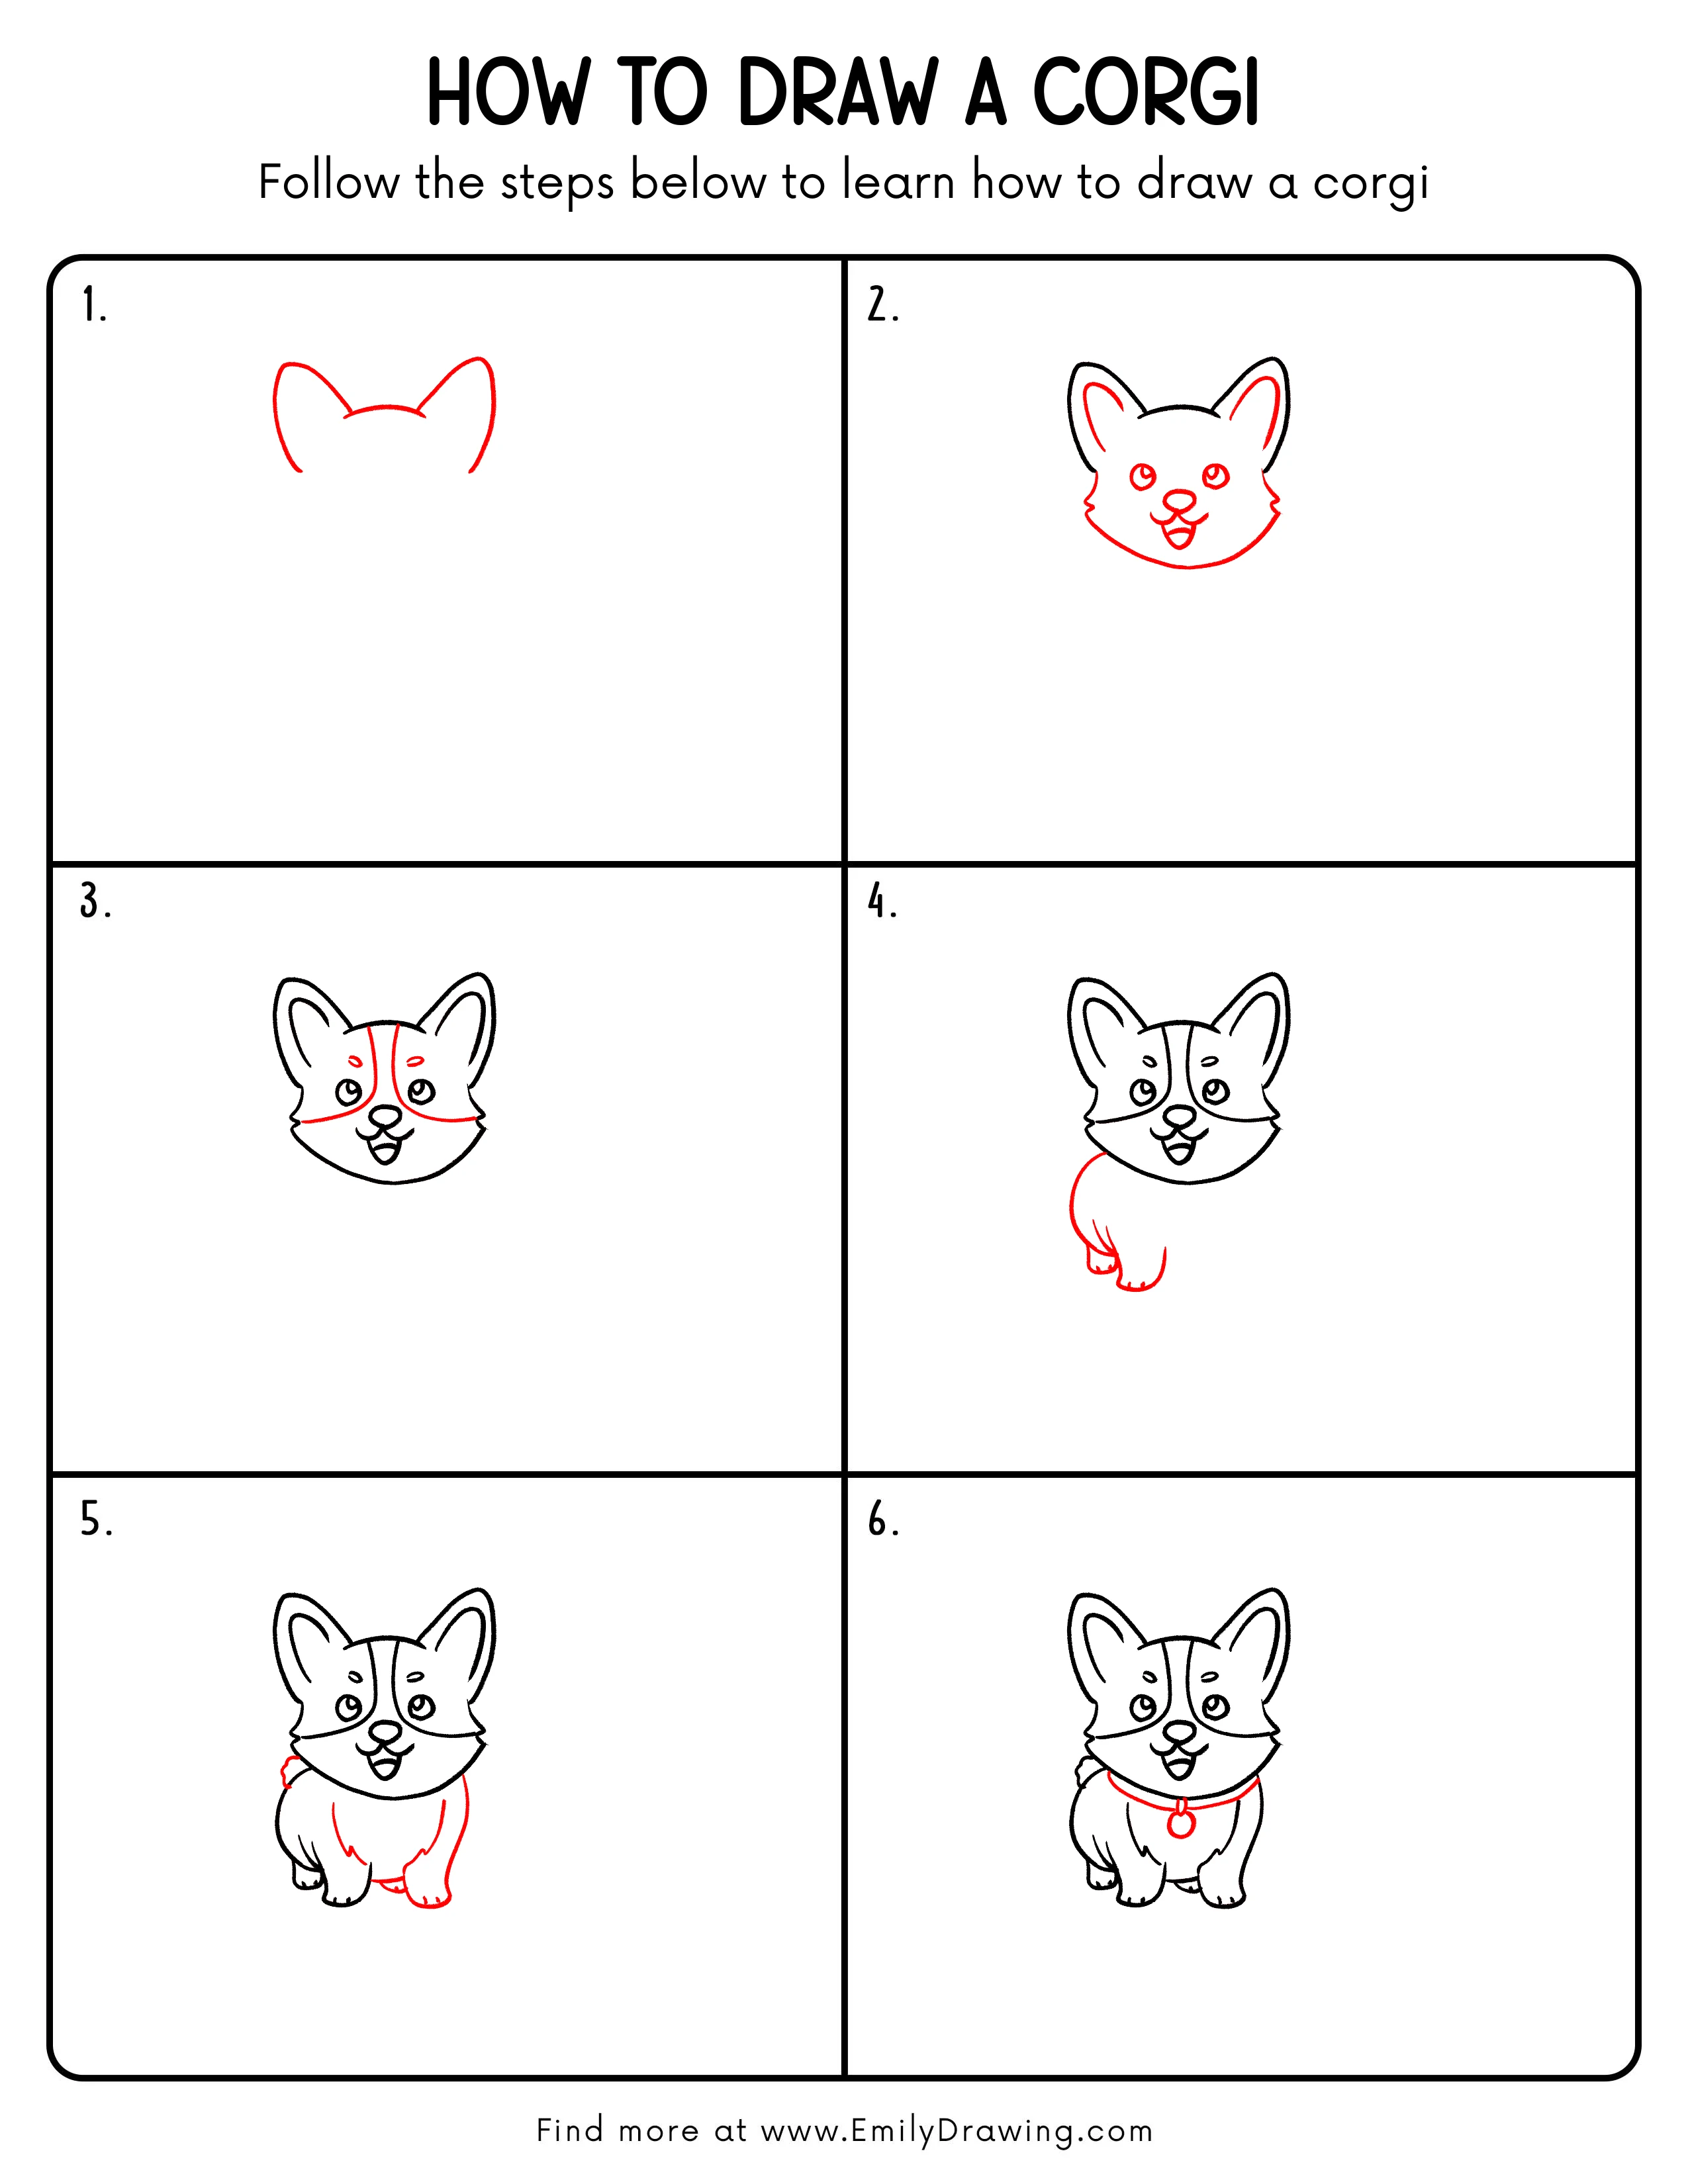
FREE Download Printable Corgi Drawing Tutorial
Frequently Asked Questions
How can I make both ears match?
Mark the two ear tips and bases lightly before drawing their outer curves.
Why does the face look uneven?
Use a faint vertical guide through the forehead, nose, mouth, collar loop, and tag while placing the paired features.
How do I make the corgi look fluffier?
Replace a few smooth edges around the cheeks and chest with short, gentle pointed tufts.