This easy drawing tutorial shows how to draw a cute computer step by step.
You will build simple shapes first, then add friendly details.
Take your time and keep your lines smooth and rounded.

What You Will Need
- Pencil
- Eraser
- Black marker or pen
- Colored pencils or crayons (optional)
Here are my RECOMMENDED Art Supplies!
- Crayola Coloring Set (140 Pieces – Mega Value!)
- 24 Colored Crayon Set
- A4 Printer Paper
- Crayola Coloring Pencils
- HP Home Printer with Instant Ink!
Time needed:
21 minutes.
Step-by-Step Drawing Guide
Step 1: Draw the Inner Screen
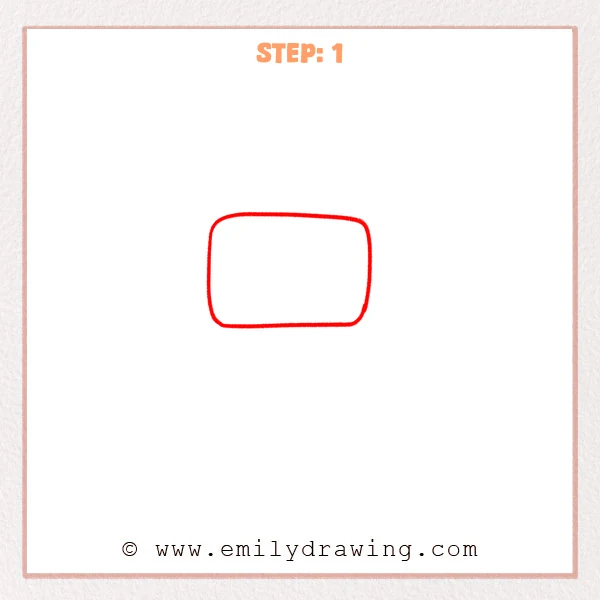
Start with a smaller rounded rectangle to form the computer’s inner screen area.
Keep the corners smooth and the line light so you can add the outer frame later.
Pro Tip: Center the inner screen and leave space around it for the outer frame.
Step 2: Add the Outer Frame
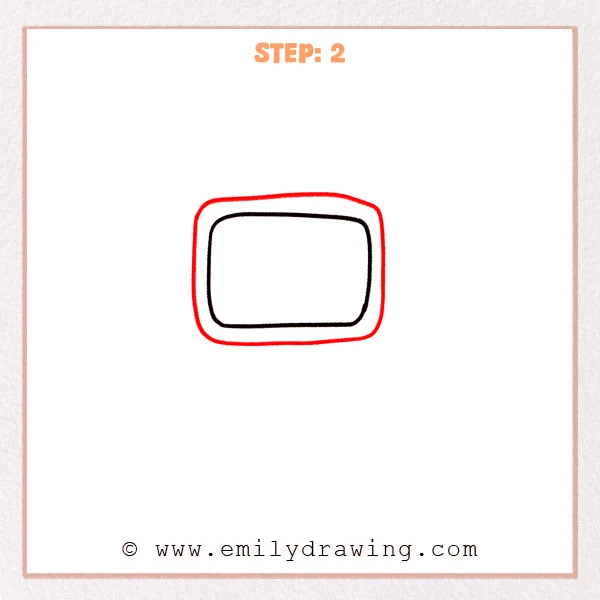
Draw a larger rounded rectangle around the inner screen to create a thick outer frame.
Keep the spacing even between the two shapes so the bezel looks consistent.
Pro Tip: Mark the same bezel width on all sides before drawing the outline.
Step 3: Draw a Cute Face on the Screen
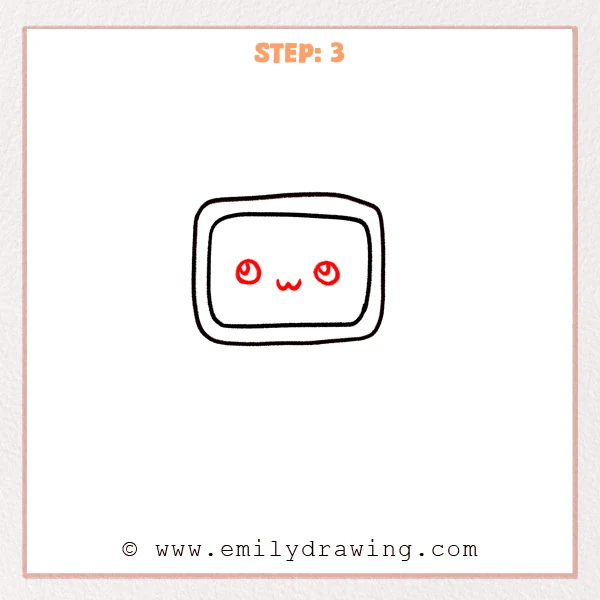
In the center of the inner screen, draw a small “w”-shaped mouth using two smooth curves.
Add one big round eye on each side, then place a small highlight circle inside each eye.
Pro Tip: Keep both eyes symmetrical and spaced evenly from the mouth.
Step 4: Add a Small Stand
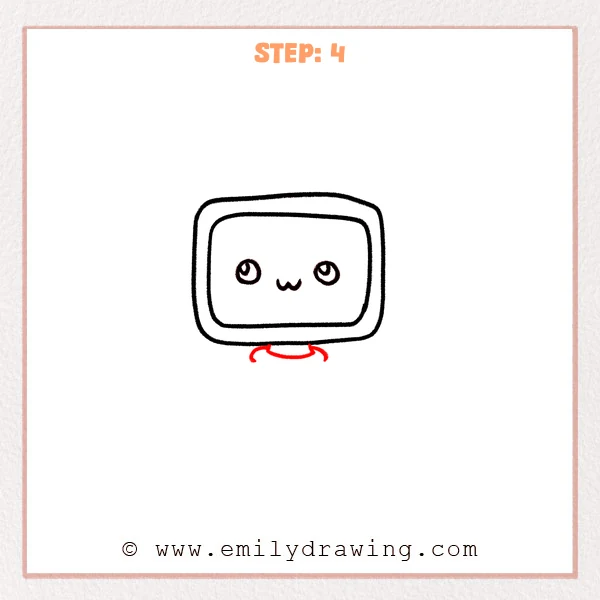
Under the center of the screen, draw a shallow curved line to form a tiny neck/stand.
Add a short curved line on each side so the stand looks like it supports the screen.
Pro Tip: Center the stand under the screen and keep both side curves the same length.
Step 5: Draw the Keyboard
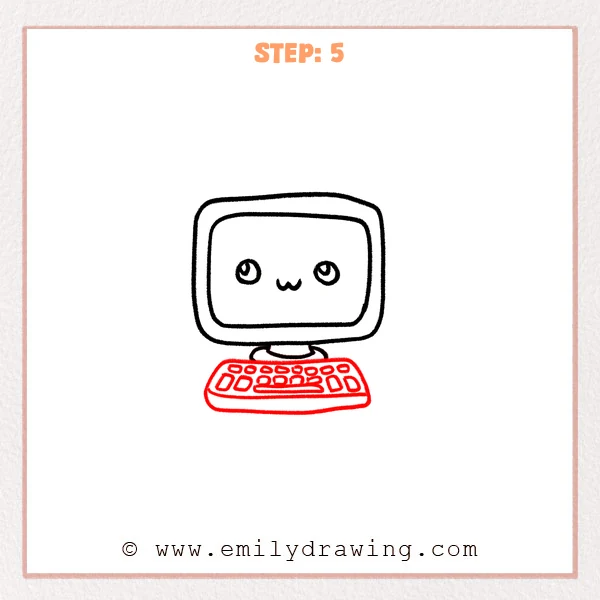
Below the stand, draw a wide, flattened rounded rectangle for the keyboard, with a slight tilt.
Inside it, add small rounded keys and one long spacebar near the bottom.
Pro Tip: Make the keyboard slightly wider than the screen so it feels sturdy.
Step 6: Add the Mouse and Cable
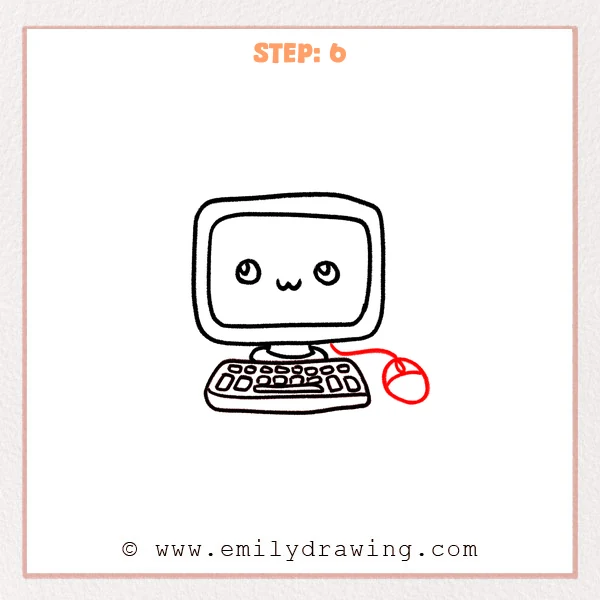
To the right of the keyboard, draw a small oval for the mouse and add a curved line to split the buttons.
Draw a smooth, wavy cable line from the keyboard area to the mouse.
Pro Tip: Keep the mouse small, about the height of the keyboard, for balance.
Step 7: Color in your drawing!
Fun Facts
- Early computers were so large they could fill an entire room.
- A computer’s screen area is called the display, and the frame is called the bezel.
- Keyboards usually have a spacebar because it is used very often.
Pin it now, Draw later!
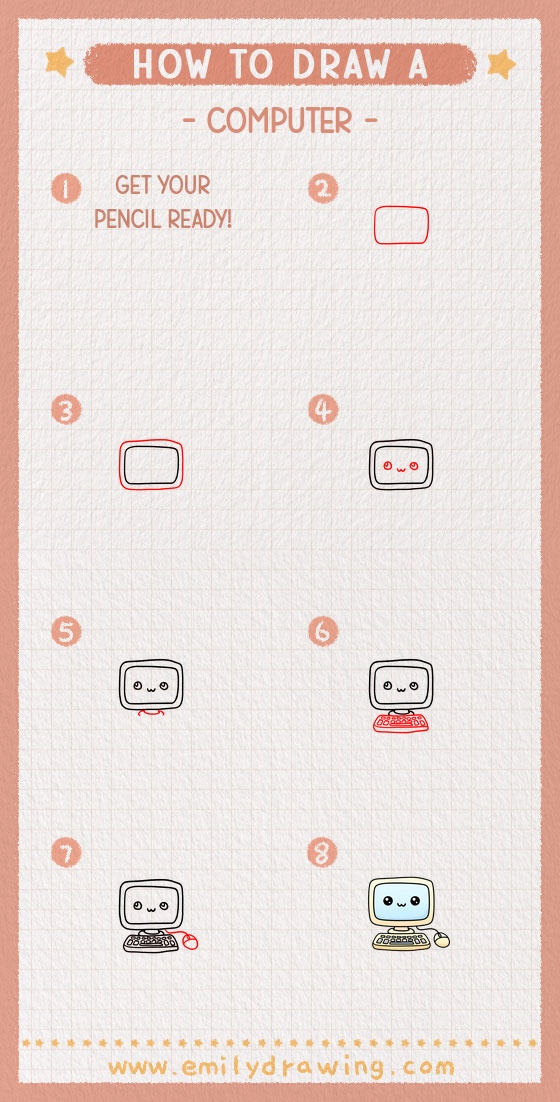
Trace your final lines with a darker pen, then erase extra sketch marks.
You can color the screen lightly and add a tiny shine on the frame.
Now you know how to draw a computer step by step—try drawing it with different faces next.
Get the FREE Printable Drawing Guide
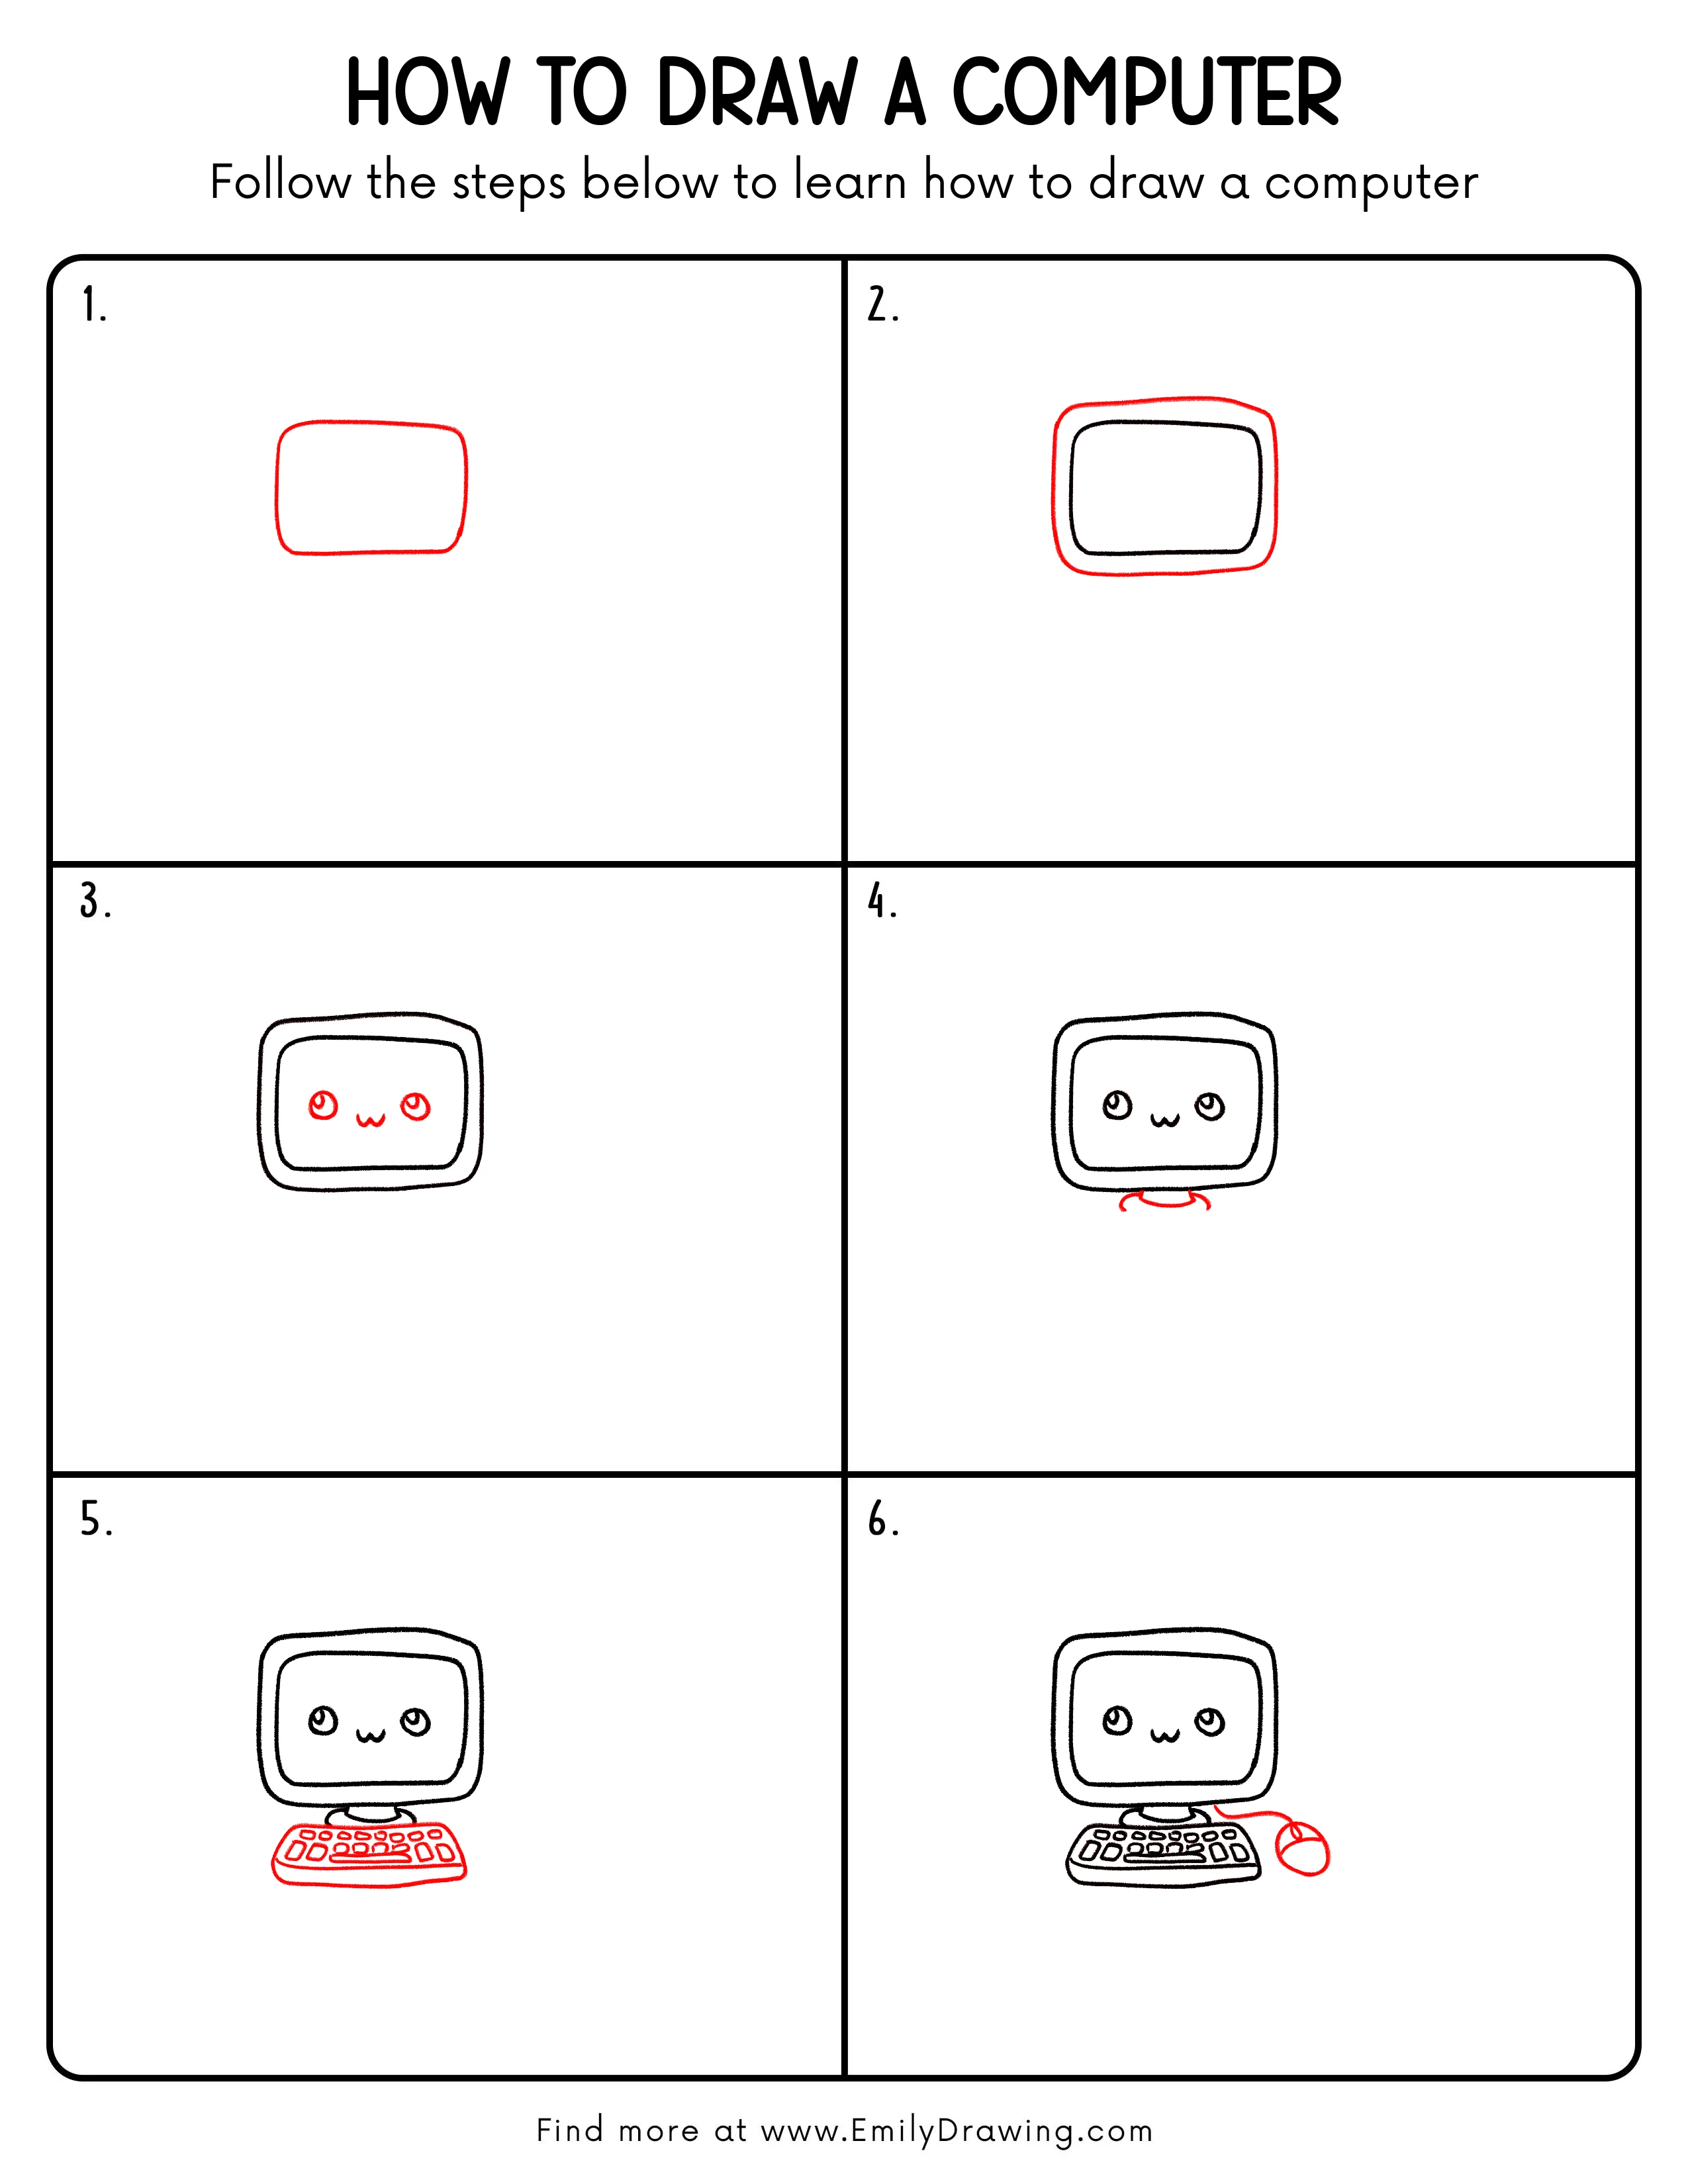
FREE Download Printable Computer Drawing Tutorial
Frequently Asked Questions
How can I make my computer drawing look more 3D?
Add a second outline slightly offset behind the frame, and keep it subtle.
What if my bezel looks uneven?
Lightly measure the spacing on each side, then redraw the outer frame smoothly.
Can I turn this into a laptop instead?
Yes, make the screen thinner and draw the keyboard as a wider flat base connected to it.