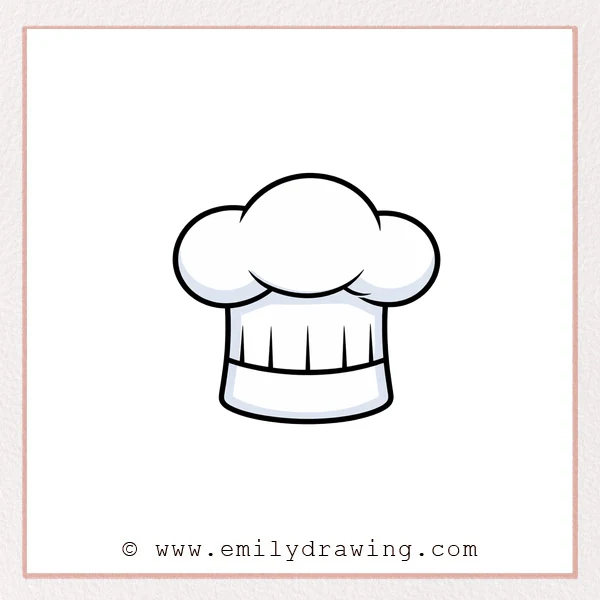
A chef’s hat is a fun, friendly shape made from simple curves.
In this easy drawing tutorial, you will build it one step at a time.
Take your time, and keep your lines light as you sketch.
What You Will Need
- Pencil
- Eraser
- Black pen or marker (optional)
- Paper
Here are my RECOMMENDED Art Supplies!
- Crayola Coloring Set (140 Pieces – Mega Value!)
- 24 Colored Crayon Set
- A4 Printer Paper
- Crayola Coloring Pencils
- HP Home Printer with Instant Ink!
Time needed:
25 minutes.
Step-by-Step Drawing Guide
Step 1: Draw the Main Curve
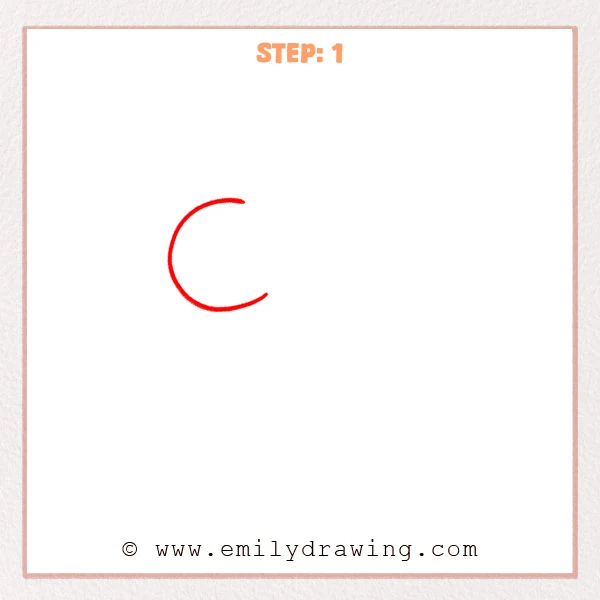
Start with a big C-shaped curved line, open on the right side.
Keep the curve smooth, slightly narrower at the top and bottom.
This line becomes the first guide for your chef’s hat shape.
Pro Tip: Draw lightly so you can adjust the curve and size easily.
Step 2: Add the Top Arch
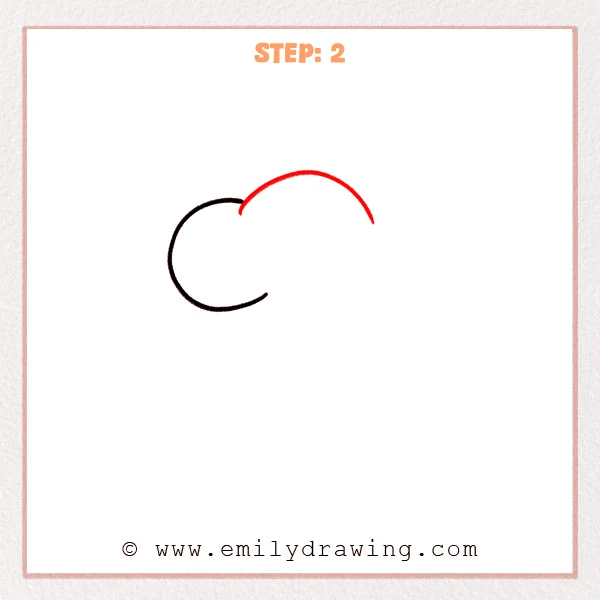
Draw a longer curved arch above the first curve, stretching to the right.
Place the left end near the upper opening, and keep the right end open.
This arch sets the puffy top height of the chef’s hat.
Pro Tip: Keep the top arch slightly flatter so the chef’s hat looks puffy.
Step 3: Close the Puffy Top with a Right Bump
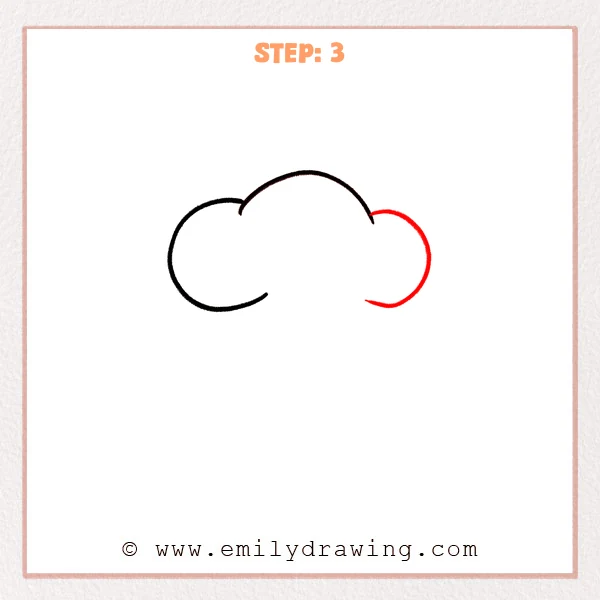
Add a rounded bump on the right side to close the top shape.
Match the bump’s curve to the left side so it feels balanced.
Leave a small gap at the bottom edges for the brim area later.
Pro Tip: Make the right bump similar in size to the left bump for symmetry.
Step 4: Add the Inner Bottom Curve
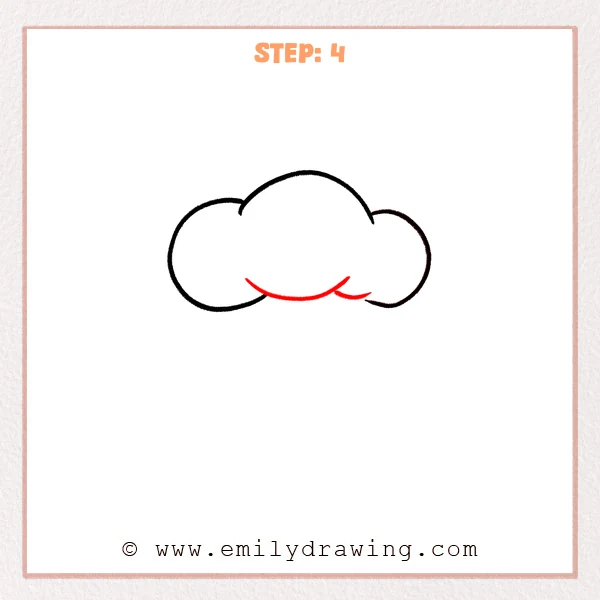
Inside the bottom of the hat, draw a long smile-shaped curve from left to right.
Add a short extra curve on the right to suggest a small fold.
These curves start the lower edge structure of the chef’s hat.
Pro Tip: Keep the bottom curve shallower than the top so it feels like soft fabric.
Step 5: Draw the Brim Shape
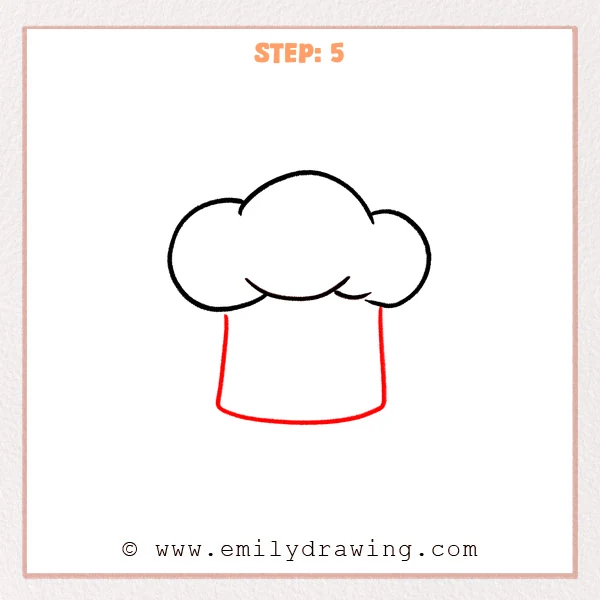
Draw two straight lines down from the bottom edge to form the left and right sides of the brim.
Connect those lines with a smooth curved line at the bottom, like a soft rectangle.
This step defines the main brim/body shape of the chef’s hat.
Pro Tip: Keep the side lines mostly parallel, and lift the bottom curve slightly for a cute look.
Step 6: Add the Brim Band and Pleats
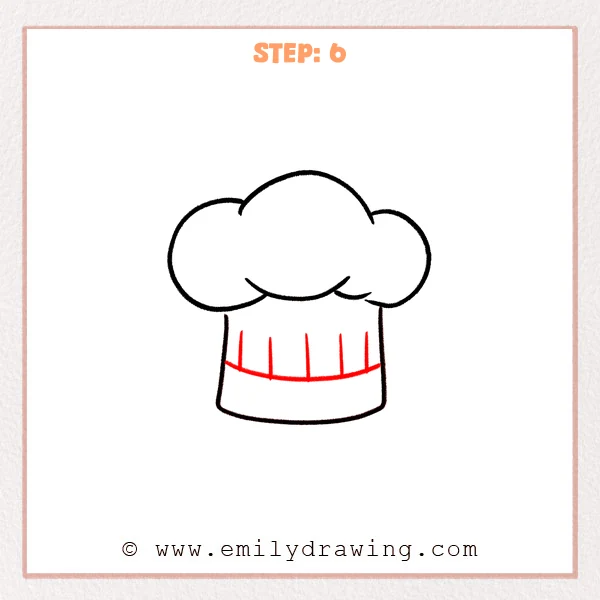
Draw a gently curved line across the upper part of the brim to show a band.
Add several short vertical lines rising from that curve to suggest fabric folds.
Keep these lines inside the brim area and away from the puffy top.
Pro Tip: Vary the fold line lengths a little to make them look natural.
Step 7: Color in your drawing!
Fun Facts
- Tall chef’s hats are often called a “toque.”
- The puffy top helps the hat look soft and lightweight.
- Chef hats are a classic symbol of cooking and baking.
Pin it now, Draw later!
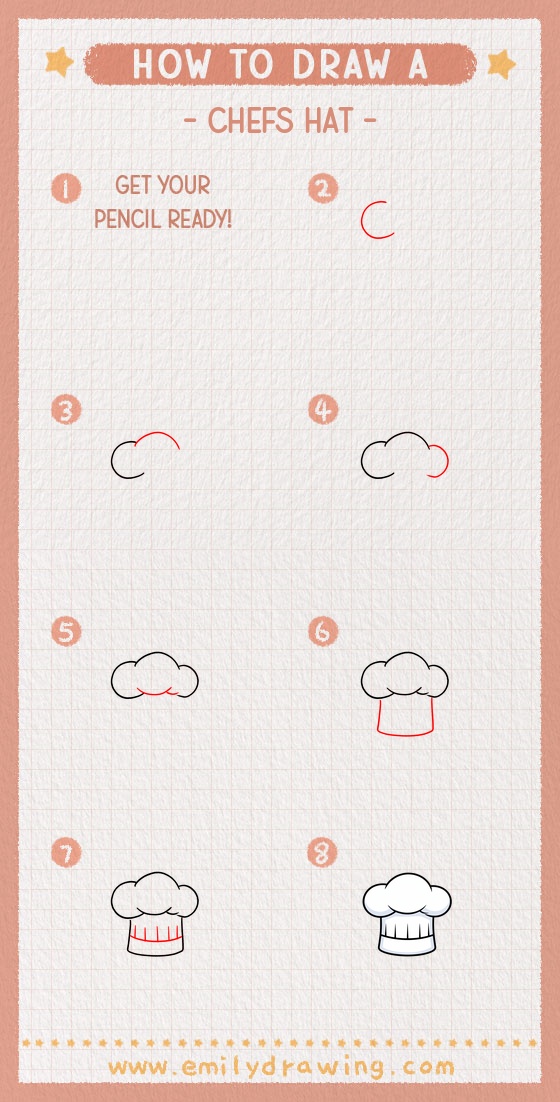
Go over your final outline with a darker pencil or a pen if you like.
Erase extra sketch marks, and keep the curves clean and smooth.
Now you know how to draw a chef’s hat step by step—try adding a face or kitchen tools next.
Get the FREE Printable Drawing Guide
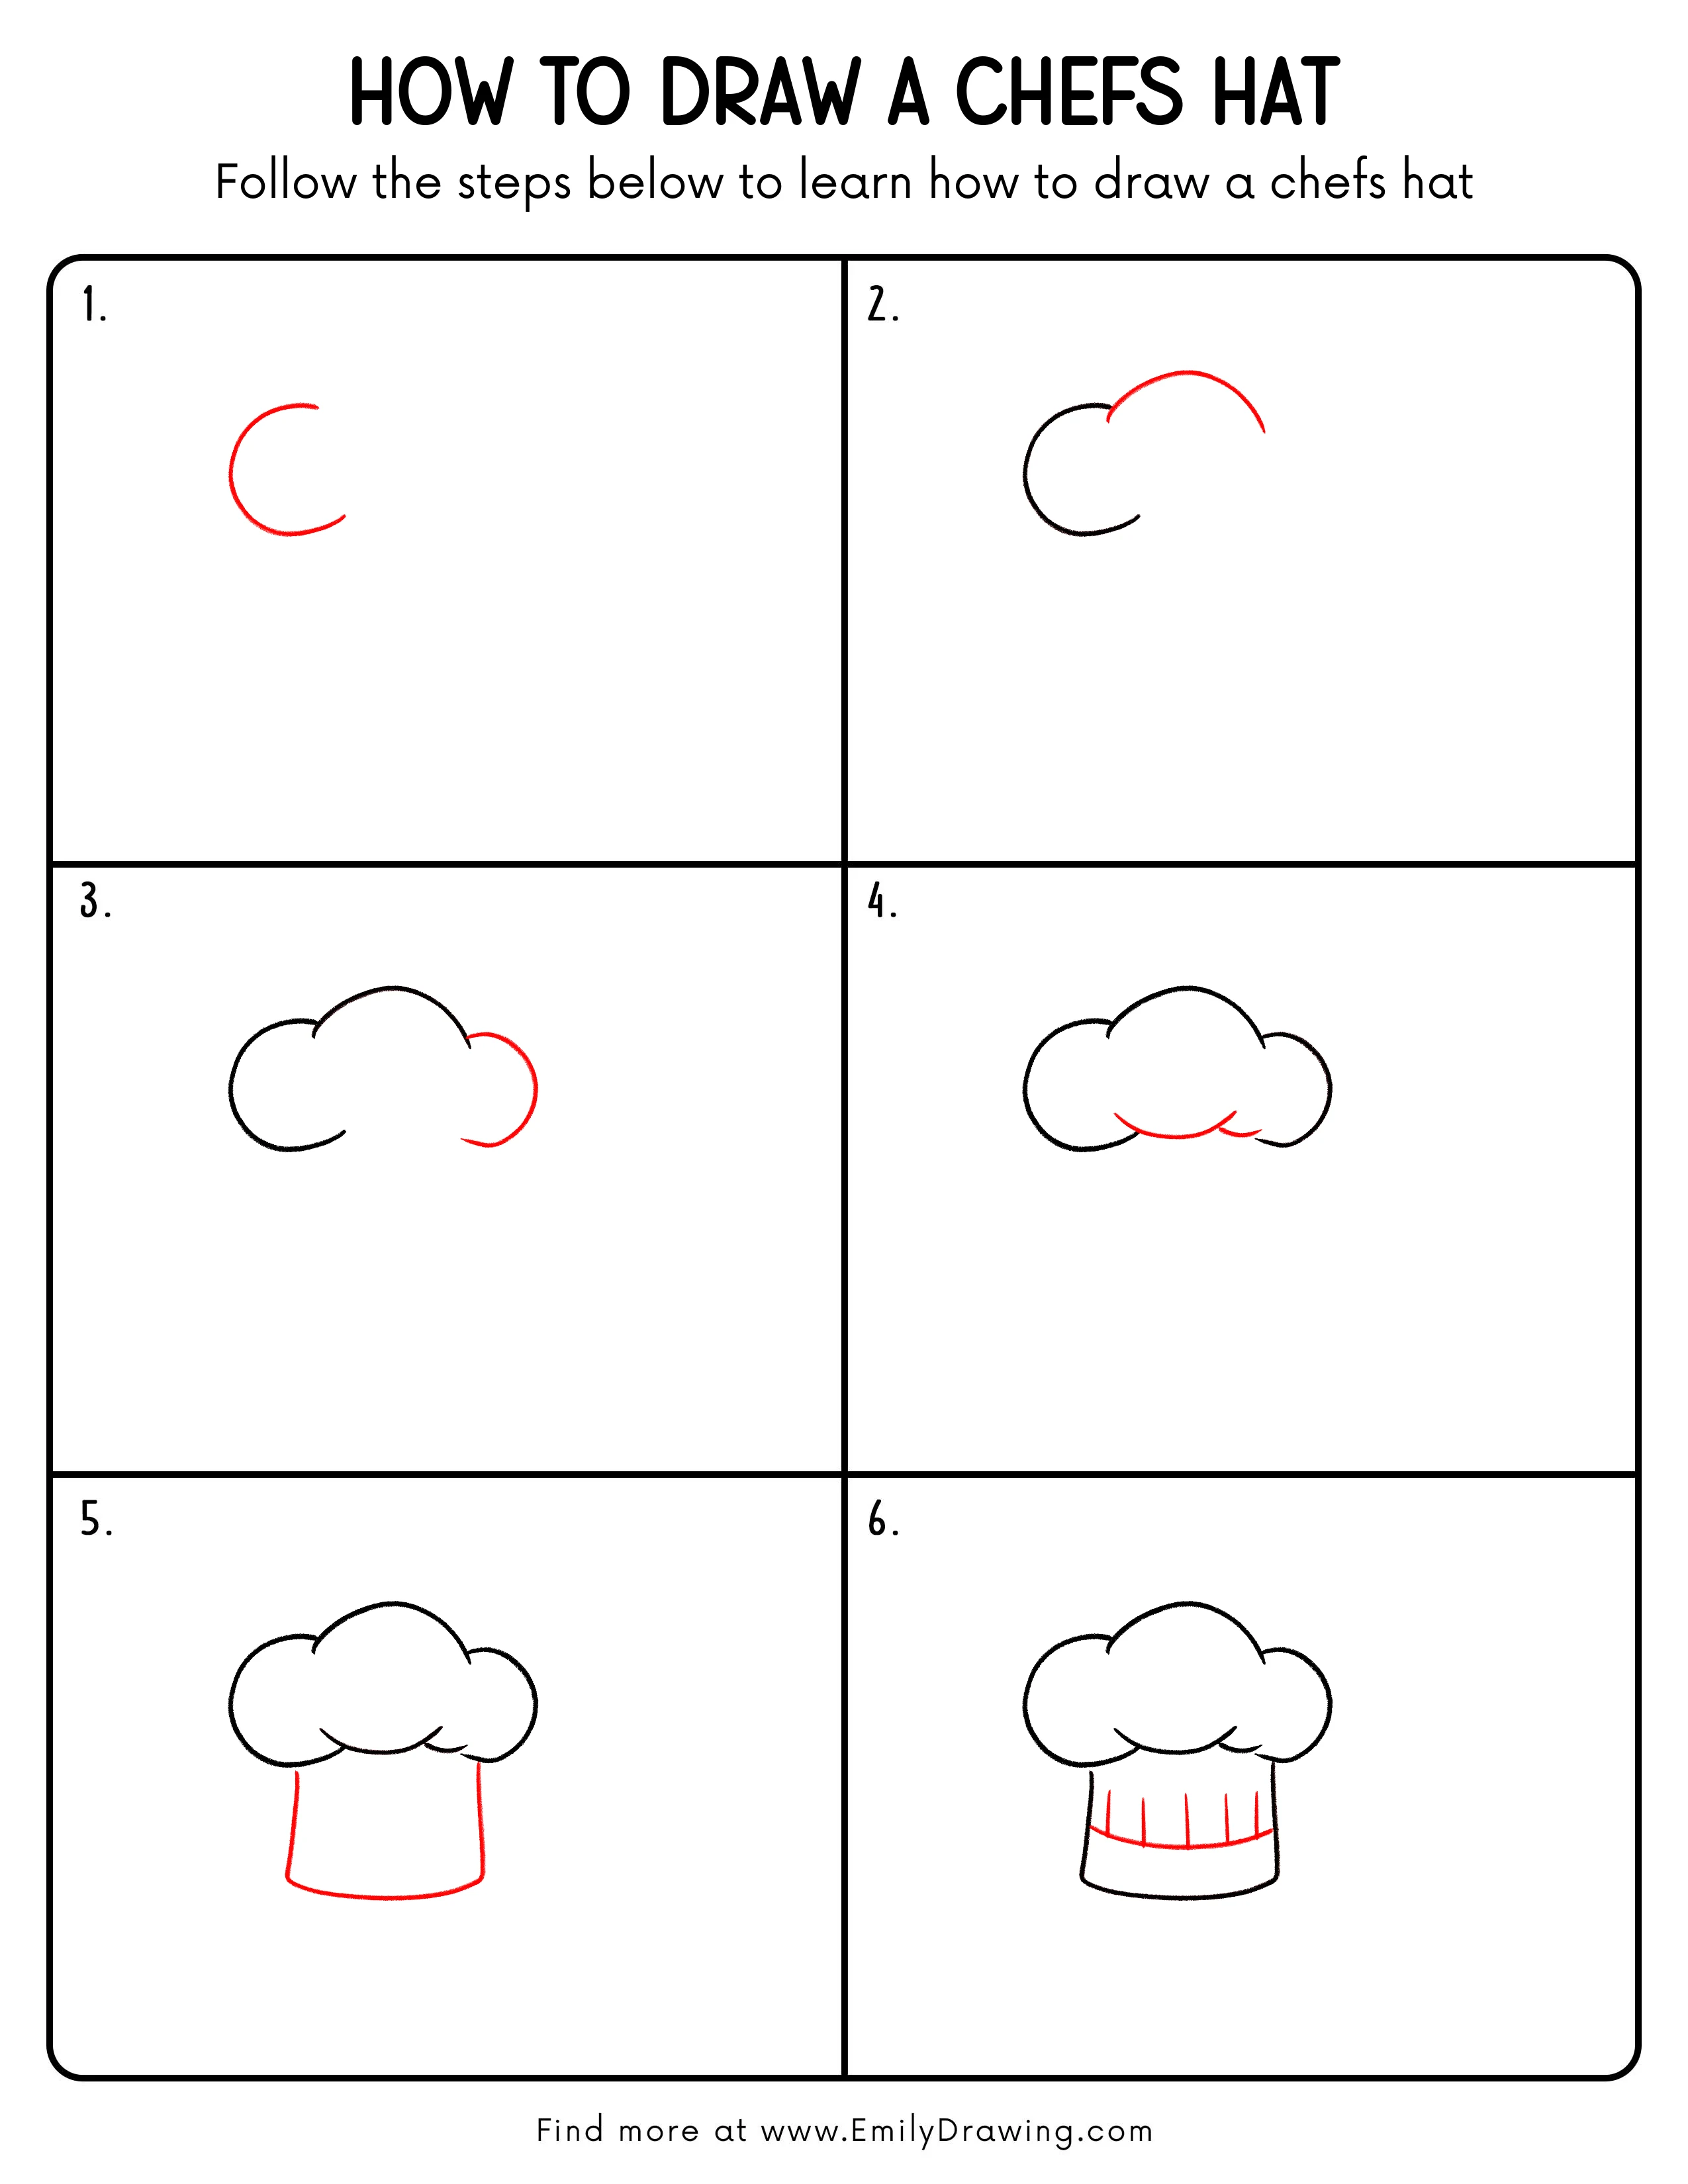
FREE Download Printable Chefs Hat Drawing Tutorial
Frequently Asked Questions
How do I make the chef’s hat look puffier?
Make the top bumps rounder and wider, and keep the top arch slightly flatter.
What if my brim looks crooked?
Check that the side lines are close to parallel, then redraw the bottom curve more evenly.
Can I color my chef’s hat?
Yes, keep it white for a classic look, or add light gray shading lines for gentle texture.